
Related Manuals for Varex Imaging 4343W


Summary of Contents for Varex Imaging 4343W
- Page 1 4343W X-ray Detector Before using the X-ray Detector, be sure to read this manual thoroughly along with any other manuals for the software and other system components. Keep this manual where it is easily accessible. ®...
- Page 2 Before You Begin • To avoid personal injury or product damage, read the manual and all accompanying papers carefully before operating the 4343W X-ray Detector. • The X-ray Detector is intended for use by qualified professional personnel who are trained and knowledgeable in the use of X-ray Detectors, X-ray systems, and electrical equipment.
- Page 3 4343W X-ray Detector For Your Safety To avoid personal injury or product damage, read this manual and all accompanying information carefully before handling, installing, or using the X-ray Detector. Follow all instructions, warnings, and cautions in this manual and all warnings and cautions printed on the warning label.
- Page 4 Before You Begin 4343W X-ray Detector Installation and Environment of Use The X-ray Detector is intended to be installed, maintained, and used WARNING by qualified professional personnel who are trained and qualified in the installation, maintenance, and use of X-ray equipment. All parts of the X-ray Detector are suitable for use within the patient environment.
- Page 5 4343W X-ray Detector It is important that the X-ray Detector is not directly connected to the Caution installed network. Connection of the X-ray Detector with the installed computer network may disturb the IT environment. Do not operate the X-ray Detector in a location with the following...
- Page 6 Before You Begin 4343W X-ray Detector Service Cable Disconnect the Service Cable by pulling on the connector and not the WARNING cable itself. Ignoring this warning may cause substantial product damage. Do not modify the Service Cable or subject the cable to external stress WARNING or damage.
- Page 7 4343W X-ray Detector Handling Never disassemble, modify, or alter the X-ray Detector, its WARNING components, battery pack, battery charger, or accessories. Ignoring this warning may cause electrical shock and/or unknown hazards, which may result in severe personal injury, death, or substantial product damage.
- Page 8 Before You Begin 4343W X-ray Detector Battery and Inductive Charger Do not use the battery pack if the casing is broken or if it emits an WARNING unusual odor, smoke, or excessive heat, or if it leaks any substance. Avoid contact with any substance seeping from the battery pack. If any fluid touches your skin or eyes, wash the affected area with clean, running water and immediately seek medical attention.
- Page 9 4343W X-ray Detector Do not connect the battery pack to an electrical outlet directly, or to WARNING any other electrical source not described in the manual. Do not drop or hit the battery against hard objects since this may cause...
- Page 10 Before You Begin 4343W X-ray Detector Network Do not connect the X-ray Detector to the common IT network, but use a WARNING point-to-point connection with the host computer or dedicated WLAN access point. Ignoring this warning may cause unauthorized access to this device.
- Page 11 4343W X-ray Detector If a Problem Occurs If any abnormal condition, such as smoke, fumes, or strange sounds, is WARNING evident, remove the battery from the X-ray Detector, and immediately ask your establishment’s safety representative to contact your dealer, distributor, or device manufacturer.
- Page 12 Before You Begin 4343W X-ray Detector This page intentionally left blank. www.vareximaging.com...
-
Page 13: Table Of Contents
Description of the 4343W ........ - Page 14 Troubleshooting ............53 12.1 After-sales Service for Varex Imaging Products......56 13.0 Disposing of the X-ray Detector and Battery .
- Page 15 4343W X-ray Detector Table of Contents 15.2 Declaration of Conformity for European Union ......65...
- Page 16 Table of Contents 4343W X-ray Detector This page intentionally left blank. www.vareximaging.com...
- Page 17 List of Tables Table 1 Abbreviations ............2 Table 2 Explanation of Symbols.
- Page 18 List of Tables 4343W X-ray Detector This page intentionally left blank. xviii www.vareximaging.com...
- Page 19 VHB Tape Placement Dimension on Varex Inductive Battery Charger..18 Figure 15 Third-party Inductive Battery Charger and 4343W X-ray Detector Alignment . . 20 Figure 16 Reboot Sequence............21 Figure 17 LED Status Indicator .
- Page 20 List of Figures 4343W X-ray Detector Figure 31 Detector Linked in ViVA ..........36 Figure 32 Mode Drop Down Menu .
-
Page 21: Scope
4343W X-ray Detector Scope This document describes design elements and respective interfaces for the 4343W X-ray Detector. All applicable mechanical, electronic, and software interfaces are described. Contraindication There are no contraindication situations. Intended Use Varex Imaging Digital X-ray Detectors and their accessories are components designed to be integrated into products by X-ray system manufacturers. -
Page 22: Abbreviations
Amorphous Silicon Frames per second kilopascal Original Equipment Manufacturer PREP Prepare Request Software Developer Kit ViVA Varex Imaging and Viewing Application Varex Smart Panel vTrigger Automatic Exposure Detection WLAN Wireless Local Area Network Definition of Symbols Table 2 Explanation of Symbols... - Page 23 4343W X-ray Detector Table 2 Explanation of Symbols (Continued) Symbol Description IP68 The X-ray Detector has an IP68 ingress protection rating. It is completely pro- tected against ingress of dust and has protection against full water immersion for up to 60 minutes, at depths up 1m.
-
Page 24: Standards And Regulations
4343W X-ray Detector Standards and Regulations The 4343W X-ray Detector is designed to be compliant with the requirements detailed in Table 3 below. All regulatory certificates are valid only if the original accessories are used. All regulatory certificates are rendered invalid if any modifications to the Product are made, or any portion thereof, without obtaining the prior written authorization of Varex Imaging. -
Page 25: Description Of The 4343W
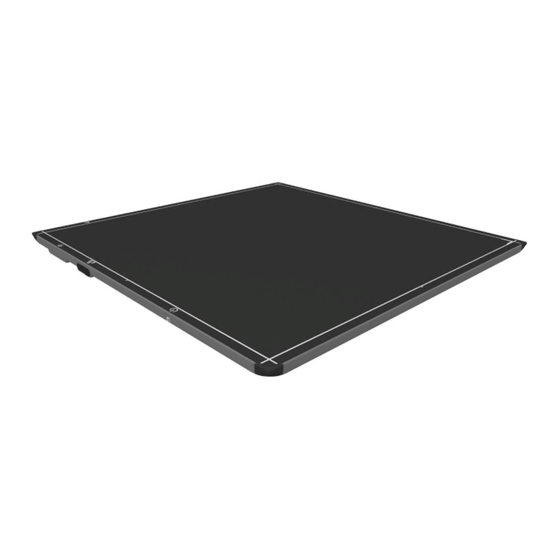
4343W X-ray Detector Description of the 4343W The 4343W is a lightweight, wireless X-ray Detector designed for medical and veterinary use. The X-ray Detector together with the Varex Smart Panel (VSP) software is designed for integration into an X-ray system. The VSP is the interface between the X-ray Detector and the Client PC;... -
Page 26: Figure 2 Imaging System Overview - As Access Point
4343W X-ray Detector For proper operation, X-ray Detector antennas and access point antennas WARNING should be unobstructed. Access point should not be installed next to power supply or generator WARNING equipment. Please contact your Varex representative for a list of approved access points. -
Page 27: Shipment Contents
Items received in each shipment. • 4343W X-ray Detector • X-ray Detector Test Results DVD (Files specific to the detector in the shipment) • Software DVD • VSP/ViVA System Software • 4343W X-ray Detector Reference Manual (DVD) • Service Cable, 6 ft. www.vareximaging.com... -
Page 28: Optional Parts
4343W X-ray Detector Optional Parts The 4343W shall only be used with its approved Varex Imaging accessories and replacement parts. Product certification and warranty are void if any modifications to the product is made, or any instruction, warning, or caution is not followed. -
Page 29: X-Ray Detector Surfaces And Features
4343W X-ray Detector X-ray Detector Surfaces and Features Figure 5 X-ray Detector Surfaces and Features Table 5 X-ray Detector Surfaces and Features Number Description Handles Battery Alignment Marker Battery and Battery Well (underneath battery is Replaceable Battery Contact) Replaceable Battery Latch... -
Page 30: X-Ray Detector Dimensions
4343W X-ray Detector X-ray Detector Dimensions Measured in mm and [inches in brackets]. Figure 6 X-ray Detector Dimensions Figure 7 X-ray Detector Dimensions www.vareximaging.com... -
Page 31: X-Ray Detector Specifications
4343W X-ray Detector X-ray Detector Specifications Table 6 X-ray Detector Specifications Sensor Detector Amorphous Silicon active TFT/PIN diode Technology Scintillator CSI Premium, CSI Standard, and DRZ+ Pixel Matrix 3072 (v) x 3072 (h) Pixel Pitch 139 µm Active Area 3062 (v) x 3062 (h) DRZ+, 3052 (v) x 3052 (h) CSI... -
Page 32: Table 6 X-Ray Detector Specifications
4343W X-ray Detector Table 6 X-ray Detector Specifications (Continued) Transmit Power WIFI_Chain 0: • 802.11a: 14.5 + 1dBm • 802.11n/ac 20_5180MHz~5240MHz: 13.5 + 1dBm • 802.11n/ac 20_5745MHz~5825MHz: 13 + 1dBm • 802.11n/ac 40_5190MHz: 11 + 1dBm • 802.11n/ac 40_5230MHz: 13.5 + 1dBm •... -
Page 33: Environmental Considerations
4343W X-ray Detector Environmental Considerations Environments outside the specification reduce the lifetime and may irreparably damage the X-ray Detector. Table 7 Environmental Conditions Category Limits Storage & Transport Temperature (ambient) -20º C to +55º C Operating Temperature (ambient) 10º C to 40º C T1 Temperature Sensor Minimum >... -
Page 34: X-Ray Detector Battery
New Batteries are shipped from Varex in shut-down mode. Before installing into the X-ray Detector, the Battery must be inserted into the 1 or 3-bay charger to remove it from shut-down mode. Note For additional information about the Varex Imaging Wireless Battery and Chargers, visit www.vareximaging.com. 8.7.1 Battery Installation Insert Battery at a slight angle so that the side with contacts sits over the adjoining contacts in the battery compartment. -
Page 35: Battery Removal
4343W X-ray Detector 8.7.2 Battery Removal Press-in the Battery latch until an audible click is heard. The latch will stay in closed position. Place a finger in opening on either side of the latch and lift the battery out. Figure 9... -
Page 36: Battery Charge Level
Figure 11 Battery Charge Level 8.7.4 Battery Hot-Swap The 4343W X-ray Detector is equipped with a Hot-Swappable Battery. When a discharged Battery is removed from the X-ray Detector, the User will have approximately 3 minutes of operation for the Battery Hot-Swap to occur. -
Page 37: Figure 12 Varex Inductive Battery Charger Dimensions And Mounting Hole Locations
4343W X-ray Detector Alignment between the Varex Inductive Battery Charger and the X-ray WARNING Detector should be exact. Poor alignment or foreign objects may cause overheating. The Varex Inductive Battery Charger and the X-ray Detector charging Caution location should be flush when charging. -
Page 38: Figure 13 Vhb Tape Placement Locations On Varex Inductive Battery Charger
4343W X-ray Detector Figure 13 VHB Tape Placement Locations on Varex Inductive Battery Charger Figure 14 VHB Tape Placement Dimension on Varex Inductive Battery Charger www.vareximaging.com... -
Page 39: Designing A Custom Inductive Battery Charger
Designing a Custom Inductive Battery Charger The OEM may design an Inductive Battery Charger following certain guidelines provided by Varex Imaging. Please contact your appointed Varex representative for information and requirements in designing a custom Inductive Battery Charger. See“Section 12.1, After-sales Ser- vice for Varex Imaging Products”... -
Page 40: Using A Third-Party Inductive Battery Charger
To support image acquisition while using the charger, the Varex supplied Inductive Battery Charger or a custom designed Inductive Battery Charger must be used, see Section 8.8 Section 8.9. Figure 15 Third-party Inductive Battery Charger and 4343W X-ray Detector Alignment www.vareximaging.com... -
Page 41: Power-On And Power-Off Sequence
4343W X-ray Detector 8.11 Power-on and Power-off Sequence To Power-on: Insert the Battery into the 1 or 3-bay charger to remove from shut-down mode (only applies to Batteries that are new). Place Battery into X-ray Detector making sure the Battery latches into place, see Section 8.7.1... -
Page 42: Led Status Indicator Behavior
8.14 Position Sensing The 4343W is equipped with two position sensors that communicate with software the X-ray Detector’s exact position within a bucky setup. Refer to document 03236 FP-2032 - Varex Smart Panel Software Interface for integration of Position Sensing. -
Page 43: Detector Sharing
8.15 Detector Sharing The 4343W X-ray Detector is equipped with Detector Sharing capability. Detector Sharing allows the IP address, password, and SSID to be set via software command. The software command for Detector Sharing can be sent via wireless or the Service Cable. Refer to document 03236 FP-2032 - Varex Smart Panel Software Interface for more information. -
Page 44: System Software
4343W X-ray Detector 10.0 System Software The 4343W deploys the Varex Smart Panel (VSP) architecture. X-ray Detector software is composed of two parts: • Software necessary to capture, process, and correct X-ray images (embedded in the detector). • The VSP COMM workstation libraries comprise the VSP SDK. -
Page 45: Vtrigger Acquisition (Aed)
4343W X-ray Detector If corrections are not turned on (i.e. raw frames), multiple frames will be delivered to the work- station, see Figure Figure 19 Exposure: Raw Frames 10.2 vTrigger Acquisition (AED) The vTrigger acquisition is controlled by hardware. Using vTrigger requires that the software is set to a configuration mode that enables vTrigger. -
Page 46: X-Ray Generator Interface Signals
4343W X-ray Detector 10.3 X-ray Generator Interface Signals Normally a set of hardware signals are used to interface between the X-ray Detector and the X-ray generator and hand switch. For example, PREP and REQ are two hand switch signals that are typically used to indicate the user request for an X-ray exposure. -
Page 47: Bonjour Installation Files
4343W X-ray Detector It should be noted that corrections files are not stored on the workstation. Corrections and configuration files are stored on the X-ray Detector. Note Refer to: 03236 FP2032_VarexSmartPanel_SoftwareInterfaceSpecification.pdf which provides API documentation for the software. Note For assistance operating ViVA, consult the ViVA Online help documentation. -
Page 48: X-Ray Detector Calibration
4343W X-ray Detector 10.5 X-ray Detector Calibration X-ray Detector calibration files are stored inside the detector non-volatile memory. There are three calibration files per mode: offset, gain, and defects. The calibration files are used for corrections during image acquisition. Note After a calibration, ensure the new calibration files are used by closing and re-opening the link to the X-ray Detector. -
Page 49: Figure 21 Initiate Offset Calibration
4343W X-ray Detector Click the Offset Calibration Button or click Offset Calibration from the menu bar under Acquisition. Figure 21 Initiate Offset Calibration A Calibration Setting window appears. Enter the number of frames desired and click OK. Figure 22 Calibration Setting window... -
Page 50: Figure 23 Offset Calibration Progress
4343W X-ray Detector An Offset Calibration Progress window appears. Figure 23 Offset Calibration Progress Once all frames are acquired, the X-ray Detector is updated with the averaged offset calibration frame for the current mode. The updated message will show on the progress window and calibration process is complete. -
Page 51: Gain Calibration
4343W X-ray Detector 10.5.3 Gain Calibration To compensate for non-uniformities in the X-ray Detector, a gain reference image (flat field) is used by the Corrections module to correct all images. The flat field image must be captured by the Varex Smart Panel (VSP) prior to acquiring images. The process of capturing the flat field image is known as Gain Calibration. -
Page 52: Table 10 Gain Calibration Sequence - All Modes
4343W X-ray Detector Note We recommend accumulating 32 frames for gain calibration and 8 frames for offset calibration for optimal image quality. Note Gain Calibration should be performed at least once per year. The actual number of calibration frames used is determined by the system integrator depending upon their specific performance requirements. -
Page 53: Gain Calibration Steps
4343W X-ray Detector 10.5.4 Gain Calibration Steps Choose the desired imaging mode from the Mode Drop Down Menu. Figure 25 Mode Drop Down Menu Under the Acquisition menu, click Gain Calibration. This invokes hardware handshaking for the dark field calibration. -
Page 54: Figure 27 Gain Calibration Progress Window
4343W X-ray Detector A Gain Calibration Progress window will appear. When prompted (waiting for X-ray), perform exposure. Figure 27 Gain Calibration Progress window Once all X-ray frames have been accumulated, the calibration process will average the gain calibration image for the current mode. -
Page 55: Figure 29 Gain Calibration Complete
4343W X-ray Detector When complete, an updated message and successfully finished calibration message will appear. The calibration process is complete. Click Close. Figure 29 Gain Calibration Complete Note Gain calibration should be performed at regular intervals: • At least, every twelve (12) months. -
Page 56: Linking To The X-Ray Detector
4343W X-ray Detector 10.6 Linking to the X-ray Detector Place a battery into the battery slot on the X-ray Detector and latch into place. The X-ray Detector LED will be solid Orange, then begin to blink Green. See Table To link to the X-ray Detector, click the ViVA icon, to launch the application. -
Page 57: Viva Configuration Settings
4343W X-ray Detector 10.7 ViVA Configuration Settings This section describes the ways to view or change calibration and system settings that are currently used in ViVA. Choose the desired imaging mode from the Mode Drop Down Menu. Figure 32 Mode Drop Down Menu To enable or disable Hardware Handshaking, click Acquisition under the Menu Bar and select or de-select Hardware Handshaking. -
Page 58: Figure 34 Hardware Handshaking Selected
4343W X-ray Detector Figure 34 Hardware Handshaking Selected To see System Settings, click Acquisition under the Menu Bar. Click on System Settings. A System Settings window will appear. Image and calibration settings may be turned On or Off in this window. -
Page 59: Image Acquisition
4343W X-ray Detector Figure 36 System Settings window 10.8 Image Acquisition Acquisition can be performed after Offset and Gain Calibration have been performed. This section describes how to acquire images. Before performing acquisition, settings should be checked to ensure that the desired corrections are applied to acquired frames. -
Page 60: Figure 37 Radiographic Acquisition Settings
4343W X-ray Detector To set the Correction type, click on Settings, the Acquisition Settings Menu will appear. Figure 37 Radiographic Acquisition Settings In the Acquisition Settings window; the type of corrected image, the number of loop acquisitions (if desired), auto-save, and Debug Verbosity may be selected. Click OK. -
Page 61: Acquiring Radiography Images
4343W X-ray Detector 10.8.1 Acquiring Radiography Images Radiography provides single-shot, high-resolution images for diagnosis. Note The OEM workstation should have the ability to employ the PREP and Expose_OK signals. See Section 10.3 or Section VSPADU-UTILITY in 03236 FP2032_VarexSmartPanel_SoftwareInterfaceSpecification.PDF for an example of controlling the X-ray Generator. -
Page 62: Figure 41 Acquire Image
4343W X-ray Detector Figure 41 Acquire Image An Acquisition Progress window will appear. Click Start Acquisition and initiate X-ray exposure. Figure 42 Start Acquisition www.vareximaging.com... -
Page 63: Radiographic Acquisition Settings
4343W X-ray Detector The Radiographic Acquisition Progress window will begin to show acquisition process with a blue status bar. Once the image has appeared, another image may be taken or the window may be closed by clicking Close. Figure 43 Image Acquisition Progress The acquired image can be saved in the desired file format by clicking File/Save As. -
Page 64: Vsp Control Panel
• Reset software to Factory Image* Note Control Panel screens will vary slightly for the type of detector. WiFi related settings will only display for wireless detectors (e.g. 4343W). 10.9.1 Access the VSP Control Panel To access the Control Panel: Open a browser and navigate to the IP Address of the X-ray Detector, example: http://192.168.2.31... -
Page 65: Figure 46 Vsp Control Panel
4343W X-ray Detector Note The Authentication Required Dialog Box will look different in each browser, but require the same User Name and Password. Enter the default user and password: • User Name: admin • Password: password Click Log In. Note Once the X-ray Detector is configured, the default password should be changed. -
Page 66: Modify Settings
4343W X-ray Detector 10.9.2 Modify Settings To modify the settings: Click Settings. The Settings content will load and any settings that are able to be modified. After inputting desired settings, click Update. The X-ray Detector will reboot and the new settings will updated on the X-ray Detector. -
Page 67: Change Password
4343W X-ray Detector 10.9.3 Change Password To change the password after logging in: Click Change Password. Enter a new Password. Once the new password is entered along with its matching confirmation, click Change to confirm the new password. To clear the passwords entered in the forms, click Reset. -
Page 68: Firmware Update
4343W X-ray Detector 10.9.4 Firmware Update To update the VSP Firmware: Click Update Firmware. This option is used to update all X-ray Detector software (embedded software, firmware, etc). Select the Varex provided firmware image by clicking Browse. After selecting the desired firmware, click Update Firmware to send the image to the VSP and start the upgrade process. -
Page 69: Figure 50 Firmware Updated
4343W X-ray Detector During the update, another page will display showing the file upload was successful. At this point the X-ray Detector will apply the updated firmware. Figure 50 Firmware Updated A fully charged battery should be used during firmware update. Do not WARNING remove the battery during firmware update. -
Page 70: Maintenance
4343W X-ray Detector 11.0 Maintenance In principle, the X-ray Detector assembly is maintenance-free, however; it is important that all calibrations are regularly performed and used for image processing. Although the a-Si X-ray Detectors are resistant to X-rays they can exhibit degradation over time when exposed to high X-ray dose environments. -
Page 71: Cleaning The X-Ray Detector
4343W X-ray Detector 11.1.2 Cleaning the X-ray Detector To clean the X-ray Detector: Remove the battery from the X-ray Detector. Locate and read the cleaning instructions specified on the product label. Follow the product instructions for cleaning. Note If you are using a disinfectant other than those specified, we recommend you consult a specialist for the procedure for disinfection. -
Page 72: Field Replaceable Parts
11.2 Field Replaceable Parts The 4343W has been designed to allow for field replacement of parts that may wear out after repeated usage, avoiding the need to return the X-ray Detector to Varex for repair. Contact Varex customer support (Section 12.1), for procedure to replace the following items:... -
Page 73: Troubleshooting
4343W X-ray Detector 12.0 Troubleshooting This section describes suggestions for troubleshooting. Table 12 Problems and Solutions Problem Solution Detector fails to link wirelessly 1. Ensure that the detector is associated to the access point, refer to Table 8 for LED indicator behavior. - Page 74 4343W X-ray Detector Table 12 Problems and Solutions (Continued) Acquired image shows a white or 1. Let power-off (Section 8.11) or reboot the detector (Section 8.12), a black channel re-insert the battery, re-establish the link. 2. Ensure that the tube dose is set to the correct settings.
- Page 75 4343W X-ray Detector Table 12 Problems and Solutions (Continued) Residual X-ray image from previ- Charge on the sensor pixels from an exposure beyond the ous acquired image shows in cur- saturation point of the pixels may cause a residual image. It can be...
-
Page 76: After-Sales Service For Varex Imaging Products
This product should not be mixed with other commercial waste for disposal. Follow the local radiation protection regulations. The Varex Imaging product may be attached as part of a component to other manufacturers’ systems. These other manufacturers are directly responsible for the collection and processing of their own waste products under the terms of the WEEE Directive. -
Page 77: Safety - Electromagnetic Interference
4343W X-ray Detector 14.0 Safety - Electromagnetic Interference This equipment generates, uses and can radiate radio frequency (RF) energy and, if not installed and used in accordance with the instructions, may cause harmful interference to other devices or may be affected by other equipment in the vicinity. If this equipment does cause harmful... -
Page 78: Electromagnetic Immunity
4343W X-ray Detector 14.2 Electromagnetic Immunity Table 14 ESD, Transient/Burst, Surge, Voltage Variation, Magnetic Fields IEC 60601-1-2 Immunity test Compliance Electromagnetic environment test level Electrostatic ± 8 kV ± 8 kV Floors should be wood, concrete, or ceramic discharge (ESD) -
Page 79: Table 15 Test Specs For Enclosure Port Immunity To Rf Wireless Communications
4343W X-ray Detector Table 14 ESD, Transient/Burst, Surge, Voltage Variation, Magnetic Fields (Continued) IEC 60601-1-2 Immunity test Compliance Electromagnetic environment test level Power frequency 30 A/m 30 A/m Magnetic field should be that of a typical (50/60 Hz) location in a typical professional healthcare magnetic field environment. - Page 80 4343W X-ray Detector Table 15 Test Specs for Enclosure Port Immunity to RF Wireless Communications Equipment Test Immunity Band Service Modulation Distance Frequency Power Test Level 2450 2400-2570 Bluetooth, Pulse modulation WLAN, 802.11 b) 217 Hz b/g/n, RFID 2450, LTE Band 7...
-
Page 81: Radio Frequency (Rf) Compliance Information
FCC responsible: Varex Imaging Corporation, 1678 South Pioneer Road, Salt Lake City, Utah 84104, USA, Tel: + 801/972-5000, Website: www.vareximaging.com FCC Caution: Any changes or modifications not expressly approved by the party responsible for compliance could void the user's authority to operate this equipment. - Page 82 4343W X-ray Detector If this equipment does cause harmful interference to radio or television reception, which can be determined by turning the equipment off and on, the user is encouraged to try to correct the interference by one or more of the following measures noted below: •...
-
Page 83: Regulatory
4343W X-ray Detector 15.0 Regulatory This section includes the manufacturers’ declaration of standards and regulations for which the X-ray Detector complies with. 15.1 Industry Canada Notice To prevent radio interference to the licensed service, this device is intended to be operated indoors and away from windows to provide maximum shielding. - Page 84 4343W X-ray Detector Users should also be advised that high-power radars are allocated as primary users (i.e. priority users) of the bands 5250-5350 MHz and 5650-5850 MHz and that these radars could cause interference and/or damage to LE-LAN devices. Francés Les dispositifs fonctionnant dans la bande 5150-5250 MHz sont réservés uniquement pour...
-
Page 85: Table 16 Europe - Declaration Of Conformity In Languages Of European Community
Hereby, Varex Imaging, declares that this Radiolan is in compliance with the essential requirements and other relevant provisions of Directive 1999/5/EC. Español [Spanish] Por medio de la presente Varex Imaging. declara que el Radiolan cumple con los requisitos esenciales y cualesquiera otras disposiciones aplicables o exigibles de la Directiva 1999/5/CE. - Page 86 Varex Imaging declara que este Radiolan está conforme com os requisitos [Portuguese] essenciais e outras disposições da Directiva 1999/5/CE. Slovensko Varex Imaging izjavlja, da je ta Radiolan v skladu z bistvenimi zahtevami in [Slovenian] ostalimi relevantnimi določili direktive 1999/5/ES. Slovensky [Slovak] Varex Imaging týmto vyhlasuje, že Radiolan spĺňa základné...
- Page 87 Index Abbreviations Hot-Swap, Battery Accessories How To Acquire Image Access Control Panel Alerts and Notes, Meaning of Acquire Image Gain Calibration Link Battery Offset Calibration Charge Level Power Off Installation Power On Removal Reboot Battery Hot-Swap Image Acquisition Calibration Procedures Auto-Save Calibration, Gain Corrected Image...
- Page 88 Index 4343W X-ray Detector Files to Install Reboot Gain Calibration Progress Window Reboot the Detector Hardware Handshaking Remove Battery Image Acquisition Launch Mode Drop Down Menu Safety Note Offset Calibration Button viii Battery Offset Calibration Progress window Cyber Security Radiographic Acquisition Progress Window...
- Page 89 4343W X-ray Detector This page intentionally left blank.
- Page 90 ©2020 Varex Imaging All rights reserved. The Varex Imaging logo and design are registered trademarks of Varex Imaging or its subsidiaries, in the United States and other countries. All other trademarks not owned by Varex Imaging or its subsidiaries that are depicted herein are the property of their respective owners.
Need help?
Do you have a question about the 4343W and is the answer not in the manual?
Questions and answers