Bard FUSION-TEC WR Series Literature Assembly
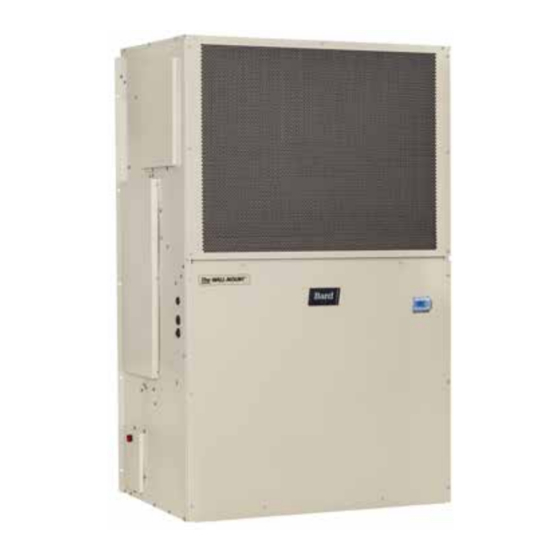
Сsystem/wall-mount air conditioner with lc6000-200 supervisory controller
Hide thumbs
Also See for FUSION-TEC WR Series:
- Service instructions manual (56 pages) ,
- Installation instructions manual (47 pages)
Table of Contents
Advertisement
Quick Links
Advertisement
Chapters
Table of Contents

Related Manuals for Bard FUSION-TEC WR Series


Summary of Contents for Bard FUSION-TEC WR Series
- Page 1 Literature Assembly 911-0771 Contains the following: 2100-704(C) Fusion Tec A/C Install Inst WR 2100-709 Fusion Tec Quick Start Guide WR 2100-034(F) User’s Guide 2100-479 Leak Test, Evacuation, Charging 2110-1547(E) Replacement Parts Manual 7960-788 Commissioning Report 7960-420 Warranty...
- Page 3 INSTALLATION INSTRUCTIONS Bard Air Conditioning System FUSION-TEC LC6000-200 ® WR Series Supervisory Wall-Mount Controller Air Conditioner Bard Manufacturing Company, Inc. Manual: 2100-704C Bryan, Ohio 43506 Supersedes: 2100-704B www.bardhvac.com Date: 1-2-20 Page 1 of 47...
-
Page 4: Table Of Contents
CONTENTS General Information ...........4 FIGURES Air Conditioning System ........4 Figure 1 WR Series Model Nomenclature ... 7 Wall-Mount Air Conditioner Units ....... 4 Figure 2 Dimensions ........9 Controller ............4 Figure 3 Prefilling Traps on Indoor Drain Pan General ............ - Page 5 Figure 42 Clearing Unit Alarm Logs ....39 WARNING Figure 43 Setting Controller Date and Time ..40 Figure 44 LC6000 Controller Display/Interface ... 40 Figure 45 Enable/Disable Zone 1 Indoor Humidity Sensor ....... 41 Electrical shock hazard. Figure 46 Enable/Disable Zone 2 Indoor Have a properly trained individual perform Humidity Sensor .......
-
Page 6: General Information
(one sensor per zone) will need to be purchased and installed in the additional zones. One additional temperature-only sensor (Bard P/N 8301-058) may also be used in Zone 1 but will also need to be purchased separately. Additional temperature/humidity sensors require field-supplied 5-wire 18 gauge shielded cable. -
Page 7: General
General For more information, contact these publishers: Air Conditioning Contractors of America (ACCA) The equipment covered in this manual is to be installed by 1712 New Hampshire Ave. N.W. trained, experienced service and installation technicians. Washington, DC 20009 The refrigerant system is completely assembled and Telephone: (202) 483-9370 Fax: (202) 234-4721 charged. -
Page 8: List Of Necessary Materials/Tools
LIST OF NECESSARY MATERIALS/TOOLS Additional hardware and miscellaneous supplies are needed for installation. These items are field supplied and must be sourced before installation. This list also includes tools needed for installation. List of Materials/Tools • Personal protective equipment/safety devices/ anti- •... -
Page 9: Figure 1
5 – Internal and External Cabinet Component Coating, Coated Evaporator Coil, Coated Condenser Coil ACCESSORIES AND CONTROLS OPTIONS X – Standard accessories including airflow sensor, dirty filter sensor, pressure transducers, crankcase heater S – All standard accessories plus additional Bard Guard security features and security frame Manual 2100-704C... -
Page 10: Minimum Clearance
Minimum Clearance Clearance to Combustibles Counter flow wall-mount air conditioner models have The unit itself is suitable for 0" clearance, but the a removable lower front service panel that allows supply air flange requires a minimum of 1/4" clearance access to the control panel, blower, compressor, circuit to combustible material. - Page 11 Manual 2100-704C Page 9 of 47...
-
Page 12: Wall-Mount Unit Mounting
(see Figure 3). not line up in which case the original bolts would need A unique feature of the FUSION-TEC WR Series wall- to be removed or cut away. mount unit is the ability to hang the front service panel... -
Page 13: Figure 3
FIGURE 3 Prefilling Traps on Indoor Drain Pan Hoses Evaporator Drain Pan Left Side Drain Hose Evaporator Drain Pan Right Side Drain Hose Pour water into evaporator drain pan directly above left and right drain fittings until coiled drain tubes in blower section are visibly full. FIGURE 4 Hanging Front Access Panel to Allow Access to Control Panel... -
Page 14: Supply Air Grill Installation
The rear deflectors must be folded out and Bard model SGR-5W grille is custom designed for secured by the installer with the supplied screws utilization with Bard wall-mount unit WR**AP* for (see Figure 5). - Page 15 Manual 2100-704C Page 13 of 47...
- Page 16 Manual 2100-704C Page 14 of 47...
- Page 17 FIGURE 10 Electric Heat Clearance Typical Building Outside Sheeting Wall Frame Inside Sheeting 1/4" Min. Supply Air Duct Flange of Wall 1/4" Min. SUPPLY GRILLE MIS-3897 FIGURE 11 Wall Mounting Instructions WALL STRUCTURE See FIGURE 2 – Mounting Instructions FACTORY SUPPLIED RAIN FLASHING.
- Page 18 FIGURE 12 Wall Mounting Instructions WR35 Models 39.00 ATTACH TO TOP PLATE OF WALL 27.88 1.000 1.000" CLEARANCE ALL AROUND DUCT IF REQUIRED RETURN DUCT 7.88 INTERIOR FINISHED WALL OPENING OVER FRAME 18.00 1.000" CLEARANCE ALL AROUND DUCT IF REQUIRED SUPPLY DUCT 13.88 OPENING...
- Page 19 FIGURE 13 Common Wall Mounting Installation RAIN FLASHING RAFTERS FINISHED CEILING SURFACE RETURN AIR WALL SLEEVE RETURN AIR DUCT FIELD SUPPLIED W/ GRILLE W/ GRILLE SUPPLY AIR WALL SLEEVE SUPPLY AIR FIELD SUPPLIED OPENING W/ GRILLE W/ GRILLE OUTSIDE WALL FREE AIR FLOW NO DUCT MIS-3899...
-
Page 20: Wall-Mount Unit Wiring
WALL-MOUNT UNIT WIRING required. If this is the case, the unit rating plate will WARNING so indicate. All models are suitable only for connection with copper wire. Each unit and/or wiring diagram will be marked “Use Copper Conductors Only”. These instructions must be adhered to. - Page 21 FIGURE 15 The main unit circuit breaker disconnect access is located on the front panel of the unit. Located at the VAC Supply Wiring Landing Points upper right corner of this panel is the rubber circuit breaker boot. This allows unit power to be disconnected without panel removal.
-
Page 22: Figure 18
FIGURE 17 Rear Communication and Power Wire Entrances (Optional) LOW VOLTAGE/COMMUNICATION ENTRANCE UNIT POWER ENTRANCE LIQUID TIGHT CONDUIT MUST NOT PASS THIS LINE TO PREVENT DAMPER BLADE INTERFERANCE LIQUID TIGHT CONDUIT SECURE TO KEEP CLEAR OF HEATER ELEMENT CONDUIT ROUTE THROUGH RUBBER BUSHING OPTIONAL REAR POWER WIRE ENTRANCE... - Page 23 3. If incoming AC voltage is below 220VAC..shut off AC breaker to unit and move factory "240V" wire to "208V" terminal Shelter supply breaker in ON position Bard system breaker in OFF position 240V/208V Single Phase Voltage Range: 197VAC – 253VAC 240V/208V Three Phase Voltage Range: 197VAC –...
-
Page 24: Preliminary Start Up
Once the first of the Bard FUSION-TEC WR Series wall-mount units is installed and powered on, it will operate in orphan mode—... -
Page 25: Lc6000 Controller Installation
LC6000 CONTROLLER INSTALLATION FIGURE 20 Typical LC6000-200 Component Location RJ11 Cable to Display Transformer Control Board Ethernet Cable Connection USB Male A to Micro Male Four Fused B Cable Power Supply Terminals Emergency Off Alarm Jumper Emergency Vent Alarm Jumper Generator Run Alarm Jumper Terminal Block... -
Page 26: Lc6000 Controller
IMPORTANT: When working with circuit board connecting wires to the terminal block, confirm that the components, Bard recommends the use of fuse in each of the four fuse holders is in the proper an anti-static wrist strap to prevent static position (active) as shown in Figure 21. -
Page 27: Installing Remote Indoor Temperature/Humidity Sensor(S)
Installing Remote Indoor Temperature/Humidity Sensor(s) One remote indoor temperature/humidity sensor and 35' of 18 gauge 5-conductor shielded cable is included with the controller. This sensor must be installed for proper operation. Mount the temperature/humidity sensor in a location least likely to be affected by open doors, rack-mounted fans, radiant heat sources, etc. Locating the sensor between both return grilles is often the best location, but every installation is unique. -
Page 28: Figure 23
For proper operation, the remote indoor temperature/humidity sensor (and any additional sensors) must be configured properly with the controller as shown in Step 2 on page 25. An additional remote indoor temperature- only sensor can be purchased and installed in Zone 1. If the site in which the LC6000 controller will be used has more than one zone (maximum three zones per LC6000), additional remote temperature/humidity sensors (one per zone) will need to be purchased and installed in the additional zones. - Page 29 Installing Optional Outdoor Temperature/Humidity Sensor One optional outdoor temperature/humidity sensor (8301-090) can be installed. Follow the manufacturer's mounting instructions. Use 18 gauge 5-conductor shielded cable to connect to controller. FIGURE 24 Remote Outdoor Temperature/Humidity Sensor Installation Connect wires from the 18 gauge shielded cable to terminals #65, #66, #67, #70 and #71. Wire Sensor Description...
-
Page 30: Generator Run Connections
Emergency Off, Emergency Ventilation and Generator Run Connections The LC6000-200 controller is shipped with emergency off, emergency ventilation and generator run contacts. There are factory-installed jumpers across terminals #6 and #7 (emergency off), #8 and #9 (emergency ventilation) and #10 and #11 (generator run). Remove the factory-installed jumpers before making the connections. FIGURE 25 LC6000-200 Series Connection for Emergency Off, Emergency Ventilation and Generator Run (If Applicable) Generator Run*... -
Page 31: Communication Wiring
Communication Wiring Connect the communication wiring from the wall-mount units to the controller in the manner shown in Figures 26, 27 or 28. The daisy chain does not need to follow the addressing order. The communication wire should be 2-wire, 18 gauge shielded cable with drain. -
Page 32: Figure 28
FIGURE 28 Placement of Communication Wire Filters (Daisy Chain and Alternate Methods) Daisy Chain Wiring (up to 14 units) Place filter here Place filter here LC6000 Unit 1 Unit 2 Unit 3 Unit 4...up to 14 units Alternate Wiring (up to 14 units) Place filter here Place filter here LC6000... - Page 33 The steps outlined on the following pages show how to connect the communication wiring using the daisy chain method shown in Figure 26 on page 29. If using the alternate method (as shown in Figure 27 on page 29), the connections to the controller and each wall-mount unit will be the same but the filters need to be placed in the positions shown in Figure 28.
-
Page 34: Figure 30
FIGURE 30 Communication Wiring: Termination at the First Wall-Mount Unit Unit 1 Terminal Block 9 10 16 17 – – From LC6000 Controller From the controller, extend the shielded cable through a separate conduit and route to the provided terminal block next to the wall-mount control board. -
Page 35: Figure 31
FIGURE 31 Communication Wiring: Termination at Additional Wall-Mount Units Unit 2 − 14 9 10 16 17 Terminal Block – – From Wall-Mount Unit 1 Route the cable from the first wall-mount unit to the terminal block of the second wall-mount unit. If this is the last unit to be connected, make a small service loop Wall-Mount Unit 2 and attach EMI filter as shown. -
Page 36: Supply Wiring
Supply Wiring The LC6000 controller is powered by 120, 208 or 240 volts from the shelter. Field-supplied supply wiring should be minimum 16 gauge, maximum 14 gauge (see Figure 32). A reliable earth ground must be connected in addition to any grounding from conduit. Grounding bolts and nuts are included with the controller for this purpose; a 2 hole grounding lug must be field supplied. - Page 37 Bard Guard Alarm Signal Common Signal for Outdoor Temperature Sensor Humidifier 2 Ground for Outdoor Temperature Sensor Common Ground for Bard Guard Alarm Signal Humidifier 3 Orange Power Connector Common 24 VAC+ 24 VAC Supply Emergency Off Alarm Orange Power Connector...
-
Page 38: Figure 34
FIGURE 34 LC6000-200 Wiring Diagram TB 61 YELLOW LC6000 BLUE TB 64 TERMINAL BLOCK (L1) 120V IN 120V IN WHITE 120V/208V/230VAC (L1) 208V IN 208V IN TRANSFORMER (L1) 230V IN 230V IN ORANGE 24VAC (L2 OR N) COMMON IN COMMON IN BLACK POWER GND GREEN... -
Page 39: System Set Up
SYSTEM SET UP FIGURE 35 The LC6000 controller and TEC-EYE hand-held TEC-EYE Connection to Unit Control diagnostic tool will both be used to set up the Bard air conditioning system. TEC-EYE Hand-Held Diagnostic Tool The microprocessor control used in the WR Series wall-... -
Page 40: Setting Up Wall-Mount Units For Operation
Current software To change these settings: versions, change log and installation 1) Press MENU key to access the Main Menu instructions are available on the Bard website at screen. http://www.bardhvac.com/software-download/ 2) Press UP or DOWN keys and ENTER key to enter TECHNICIAN password 1313. -
Page 41: Figure 39
FIGURE 41 pressing ENTER key to scroll to Return to Screens, pressing UP or DOWN key to change Run Test: A/C Circuit value to YES and pressing ENTER key. FIGURE 38 Executing Run Test Run Test Parameter Description Econ Stage Time: Amount of time (in seconds) allowed for damper blade movement in each direction. -
Page 42: Setting Up Lc6000 For Operation
After each of the wall-mount units have been FIGURE 43 addressed, had a run test performed and had the alarm Setting Controller Date and Time logs cleared, the rest of the system set up can proceed. Setting Up LC6000 for Operation The LC6000 controller will be used for the remaining steps in the set up process. -
Page 43: Figure 45
6) Press UP or DOWN key to change value to ON 4) Press UP or DOWN keys to scroll to Z3 Indoor to enable sensor (or change value to OFF to Hum C6. disable sensor). 5) Press ENTER key to scroll to Enable (see Figure 47). -
Page 44: Figure 49
2) Use UP or DOWN keys and ENTER key to To enable/disable Zone 3 Remote Temperature: enter USER password 2000. 1) Press MENU key to go to the Main Menu 3) Press UP or DOWN keys to scroll to IO Config; screen. -
Page 45: Enter Total Number Of Units
1) Press MENU key to go to the Main Menu choices, reference the most recent version of screen. FUSION-TEC WR Series Service Instructions 2100- 2) Press UP or DOWN keys and ENTER key to 695. enter USER password 2000. -
Page 46: Clear Controller Alarm Logs
8) Press ENTER key to save. considered “complete". FIGURE 55 Additional programming information can be found Selecting Economizer Type in FUSION-TEC WR Series Service Instructions 2100-695 and LC6000 Service Instructions 2100- 669. 9. Clear Controller Alarm Logs The LC6000 controller may have alarms logged due to bench testing. -
Page 47: Additional Information
ADDITIONAL INFORMATION Menu Screens and Password Levels Setpoints WR Series Unit The LC6000 setpoints will determine the cooling and System Config: A1-A10 User (2000) heating setpoints when communicating with the wall- Adv. System Config: B1-B8 Technician (1313) mount units. The unit cooling and heating setpoints I/O Config: C1-C15 Technician (1313) will determine the cooling and heating setpoints when On/Off: User (2000) - Page 48 TABLE 6 TABLE 7 WR Series Wall-Mount Unit Status Messages LC6000 Status Messages Message Description Message Description The LC6000 is ready and functioning PLC is on and has not started Waiting... properly. running the application yet. The LC6000 is being turned off by the Unit is on and in orphan mode with Orphan Mode Off by BMS...
-
Page 49: Remote Indoor Temperature/Humidity Sensor
Remote Indoor Temperature/Humidity Sensor Orientation Current versions of the remote indoor temperature/ humidity sensor need to be installed with the shielded cable wires entering the bottom of the back of the sensor to connect to the sensor terminals (see Figure 58). - Page 51 This quick start guide is designed to lead an installer NOTE: Each unit must have a unique address for the through the steps necessary for setting up a Bard air communication to work properly. Bard also conditioning system composed of FUSION-TEC WR Series recommends labeling each unit for ease in wall-mount units paired with an LC6000 controller.
- Page 52 Press UP/DOWN keys to scroll to Date/Time change. Press UP/DOWN keys to scroll through the Information screens until the desired unit Information screen Press ENTER key to scroll to the desired value to be appears. changed. In addition to being able to remotely view the units, an Press UP/DOWN keys to change the value.
- Page 54 USER’S GUIDE For all Packaged Systems (Air Conditioners and Heat Pumps) WA & WL - Series Air Conditioners IH - Series Air Source Heat Pumps WH & SH - Series Air Source Heat Pumps PA - Series Air Conditioners PH - Series Air Source Heat Pumps QA - Series Air Conditioners QH - Series Air Source Heat Pumps MANUAL 2100-034 REV.
- Page 55 TABLE OF CONTENTS General Information Air Filters Page 3 Outdoor Coil Page 3-4 Routine Equipment Outdoor Maintenance Page 4 Basic Operating Principles Air Conditioners Page 4-5 Heat Pump (Air-to-Air) Page 5-6 Heat Pump (Water-to-Air) Page 6 Ventilation Page 7 Dehumidification Circuits Page 7 Automatic Control Systems Thermostats...
-
Page 56: General Information
This manual is generic in nature and covers a wide range of heating and cooling products manufactured by Bard Manufacturing Company. It is intended to be a general guide for care and operation of typical systems and covers the most important features you should be aware of and are responsible for as the user of the equipment. -
Page 57: Routine Equipment Outdoor Maintenance
Depending on the specific equipment involved, the surface that can accumulate debris can be on the opposite side that is exposed to view when standing in front of the machine. Closely review the machine when operating to see which direction or path that the airflow moves through the machine, and if the air inlet side of the coil is hidden, try to observe the back (hidden) side by looking into the side grilles, using flashlight if necessary. -
Page 58: Heat Pump (Air-To-Air)
stream in the process. It may take several hours to pull down a hot, moist building or structure on initial startup, or anytime the system has been turned off for a long period of time. It is generally best to set the thermostat at a comfortable temperature and let it control the system as needed, rather than turning it on and off. -
Page 59: Heat Pump (Water-To-Air)
The length of the defrost cycle will vary depending upon actual outdoor temperature, humidity levels and amount of accumulated frost. It could range from 1-2 minutes up to but not exceeding 10 minutes. When the defrost cycle terminates, the reversing valve will shift back to heating mode and the outdoor fan will restart. -
Page 60: Ventilation
User’s Guide. Many installers also install thermostats other than those offered by Bard, and must determine proper compatibility prior to installation. -
Page 61: Insufficient Cooling Or Heating
50 and 60% Relative Humidity (RH) and typically affords acceptable human comfort conditions for most individuals, and under no circumstances should be set lower than 40% as overcooling of the conditioned space and/or freeze-ups of the indoor coil may occur. INSUFFICIENT COOLING OR HEATING In extremely hot or cold weather your system will continue to deliver its normal supply of conditioned air. -
Page 62: Helpful Hints & Operating Practices
HELPFUL HINTS AND GOOD OPERATING PRACTICES The following information will help you enjoy the full comfort and benefits of your Bard cooling and heating system, maximize the performance and efficiency, and help extend the life of your system: 1. Always keep the equipment in peak operating condition with routine scheduled maintenance, especially for the air filters and to assure clean outdoor coil. - Page 64 SERVICING PROCEDURE R-410A LEAK TEST EVACUATION CHARGING Bard Manufacturing Company, Inc. Manual No.: 2100-479 Supersedes: NEW Bryan, Ohio 43506 File: Volume I, Tab 1 Since 1914...Moving ahead, just as planned. Date: 03-08-07 Manual 2100-479 Page 1 of 11...
-
Page 65: Figure 42 Clearing Unit Alarm Logs
CONTENTS General Troubleshooting the Mechanical System Recovery Equipment Rated for R-410A ....3 Air Conditioning & Heat Pump - Cooling .....9 Leak Detectors ............3 Gauge Manifold ............3 Low Suction — Low Head Pressure ......9 High Suction — Low Head Pressure ......9 Attaching Gauge Manifold ........3 Low Suction —... -
Page 66: General
GENERAL GAUGE MANIFOLD WARNING WARNING The oils used with R-410A refrigerant are hydroscopic and absorb water from the Gauge manifold must be suitable for use atmosphere readily. Do not leave systems with R-410A refrigerant and POE oils. open to the atmosphere for more than 5 minutes. -
Page 67: Attaching Manifold Hose To Schrader Valve
3. Close drum valve and disconnect from center port. ATTACHING MANIFOLD HOSE TO Release nitrogen or CO2 into the atmosphere through SCHRADER VALVE suction line of gauge manifold. 4. Correct any leaks and recheck. When leaks, if any, WARNING have been repaired, system is ready to be evacuated and charged. -
Page 68: Charging
R-410A System Charging CHARGING THE SYSTEM BY WEIGHT Even though R-410A has a very small fractionation potential, 1. Connect manifold as instructed. it cannot be ignored completely when charging. To avoid fractionation, charging of an air conditioner or heat pump 2. - Page 69 FIGURE 1 TYPICAL AIR CONDITIONING SYSTEM COOLING CYCLE MIS-369 Manual 2100-479 Page 6 of 11...
- Page 70 FIGURE 2 TYPICAL HEAT PUMP SYSTEM COOLING CYCLE MIS-368 Manual 2100-479 Page 7 of 11...
- Page 71 WARNING To speed refrigerant flow, it may be necessary to place refrigerant drum in a pan of warm water (not greater than 130ºF). Remember to either consider the total weight of the pan of water or remove the drum for weighing frequently to keep track of the charging process.
-
Page 72: Air Conditioning & Heat Pump - Cooling
roubleshooTing The echanical ysTeM AIR CONDITIONING AND HEAT PUMP — COOLING LOW SUCTION — LOW HEAD LOW SUCTION — HIGH HEAD PRESSURE PRESSURE 1. Restricted ��� over indoor coil. 1. Partial restriction and then overcharged. 2. Defective indoor fan motor. HIGH SUCTION — HIGH HEAD 3. - Page 73 Manual 2100-479 Manual 2100-479 Page 10 of 11 Page 10 of 11...
- Page 74 Manual 2100-479 Manual 2100-479 Page 11 of 11 Page 11 of 11...
- Page 76 Blower Assembly Components – WR58BP* Important Exploded View ..........16 Usage List ..........16 Contact the installing and/or local Bard distributor for all parts requirements. Make sure to have the complete model and serial number available from the unit rating plates.
-
Page 77: Cabinet Components
CABINET COMPONENTS SEXP-885 A NOTE: When replacing parts in the upper condenser area, note any use of caulk as a sealant. Be sure to replace caulk seals using 100% silicone outdoor-rated caulk. This drawing is referenced in tables on pages 3 and 4 Manual 2110-1547E Page 2 of 20... - Page 78 Motor Cradle S518-121 Lower Intake Grille Assembly 5252-033 Bard Nameplate Standard unit e terior cabinet parts are manufactured with various paint color options. To ensure the proper paint color is received, please reference the following codes: Beige -X, White -1, Buckeye Gray -4, Desert Brown -5, Dark Bronze -8 NS –...
- Page 79 Motor Cradle Mount S518-119 Lower Intake Grille Assembly 5252-033 Bard Nameplate Standard unit e terior cabinet parts are manufactured with various paint color options. To ensure the proper paint color is received, please reference the following codes: Beige -X, White -1, Buckeye Gray -4, Desert Brown -5, Dark Bronze -8 NS –...
- Page 80 This page intentionally left blank Manual 2110-1547E Page 5 of 20...
-
Page 81: Functional Components
FUNCTIONAL COMPONENTS SEXP-886 A Manual 2110-1547E This drawing is referenced in tables on pages 7 and 8 Page 6 of 20... - Page 82 FUNCTIONAL COMPONENTS Dwg No. Part Number Description 8000-440 Compressor 8000-442 Compressor 8000-379 Compressor 8000-380 Compressor S900-362-0154 Blower Assembly S5154-002-0146 Blower Assembly 8200-054 Condenser Motor Mount 8200-055 Condenser Motor Mount 7051-094 Condenser Discharge Grille 7051-091 Condenser Discharge Grille 5151-064 Fan Blade 5151-062 Fan Blade 8106-061-0167...
- Page 83 FUNCTIONAL COMPONENTS Dwg No. Part Number Description 8000-385 Compressor 8000-386 Compressor S5154-007-0142 Blower Assembly 8200-055 Condenser Motor Mount 7051-091 Condenser Discharge Grille 5151-062 Fan Blade S8106-061-0132 Condenser Fan Motor 5051-216 Condenser Coil 5054-216 Condenser Coil – Coated 800-0417 Distributor Assembly 917-0339 Evaporator Coil 917-0340...
- Page 84 This page intentionally left blank Manual 2110-1547E Page 9 of 20...
-
Page 85: Control Panel - 1 Phase
CONTROL PANEL – 1 PHASE TERMINAL BLOCK ASSEMBLY 26 27 13 14 1 2 3 4 8 9 10 11 12 15 16 17 18 19 20 21 22 BOTTOM SEXP-887 B Manual 2110-1547E Page 10 of 20... - Page 86 (Example: 8301-068-002A). A software upgrade of all PLCs onsite (units and controllers) should accompany any PLC replacement. Latest revisions of software, change log and instructions are available on the Bard website at http://www.bardhvac.com/software-download/ Capacitor mounted to WR35/36BPA control panel ...
-
Page 87: Control Panel - 3 Phase
CONTROL PANEL – 3 PHASE TERMINAL BLOCK ASSEMBLY 13 14 8 9 10 11 12 15 16 17 18 19 20 21 22 26 27 BOTTOM SEXP-891 Manual 2110-1547E Page 12 of 20... - Page 88 (Example: 8301-068-002A). A software upgrade of all PLCs onsite (units and controllers) should accompany any PLC replacement. Latest revisions of software, change log and instructions are available on the Bard website at http://www.bardhvac.com/software-download/ Wiring diagram reference listed under HEATER PACKAGES on page 18...
-
Page 89: Blower Assembly Components - Wr35Bp
BLOWER ASSEMBLY COMPONENTS – WR35BP* SEXP-939 Drawing Part Number Description 5152-014 Blower Wheel S8106-051-0154 1/3 HP Programmed Motor C8106-051-0154 1/3 HP Control Only Replacement 151-126 Housing 105-1435 Left Mounting Angle 105-1443 Right Mounting Angle Manual 2110-1547E Page 14 of 20... -
Page 90: Blower Assembly Components - Wr36Bp
BLOWER ASSEMBLY COMPONENTS – WR36BP* SEXP-629 Drawing Description Part Number 5152-049 Blower Wheel S8105-059-0146 1/3 HP Programmed Motor 151-122 Housing C8105-059-0146 1/3 HP Control Only Replacement 3000-1578 0-10VDC Adapter Wire Manual 2110-1547E Page 15 of 20... -
Page 91: Blower Assembly Components - Wr58Bp
BLOWER ASSEMBLY COMPONENTS – WR58BP* SEXP-942 Drawing Part Number Description 5154-007-0142 Complete Blower Wheel C5154-007-0142 3/4 HP Control Only Replacement 3000-1578 0-10VDC Adapter Wire Manual 2110-1547E Page 16 of 20... -
Page 92: Heater Packages - Wr35Bp
HEATER PACKAGES – WR35BP* SEXP-940 Dwg No. Part Number Description 113-709 Top Heater Support 113-710 Lower Heater Support 8604-150 Heat Strip 1.5KW 240V 2 Term 8604-148 Heat Strip 5.0KW 240V 2 Term 8604-149 Heat Strip 6.0KW 240V 3 PH 8402-190 Limit Control 130P/150BU 1012-065 Screw, Type AB PZPNHD #8-18X3/8... -
Page 93: Heater Packages - Wr36Bp*/Wr58Bp
HEATER PACKAGES – WR36BP*/WR58BP* SEXP-892 Dwg No. Part Number Description 113Y671 Left Heater Support 113X672 Right Heater Support 113-668 Heater Bracket Front 8604-150 Heat Strip 1.5KW 240V 2 Term 8604-148 Heat Strip 5.0KW 240V 2 Term 8604-149 Heat Strip 6.0KW 240V 3PH 8402-190 Limit Control 130P/150BU 8611-016... -
Page 94: Freecooling Damper Motor
FREECOOLING DAMPER MOTOR SEXP-902 Dwg. No. Part Number Description 103-537 Actuator Support Channel 103-538 Actuator Support Channel 113-712 Rod Support Bracket 113-711 Actuator Bracket 141-326 Gusset 8602-093 90 in/lb Actuator 8602-101 Actuator Drive Rod Assembly 8602-102 Actuator Drive Rod Assembly 8602-008 Ball Joint 8602-042... -
Page 95: Anti-Theft Kit (Optional)
ANTI-THEFT KIT (OPTIONAL) SEXP-888A SEXP-888 A Dwg No. Part Number Description 9050-004 Frame Assembly 9050-008 Frame Assembly 9050-005 Base Bracket 9050-006 Top Bracket 9050-007 Top Bracket 8406-135 Low Pressure Switch 8406-156 Panel Switch 910-2038 Speaker Assembly 1012-346 Tri-Groove Nut 2151-022 Tri-Groove Socket –... -
Page 97: Date
Jobsite Startup and Commissioning Report Shelter (Name/Number): Commissioned By (Name): Installation By (Company): Installer Address/Phone No.: Date Commissioned: Shipping Inspection – Inspect each unit for the following: Do any of the units have visible damage from falling over during transit? Are any of the Condenser Coils located at the upper front of each unit Damaged? Are any of the Condenser fan assemblies located in the top of each unit damaged? Inspect the lower front door and side panels of each unit. - Page 98 Are EMI filters installed on the 2 wire shielded cable ran from the controller to the units? A continuity check between the 2 communications wires with a multimeter will verify proper “+” and “-“connections have been made for the 2 wire shielded cable. This may be checked at the unit or controller.
- Page 99 Outdoor Ambient Temperature Indoor Room Temperature Controller Setup – Verify the following: Are all hard wired alarms (NOC) and/or Ethernet cable connected and functional? Are all remote indoor temperature and humidity sensors connected and operational? Is the time and date set in the controller? Warm the indoor temperature and humidity sensor with a blow dryer or heat gun.
- Page 101 If you can not show us the actual date of purchase, the time periods in this warranty will start on the date that we shipped your Bard product from our factory.
- Page 102 Factory coated coils have a “5” year warranty in corrosive environments that are listed as approved. Internet Resources Recognized as a leader in the HVAC industry, Bard combines quality products and outstanding service with innovation and technological advances to deliver high- performance heating and cooling products around the world. Please visit www.bardhvac.com...
Need help?
Do you have a question about the FUSION-TEC WR Series and is the answer not in the manual?
Questions and answers