Table of Contents
Advertisement
Quick Links
Advertisement
Table of Contents

Subscribe to Our Youtube Channel
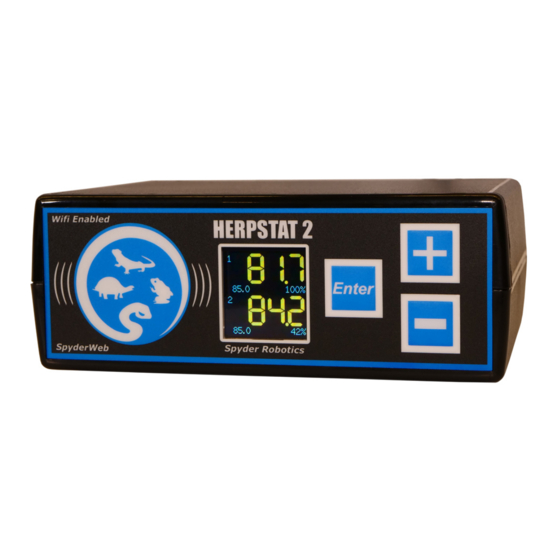
Summary of Contents for Spyder Robotics SpyderWeb Herpstat 2
- Page 1 Herpstat 2 SpyderWeb User’s Manual www.spyderrobotics.com...
- Page 2 Thank you for choosing the Herpstat digital proportional thermostat. This product offers the following features: Proportional heating constantly monitors and adjusts the amount of heat necessary to • maintain a target temperature (usable range from 40˚F to 150˚F or 4˚C to 65˚C). Soft startup slowly applies power during initial warm-ups.
-
Page 3: Hardware Installation
Hardware Installation Note: Our support page has a document on probe placement titled “Where should I mount my thermostat’s probe”. Visit the support page at this address: http://www.spyderrobotics.com/support WARNING: FIRE OR ELECTRICAL SHOCK MAY RESULT FROM MISUSE. FOR INDOOR USE ONLY! Use only in a dry location. This device is 120V AC. - Page 4 Quick Start Using A Phone / Tablet / Computer Overview of steps: 1. Connect phone / tablet / computer directly to the Herpstat using Wi-Fi via Access Point Mode. 2. Enter the Device Configuration and set your desired settings. (This can be done later in the full Admin Page after exiting the Access Point mode) 3.
- Page 5 In Access Point mode you can click the red Device Configuration link and have access to most of the main control settings of the Herpstat just as if you were physically using the device. Note: You will not have access to the email and other web related options while in Access Point mode.
-
Page 6: Setup Procedure
Force humidity outlet on. System information display. Wi-Fi information. Setup Procedure Note: The Enter button is used to select options while the Plus and Minus buttons are used to alter the options or navigate the menu. Some menus use the Enter button to advance to the next option. While in the menu all power to the outputs are turned off for safety. - Page 7 Display Type: This setting adjusts whether to display temperature in Celsius or Fahrenheit. LCD Theme: This setting adjusts color scheme including background colors and font colors. LCD Brightness: This setting adjusts the brightness of the LCD backlighting. System Time: This setting adjusts the system clock's time. While setting the time use the Plus and Minus buttons to adjust the hour.
- Page 8 Ramping: This setting adjusts how long it will take to switch between periods. This allows you to do a slow transition between temps when multiple periods are selected. High / Low Alarms: This menu will let you set a high and low temperature for the selected output that when breached causes an audible alarm.
- Page 9 Output Setup for Humidity Control From the initial menu screen select an output using the Plus and Minus button and press Enter. Humidity (Sensed) menu. Humidity (Scheduled) menu. Humidity (Hybrid) menu. Humidity (Dehumidfy) menu. Mode: Humidity (Sensed), Humidity (Dehumidify), Humidity (Scheduled), Humidity (Hybrid) Note: When the Mode is changed all settings for selected output will be set to the defaults for that particular mode.
- Page 10 Safety (menu option) From the initial menu screen select Safety using the Plus and Minus button and press Enter. Safety: This setting determines what course of action will take place during an error condition. This also controls the built in safety relay. Once the error condition is corrected the device will return to normal operations. INDIVIDUAL OUTPUTS: This option is the default setting and does not enable the built in safety relay.
- Page 11 Wi-Fi Setup (menu option) Special Requirements: There are length limitations on some features of the SpyderWeb: Your home router SSID: 20 Characters Your home routers password: 16 Characters SendTo and From email addresses: 39 Characters Email passwords: 19 Characters Note: The fastest way to connect your Herpstat to Wi-Fi is by selecting Access Point on the main menu page.
-
Page 12: Accessing The Web Interface
Your Wi-Fi Router Setup: Basic: The Herpstat will initially get a dynamic IP address from your router. If accessing the Herpstat from inside your network no additional modifications are needed. You can access the SpyderWeb by typing the Herpstat IP address into the web browser of any phone / table / computer that is connected to your network. -
Page 13: Email Setup
Other options on the Admin page are: Device Nickname: Give your device a unique nickname to make it easier when viewing multiple devices. Enable Emergency Shutdown: This option controls the safety relay on the thermostat. If the user is remotely viewing and notices a problem this feature can be activated which will trigger the safety relay and cut power to any outlets on the device. -
Page 14: Troubleshooting
5x20mm fast acting fuse. Never bypass the safety fuse or use a larger fuse as it can become a serious safety hazard. Additional fuses can be purchased through Spyder Robotics online webstore. We recommend keeping spares on hand to avoid potential downtime should this scenario occur. - Page 15 Replacement parts may be new or serviceable used parts at Spyder Robotics LLC option, of equal or better quality to those being replaced. This warranty does not extend and shall not apply to products that have been subjected to misuse, neglect, accident, or improper installation.


Need help?
Do you have a question about the SpyderWeb Herpstat 2 and is the answer not in the manual?
Questions and answers