Table of Contents
Advertisement
Quick Links
Thank you for choosing the Herpstat HP. This product offers the following features:
High Powered ON/OFF style control of heating, cooling, or a humidity device. (usable range from
•
40˚F to 110˚F or 4˚C to 43˚C).
•
Temperature sensor included with an internal resolution of .1125 ˚F and is accurate to ± .9 ˚F
•
Can be used with optional humidity sensor to control humidity instead of heating/cooling.
•
Can be used with optional humidity sensor for heating while monitoring humidity.
•
Built in Safety Relay gives backup protection against a main relay failure causing a "run away"
heating situation.
•
Built in electrical tracking that typically improves relay contact life providing longer product life.
•
User selectable temperature ramping.
•
Sensor Matching allows the user to digitally calibrate the sensor output to match other equipment.
•
Selectable day/night schedules with nighttime temperature setting.
High/Low tracking helps monitor heating system and enclosure efficiency.
•
High/Low threshold alarms.
•
•
Settings are retained in memory even if power is lost. *
•
Power Outage detection/tracking.
Temperature can be set/displayed in Fahrenheit or Celsius.
•
Easy to read backlit LCD display.
•
•
12ft removable sensor allows for easy replacement if necessary.
Audible alarm system.
•
Internal error detection shuts off heat if sensor fails or is disconnected.
•
Handles up to 1500 watts continuous (1650 watts peak).
•
•
Replaceable fuse.
6ft electrical cord and grounded outlet
•
•
* Software clock is reset and features requiring the clock are disabled on power loss.
Hardware Installation
WARNING: FIRE OR ELECTRICAL SHOCK MAY RESULT FROM MISUSE. FOR INDOOR USE ONLY!
Do not exceed 1500 watts continuous use.
1.
Insert the temperature probe plug into jack on the back of the Herpstat HP.
2.
Attach the Herpstat's power cable to the back of the unit and then connect to a standard 120V
electrical outlet.
3.
Attach the heating or cooling device to the Herpstat's AC outlet.
for use with oil filled heaters, cooling fans, or humidity control devices within a room. This
thermostat is not recommended for individual control of cages, racks or enclosures.
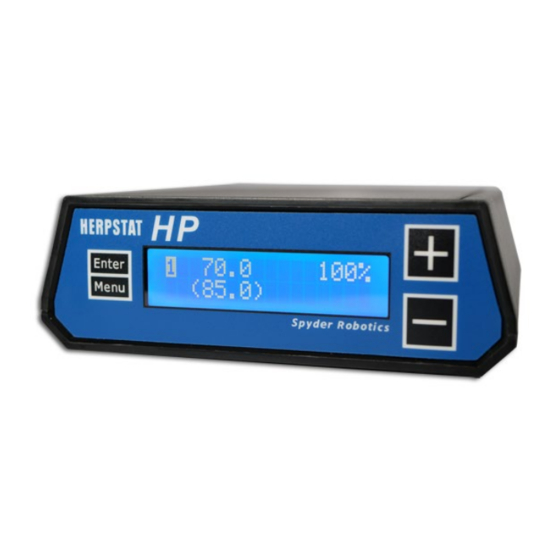
Herpstat HP
(version 2)
User's Manual
www.spyderrobotics.com
This thermostat is recommended
Advertisement
Table of Contents

Related Manuals for Spyder Robotics Herpstat HP


Summary of Contents for Spyder Robotics Herpstat HP
- Page 1 WARNING: FIRE OR ELECTRICAL SHOCK MAY RESULT FROM MISUSE. FOR INDOOR USE ONLY! Do not exceed 1500 watts continuous use. Insert the temperature probe plug into jack on the back of the Herpstat HP. Attach the Herpstat's power cable to the back of the unit and then connect to a standard 120V electrical outlet.
- Page 2 Installation Tips: Do not use aluminum tape on the probe tip. This can cause false readings and poor regulation. Route the probe wires so that they are not in direct contact with the 120vac cables going to the heating devices. Preferably leave at least a few inches between the probe wires and the AC lines to avoid cross talk/electrical interference issues.
- Page 3 Set System Time: This setting adjusts the system clock's time. While setting the time the Plus button increments the hour and the Minus button increments the minute. Sensor Type: This setting selects which type of sensor will be used. The Temperature option is used for the included temperature sensor and the Temp &...
- Page 4 Enable Nite Cycle (OFF / ON) To Enable/Disable the Nite Cycle press the Enter button while on this display. Nighttime Temperature: This setting is the temperature the device will maintain during the Nite Cycle. NiteCycle Start Time: This setting adjusts what time the Nite Cycle starts. (Output Setup for Temperature Control continued...) NiteCycle End Time: This setting adjusts what time the Nite Cycle ends.
- Page 5 Safety Setup (menu option) From the initial menu screen select Safety Setup using the Plus and Minus button and press Enter. Safety Relay: This setting determines the operation of the Safety Relay during an error condition. Once the error condition is corrected the device will return to normal operations.
- Page 6 Replacement parts may be new or serviceable used parts at Spyder Robotics LLC option, of equal or better quality to those being replaced. This warranty does not extend and shall not apply to products that have been subjected to misuse, neglect, accident, or improper installation.
Need help?
Do you have a question about the Herpstat HP and is the answer not in the manual?
Questions and answers