Advertisement
Table of Contents
- 1 Table of Contents
- 2 About Your Proseries Xtp
- 3 Before Installation
- 4 Mounting the Heater to the Wall
- 5 Electrical Hookup
- 6 Plumbing Hookup
- 7 Commissioning the Water Heater
- 8 Software Features
- 9 Start-Up Process
- 10 Monitoring & Preventive Maintenance
- 11 Technical Support
- 12 Applications Schematics
- 13 Repairs and Options
- 14 Wiring Schematics
- Download this manual
Advertisement
Table of Contents

Related Manuals for EemaX XTP PRO Series


Summary of Contents for EemaX XTP PRO Series
- Page 1 INSTALLATION, OPERATION, AND MAINTENANCE MANUAL FOR TANKLESS ELECTRIC WATER HEATERS PROSERIES XTP™...
- Page 2 IMPORTANT SAFETY INFORMATION READ ALL INSTRUCTIONS BEFORE USING DANGER Indicates an imminently hazardous situation which, if not avoided, will result in death or serious injury. WARNING Indicates a potentially hazardous situation which, if not avoided, could result in death or serious injury.
- Page 3 8. If the Eemax Tankless Water Heater is 3. The unit must be installed by a installed in a location where water licensed electrician and plumber.
- Page 4 IMPORTANT SAFETY INFORMATION READ ALL INSTRUCTIONS BEFORE USING 10. When the heater is installed in a well 14. This heater must be installed in a water system or if the plumbing location where it is not subject to system is prone to introducing air into freezing temperatures unless supplied the heater, it is highly recommended with factory installed freeze...
-
Page 5: Table Of Contents
IMPORTANT SAFETY INFORMATION READ ALL INSTRUCTIONS BEFORE USING 17. Applications with the use of a circulating pump recirculation circulator must be installed according schematics. Should applications call for the use of antifreeze. A mixture of Propylene Glycol is the only recommended antifreeze. The use of Ethylene glycol antifreeze is strictly prohibited. -
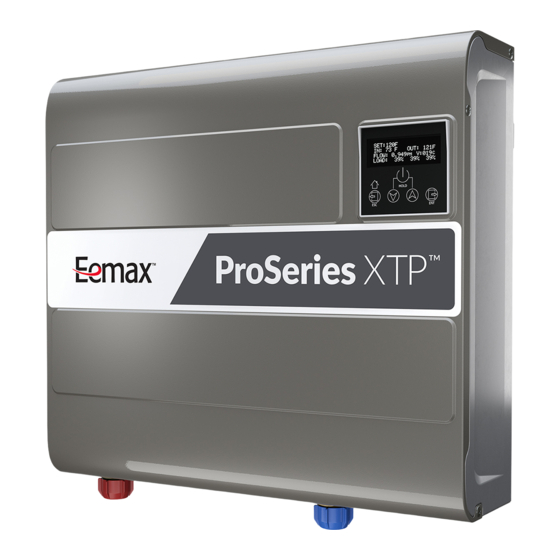
Page 6: About Your Proseries Xtp
The microprocessor controller receives this information and determines the amount of power to send to the heating elements to heat the water to the desired temperature. Eemax tankless electric water heaters only use as much power as needed by modulating the heating elements from 0 to 100%. -
Page 7: Before Installation
Level MOUNTING THE HEATER TO THE WALL Follow the mounting instructions below as appropriate to your installation. Eemax recommends the heater be installed close to the point-of-use. CAUTION This heater must be installed in a location where it is not subject to freezing temperatures, unless supplied with factory installed freeze protection. - Page 8 10" Top Clearance Upright Installation 8" Clearance 8" Clearance 18" Clearance Alternate Installation ProSeries XTP models are approved for zero clearance to combustible surfaces such as plywood. Above clearances are recommended for service and installation. Locate the best position to mount the unit. Check clearances around the unit according to the diagram below. Measure from the top, bottom, left &...
-
Page 9: Electrical Hookup
ELECTRICAL HOOKUP Eemax recommends that the heater is installed and serviced by a licensed plumber and electrician. WARNING Before beginning any work on this installation, be sure that the electrical breaker is "off"... - Page 10 Before starting any electrical work: VERIFY there is no power at the heater The field wiring power conductors are to be secured to the L1, L2 and L3 connectors on the contactor(Fig. 1) .The ground is to be secured to the GND connector to the left of the contactor. Fig.
-
Page 11: Plumbing Hookup
PLUMBING HOOKUP Must flush line a minimum 2 minutes, at a maximum flow on initial start-up. Reference the recommended installation diagram below. Additional installation diagrams for recirculation loops, multiple ProSeries XTP units plumbed in series or parallel configurations, can be found in the APPLICATION SCHEMATICS section of this manual. The heater is equipped with brass ¾”... - Page 12 WARNING Must flush out water heater for minimum 2 minutes at maximum flow on initial start-up or after any service work has been performed. Close and open drain valve 3 times to remove any lodged air bubbles. Failure to do so may damage the heater. Minimum inlet water pressure 35 psi dynamic.
- Page 13 Proper water conditions must be maintained to prevent damage to the water heater. MAXIMUM ALLOWABLE CONSTITUENT (MG/L) BETTER BEST CONCENTRATION Alkalinity Calcium Carbon Dioxide Chlorine Free Chlorine 0.05 Iron 0.01 Magnesium as Mg Magnesium as Mn Nitrate Oxygen Silica Sodium Sulfate Total Dissolved Solids (TDS)* Total Hardness...
-
Page 14: Commissioning The Water Heater
COMMISSIONING THE WATER HEATER CAUTION Before switching the electrical breaker "on", make sure the inlet and outlet ball valves are fully open and water is flowing through all points of use for a minimum of 2 minutes at maximum flow. Open and close drain valve 3 times while purging to remove any lodged air bubbles. - Page 15 Navigating the menus: Tap the left ESC button to move to the main menu screen. Diagram 1 contains a flow chart of all of the sub-menus that are accessible and which keys to press in order to navigate to each menu. To return to the “Run”...
-
Page 16: Software Features
SOFTWARE FEATURES Notifications: Code Name Unit behavior Action B005 Inlet thermistor disconnected Heating enabled based on default Check thermistor connections. Check parameters and history data. parameter P000 and adjust if needed. C010 Outlet thermistor disconnected Heating enabled without calibration. Check outlet thermistor connection. B015 Inlet AND outlet thermistors Heating enabled based on default... - Page 17 Parameters: Code Name Details Default/values P000 Inlet override Overrides inlet 180F OR highest measured temperature in case of an inlet temperature. inlet thermistor missing. P005 Setpoint tuning Allows user to fine tune 0F (adjustable between -10 outlet temperature to and 10 F) match the setpoint.
-
Page 18: Start-Up Process
Plumbing installation checklist must be filled out and left with water heater. Must flush water heater for 2 minutes at a minimum. Eemax installation checklist and start-up procedure for ProSeries XTP water heaters Important - Read and fully understand all steps outlined below before proceeding. Failure to do so may damage the water heater and void any warranty. - Page 19 Important - Read and fully understand all steps outlined below before proceeding. Failure to do so may damage the water heater and void any warranty. Technical support is available at 1 (800) 543-6163 Start-up procedure and checklist Step Category Action Confirmed by Notes Start-up...
- Page 20 Shutdown Process (Normal, Emergency, and Long Term) Shut down procedure Important - Read and fully understand all steps outlined below before proceeding. Failure to do so may damage the water heater and void any warranty. Technical support is available at 1 (800) 543-6163 Step Category Action...
-
Page 21: Monitoring & Preventive Maintenance
Perform PMR per site requirements not to exceed 90 days. Maintenance inspection program (MIP): Eemax water heaters are very low maintenance. Ensure PMR is completed every 90 days. Disable power to the unit via external disconnect or local disconnects. Per site lockout procedures open cabinet door and visually inspect components for sings of damage associated with possible water leaks, excessive heat or external factors that could impact the water heater and associated components. -
Page 22: Technical Support
TECHNICAL SUPPORT TECHNICAL SUPPORT FORM PERFORM STEPS BELOW BEFORE CALLING TECHNICAL SUPPORT WATER HEATER MODEL # ____________________________________ SERIAL # ____________________________________ Inlet Water Pressure ____________________ Inlet Water Temperature ____________________ Notifications ______________________________________________________________________________________________ ______________________________________________________________________________________________ Incoming Voltage Testing Elements (FIG 1) Amp draw on each heating element, Record current L1 ____________ values from display during operation. - Page 23 ECO Testing Points Test ECO’s (electric cut offs): To check all ECO’S simultaneously measure from COMMON TEST POINT to 3 CHAMBER (or 6 CHAMBER) for continuity. If no continuity, then check across each ECO individually. ECO’s may be manually reset after they have cooled. Run cold water and press the stem to reset.
-
Page 24: Applications Schematics
APPLICATIONS SCHEMATICS... -
Page 38: Repairs And Options
REPAIRS Repair Parts WARNING Service and repairs are to be performed by licensed electricians or qualified servicemen WARNING Before attempting any repairs to the heater, make sure that the electrical breaker is “off” and confirm that there is no voltage at the heater. ECO’s LED Display &... - Page 39 Repair Parts (continued) Element Flow Meter Master Inlet Fitting Inlet & Outlet Inlet Outlet Model Number Number Assembly Display Transformer Contactor Flow Meter Thermistors Assembly Manifold Kit Manifold Kit Assembly (inc board) Board EX08200-16 & XTP018208 EX05502-00 EX76042-02 EX09100-01 EX08303-07 EX08200-12 EX279D EX08309-02 EX78016-00 EX78017-00 EX78018-00 EX08200-17 EX08200-16 &...
-
Page 40: Wiring Schematics
WIRING SCHEMATICS... - Page 41 EX07200-89 REV A...
- Page 42 USA AND CANADA: Eemax Inc. 400 Captain Neville Drive, Waterbury, CT 06705 Toll Free: 1-800-543-6163, or 203-267-7890 Fax: 203-267-7975 Eemax.Support@eemax.com EX07200-89 REV A...
Need help?
Do you have a question about the XTP PRO Series and is the answer not in the manual?
Questions and answers
Power is on water is flowing contacts won't engage heater is nine months old what could be wrong
If the EemaX XTP PRO Series heater is not engaging despite power being on and water flowing, the issue could be due to one or more of the following:
1. Water Pressure: The water pressure may not be within the required range of 40–90 PSI. If the pressure is too low or high, the unit may not operate properly. Check the water pressure and ensure it meets the specified limits.
2. Air or Debris in the System: Air or debris in the water supply system can prevent proper operation. Ensure the water supply valves are open, and purge the system to remove any air or debris.
3. Clean Water Supply: The heater must be supplied with clean, potable water. Check for clogged filter screens, y-strainers, or pre-filters and ensure a clear water supply.
4. Flow Rate Below Minimum: The flow rate might be below the minimum required for the heater to activate. Verify the flow rate matches the model's specifications.
5. Component Failure: A component failure could prevent the unit from engaging. Check for any notification codes (if applicable) and refer to the corrective actions outlined in the manual.
By verifying these factors, you can identify and address the issue.
This answer is automatically generated