Table of Contents
Advertisement
Advertisement
Table of Contents

Related Manuals for PVI Vecaster Pro Series

Summary of Contents for PVI Vecaster Pro Series
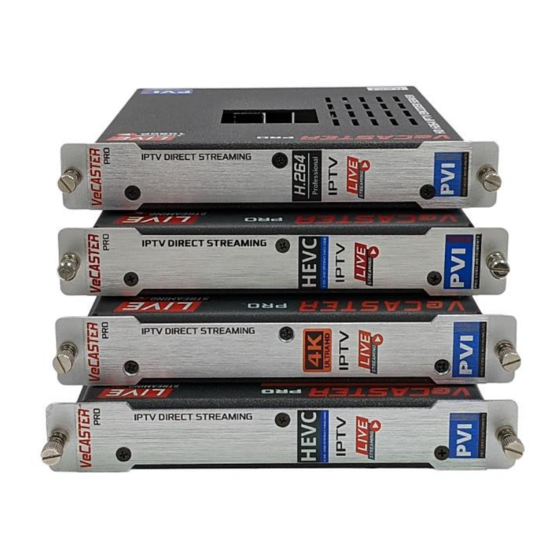
- Page 2 VECASTER SERIES MANUAL Pro Video instruments PRODUCT SPECS & FEATURES ● Power: 12v/DC (12v/1A 5W) ● Encoding: Latest H.264/H.265 High Efficiency Encoding Technology (Depending on Model) HD 720P/ 1080i /1080p / 4K 30hz UltraHD (Depending on model) @ 60 Hz ultra-low latency. Standard baseline/Main/High Profile support.
-
Page 3: Connecting To The Unit
VECASTER SERIES MANUAL Pro Video instruments ● Modular-Expandable-Reliable CONNECTING TO THE UNIT NETWORK CONNECTION VIA WINDOWS PC These steps walk you through setting a Windows PC to a Static IP address, to allow an Ethernet connection with the unit on its default IP address of 192.168.1.168. - Page 4 VECASTER SERIES MANUAL Pro Video instruments Note: The following manual refers to the Vecaster HEVC model. Menu features and format might differ from your model; however, the core features are the same. POWERING THE DEVICE – QUICK GUIDE 1. Connect the power adapter that came with your unit. 2.
-
Page 5: Hdmi Input
VECASTER SERIES MANUAL Pro Video instruments MULTIPLE UNITS NSTALLING To install multiple units on the same network, make sure to CHANGE the IP address of each unit BEFORE you connect them to the same network so there will be no IP Conflicts. Point your web browser to the IP address of the unit (default is 192.168.1.168) Login to the unit, click NETWORK on the bottom, change the NETWORK SETTINGS as needed by your application. - Page 6 VECASTER SERIES MANUAL Pro Video instruments CONNECTING TO THE VECASTER The factory network settings of the Network port are as followed: IP address 192.168.1.168 Subnet 255.255.255.0 Gateway 192.168.1.1 To connect to the Web interface, we must first connect directly to the Network port on the back of the unit using an Ethernet patch cable CAT5e/CAT6 or higher.
- Page 7 VECASTER SERIES MANUAL Pro Video instruments Open a CMD prompt in windows and use the following command: ping 192.168.1.168 If you are connected directly to the unit, you should get a response. If not, the following message appears in the command prompt. If the unit is not pingable, verify that your connections are secure and that your Static IP of your PC is set up correctly.
- Page 8 VECASTER SERIES MANUAL Pro Video instruments LOGGING INTO WEB GUI INTERFACE If you can ping the unit successfully, then we can proceed to open your web browsers such as Firefox, Chrome, or Safari. In the address bar, enter the default IP of the unit: 192.168.0.136 and hit enter. The login page prompt appears for the Web interface.
-
Page 9: Web Interface
VECASTER SERIES MANUAL Pro Video instruments WEB INTERFACE ● Once you have logged into the unit you will see the STATUS page. This will display all your enabled formats for all streams and video input resolution as well as status of the current unit. NOTE: If the unit starts slowing down or the CPU usage is too high under the status page, please disable any formats you are not using or Factory Reset the Unit under the Systems Tab... - Page 10 VECASTER SERIES MANUAL Pro Video instruments AVIGATION PANEL ● This is at the bottom of the web interface. Depending on your model, it may look slightly different. Here you can change between your Main & Subtreams, Network Settings, Audio Settings, & Advance System menu. Your focus should be on MAIN STREAM &...
- Page 11 (if available to you) but are not necessary unless you wish to use a specific format and require unique settings such as lower bitrate or frames for that particular application. This is just an example of our substream settings here at PVI:...
- Page 12 VECASTER SERIES MANUAL Pro Video instruments ON SCREEN DISPLAY (OSD) ● Here you can set your Logo to Display (overlay) over the incoming HDMI video such as your company logo or Text. The unit has 4 different CG Generators providing you many options such as Text, Logo, Scrolling Text, or Time Stamping. ●...
- Page 13 VECASTER SERIES MANUAL Pro Video instruments To enable OSD – On Screen Display, click on the drop-down menu for the specific zone and enable. Select the type of OSD you wish to use. Depending on your model some OSD options might not be available.
- Page 14 VECASTER SERIES MANUAL Pro Video instruments ETTINGS ⮚ TEXT X: [0-1920]: Left and Right position of the Text. ⮚ TEXT Y: [0-1080]: Up and down position of the Text. ⮚ FONT: [8-72]: Size of Text. ⮚ ALPHA: Opacity of the Text [0-128]. ⮚...
- Page 15 VECASTER SERIES MANUAL Pro Video instruments OSD- EXAMPLES...
- Page 16 VECASTER SERIES MANUAL Pro Video instruments CROLLING TAMP...
- Page 17 VECASTER SERIES MANUAL Pro Video instruments NETWORK Here you can adjust the network settings to match the needs of your specific network topology.
-
Page 18: Audio Encoding Settings
VECASTER SERIES MANUAL Pro Video instruments AUDIO ENCODING SETTINGS Here you can adjust your Audio Format and Volume for the Streams to suit your needs. The settings by default work just fine. ● Audio Input: Source for audio input ● Sample rate: Adjust this setting to toggle between sample rates. - Page 19 VECASTER SERIES MANUAL Pro Video instruments AUDIO FORMAT OPTIONS AAC-LC: A – L DVANCE UDIO ODING OMPLEXITY Designed for standard Audio encoding over IP that achieves higher sound quality than MP3 at the same bitrate. HE-ACC: H – A IGH EFFICACY DVANCED UDIO NCODING...
-
Page 20: System Settings
VECASTER SERIES MANUAL Pro Video instruments SYSTEM SETTINGS Under the System tab of the nav menu provides you several advance options for the encoder. Change password, Advance encoding options, NTP Time server, Update firmware, Load configuration, Backup configuration, Reboot, Factory reset. CHANGE PASSWORD: Customers can change the password here. -
Page 21: Advance Options
VECASTER SERIES MANUAL Pro Video instruments ADVANCE OPTIONS: Here you can change the Advanced settings for the encoder. At the bottom of the page, you can perform a soft reboot of the device, as well as Factory reset the unit if required. You can also set up an automatic restart of the unit to ensure the units stream restarts and refreshes itself daily during off-hours. -
Page 22: Schedule Restart
● Upgrade Settings: This is where upgrade files would be uploaded to the device. Please refrain from using this feature without the instruction of PVI Support. ● System Settings: This is where you can reboot the device or reset the device back to its' factory settings. - Page 23 VECASTER SERIES MANUAL Pro Video instruments NTP – TIME STAMPING SERVER: NTP time server allows you to sync your device to an NTP server for accurate time stamping. ● NTP Enable: Enable or Disable this feature ● NTP Server: Enter the address for the NTP server. The default is time.windows.com. ●...
- Page 24 Users can upload the latest firmware for their device here or load a configuration file that was backed up previously or from another device. ● Firmware: Firmware file must be named up.rar. The provided file given from PVI will already be called this. Please do not change or modify this file as it could result in irreversible damage to the unit. ●...
-
Page 25: Backup Configuration
VECASTER SERIES MANUAL Pro Video instruments BACKUP CONFIGURATION: Provides the user a dump file of the current settings from the unit. This includes the IP Network settings of the unit. Please be aware of this. FACTORY RESET | REBOOT: Reboot: Soft reboots the unit Factory reset: Resets the settings back to default. - Page 26 VECASTER SERIES MANUAL Pro Video instruments TESTING YOUR STREAM IN VLC VLC is a free and open-source, cross-platform multimedia player, and framework that plays various streaming protocols. You can find it here: https://www.videolan.org/ Rule of Thumb: If your stream works in VLC, your stream is operational. 1.
- Page 27 VECASTER SERIES MANUAL Pro Video instruments...
- Page 28 VECASTER SERIES MANUAL Pro Video instruments STREAMING TO FACEBOOK LIVE PRODUCER To Stream to Facebook Live, we must enable the RTMP PUSH format on the VeCaster. Depending on your model, the Web interface will vary, but the steps are the same. Once we have enabled the RTMP Push URL on your encoder, proceed to Facebook.
- Page 29 VECASTER SERIES MANUAL Pro Video instruments Facebook will direct you to a new page to configure the live feed which is now known as Live Producer (as of March 2020) Under the Get Started options, click on the drop-down menu to change from "Camera," to "Use Steam Keys"...
- Page 30 VECASTER SERIES MANUAL Pro Video instruments Once "Use Stream Keys" is selected, a new menu will appear on the right side of the Get Started Menu. Facebook will provide you a URL and a Stream Key The following information is an example, and the user should refer to your Facebook account for the following information. Server URL: rtmps://live-api-s.facebook.com:443/rtmp/ Stream Key: 219212059317004?s_bl=1&s_ps=1&s_sw=0 With the following information provided by Facebook, we can apply it to our VeCaster unit.
- Page 31 VECASTER SERIES MANUAL Pro Video instruments RTMPS://SERVER URL/STREAM KEY Combine: rtmps://live-api-s.facebook.com:443/rtmp/219212059317004?s_bl=1&s_ps=1&s_sw=0 Copy the Combine URL into the VeCaster. Delete the default information in the text field Paste the new Combine URL into the Text Field. Once entered, hit the Setup/Apply Button. Please note it can take up to 30 seconds before Facebook will show the Live preview of the stream.
- Page 32 VECASTER SERIES MANUAL Pro Video instruments STREAMING TO YOUTUBE Here are the steps required to broadcast the video feed from our VeCaster to YouTube Live. Enable RTMP(s) Push format on your encoder. The look of the menu may vary depending on your model. Mainstream >...
- Page 33 VECASTER SERIES MANUAL Pro Video instruments Login to your YouTube Studio. Click on the Live icon in YouTube Studio.
- Page 34 VECASTER SERIES MANUAL Pro Video instruments Create a new Live Stream or use an existing stream setting.
- Page 35 VECASTER SERIES MANUAL Pro Video instruments Once the stream is created YouTube will provide the RTMP URL and Stream Key. The key is unique to your account. Server URL:rtmp://a.rtmp.youtube.com/live2 Stream Key:live_123456 Combine the Server URL and the Stream Key Combined: rtmp://a.rtmp.youtube.com/live2/live_123456...
- Page 36 VECASTER SERIES MANUAL Pro Video instruments Copy the combined URL into the VeCaster Delete the default information in the text field. Paste the new combined URL into the Text Field. Once entered hit the Setup Button. Please note it can take up to 30 seconds before YouTube will show the live preview of the stream. ➢...
- Page 37 VECASTER SERIES MANUAL Pro Video instruments STREAMING TO OTHER RTMP SERVICES Most of the Streaming Services on the market use the RTMP format to Ingest your Video feed. They will provide you a Stream URL and a Stream Key. Here are the steps required to broadcast the Video Feed from our VeCaster to your Streaming Service. Enable RTMP Push format on your encoder, the look of the menu may vary depending on your model.
- Page 38 VECASTER SERIES MANUAL Pro Video instruments Most of the Streaming services will provide you the following. Please refer to your Streaming Service Instructions on where to find this information. Server URL:rtmp://mylivestream.com Stream Key:live_123456 For this to work on the encoder must combine the Server URL and the Stream Key as shown below. Combined: rtmp://mylivestream.com/app/live_123456 If your Services uses a Username and Password for the RTMP Stream then use this format, otherwise, ignore: Username:pvi123...
- Page 39 VECASTER SERIES MANUAL Pro Video instruments Paste the new Combine URL into the Text Field. Once entered hit the Setup Button. Please note it can take up to 30 seconds before most Streaming services will show the Live preview of the stream. ➢...
-
Page 40: Streaming Protocols
VECASTER SERIES MANUAL Pro Video instruments STREAMING PROTOCOLS 1. .TS format—MPEG Transport Stream ● Digital container format for transmission and storage of audio, video, & PSIP Data. ● Encapsulates packetized elementary streams and equips them with error correct and synchronization features to maintain transmission integrity when the communication channel carrying the stream is degraded. - Page 41 VECASTER SERIES MANUAL Pro Video instruments 4. HLS—HTTP Live Streaming ● HTTP-based adaptive bitrate streaming communications protocol. ● Works by breaking the overall stream into a sequence of small HTTP-based file downloads, each download loading one short chunk of an overall potentially unbounded transport stream. A list of available streams, encoded at different bit rates, is sent to the client using an extended M3U playlist.
- Page 42 VECASTER SERIES MANUAL Pro Video instruments ● Network control protocol designed for use in entertainment and communications systems to control streaming media servers. ● The protocol is used for establishing and controlling media sessions between end points. Clients of media servers issue VHS-style commands, such as play, record and pause, to facilitate real-time control of the media streaming from the server to a client (Video On Demand) or from a client to the server (Voice Recording).
- Page 43 VECASTER SERIES MANUAL Pro Video instruments GLOSSARY Net Drop Threshold: Specify the maximum number of Layer 2 PDUs (Protocol Data Units) of the specified protocol that can be received per second on the interfaces in a specified VLAN before the switch begins dropping the Layer 2 PDUs. The drop threshold value must be less than or equal to the shutdown threshold value.
-
Page 44: Tech Support
VECASTER SERIES MANUAL Pro Video instruments TECH SUPPORT ⮚ Please read this manual carefully as it covers NEARLY ALL ASPECTS to set this product as per your needs, using pictures and examples. ⮚ Should you need any additional support please go to www.pvisupport.com and open a support ticket or start a chat. ⮚... - Page 45 VECASTER SERIES MANUAL Pro Video instruments...
Need help?
Do you have a question about the Vecaster Pro Series and is the answer not in the manual?
Questions and answers