Table of Contents
Advertisement
Advertisement
Table of Contents

Related Manuals for QAcoustics Q Active 200


Summary of Contents for QAcoustics Q Active 200
- Page 1 Q Active MANUAL...
-
Page 2: Table Of Contents
Contents Important safety information and warnings....Introduction..............Package contents............Feature summary............Speaker position and assembly........Hub positioning and connectivity........Connecting the system and powering on..... Configuring WIFI and name using Google Home... Playing audio using Google Cast........Playing audio using Spotify Connect......Playing audio using AirPlay 2........ -
Page 3: Important Safety Information And Warnings
Important safety information and warnings The safety marking label is located on the bottom of the product as show below: Q Active 200 and 400 speaker: Q Active System Model: QA200 100 - 240V ~ 50/60Hz, Max 160W Product marking label... - Page 4 Important safety information and warnings 1 Notices 1.1 FCC Statement (For US Customers) This device complies with Part 15 of the FCC Rules. Operation is subject to the following two conditions: (1) this device may not cause harmful interference, and (2) this device must accept any interference received, including interference that may cause undesired operation.
- Page 5 • Never install this product in a confined space. Always leave a space or at least four inches around the product for ventilation. • The ventilation should not be impeded by covering the ventilation openings with items,such as newspapers,table-cloths,curtains,etc. • Do not place any sources of danger on the apparatus (for example: liquid filled objects, lighted candles). •...
-
Page 6: Introduction
Thank you for purchasing a pair of Q Acoustics Q Active speakers. This manual is intended to take you through setup and installation and will help provide optimum performance from the product. There are on-line video tutorials available for setup at www.qacoustics. co.uk/kb. -
Page 7: Feature Summary
Feature summary Wired Connectivity: Analogue audio input* – Stereo phono sockets allow a connection to an external analogue audio source such as CD player. Analogue MM phono input* – Stereo phono sockets allow a connection to a turntable fitted with a moving magnet cartridge. -
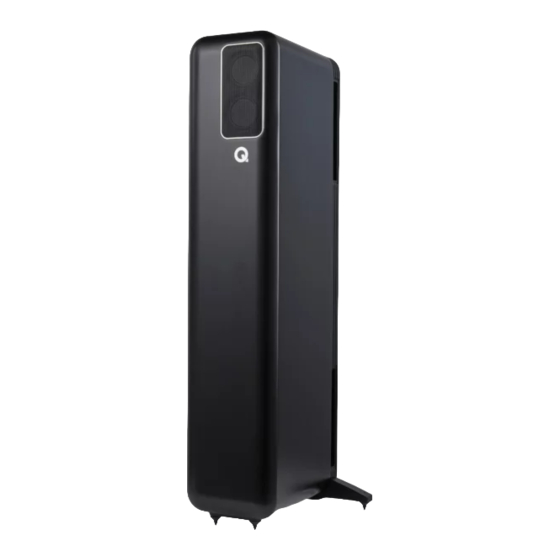
Page 8: Speaker Position And Assembly
Speaker positioning and assembly Q Active 400 (Floorstanding) The Q Active 400 speakers are designed to be floor mounted only and supplied with front and rear support bases which must be attached to the bottom of the speaker in order to fit the supplied spike feet. - Page 9 (see image opposite) to give the widest soundstage possible. Please note that each speaker requires a mains electricity socket. Alternatively you can use Q Active 200 with the Q Active speaker stands (available separately), follow the supplied instructions with the stands.
-
Page 10: Hub Positioning And Connectivity
The foam port bung supplied is optional for any of the boundary settings but is required when the speaker is positioned flat against a rear boundary. Ensure the bungs are fitted snugly into the port without inserting them too far. You will find the level of bass is reduced but definition and bass extension is increased. -
Page 11: Connecting The System And Powering On
USB POWER – fit country adapters for the local mains and connect to the hub using the supplied USB cable. PHONO GROUND - Connect the ground cable from your analogue source if required. RESET – Press and hold for 5s to perform a factory reset. ETHERNET –... - Page 12 Connecting the system and powering on Once power is connected the hub will start flashing some of its status LED indicators as shown below. STANDBY – This will flash red whilst the hub is initialising and will stop flashing once connections to the speakers are verified, or after a 3 minute timeout.
-
Page 13: Configuring Wifi And Name Using Google Home
Configuring WIFI and name using Google Home Once the hub and speakers have completed initialisation, you can configure the system to connect to your WIFI and rename the speaker using the Google Home App. You will need a Google account and the Google Home App in order to do this. -
Page 14: Playing Audio Using Bluetooth
Playing audio using Bluetooth You can use many Bluetooth devices to play audio through the Q Active system, even without any internet or WIFI configured on the Q Active hub. Firstly you will have to pair your Bluetooth device with the hub using the following instructions. -
Page 15: System Reset
System reset If for any reason you are required to do a factory reset follow these steps. IMPORTANT: The hub, speakers and remote must be reset. Locate the reset hole on both speakers. Using a pin or similar press and hold the button for 5 seconds or until you see an LED flash indication on the product (all LEDs will flash consecutively). -
Page 16: Speaker Rear Connection
Speaker rear connections AC POWER – Connect to mains power 100v – 240v RESET – Using a pin press and hold for 5 seconds for factory reset BOUNDARY CONDITION – Select for corner (top), wall (middle), free space (bottom) SPEAKER POSITION – Select left or right position in the room from the listening position USB –... - Page 17 REMOTE - Long touch (+3 seconds) will clear the currently paired remote control and enter remote pairing mode. To pair a new remote, press the pair button on the remote control. WHITE – Connected to a remote control WHITE PULSING – Searching for the paired remote control WHITE FLASHING –...
-
Page 18: Specification
Specification Product Q Active 200 Q Active 400 Acoustics Enclosure type Reflex (ported) Reflex (ported) Full range driver 2 x BMR 58mm (2.25in) 2 x BMR 58mm (2.25in) Subwoofer (high excursion) 1 x 114mm (4.5in) 2 x 114mm (4.5in) Crossover frequency... -
Page 19: Warranty
The warranty does not in any way affect your legal rights. Warranty can be extended to 2 years by registering your product at www.qacoustics.co.uk/register. For service information in other countries visit: www.qacoustics.co.uk... - Page 20 Q A C O U S T I C S . C O . U K Q17322-IS_r1...
Need help?
Do you have a question about the Q Active 200 and is the answer not in the manual?
Questions and answers