Table of Contents
Advertisement
Available languages
Available languages
Quick Links
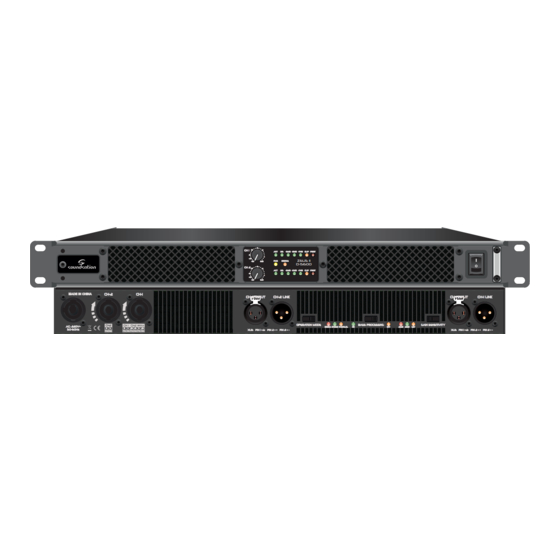
ZEUS II D-series
PROFESSIONAL POWER AMPLIFIER
CH-2
CH-1
AC: 220V~
1+
1-
1+
1-
2+ 2-
1+ 2+
50-60Hz
POS NEG
POS NEG
POS NEG
POS NEG
USER MANUAL
MANUALE UTENTE
Please read this manual carefully and properly take care of it
Leggete questo manuale e conservatelo per future consultazioni
-6
CH 1
-10
-3
ACT
SIG
-15dB -10dB -7dB
CLIP PROT
-15
-1
-30
ZEUS II
PAR
BRIDGE
-80
0dB
D-5600
-6
CH 2
-10
-3
ACT
SIG
-15dB -10dB -7dB
CLIP PROT
-15
-1
-30
-80
0dB
CH-2 INPUT
CH-2 LINK
OPERATION MODE
BRIDGE STEREO PARALLEL
XLR:
PIN 1 =
PIN 2 = +
PIN 3 = -
BASS PROCESSING
GAIN SENSITIVITY
0N
0FF
26dB 32dB
1.2V
CH-1 INPUT
CH-1 LINK
XLR:
PIN 1 =
PIN 2 = +
PIN 3 = -
Advertisement
Chapters
Table of Contents

Related Manuals for soundsation Zeus II D Series


Summary of Contents for soundsation Zeus II D Series
- Page 1 ZEUS II D-series PROFESSIONAL POWER AMPLIFIER CH 1 -15dB -10dB -7dB CLIP PROT ZEUS II BRIDGE D-5600 CH 2 -15dB -10dB -7dB CLIP PROT CH-2 CH-1 CH-2 INPUT CH-2 LINK CH-1 INPUT CH-1 LINK OPERATION MODE BASS PROCESSING GAIN SENSITIVITY AC: 220V~ BRIDGE STEREO PARALLEL 26dB 32dB...
- Page 2 Dear customer, First of all thanks far purchasing a SOUNDSATION® product. Our mission is to satisfy all possible needs of musical instrument and professional audio users offering a wide range of products using the latest technologies. We hope you will be satisfied with this item and, if you want to collaborate, we are looking for a feedback from you about the operation of the product and possible www.soundsation-...
-
Page 3: Table Of Contents
ENGLISH TABLE OF CONTENTS 1. UNBOXING .........................5 2. ACCESSORIES ......................6 3. OVERVIEW ........................6 3.1. MAIN FEATURES ..............................6 4. FRONT PANEL ......................7 5. REAR PANEL .......................8 6. AUDIO CONNECTIONS ....................10 7. OPERATION MODES ....................10 7.1. STEREO MODE ..............................11 7.2. PARALLEL MODE ..............................12 7.3. - Page 4 ENGLISH ZEUS II D-series User manual IMPORTANT SAFETY SYMBOLS The symbol is used to indicate that some hazardous live terminals are involved within this apparatus, even under the normal operating con- ditions, which may be sufficient to constitute the risk of electric shock or death.
-
Page 5: Unboxing
ENGLISH ZEUS II D-series User manual 3)^Ventilation Do not block areas of ventilation opening. Failure to do could result in fire. Always install according to the manufacturer’s instructions. 4)^Object and Liquid Entry Objects do not fall into and liquids are not spilled into the inside of the apparatus for safety. -
Page 6: Accessories
2. ACCESSORIES SOUNDSATION can supply a wide range of quality accessories that you can use with ZEUS II D-Series amplifiers, like Mixers, Speakers, Cable, Stands, etc. All products in our catalogue has been long tested with this device so we recommend to use Genuine SOUNDSATION Accessories and Spare Parts. -
Page 7: Front Panel
ENGLISH ZEUS II D-series User manual 4. FRONT PANEL 1)^POWER Switch Press the switch to the (1) position to turn ON the amplifier and to the (0) position to turn it OFF. Note: When the power switch is turned OFF, the device is not completely disconnected from the mains. -
Page 8: Rear Panel
ENGLISH ZEUS II D-series User manual 7)^CLIP indicator Two orange LEDs, each assigned to a channel, indicate when the corresponding channel has an output overload. Some flashing may be normal but if these LEDs remain on for a long time, please reduce the input signal levels until the LEDs turn off. 8)^PROTECT indicator Two red LEDs, each assigned to one channel. - Page 9 ENGLISH ZEUS II D-series User manual 3)^VENTILATION grille It allows constant ventilation between the front and back of the amplifier. It is suggest- ed not to obstruct this grill. 4)^INPUT AND LINK CONNECTORS Each channel has one balanced female XLR connector, which accepts a XLR plug from almost any type of equipment with a balanced or unbalanced outputs.
-
Page 10: Audio Connections
ENGLISH ZEUS II D-series User manual 6. AUDIO CONNECTIONS You will need XLR cables for the connections to the amplifier. See the pictures below that show the internal wiring of these cables. Be sure to use only high quality cables. You can, of course, also connect unbalanced equipment to balanced inputs. -
Page 11: Stereo Mode
ENGLISH ZEUS II D-series User manual 7.1. STEREO MODE MIXER CH-1 CH-2 S/N: LOUDSPEAKER 2 LOUDSPEAKER 1 SPEAKON SPEAKON LOUDSPEAKER SIDE LOUDSPEAKER SIDE CHANNEL 2 CHANNEL 1 In STEREO MODE you have: • Separate 1 and 2 channel inputs • Separate 1 and 2 channel outputs Each channel has its level control. -
Page 12: Parallel Mode
ENGLISH ZEUS II D-series User manual 7.2. PARALLEL MODE MIXER CH-1 S/N: LOUDSPEAKER 2 LOUDSPEAKER 1 SPEAKON SPEAKON LOUDSPEAKER SIDE LOUDSPEAKER SIDE CHANNEL 2 CHANNEL 1 The PARALLEL MODE, with a mono input and two mono outputs, allows you to insert a mono signal into an input and have the mono signal in both outputs, with separately adjustable level controls. -
Page 13: Bridge Mode
ENGLISH ZEUS II D-series User manual 7.3. BRIDGE MODE MIXER CH-1 S/N: LOUDSPEAKER 1 SPEAKON LOUDSPEAKER SIDE CHANNEL 1 BRIDGE mode with a mono input and a mono output, allows you to add the respective signals of the two amplification channels and make them available on a single output. The input signal of channel 1 will be present on the Speakon of the CHANNEL 1 OUT- PUT. -
Page 14: Stereo / Parallel Mode Cable Wiring
ENGLISH ZEUS II D-series User manual 7.4. STEREO / PARALLEL MODE CABLE WIRING 1– 1– COLD TO AMPLIFIER 2– 1– 1– COLD TO LOUDSPEAKER 2–... -
Page 15: Bridge Mode Cable Wiring
ENGLISH ZEUS II D-series User manual 7.5. BRIDGE MODE CABLE WIRING 1– COLD TO AMPLIFIER 2– 1– 1– COLD TO LOUDSPEAKER 2–... -
Page 16: Rack Mounting And Dimensions
ENGLISH ZEUS II D-series User manual 8. RACK MOUNTING AND DIMENSIONS Use four screws and washers to mount the amplifier to the equipment rack rails. To use the amplifier outside a rack, attach the self-adhesive rubber feet to the bottom. In the applications where the rack assembly may be moved, we strongly recommend supporting the rear of the amplifier. -
Page 17: Specification
ENGLISH ZEUS II D-series User manual 9. SPECIFICATION MODEL ZEUS II D-3750 ZEUS II D-4700 ZEUS II D-5600 8Ω Stereo Output Power 800W 1000W 1200W 4Ω Stereo Output Power 1300W 1650W 2000W 8Ω Bridge Output Power 2300W 2850W 3450W 4Ω Bridge Output Power 3750W 4700W 5600W... -
Page 18: Warranty And Service
SOUNDSATION shall satisfy the warranty obligations by remedying any material or manufacturing faults free of charge at SOUNDSATION’s discretion either by repair or by exchanging individual parts or the entire appliance. Any defective parts removed from a product during the course of a warranty claim shall become the property of SOUNDSATION. - Page 19 ITALIANO SOMMARIO 1. DISIMBALLAGGIO ....................21 2. ACCESSORI .......................22 3. DESCRIZIONE GENERALE ..................22 3.1. Caratteristiche principali............................22 4. PANNELLO FRONTALE ....................23 5. PANNELLO POSTERIORE ..................24 6. CONNESSIONI AUDIO .....................26 7. MODI OPERATIVI .....................26 7.1. MODO STEREO ..............................27 7.2. MODO PARALLELO ..............................28 7.3. MODO BRIDGE..............................29 7.4.
- Page 20 ITALIANO MANUALE D’USO ZEUS II D-series IMPORTANTI SIMBOLI DI SICUREZZA Il simbolo è usato per indicare che in questa apparecchiatura sono presenti alcuni terminali sotto tensione pericolosi, anche in condizioni di normale funzionamento, che possono costituire rischio di scosse elettriche o di morte Il simbolo viene utilizzato nella documentazione di servizio per indi- care che uno specifico componente può...
-
Page 21: Disimballaggio
ITALIANO MANUALE D’USO ZEUS II D-series 3)^VENTILAZIONE Non ostruite le prese d’aria per la ventilazione: ciò potrebbe provocare incendi. Installa- te sempre l’unità secondo le istruzioni del produttore. 4)^Introduzione di oggetti e liquidi Non introdurre oggetti o versare liquidi all’interno dell’apparato per ragioni di sicurezza 5)^Cavo di alimentazione e spina Evitate che il cavo di alimentazione venga calpestato o schiacciato, in particolare in prossimità... -
Page 22: Accessori
2. ACCESSORI SOUNDSATION può fornire una vasta gamma di accessori di qualità che è possibile utilizzare con gli amplificatori ZEUS II Serie D, come mixer, cavi, diffusori, supporti ecc. Tutti i prodotti nel nostro catalogo sono stati lungamente testati, quindi consigliamo di utilizzare accessori e ricambi originali SOUNDSATION. -
Page 23: Pannello Frontale
ITALIANO MANUALE D’USO ZEUS II D-series 4. PANNELLO FRONTALE 1)^Interruttore di alimentazione Premere l’interruttore sulla posizione (1) per accendere l’amplificatore e verso (0) per disattivarlo. Nota: quando l’interruttore di alimentazione è spento, il dispositivo non è completamente scollegato dalla rete. Quindi se l’amplificatore non viene uti- lizzato per un lungo periodo, scollegare il cavo di alimentazione dalla presa. -
Page 24: Pannello Posteriore
ITALIANO MANUALE D’USO ZEUS II D-series 7)^INDICATORE DI CLIP Due LED arancioni, ciascuno assegnato a un canale, indicano quando il canale corri- spondente ha un sovraccarico di uscita. Alcuni lampeggiamenti potrebbero essere nor- mali ma se questi LED rimangono accesi per un lungo periodo bisogna ridurre i livelli del segnale in ingresso fino a quando i LED non si spengono 8)^INDICATORE DI PROTEZIONE Due LED rossi, ciascuno assegnato a un canale. - Page 25 ITALIANO MANUALE D’USO ZEUS II D-series ATTENZIONE: Connettere sempre il terminale di terra! Prestare attenzione alla propria sicurezza! L’installazione del dispositivo deve essere approvata da un esperto prima di essere messa in funzione per la prima volta. 2)^CONNETTORI DI USCITA Ogni canale ha una uscita Speakon®...
-
Page 26: Connessioni Audio
ITALIANO MANUALE D’USO ZEUS II D-series 6. CONNESSIONI AUDIO Per le connessioni in ingresso all’amplificatore, saranno necessari dei cavi XLR. Fare rife- rimento alle immagini sotto che mostrano il cablaggio interno di questi cavi. Assicurarsi di utilizzare solo cavi di alta qualità. Naturalmente, puoi anche collegare apparecchiature sbilanciate a ingressi bilanciati. -
Page 27: Modo Stereo
ITALIANO MANUALE D’USO ZEUS II D-series 7.1. MODO STEREO MIXER CH-1 CH-2 S/N: LOUDSPEAKER 2 LOUDSPEAKER 1 SPEAKON SPEAKON LOUDSPEAKER SIDE LOUDSPEAKER SIDE CHANNEL 2 CHANNEL 1 In modalità STEREO si hanno: • Ingressi separati dei canali 1 e 2 •... -
Page 28: Modo Parallelo
ITALIANO MANUALE D’USO ZEUS II D-series 7.2. MODO PARALLELO MIXER CH-1 S/N: LOUDSPEAKER 2 LOUDSPEAKER 1 SPEAKON SPEAKON LOUDSPEAKER SIDE LOUDSPEAKER SIDE CHANNEL 2 CHANNEL 1 Il MODO PARALLELO, con un ingresso mono e due uscite mono, consente di inserire un segnale mono in un ingresso e di avere il segnale mono in entrambe le uscite, con controlli di livello regolabili separatamente. -
Page 29: Modo Bridge
ITALIANO MANUALE D’USO ZEUS II D-series 7.3. MODO BRIDGE MIXER CH-1 S/N: LOUDSPEAKER 1 SPEAKON LOUDSPEAKER SIDE CHANNEL 1 IL MODO BRIDGE con ingresso mono e uscita mono consente di aggiungere i rispet- tivi segnali dei due canali di amplificazione e renderli disponibili su un’unica uscita. Il segnale di ingresso del canale 1 sarà... -
Page 30: Cablaggio Per I Modi Stereo / Parallelo
ITALIANO MANUALE D’USO ZEUS II D-series 7.4. CABLAGGIO PER I MODI STEREO / PARALLELO 1– 1– COLD TO AMPLIFIER 2– 1– 1– COLD TO LOUDSPEAKER 2–... -
Page 31: Cablaggio Per Il Modo Bridge
ITALIANO MANUALE D’USO ZEUS II D-series 7.5. CABLAGGIO PER IL MODO BRIDGE 1– COLD TO AMPLIFIER 2– 1– 1– COLD TO LOUDSPEAKER 2–... -
Page 32: Montaggio Su Rack E Dimensioni
ITALIANO MANUALE D’USO ZEUS II D-series 8. MONTAGGIO SU RACK E DIMENSIONI Utilizzare quattro viti e rondelle per montare l’amplificatore sulle guide del rack dell’ap- parecchiatura. Per utilizzare l’amplificatore all’esterno di un rack, fissare i piedini in gomma autoadesiva sul fondo. Nelle applicazioni in cui è possibile spostare il gruppo del rack, si consiglia vivamente di supportare il retro dell’amplificatore. -
Page 33: Specifiche
ITALIANO MANUALE D’USO ZEUS II D-series 9. SPECIFICHE MODEL ZEUS II D-3750 ZEUS II D-4700 ZEUS II D-5600 Potenza di uscita Stereo 8Ω 800W 1000W 1200W Potenza di uscita Stereo 4Ω 1300W 1650W 2000W Potenza di uscita Bridge 8Ω 2300W 2850W 3450W Potenza di uscita Bridge 4Ω... -
Page 34: Garanzia E Assistenza
In alternativa è possibile inviare il prodotto a SERVICE CENTER SOUNDSATION - Via Enzo Ferrari, 10 - 62017 Porto Recanati - Italia. Per poter inviare un prodotto al centro di assistenza è necessario un numero di RMA. Le spese di trasporto devono essere coperte dal proprietario del prodotto. - Page 35 Questo prodotto viene importato nella UE da FRENEXPORT SPA – Via Enzo Ferrari, 10 - 62017 Porto Recanati - Italy www.soundsa tionmusic.com Soundsation® is a registered trademark of FRENEXPORT SPA - Italy Soundsation® è un marchio di fabbrica registrato della FRENEXPORT SPA - Italy...
- Page 36 www.soundsa tionmusic.com Ver 1.1 - Jun 2018...
Need help?
Do you have a question about the Zeus II D Series and is the answer not in the manual?
Questions and answers