Advertisement
Curved Onyx Permanently Tensioned Projection Screen by Draper
1 Read instructions through completely before proceeding.
2 Follow instructions carefully. Installation contrary to instructions
invalidates warranty.
3 Screen should be accessible for complete removal should fabric
become damaged or should other service be required.
4 Screen should be installed level (using a carpenter's level).
5 Nothing should be fastened to screen frame or viewing surface.
6 Make sure you have received all parts (see parts list below and
exploded diagram on page 2).
7 Tools Required: Medium (#2) Phillips screwdriver (6" or greater shaft
length suggested). Optional tools: Flat blade screwdriver or small
putty knife.
8 Installer is responsible for providing appropriate hardware for mounting.
9 When lifting assembled screen, do not lift at only one corner; lift at
both corners. Lifting by one corner could result in damage to the
screen frame, especially on large screens.
10 The ideal temperature range for assembling folding screens to prevent
damaging the surface is 68°-78° F (20°-26° C). Assembling below
recommended temperatures may damage surface and void warranty.
NOTE: Screen has been thoroughly inspected and tested at factory and
found to be operating properly prior to shipment.
Curved Onyx—Hardware and Parts List
Frame Extrusions - 4
#10-24 fasteners - 8
Surface Retention
Extrusions- varies
Brackets -
See last page of
instructions
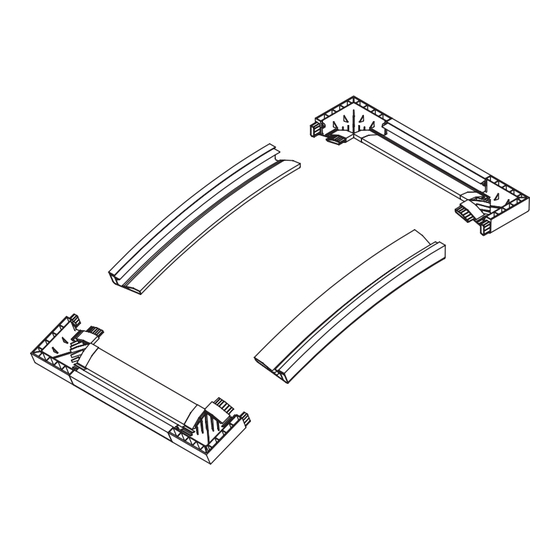
Frame Preparation
1 Clean area and place frame assembly pieces face down. Insert plastic
corner pieces into ends of aluminum frame extrusions as indicated in
Figures 1 through 4. Secure each corner to each frame extrusion by
threading one #10-24 fastener through hole in plastic corner and into
rounded slot in aluminum frame extrusion.
Caution: Do not over-tighten fasteners—over-tightening could cause
damage to the frame corners.
Patented by Draper, Inc., U.S. Patent Nos. 6,785,047; 7,113,332; and 7,369,310.
®
Copyright © 2013 Draper Inc.
Form CurvedOnyx_Inst13 Printed in U.S.A.
Assembly/Mounting Instructions
Caution
Frame Corners - 4
Right-C173.042
Left-C173.043
Four-C098.018
Plastic Tubing - 4
Viewing Surface - 1
Figure 1
2 Secure corner pieces to aluminum frame extrusions with four (4) remaining
fasteners. Check to verify that all four (4) plastic corners are secure to
aluminum frame extrusion lengths and all eight (8) fasteners are tight (see
Fig. 5).
Caution: Do not over-tighten fasteners—over-tightening could cause
damage to the frame corners.
Caution: When lifting assembled screen, do not lift at only one corner; lift
at both corners. Lifting by one corner could result in damage to the screen
frame, especially on large screens.
If you encounter any difficulties installing or servicing your Onyx screen, call your
dealer or Draper, Inc., Spiceland, Indiana, (765) 987-7999 or fax (765) 987-7142.
Figure 2
Figure 3
Figure 4
Figure 5
(Continued on Page 2)
Advertisement
Table of Contents

Related Manuals for Draper Curved Onyx


Summary of Contents for Draper Curved Onyx
- Page 1 (Continued on Page 2) If you encounter any difficulties installing or servicing your Onyx screen, call your Copyright © 2013 Draper Inc. Form CurvedOnyx_Inst13 Printed in U.S.A. dealer or Draper, Inc., Spiceland, Indiana, (765) 987-7999 or fax (765) 987-7142.
- Page 2 Installer is responsible for providing attachment hardware. Figure 7 4 The bottom center bracket on the Curved Onyx acts as a locking bracket. Slide the center plate up, then push the screen back against the wall, Please Note: To make this step easier, pinch the end of the pocket closed releasing the center plate.
- Page 3 72" x 96" 80" x 104" C501.325 47" 150" 90" x 120" 98" x 128" C501.325 47½" Curved Onyx Curved Onyx (Exploded Rear View) 108" x 144" 116" x 152" C501.326 71" Frame —Side 16:10 Format Detail 67" 35¼" x 56½"...
Need help?
Do you have a question about the Curved Onyx and is the answer not in the manual?
Questions and answers