
Related Manuals for Grace Company Continuum II


Summary of Contents for Grace Company Continuum II
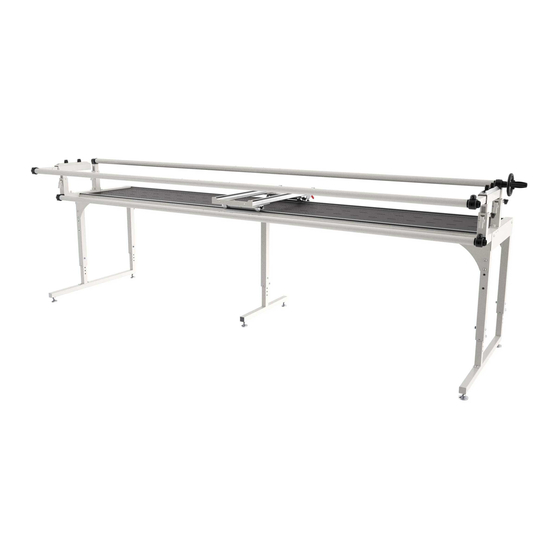
- Page 1 Accessory Batting Rail Assembly Copyright August 31, 2020 Grace Company (Reproduction Prohibited) Version 1.0...
-
Page 2: Table Of Contents
Contents Batting Rail Configurations ......................2 Included Parts & Tools ........................ 3 Common Questions ........................3 8 Foot Frame ..........................4 10 Foot Frame ........................... 7 12 Foot Frame ..........................11 4 Foot ............................16 5 Foot ............................19 Batting Rail Configurations 8 Foot Non-ratcheting Rail Non-ratcheting... -
Page 3: Included Parts & Tools
Included Parts & Tools Please make sure all pieces are included in your kit. Non-Ratcheting Rail Section 4 ft (x2) CII-09-14638 2 ft Rail Section (x2) Rail Coupler (x3) MFT-04-11397 CNT-08-11865 Rail Holder SBHCS Allen Wrench 5 mm Allen Wrench 4 mm Assembly (x2) M8 x 16 mm (x4) CII-09-14611... -
Page 4: Foot Frame
8 Foot Frame Parts & Tools Needed: Non-ratcheting rail Section 4 ft (x2) Rail Coupler Allen Wrench 4 mm SBHCS Rail Holder Allen Wrench 5 mm M8 x 16 mm (x4) Assembly (x2) - Page 5 Batting Rail - 8 Foot Frame Instructions To assemble and install the batting rail on the 8 foot frame, take the following steps: Slide a rail coupler into one of the non-ratcheting rail sections. Line up the screws on the coupler with the holes on the rail.
- Page 6 Batting Rail - 8 Foot Frame Align the holes with the coupler screws and loosen the screws with the 4 mm Allen wrench until they press firmly against the inside of the rail. Install the rail holder assemblies onto the front of the frame legs using two M8 x 16 mm SBHCS screws each and a 5 mm Allen wrench.
-
Page 7: Foot Frame
10 Foot Frame Parts & Tools Needed: Non-ratcheting rail Section 4 ft (x2) Rail Coupler (x2) Allen Wrench 4 mm 2 ft Rail Section SBHCS Rail Holder Allen Wrench 5 mm M8 x 16 mm (x4) Assembly (x2) - Page 8 Batting Rail - 10 Foot Frame Instructions To assemble and install the batting rail on the 10 foot frame, take the following steps: Slide a rail coupler into one of the non-ratcheting rail sections. Line up the screws on the coupler with the holes on the rail.
- Page 9 Batting Rail - 10 Foot Frame Align the holes with the coupler screws and loosen the screws with the 4 mm Allen wrench until they press firmly against the inside of the rail. Now insert a second coupler into the 2 ft rail section. Rail Coupler Once again, loosen the screws with the 4 mm Allen wrench until the rail and coupler are snug.
- Page 10 Batting Rail - 10 Foot Frame Install the remaining non-ratcheting rail section onto the other side of the rail coupler. Use the 4 mm Allen wrench to loosen the coupler screws. Non-ratcheting rail Section Install the rail holder assemblies onto the front of the frame legs using two M8 x 16 mm SBHCS screws each and a 5 mm Allen wrench.
-
Page 11: Foot Frame
12 Foot Frame Parts & Tools Needed: Non-ratcheting rail Section 4 ft (x2) Rail Coupler (x3) Allen Wrench 4 mm 2 ft Rail Section (x2) SBHCS Rail Holder Allen Wrench 5 mm M8 x 16 mm (x4) Assembly (x2) - Page 12 Batting Rail - 12 Foot Frame Instructions To assemble and install the batting rail on the 12 foot frame, take the following steps: Slide a rail coupler into one of the non-ratcheting rail sections. Line up the screws on the coupler with the holes on the rail.
- Page 13 Batting Rail - 12 Foot Frame Align the holes with the coupler screws and loosen the screws with the 4 mm Allen wrench until they press firmly against the inside of the rail. Now insert a second coupler into the 2 ft rail section. Rail Coupler Once again, loosen the screws with the 4 mm Allen wrench until the rail and coupler are snug.
- Page 14 Batting Rail - 12 Foot Frame Install a second 2 ft rail section onto the rail coupler. Loosen the coupler screws with the 4 mm Allen wrench to fix the rail section in place. 2 ft Rail Section Slide the third rail coupler into the free end of the 2 ft rail section. Use the 4 mm Allen wrench to loosen the screws until the rail coupler is held firmly in place.
- Page 15 Batting Rail - 12 Foot Frame Install the rail holder assemblies onto the front of the frame legs using two M8 x 16 mm SBHCS screws each and a 5 mm Allen wrench. Rail Holder SBHCS M8 x 16 mm (x4) Assembly (x2) Press batting rail into the rail holder assemblies.
-
Page 16: Foot
4 Foot Parts & Tools Needed: Non-ratcheting rail Section 4 ft (x2) Allen Wrench 6 mm Rail Holder SBHCS Allen Wrench 5 mm Assembly (x2) M8 x 16 mm (x4) Not included. See base frame tools. - Page 17 Batting Rail - 4 Foot Frame Instructions To assemble and install the batting rail on the 4 foot crib setup, take the following steps: Use the 6 mm Allen wrench to loosen the M10 x 80 mm SBHCS screw on the non-ratcheting rail section.
- Page 18 Batting Rail - 4 Foot Frame Install the rail holder assemblies onto the front of the frame legs using two M8 x 16 mm SBHCS screws each and a 5 mm Allen wrench. Rail Holder SBHCS M8 x 16 mm (x4) Assembly (x2) Press batting rail into the rail holder assemblies.
-
Page 19: Foot
5 Foot Parts & Tools Needed: Non-ratcheting rail Section 4 ft (x2) Allen Wrench 6 mm Not included. See base frame tools. Rail Section 5 ft Not included. See base frame parts. Rail Holder SBHCS Allen Wrench 5 mm Assembly (x2) M8 x 16 mm (x4) - Page 20 Batting Rail - 5 Foot Frame Instructions To assemble and install the batting rail on the 5 foot crib setup, take the following steps: On both non-ratcheting rail sections: Use the 6 mm Allen wrench that came with your base frame to loosen the M10 x 80 mm SBHCS screw.
- Page 21 Batting Rail - 5 Foot Frame Install the rail holder assemblies onto the front of the frame legs using two M8 x 16 mm SBHCS screws each and a 5 mm Allen wrench. SBHCS Rail Holder M8 x 16 mm (x4) Assembly (x2) Press batting rail into the rail holder assemblies.
- Page 22 The Grace Company 2225 South 3200 West Salt Lake City, UT 84119 Phone: 1-800-264-0644 Fax: 801-908-8888 www.graceframe.com...
Need help?
Do you have a question about the Continuum II and is the answer not in the manual?
Questions and answers