Advertisement
Advertisement

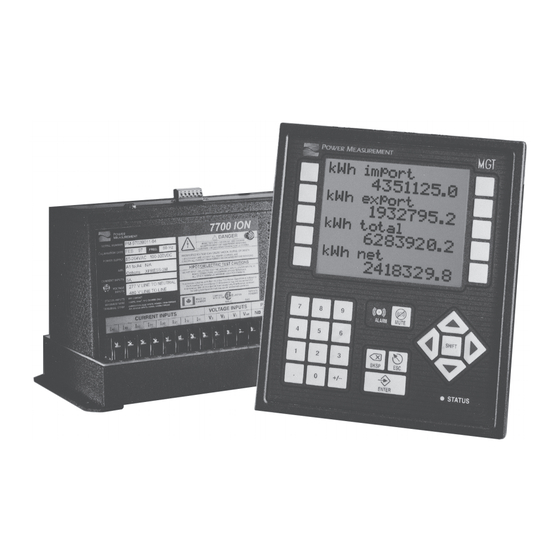
Related Manuals for Power Measurement ION 7700


Summary of Contents for Power Measurement ION 7700
- Page 3 Service Considerations Servicing the ION 7700 meter should only be performed by qualified, competent personnel that have appropriate training and experience with high voltage and current devices. The meter must be serviced in accordance with all Local and National Electrical Codes.
- Page 4 Power Measurement’s liability shall be limited to twice the amount of the relevant purchased product. Not to limit the foregoing, a) Power Measurement shall not be liable for any claim (other than a claim solely for the breach of one of...
-
Page 5: Table Of Contents
Installing the Terminal Strip Cover ......11 Installing the ION 7700 Adapter Plate ......12... -
Page 6: Before You Begin
The components inside the meter are extremely sensitive to electrostatic discharge. To prevent damage to the unit, wear an anti-static wrist strap at all times when working inside the unit. Failure to use proper equipment during servicing will void the ION 7700 meter’s warranty. Recommended Tools Phillips screwdriver... -
Page 7: Removing And Replacing The Meter Lid (Xpress Card)
Removing and Replacing the Meter Lid (Xpress Card) Removing the meter lid/Xpress Card Using #2 Phillips screwdriver, remove the four screws from the ION 7700 meter lid. If equipped with an Xpress Card, it is mounted onto the meter lid. Lift the cover straight up to unplug the Xpress card from the main board inside the meter. -
Page 8: Replacing The Comm Card
Replacing the Comm Card These instructions apply to the standard communications card (with or without the internal modem). Remove the meter lid/Xpress Card. The comm card (standard or modem) is located beside the power supply unit. Grasp the comm card and pull straight up to remove it. Ensuring proper orientation, slide the replacement comm card into its slot and press down to plug it in. -
Page 9: Using The Rm Key
Using the RM Key The Revenue Meter Programming Key (RMKey) is a device which plugs into the ION 7700 revenue meter and disables its security systems in order to facilitate programming. This key is typically used by utility meter shop personnel who want to program a revenue meter in-house. - Page 10 Removing the RMKey Remove or disable any power source connected to the meter. Unplug and remove the RMKey to re-enable all meter security systems. If the meter is equipped with the Aux Card, applicable, plug it back into the meter. Replace the meter lid/Xpress Card.
-
Page 11: Installing The Terminal Strip Cover
Installing the Terminal Strip Cover The terminal strip cover provides an insulation barrier for the wiring terminals. Complete the wiring to the ION 7700 meter’s terminal strip, then: Place the terminal strip cover over the terminal strip, arranging the wires so they rest in the slots of the terminal strip cover. -
Page 12: Installing The Ion 7700 Adapter Plate
Installing the ION 7700 Adapter Plate The ION 7700 adapter plate allows the ION 7700 meter base or MGT to be mounted onto an existing ACM 3000 series mounting hole. Step 1: Remove the existing 3000 series meter Step 2: Resize the panel cut-out Cut away the two areas identified in the following diagram. -
Page 13: Replacing The Mgt Keypad
Replacing the MGT Keypad Use a #1 Phillips screwdriver to remove the six screws from the back of the MGT. Remove the display and backlight cables. - Page 14 Use a #2 Phillips screwdriver to remove the four MGT circuit board screws. Lift up the MGT circuit board. Unplug the keypad connector.
- Page 15 Use a small flat screwdriver to pry the corner of the keypad loose. Peel the keypad off the faceplate. The supplied adaptor is required to connect the new keypad connector to the old style header on the MGT circuit board.
- Page 16 Peel adhesive backing from underneath the keypad connector. This prevents the keypad from lifting up along the edge at this location. 10. Peel the remaining adhesive backing from the keypad. Be careful not to contaminate the adhesive or the LCD window with your fingers. Holding the keypad connector down with one hand, the adhesive backing can be peeled away without touching the back of the keypad.
- Page 17 12. Align the bottom corners of the keypad and attach to the faceplate. 13. Align the top corners of the keypad. Apply pressure over the entire surface of the keypad to firmly attach it to the faceplate. 14. Attach the adapter to the keypad connector, as shown, with the white connector facing you.
- Page 18 15. Lock the connector in place. Pull gently to make sure it is locked firmly; the adapter should not slip. 16. Attach the keypad adapter to the MGT circuit board as shown and make sure the connector is completely seated. 17.
- Page 19 18. Reattach the backlight connector; this connector is keyed and can be plugged in only the correct way. 19. Reattach display connector; be careful to line up the header properly. 20. Replace the four screws to fasten the MGT circuit board to the faceplate. Replace the back cover, and fasten the six screws.
- Page 20 For further assistance please contact us at: Worldwide Headquarters 2195 Keating Cross Road Saanichton, BC Canada V8M 2A5 Tel: 1-250-652-7101 Fax: 1-250-652-0411 Email: support@pwrm.com www.pwrm.com © 2004 Power Measurement Printed in Canada MRP: 70050-0199-00 Revision Date: Oct 4, 2004...
Need help?
Do you have a question about the ION 7700 and is the answer not in the manual?
Questions and answers