Wolverine MovieMaker Pro User Manual
Hide thumbs
Also See for MovieMaker Pro:
- Instruction manual (22 pages) ,
- User manual (16 pages) ,
- Manual (7 pages)
Advertisement
Wolverine MovieMaker Pro User Guide
Notice: Extra instructions and other details can be found in the manual provided with
the device.
Function of Buttons
Power button: Use to turn the device on or off.
Menu/Mode button: Use to go to the Menu/Mode screen or to back out of a
process (press button twice).
Up and Down arrow buttons: Used to navigate the menu/mode screen.
Enter/Start/Stop button: Use to select a highlighted item or start/stop a process.
Getting Started
1. Attach Power Cord: Plug in the included 12V power cord.
2. Insert a SD/SDHC Memory Card (max. 32 GB):
a. Confirm that the SD/SDHC card is unlocked (small tab is in upper
position).
b. Insert and push the SD/SDHC card inward into the SD card slot on the
back of the device until it clicks. Improper insertion may damage the card
reader or the SD/SDHC card.
c. To eject an SD/SDHC card, push the card in first to release it, then pull it
out. (Note: Ejecting an SD card will automatically power off the device, if it
has not been powered off already.)
Note: Micro SD cards (max. 32 GB) with an adapter are compatible with the
MovieMaker Pro.
1
Advertisement
Table of Contents

Related Manuals for Wolverine MovieMaker Pro


Summary of Contents for Wolverine MovieMaker Pro
- Page 1 Wolverine MovieMaker Pro User Guide Notice: Extra instructions and other details can be found in the manual provided with the device. Function of Buttons Power button: Use to turn the device on or off. Menu/Mode button: Use to go to the Menu/Mode screen or to back out of a process (press button twice).
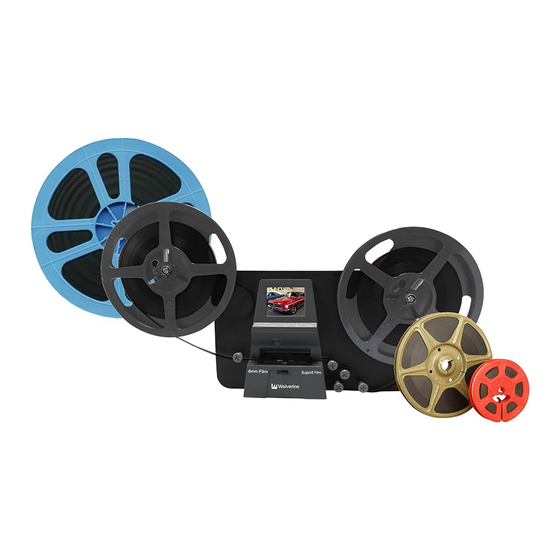
- Page 2 3. Swing up the Left Reel Arm. 4. Turn the MovieMaker Pro on. Note: On start-up the device will automatically enter Recording mode. 5. Clean the Light Table: a. Push the film door tab to the left to flip to open the door.
- Page 3 e. To exit Frame ADJ mode, press the Menu button twice. 8. Recording mode: a. Press the Enter button to ready the device for recording. b. Move the film type switch left or right (8 mm or Super 8) to select your film type.
- Page 4 11. Transferring Files onto a Computer via USB: Note: Follow these steps if you need to transfer files from the SD card inserted into the MovieMaker Pro to another storage device, to yourself via email, or etc. a. Plug the provided USB cable.
Need help?
Do you have a question about the MovieMaker Pro and is the answer not in the manual?
Questions and answers