Advertisement
Quick Links
The Wolverine Movie Maker Pro will help you convert your old 8mm and Super 8 film into a
digital MPEG-4 movie file at 1080P/20 FPS.
NOTE : A USB Flash Drive is required to save your movie files.
The following is a step-by-step guide that will walk you through how to use the Movie Maker
Pro to convert your 8mm and Super 8 films.
Step –by –Step Guide
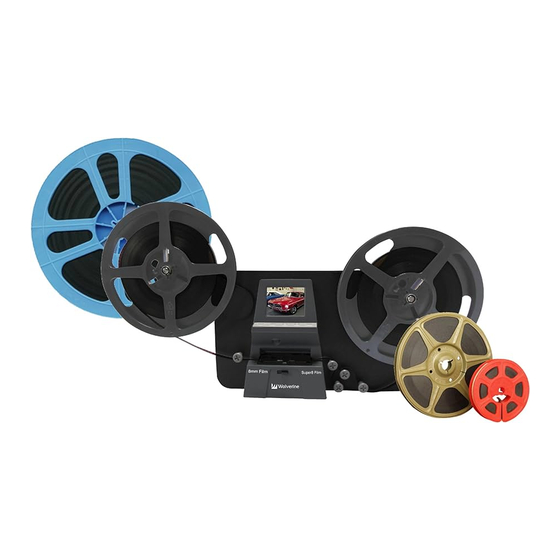
1. Determine which size take-up reel to use. Film reels come in three main sizes: 3 in, 5 in,
and 7 inch. If your film is 3 inches or 5 inches, use the 5 inch take up reel (smaller one). If
your film is on a 7 inch reel, use the 7 inch take up reel (larger one).
3 inch reel
5 inch reel
Using Wolverine MovieMaker Pro
7 inch reel
5 inch take
up reel
1
7 inch take
up reel
Advertisement

Related Manuals for Wolverine MovieMaker Pro


Summary of Contents for Wolverine MovieMaker Pro
- Page 1 Using Wolverine MovieMaker Pro The Wolverine Movie Maker Pro will help you convert your old 8mm and Super 8 film into a digital MPEG-4 movie file at 1080P/20 FPS. NOTE : A USB Flash Drive is required to save your movie files.
- Page 2 Note: The following table provides some approximate recording details for the three film reel sizes: Run-time of Completed video Reel Size Film length How long to record 3 inch 50 ft 25-35 mins 2-3 mins 5 inch 200 ft 1hr 40 mins – 2.5 hours 12-15 mins 7 inch 400 ft...
- Page 3 Zoomed view of Control Buttons: UP Button. Moves selection or value up ENTER Button. Use to select option in menu view and to start / stop recording during recording POWER Button. MENU Button. session DOWN Button. Turns machine on and off Brings up selection Moves selection menu.
- Page 4 4. Press the POWER button to turn on MovieMaker Pro 5. Press the tab on the film door to the left to flip open the film door. 6. Thread the end of the film under the three silver tabs of film tray (one on left side of film tray, one on the right side, and one in the middle).
- Page 5 Slide film under left tab Slide film under middle tab Slide film under right tab...
- Page 6 7. Loop film underneath knob on the left of the film tray. Then follow routing diagram to loop film across and under the four knobs on the right side of the machine and onto the take up reel. Wind film counter-clockwise a couple times to secure in place. 1.
- Page 7 Double check the path of the film. Make sure film is still under 3 silver tabs and fix excess film that may come off of source reel. 8. Carefully pull film manually from right side of film tray while winding excess film onto the take up reel (right reel) until the first frames of the film and under the viewer window.
- Page 8 Movie Maker Pro to the television set by connecting the black cable in the back to the VIDEO OUT port on the MovieMaker Pro. Turn on the TV with the Panasonic remote and change input to VIDEO 2. The unit display will go black and the image will appear on the...
- Page 9 11. Determine whether the film is 8mm or Super 8. Use the guide below to determine, and then push the tab on the front of the movie maker pro to match your film type (left for 8 mm, right for Super 8). 12.
- Page 10 13. The film adjustment screen will appear. You can use the UP and DOWN arrow buttons to adjust the values, and the ENTER button to switch between the X (left and right), Y, (up and down) and W (Zoom in, out) values. Click ENTER until W adjust is selected and start by zooming out.
- Page 11 15. The screen below will appear. Verify you have the film type lever pushed the appropriate way. Then click ENTER once more to begin the recording process. 16. The film will automatically advance and record. If the film sticks you might need to stop the recording process (CLICK ENTER AGAIN), open the film tray, and manually advance the film a few frames.
- Page 12 17. Film will progress until it reaches the end of the film strip. If the MovieMaker Pro doesn’t stop automatically, press the ENTER Button to stop the recording process. 18. Press the film tray lever to the left to open film tray. Pull free any remaining film from...
- Page 13 19. You’ll next need to rewind your film back onto the source film reel. Swap the Take up reel onto the left arm with the sprocket holes facing TOWARD YOU (away from the machine) Next, move the source reel onto the right arm, using the gray adapter if needed.
- Page 14 20. Press the MENU button and navigate using the ARROW buttons to select REWIND. Then press ENTER button. 21. The screen below will appear. You’ve already switched reels, so continue by pressing ENTER one more time.
- Page 15 22. The MovieMaker Pro will begin to rewind film back onto the source reel. Once the film is rewound you’ll need to press the ENTER button to stop the rewind process. 23. If you have more reels to convert, you can go back to step 1 and repeat the process for each film.
- Page 16 25. Located the SD memory card on the back of the Movie Maker Pro. Press in to eject the card and remove it from device. 26. Locate the USB adapter (silver) in the pouch by the MovieMaker Pro. Insert the SD card into the larger port on the side of the USB adapter (see image below)
- Page 17 27. You’ll now take the silver USB adapter with SD card and your flash drive over to one of the microfilm scanner computers to transfer the files over. Your USB Drive Staff USB adapter 28. Insert both drives into the BLUE USB ports on the front of the unit.
- Page 18 29. Open the File Explorer ( ) Select the STAFF – 8MM drive on the left-side menu panel. Double click on the folder FilmScaner to open. 30. Then double click on the folder Movie to open.
- Page 19 31. The new window will show the video files (.mp4) in numerical order. Left click with the mouse to select all the files (or use the keyboard shortcut control + A to select all). The file name will be highlighted in blue once selected. 32.
- Page 20 33. A new window pops up called Move Items. In the window select your USB drive. You can create a new folder on your USB drive, or simply transfer them over to your device. 1. Select Your USB drive. 2. Left Click on MOVE...
- Page 21 34. The files will be moved over to your flash drive. Once the process is finished, click on your USB drive to double check that the files moved over correctly. Then eject the USB flash drive.
- Page 22 MovieMaker Pro. 36. Return the silver USB adapter back to the pouch next to MovieMaker Pro. Return the black take-up reel onto the right side of the Movie Maker Pro. Don’t forget to take your USB drive and source disks home with you.
Need help?
Do you have a question about the MovieMaker Pro and is the answer not in the manual?
Questions and answers
card error
A card error on the Wolverine MovieMaker Pro means that the SD card is not being recognized by the device. This could be due to formatting issues, such as using NTFS instead of a compatible format, or other incompatibilities even if the card meets the required specifications (SDHC, 32GB or less, Class 6 or higher).
This answer is automatically generated
@Mr. Anderson
I **** lost inserting sd card gives me card error only message
Sorry but lost do I need to reformat sd card I only get card error message when I insert sd card
If you get a "card error" message on the Wolverine MovieMaker Pro, you may need to reformat the SD card. Ensure the card is SDHC (not SDXC), 32GB or less, and class 6 or higher. Formatting the card in NTFS may cause errors, so try formatting it properly. A quick format is usually enough, but if issues persist, a full format may help by checking for bad sectors.
This answer is automatically generated
My new Wolverine Movie maker Pro, seems to be partly doing the job . However the movie produced is off center. I have been to the menue to adjust the framing but it will only adjust to the left . So I told the machine to go to the default settings but it does not change the settings . I have tried turning the machine off and on again, but made no difference . Any adjustments to the settings in the framing menu just plus in value ?? Any suggestions would be great.. regards Jeff
To fix the framing issue on your Wolverine MovieMaker Pro, follow these steps:
1. Adjust the Framing Before Digitizing – Ensure that you set the framing adjustment correctly before scanning an entire reel.
2. Monitor Each Reel – The framing setting may vary from reel to reel due to film variations, so check and adjust it for each reel.
3. Frame Slightly Smaller – To account for inconsistencies, frame it slightly smaller and crop the video later during post-processing.
4. Use Good Editing Software – Since results are not always perfect, use software to fine-tune the framing after digitization.
By following these steps, you can minimize off-center issues and achieve better results.
This answer is automatically generated