
Related Manuals for TOOLCRAFT 1619741


Summary of Contents for TOOLCRAFT 1619741
- Page 1 Bedienungsanleitung Laser- Entferungsmesser 40 m Best.-Nr. 1619741 Seite 2 - 23 Operating Instructions Laser Rangefinder 40 m Item No. 1619741 Page 24 - 45...
-
Page 2: Table Of Contents
Inhaltsverzeichnis Seite 1. Einführung ..............4 2. Symbol-Erklärung ............5 3. Bestimmungsgemäße Verwendung ......5 4. Lieferumfang ..............6 5. Merkmale und Funktionen ..........6 6. Sicherheitshinweise ............7 a) Allgemein ..............7 b) Laser ............... 8 c) Batterien ..............10 7. - Page 3 23. Tipps und Hinweise ............ 19 24. Fehlerhilfe ..............20 25. Pflege und Reinigung ..........21 26. Entsorgung ..............22 a) Produkt ..............22 b) Batterien/Akkus ............. 22 27. Technische Daten ............23...
-
Page 4: Einführung
1. Einführung Sehr geehrte Kundin, sehr geehrter Kunde, wir bedanken uns für den Kauf dieses Produkts. Dieses Produkt entspricht den gesetzlichen, nationalen und europäischen Anforderungen. Um diesen Zustand zu erhalten und einen gefahrlosen Betrieb sicherzustellen, müssen Sie als Anwender diese Bedienungsanleitung beachten! Diese Bedienungsanleitung gehört zu diesem Produkt. -
Page 5: Symbol-Erklärung
2. Symbol-Erklärung Das Symbol mit dem Ausrufezeichen im Dreieck weist auf wichtige Hinweise in dieser Bedienungsanleitung hin, die unbedingt zu beachten sind. Das Pfeil-Symbol ist zu finden, wenn Ihnen besondere Tipps und Hinweise zur Bedienung gegeben werden sollen. Das Symbol weist auf den integrierten Laser hin. 3. -
Page 6: Lieferumfang
4. Lieferumfang • Laser-Entfernungsmesser • Aufbewahrungstasche • Handschlaufe • Gürtelclip • 2 x AAA-Batterie • Bedienungsanleitung Aktuelle Bedienungsanleitungen Laden Sie aktuelle Bedienungsanleitungen über den Link www.conrad.com/downloads herunter oder scannen Sie den abgebildeten QR-Code. Befolgen Sie die Anweisungen auf der Webseite. 5. -
Page 7: Sicherheitshinweise
6. Sicherheitshinweise Lesen Sie sich die Bedienungsanleitung aufmerksam durch beachten insbesondere Sicherheitshinweise. Falls Sie die Sicherheitshinweise und die Angaben zur sachgemäßen Handhabung in dieser Bedienungsanleitung nicht befolgen, übernehmen wir für dadurch resultierende Personen-/Sachschäden keine Haftung. Außerdem erlischt in solchen Fällen die Gewährleistung/Garantie. -
Page 8: B) Laser
• Gehen Sie vorsichtig mit dem Produkt um. Durch Stöße, Schläge oder dem Fall aus bereits geringer Höhe wird es beschädigt. • Wenden Sie sich an eine Fachkraft, wenn Sie Zweifel über die Arbeitsweise, die Sicherheit oder den Anschluss des Produktes haben. •... - Page 9 • Sollten Ihre Augen durch Laserstrahlung irritiert worden sein, führen Sie auf keinen Fall mehr sicherheitsrelevante Tätigkeiten, wie z.B. Arbeiten mit Maschinen, in großer Höhe oder in der Nähe von Hochspannung aus. Führen Sie bis zum Abklingen der Irritation auch keine Fahrzeuge mehr.
-
Page 10: C) Batterien
c) Batterien • Achten Sie beim Einlegen der Batterien auf die richtige Polung. • Entfernen Sie die Batterien, wenn Sie das Gerät längere Zeit nicht verwenden, um Beschädigungen durch Auslaufen zu vermeiden. Auslaufende oder beschädigte Batterien können Hautkontakt Säureverätzungen hervorrufen. Beim Umgang mit beschädigten Batterien sollten Sie daher Schutzhandschuhe tragen. -
Page 11: Laseraustritt / Messsensor
7. Laseraustritt / Messsensor Laseraustritt Messsensor 8. Tasten Taste MEAS Taste Unit Taste C Ein-/Ausschalter Taste MAX/MIN Messreferenztaste Taste +/- Stummschalttaste Speichertaste 10 Funktionstaste... -
Page 12: Display
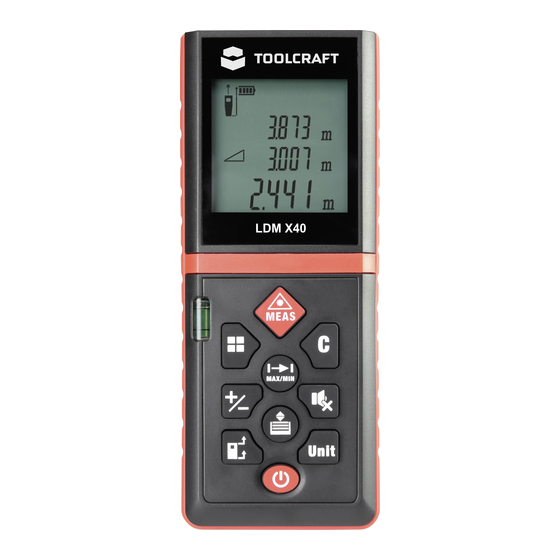
9. Display Laser-Indikator Batteriezustand C Einheit D Messwert Addition / Subtraktion Fläche / Volumen / indirekte Messung (Pythagoras) G Entfernungsmessung H Hardware-Fehler Speicherplatz Messreferenz 10. Batterien einlegen • Entnehmen Sie den Batteriefachdeckel. • Legen Sie 2 AAA-Batterien polungsrichtig ein. Beachten dabei Polaritätsangaben innerhalb... -
Page 13: Gerät Ein-/Ausschalten
11. Gerät ein-/ausschalten • Halten Sie den Ein-/Ausschalter ca. 1 Sekunde gedrückt, um das Gerät einzuschalten. Der Ziellaser ist sofort aktiviert. • Drücken Sie kurz die Taste C, um den Ziellaser zu deaktivieren. • Halten Sie den Ein-/Ausschalter ca. 1 Sekunde gedrückt, um das Gerät wieder auszuschalten. -
Page 14: C) Einheit
Werkseinstellung wird Messwert ausgehend von der Rückseite des Gerätes gemessen. c) Einheit Drücken Sie die Taste Unit, um die Einheit zu ändern. Folgende Einheiten stehen zur Auswahl: • m = Meter • ft = Fuß • in = Zoll • ---‘--‘‘ = Fuß/Zoll 13. -
Page 15: Kontinuierliche Messung
15. Kontinuierliche Messung • Drücken Sie die Taste MAX/MIN, um in den Modus für die kontinuierliche Messung zu wechseln. • Der Ziellaser wird aktiviert. Die Entfernung wird nun kontinuierlich gemessen. • Auf dem Display werden der maximale, der minimale und der zuletzt registrierte Messwert des Messvorgangs angezeigt. -
Page 16: Volumenmessung
Erste Strecke Zweite Strecke Flächenumfang Fläche 18. Volumenmessung • Drücken Sie die Funktionstaste, bis der Indikator Display erscheint. • Messen Sie die zwei Seitenlängen und die Höhe des Raumes. • Das Gerät multipliziert die Messwerte automatisch. Erste Strecke Zweite Strecke Dritte Strecke Volumen 19. -
Page 17: A) Mit Zwei Referenzpunkten
a) Mit zwei Referenzpunkten • Drücken Sie die Funktionstaste, bis der Indikator Display erscheint. • Messen Sie nun die beiden notwendigen Strecken. Beziehen Sie sich bei der Reihenfolge auf die folgende Abbildung. • Die Höhe wird automatisch berechnet und erscheint in der unteren Zeile. -
Page 18: Gespeicherte Messwerte Abrufen
• Die Höhe wird automatisch berechnet und erscheint in der unteren Zeile. Erste Strecke Zweite Strecke Dritte Strecke Höhe 20. Gespeicherte Messwerte abrufen • Die letzten 20 Messergebnisse werden automatisch gespeichert. • Drücken Sie wiederholt die Speichertaste, um die gespeicherten Messergebnisse anzuzeigen. •... -
Page 19: Gürtelclip
22. Gürtelclip • Schieben Sie den Gürtelclip in das Gehäuse, bis er einrastet. • Um den Gürtelclip zu entnehmen, drücken Sie auf die Fläche PUSH und ziehen Sie gleichzeitig den Gürtelclip aus dem Gehäuse heraus. 23. Tipps und Hinweise • Aufgrund von Lichtbrechung oder Sonneneinstrahlung kann es beim Außeneinsatz zu Messfehlern kommen. -
Page 20: Fehlerhilfe
• Stellen Sie beim Außeneinsatz sicher, dass das Produkt nicht feucht oder nass wird. • Folgende Oberflächen können aufgrund ihrer physikalischen Eigenschaften Messergebnis verfälschen: - Transparente Oberflächen (z. B. Glas, Wasser) - Reflektierende Oberflächen (z. B. Glas, glänzendes Metall) - Poröse Oberflächen (z. B. Isolierstoffe) - Strukturierte Oberflächen (z. B. Rauputz, Naturstein) 24. Fehlerhilfe Code Ursache Lösung... -
Page 21: Pflege Und Reinigung
Code Ursache Lösung Schalten Sie das Gerät aus und wieder ein. Falls nach mehreren Versuchen die Hardware-Fehler Fehlermeldung weiterhin angezeigt wird, wenden Sie sich an Ihren Händler. Falls auf der linken Seite des Displays ein Schraubenschlüssel erscheint, liegt ein Hardware-Fehler vor. Schalten Sie in diesem Fall das Gerät wiederholt ein und aus. -
Page 22: Entsorgung
26. Entsorgung a) Produkt Elektronische Geräte sind Wertstoffe und gehören nicht in den Hausmüll. Entsorgen Sie das Produkt am Ende seiner Lebensdauer gemäß den geltenden gesetzlichen Bestimmungen. Entnehmen Sie evtl. eingelegte Batterien/Akkus und entsorgen Sie diese getrennt vom Produkt. b) Batterien/Akkus Sie als Endverbraucher sind gesetzlich (Batterie- verordnung) zur Rückgabe aller gebrauchten Batterien/Akkus verpflichtet; eine Entsorgung über... -
Page 23: Technische Daten
27. Technische Daten Spannungsversorgung ....2 x AAA-Batterie Messbereich* ........0,05 – 40,00 m Genauigkeit** ........±2 mm Laserklasse ........2 Laser-Wellenlänge ......630 – 670 nm Laser-Ausgangsleistung ....<1 mW Ansprechzeit ........<0,5 s Betriebsbedingungen ...... -10 bis +40 °C 10 – 90 % rF Lagerbedingungen ......-20 bis +60 °C 10 –... - Page 24 Table of contents Page 1. Introduction ..............26 2. Explanation of symbols ..........27 3. Intended Use .............. 27 4. Delivery Content ............28 5. Features and functions ..........28 6. Safety instructions ............29 a) General information..........29 b) Laser ..............30 c) Batteries ..............
- Page 25 23. Tips and useful information ........41 24. Troubleshooting ............42 25. Care and Cleaning ............. 43 26. Disposal ..............44 a) Product ..............44 b) Batteries ..............44 27. Technical data ............45...
-
Page 26: Introduction
1. Introduction Dear customer, Thank you for purchasing this product. This product complies with statutory national and European regulations. To ensure that the product remains in this state and to guarantee safe operation, always follow the instructions in this manual. These operating instructions are part of this product. -
Page 27: Explanation Of Symbols
2. Explanation of symbols The symbol with an exclamation mark in a triangle is used to highlight important information in these operating instructions. Always read this information carefully. The arrow symbol indicates special information and advice on how to use the product. This symbol indicates the built-in laser. -
Page 28: Delivery Content
4. Delivery Content • Laser rangefinder • Storage pouch • Hand strap • Belt clip • 2 x AAA-battery • Operating instructions Up-to-date operating instructions Download the latest operating instructions at www.conrad. com/downloads or scan the QR code shown. Follow the instructions on the website. -
Page 29: Safety Instructions
6. Safety instructions Read the operating instructions and safety information carefully. If you do not follow the safety instructions and information on proper handling in this manual, we will assume no liability for any resulting personal injury or damage to property. Such cases will invalidate the warranty/guarantee. -
Page 30: B) Laser
• Always handle the product carefully. Jolts, impacts or a fall even from a low height may damage the product. • Consult an expert when in doubt about the operation, safety or connection of the appliance. • Maintenance, modifications and repairs must be done by a technician or a specialist repair centre. - Page 31 • If your eyes have been irritated by laser radiation, do not continue to carry out tasks with safety implications, such as working with machines, working from great heights or close to high voltage. Do not drive any vehicles until the irritation has completely subsided.
-
Page 32: C) Batteries
c) Batteries • Check that the batteries are inserted with the correct polarity. • The batteries should be removed from the device if it is not used for a long period of time to avoid damage through leaking. Leaking or damaged batteries may cause acid burns when they come into contact with skin. -
Page 33: Laser Aperture / Measuring Sensor
7. Laser aperture / measuring sensor Laser aperture Measuring sensor 8. Controls MEAS button On/off switch C button Measurement reference button MAX/MIN button +/- button Mute button 10 Function Button Memory button Unit button... -
Page 34: Display
9. Display Laser indicator Battery condition C Unit D Measured value Addition / subtraction Surface/volume/indirect measurement (Pythagoras) G Distance measurement H Hardware error Memory position Measurement reference 10. Inserting the batteries • Remove the battery compartment cover. • Insert 2 AAA batteries, observing correct polarity. Follow the polarity signs inside the battery compartment. -
Page 35: Switch On/Off The Device
11. Switch on/off the device • Press and hold the on/off button approx. 1 second to turn on the product. The target laser is active immediately. • Press the C button to deactivate the target laser. • Press and hold the on/off button for approx. 1 second to turn the device off. -
Page 36: C) Unit
By default, the measured value is measured from the back of the device. c) Unit Briefly press the Unit button to change the unit. The following units are available: • m = meters • ft = foot • in = inch • ---’--” = feet/inches 13. -
Page 37: Continuous Measurement
15. Continuous measurement • Press the MAX/MIN button to activate continuous measurement mode. • The laser is activated. The distance is now measured continuously. • The display shows the maximum, minimum and the last registered measured value of the measurement process. •... -
Page 38: Volume Measurement
First line segment Second line segment Area circumference Area 18. Volume measurement • Press the function button until the indicator appears on the display. • Measure the two sides and the height of the room. • The device automatically multiplies the measured values. First line segment Second line segment Third line segment... -
Page 39: A) With Two Reference Points
a) With two reference points • Press the function button until the indicator appears on the display. • Now measure the two required line segments. Please see the following figure for the right order. • The height is calculated automatically and will appear in the bottom row. First line segment Second line segment Height... -
Page 40: Recalling Stored Measured Values
• The height is calculated automatically and will appear in the bottom row. First line segment Second line segment Third line segment Height 20. Recalling stored measured values • The last 20 measurements will be stored automatically. • Repeatedly press the memory button to display the stored measurement results. -
Page 41: Belt Clip
22. Belt clip • Slide the belt clip into the housing until it snaps into place. • To remove the belt clip, press the surface marked PUSH while puling the belt clip out of the housing. 23. Tips and useful information •... -
Page 42: Troubleshooting
• During outdoor use, make sure that the product does not get damp or wet. • Due to their physical properties, the following surfaces may falsify the measurements: - Transparent surfaces (e.g. glass, water) - Reflective surfaces (e.g. glass, shiny metal) - Porous surfaces (e.g. insulating materials) - Structured surfaces (e.g. -
Page 43: Care And Cleaning
If a wrench appears on the left side of the display, there is a hardware error. In this case, turn the device on and off repeatedly. If the wrench still appears, the device is defective. 25. Care and Cleaning Never use aggressive detergents, rubbing alcohol or other chemical solutions, as these may damage the casing or cause the product to malfunction. -
Page 44: Disposal
26. Disposal a) Product Electronic devices are recyclable waste and must not be disposed of in the household waste. Always dispose of the product according to the relevant statutory regulations. Remove any inserted batteries and dispose of them separately from the product. b) Batteries You are required by law (Battery Directive) to return all used batteries. -
Page 45: Technical Data
27. Technical data Power supply ........2x AAA battery Measurement range* ......0.05 – 40.00 m Accuracy** ........±2 mm Laser class ........2 Laser wavelength ......630 – 670 nm Laser output power ......<1 mW Response time ........<0.5 s Operating conditions ....... -10 to +40 °C 10 –... - Page 48 Dies ist eine Publikation der Conrad Electronic SE, Klaus- Conrad-Str. 1, D-92240 Hirschau (www.conrad.com). Alle Rechte einschließlich Übersetzung vorbehalten. Reproduktionen jeder Art, z.B. Fotokopie, Mikroverfilmung, oder die Erfassung in elektronischen Daten-verarbeitungsanlagen, bedürfen der schriftlichen Genehmigung des Herausgebers. Nachdruck, auch auszugsweise, verboten. Die Publikation entspricht dem technischen Stand bei Drucklegung.
Need help?
Do you have a question about the 1619741 and is the answer not in the manual?
Questions and answers