Vision grills KAMADO CLASSIC B Series Quick Start Manual
Hide thumbs
Also See for KAMADO CLASSIC B Series:
- User manual (11 pages) ,
- User manual (18 pages) ,
- Setup (2 pages)
Advertisement
ENGLISH
Step 1:
Cart Assembly
• Remove bolts, washers and
locking washers from the two
"X" connectors.
• Remove paper washers and
begin assembling the "X"
connectors and legs.
• Please Note: Top & Bottom "X"
Connectors must be assembled
at the same time in order to fit
together.
• Assemble cart by inserting the
two "X" connectors into leg ends
and install bolts and washers in the same order they were removed from
"X" connectors.
• While assembling, only finger-tighten bolts, to allow adjustment in cart.
Otherwise it can be difficult to get all of the bolts inserted.
• Screw in Standard Rubber Wheels to rear Cart Legs and the Locking
Rubber Wheels to the front Cart Legs (fig. 1b).
• Tighten nuts using wrench provided.
• After cart is assembled, confirm all bolts are tightened.
STEP 2
Step 2: Shelf Brackets
• Remove the nuts and washers from the bolts welded on the bottom
banding and remove the paper washers.
• Mount shelf brackets over studs on the sides of the metal bands on the
bottom ceramic grill body with bracket slots facing up. Brackets are
stamped on the back with letters indicating their position (e.g., LF=Left
Front bracket and RB=Right Back bracket).
• Mount flat washer then acorn nut on each stud and tighten with wrench
provided.
Step 3: Grill Assembly
• Take all parts out of grill before lifting. The
grill is heavy and will require two people to lift
and guide the Kamado into cart.
• Be sure bottom vent is centered and the grill
is resting against the two back legs.
• (Step 3a:) Lower fire bowl into the grill, then
place the cast iron grate into the fire bowl.
• Place cooking grates onto grill with hinged
section facing towards front of grill.
STEP 1
STEP 1
STEP 1
STEP 3a
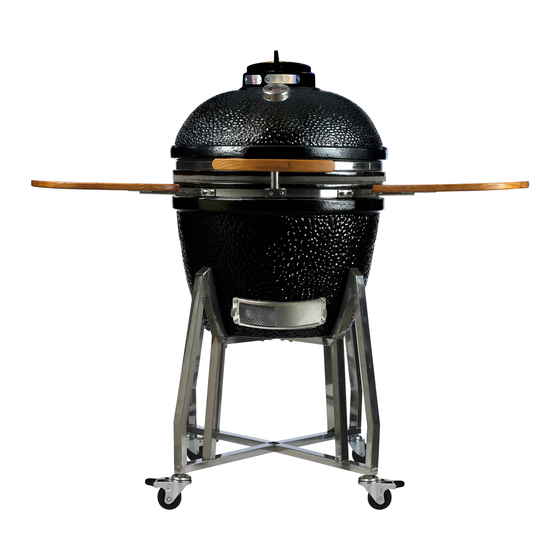
SET UP
KAMADO CLASSIC B-SERIES
Model # B-K1C2A1-N1
Step 3:
Grill Assembly
(cont.)
• (Step 3b:) Close lid and
press top vent onto grill with
calibrations facing the front.
Step 4: Handle and Side Shelf Mounting
• Remove the nuts and washers
from the bolts welded on the top
banding opposite the hinge.
• Remove paper washers and
attach handle bracket over studs.
On each stud place a flat washer
and an acorn nut, then tighten.
• Mount side shelves by inserting
the shelf rod into the shelf
bracket. Tilting the shelf up
slightly and sliding in or out allows
you to deploy or store the shelves.
Step 5: Ash Drawer Usage
• When grill is cool it is safe to remove ash from Ash Drawer
• (Step 5a:) Using both bottom knobs on Ash Drawer, lift slightly and
(Step 5b:) pull drawer out.
• Once ashes are emptied, reinstall by pushing Ash Drawer back into grill
body until it drops down back into place.
WARNING: ALWAYS WAIT FOR ASHES TO COOL BEFORE REMOVING
ASH DRAWER. NEVER PULL OUT ASH DRAWER WHILE GRILL IS HOT.
STEP 5a
Long-Term Maintenance
• Cover your grill when not in use to extend life and maintain appearance.
• When moving grill always pull by the back hinge.
www.visiongrills.com/register
to register your grill and
view frequently asked questions
STEP 3b
STEP 4
STEP 5b
Visit
Advertisement
Table of Contents

Related Manuals for Vision grills KAMADO CLASSIC B Series


Summary of Contents for Vision grills KAMADO CLASSIC B Series
- Page 1 SET UP ENGLISH KAMADO CLASSIC B-SERIES Model # B-K1C2A1-N1 Step 1: Step 3: Cart Assembly STEP 1 STEP 1 Grill Assembly STEP 3b STEP 1 (cont.) • Remove bolts, washers and locking washers from the two “X” connectors. • (Step 3b:) Close lid and •...
- Page 2 “X” Leg Connectors (with bolts, VGC XLC-L washers & spring washers) Rubber Wheels (x2) Standard VGC WHLS-L Rubber Wheels (x2) Locking VGC WHL-L-L Grill Cover VGC GC-L Vision Grills, LLC 1531 Fairview, Suite B, St. Louis, MO 63132 • 877.917.4273 • www.visiongrills.com...
Need help?
Do you have a question about the KAMADO CLASSIC B Series and is the answer not in the manual?
Questions and answers