Advertisement
Quick Links
Advertisement

Related Manuals for Vimar ELVOX 6931


Summary of Contents for Vimar ELVOX 6931
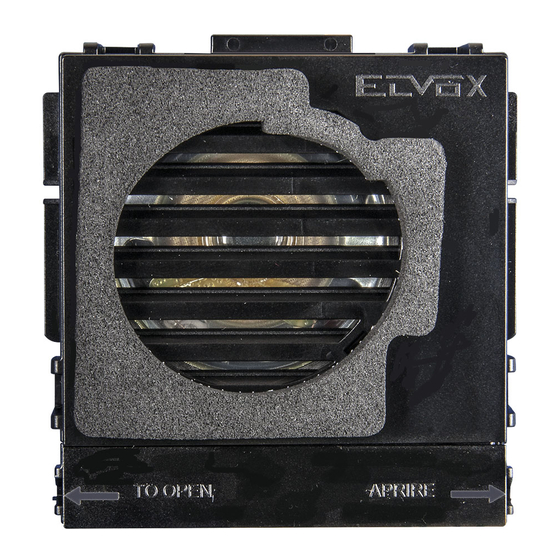
- Page 1 Installer guide Art. 6931 Audio entrance panel Due Fili unit...
-
Page 2: General Information
GENERAL INFORMATION Article 6931 is a speech unit for DUE FILI PLUS audio door entry systems. Article 6931 can manage up to 200 calls and can be used as a Master speech unit, making it possible to create audio door entry systems. In addition, it can co-exist with video panels in a mixed DUE FILI PLUS system (interphone/monitor), by using con- centrators art. - Page 3 Connector Art. 950C or Art. 692I or Art. 692I/U FON.693.10S RL 00 - 6/2009 (il fondo non serigrafato è STA.546.003) RESET Il disegno è rappresentato in negativo, la versione LED supply voltage for definitiva è bianco su fondo nero. additional C B A modules CN10...
- Page 4 Series of Number of Entrance panel type Cables Substitutive Figure entrance pa- push-buttons lamp holder nels type 88T1 C3.4, C3.6 Fig. 5, page 10 8911 C3.4, C3.6 R263 Fig. 6, page 10 88T2 C3.2, C3.4, C3.6 Fig. 5, page 10 891D C3.2, C3.4, C3.6 R263...
-
Page 5: Installation
INSTALLATION ENTRANCE DIP SWITCH Assembling and installing the speech unit Art. 6931 requires ID TARGA PANEL ID the following phases: - installing the speech unit NOT ASSIGNED NON ASSEGNATO - wiring the leads - installing and wiring any additional modules - connecting the speech unit to the system 1 (MASTER) - assigning identification... - Page 6 BASIC SOFTWARE CONFIGURATIONS Fig. 3A PUSH-BUTTONS RESET For the outdoor station it is possible to reset the two push-but- tons CH1 and CH2 without using external helps. This can be done with the following procedure, described for a generic pu- sh-button.
- Page 7 {63 ... 66} {67 ... 70} 61 ... 64 65 ... 68 ADDITIONAL MODULE PUSHBUTTON HARDWARE PROGRAMMING (ART. 8051, 8052, 8053, 8054, 12TS, {71 ... 74} {75 ... 78} 69 ... 72 73 ... 76 12TS/0, 639P) The dip-switches modify the hardware code of the first pu- shbutton at the top right of the module, while the other pu- shbuttons are associated consecutively from top to bottom, right to left (see Tables 1 and 2).
- Page 8 {167 ... 170} {171 ... 174} 165 ... 168 169 ... 172 TAB. 2 - PUSH-BUTTONS IN TWO ROWS OR TO BE {175 ... 178} {179 ... 182} 173 ... 176 177 ... 180 USED WITH ADDITIONAL MODULES TYPES 12TS/0 AND 693P Not to be used {3 ...
- Page 9 Art. RPF3 Fig. 4A Art. RPF3 Bracket with fixing screws for Art 6931 speech unit Audio speech unit Additional module with push-buttons Frame Microphone Art. 9192 Flush-mounted box Fig. 4B If using the “BUSY - WAIT” si- gnal, use the entrance panel module 8000 series, Art.
- Page 10 Art. 88T1 Art. 88T2 Fig. 5 Art. 8911 + ART. R263 Art. 891D + ART. R263 ART. R263 Fig. 6...
- Page 11 Bracket with fixing screws Fig. 7 for speech unit Cover closing the lens Art. 1222 Insertion of microphone type 6931 (see instructions instructions for entrance pa- nels series 1200) Bracket with fixing screws for speech unit Cable CN10 to module type 12TS Cable CN10 from speech unit type 6931...
- Page 12 Art. 8101 Art. 8102 Fig. 8 Art. 2101 Art. 2102 Fig. 9...
- Page 13 Art. 2550/301 + ART. R261 Art. 2550/302 + ART. R261 Fig. 10 ART. R261 Art. 3301 + ART. R261 Art. 3302 + ART. R261 Fig. 11 ART. R261 Fig. 12...
- Page 14 Art. 6931 Fig. 13 CONNETTORE PER ART. 950C Made in Italy ART. / TYPE 6930 CONNECTOR VOLUME INTERNO FOR TYPE 950C INTERNAL UNIT VOLUME 1 - Microfono / Microphone 5 - Video 2 - CH2 6 - Alim. LED / LED power 3 - Occupato / Busy 7 - Alim.
- Page 15 ADVANCED SOFTWARE CONFIGURATIONS The advanced configurations can be made via the programmer Art. 950C or PC Software SaveProg (Art. 69CD) with interface Art. 692I or Art. 692I/U by connecting it on the right-hand side of the speech unit (see Fig. 14): Fig.
-
Page 16: Message Language
The button has no function because the programmer is powered via the bus. For the same reason the auto-shutdown function is not available. The programmer keys enable selection of the following item from the main menu: During the phase of waiting for the response from the speech unit, the display shows: After a few seconds the programmer display will show the type and release of the software for the speech unit: If the speech unit is connected to one of the modules 6570, 657C, 693T, the code 6931 is replaced by 693V. - Page 17 By pressing you move onto the previous item of the programming menu. FIRST BUTTON ID Press button to move to the next item by which you can change the number of the audio/video door entry unit called in correspond- ence with the pushbutton CH1 of the speech unit. To change the ID, enter a number between 1 and 200.
- Page 18 To cancel press . To confirm, press . Acceptance of the command, as in all cases, is shown on the first line of the display: Afterwards you go back to see the new programming value and you can continue with another pushbutton: If the ID is outside the limit, the first line of the display will signal the incongruity: Use keys to move from one pushbutton to another.
- Page 19 As push-button number extension you can choose the use of only external push-buttons, either in single either in double row. To do this instead of you can use instead of you can use Press to move to the previous item of the programming menu. LOCK TIME Press to move to the next item by which you can change the time for which the lock is activated whether controlled by intephone/...
- Page 20 Bus DUE FILI ELVOX Eventuale alimentazione ausiliaria, che può essere sia continua (per esempio da art. 6923) CN1 MORSETTIERA LATO DUE FILI ELVOX CN1 MORSETTIERA LATO DUE FILI ELVOX CN1 MORSETTIERA LATO DUE FILI ELVOX che alternata (circa 20Vc.a. SERIGRAFIA DESCRIZIONE SERIGRAFIA DESCRIZIONE...
- Page 21 Massa riferimento di 12 e +C N.C. Massa riferimento di 12 e +C +12V max 100mA presente solo Massa v +12V max 100mA presente solo quando l’interfaccia e attiva NON ASSEGNATO quando l’interfaccia e attiva Video, a Display Common action Button Direct action Nothing changes...
- Page 22 CONTROLLER PUSHBUTTON CN1 MORSETTIERA L Press to move to the next item by which you can program which pushbuttons may be associated with the call of one of the four porter’s lodge controllers contemplated in the ELVOX 2-WIRE system. SERIGRAFIA By default there is no assignment: CN1 MORSETTIERA Bus DUE...
- Page 23 +12 max 100mA sempre presente Massa riferimento di 12 e +C +12V max 100mA presente solo quando l’interfaccia e attiva If the ID is outside the limit, the first line of the display will signal the incongruity: DIP SWITCH On\Off To cancel the assignment, enter 0 for the ID.
- Page 24 To change the ID of the interphone/monitor press buttons . Otherwise, enter the number of the interphone/monitor, from 1 to 200: To cancel, press . To confirm, press . To change the sequence of the selected interphone/monitor, starting from where the current value is shown, press To specify the sequence of entrance panels, use the buttons for the first 9 entrance panels.
- Page 25 The user can terminate the current sequence, by moving to another interphone/monitor and pressing , thus recalling this memory which replaces the one present. To cancel press To confirm, press . Acceptance of the command, as in all cases, is shown on the first line of the display: It is possible to move from one ID to another also by using .
- Page 26 TIMES CALL In Art. 6931 the times are adjusted via the trimmers on the The ringtone of the call from a speech unit does not follow the inside and accessible externally on the back of the speech unit rhythm of the button being pressed, but is regenerated. The with the aid of a screwdriver (see speech unit adjustments Fig.
-
Page 27: Bus Termination
Legenda for wiring diagram Minimum conductor section Terminals Ø up to 10m Electric lock 1,5 mm Others: -, +U, +I, -L (#) 1 mm # Additional power supply units (type 6923, 6582, 6982) must be installed as near as possible to the device to which they are connected. - Page 28 SIMPLE AUDIO ENTRANCE PANEL SYSTEM WITH SPEECH UNIT TYPE 6931 AND INTER- PHONES TYPE 6209 AND TYPE 8879 (REF. SI569). Mains F- Art. 6922 A0 - INTERPHONE Art. 6901, Art. 6901/D A1 - INTERPHONE SERIE PETRARCA Art. 6209 C3 - AUDIO ENTRANCE PANEL 8000, 1200, 8100, 1300, 3300, 2550/301-302, PATAVIUM SERIES C3.0-...
- Page 29 AUDIO ENTRANCE PANEL SYSTEM WITH SPEECH UNIT TYPE 6931 WITH ONE CALL AND INTERCOM- INTERPHONE MUNICATING INTERPHONES TYPE Art. 6209 + 6209 (UP TO 8) (REF. SI568). Art. 692P n° INTERPHONE Art. 6209 + Art. 692P 2° INTERPHONE Art. 6209 + Art.
- Page 30 SIMPLE AUDIO DOOR ENTRY SYSTEM WITH SPEECH UNIT ART. 6931 AUDIO DOOR ENTRY UNITS ART. 6209 AND ART. 8879. (REF. SI431). NOTE: When the speech unit Art. 6931 has more than 4 supple- mentary modules Art. 8054, remove the jumper C3.7 and connect a supplementary power supply to the terminals (VL)+ and (M)-.
- Page 31 VIDEO INTERPHONE ENTRANCE PANEL SYSTEM FOR SINGLE OR MULTI RESI- DENCE WITH MONITORS TYPE PETRARCA, GIOTTO, 6600 AND A VIDEO ENTRANCE PANEL (REF. SI527). Mains G- Art. 6923 MONITOR SERIES WIDE TOUCH ART. 7211 B1 - MONITOR SERIES 7200 ART. 7211 B2 - MONITOR SERIES 6600 Art.
- Page 32 SIMPLE VIDEO ENTRANCE PANEL SYSTEM WITH SPEECH UNIT TYPE 6931 AND SEPARATE CAMERA BY MEANS OF INTERFACE TYPE 693T (REF. SI559). Tab. 2 (Art. 693T) Termi- Max. distance: 100m nals:-, +U Max. load: 250mA with Art. 6582 Section of conductors: 1 mm² up to 50m 1.5 mm²...
- Page 33 Variant for connecting interface Art. 693T with power supply unit art. 6583/12 for video ca- mera with power input greater than 250mA (REF. Si560) Tab. 2 (Art. 693T) Mains Termi- Max. distance: 100m nals:-, +U Max. load: 1.6A with Art. 6583/12 Power supply Section of conductors: 1 mm²...
- Page 34 RISER WITH OPTION OF ALTERNATING BETWEEN THE PANEL WITH PUSH-BUTTONS ONLY AND THE ALPHANUMERIC PANEL, USED AS THE BASIS FOR INTERACTING WITH THE FOLLOWING TWO CONFIGURATIONS (REF. SI432R2). TO DIAGRAM SI432R1 - SI429R1 D0 - VIDEO ENTRANCE PANEL 89F7, 89F7/C SERIES VIDEO ENTRANCE PANEL 89F5, 89F5/C POWER SUPPLY type 6922 CONCENTRATOR type 692C...
- Page 35 VIDEO DOOR ENTRY SYSTEM WITH ONE VIDEO MAIN ENTRANCE PANEL AND TWO OR MORE USERS WITH A SECONDARY ENTRANCE PANEL WITH SPEECH UNIT ART. 6931 (REF. SI432R1). NOTE: When the speech unit Art. 6931 has more than 4 supplementary modules Art. 8054, remove the jumper C3.7 and connect a sup- plementary power supply to the terminals (VL)+ and (M)-.
- Page 36 VIDEO ENTRANCE PANEL SYSTEM WITH ONE MAIN VIDEO ENTRANCE PANEL AND TWO OR MORE USERS WITH SECONDARY ENTRANCE PANEL WITH SPEECH UNIT TYPE 6931 (REF. SI429R1). Mains I- Art. 692S F- Art. 6922 NOTE: BUS D BUS P When the speech unit Art. 6931 has more than 4 supple- mentary modules Art.
- Page 37 CONNECTION VARIATION FOR SPEECH UNIT ART. 6931 WITH MORE THAN FOUR SUPPLEMEN- TARY MODULES ART. 8054 AND SUPPLEMENTARY POWER SUPPLY ART. 6582 (REF. Si433). NOTE: When the speech unit Art. 6931 has more than 4 supplementary modu- les Art. 8054, remove the MAINS jumper C3.7 and connect a supplementary power...
- Page 38 CONNECTION VARIATION FOR “BUSY WAIT” SIGN ON SPEECH UNIT ART. 6931 (REF. SI434). CABLE RISER C3.9 C3.0 ART. 6931 C3.7 CN10 ATTENDERE OCCUPATO C3.8 C3 - AUDIO ENTRANCE PANEL 8000 SERIES + ART. 80PA C3.0- AUDIO SPEECH UNIT ART. 6931 C3.3- “BUSY WAIT”...
- Page 39 Variation of connection for installation of Variation of connection for installation of speech unit “DUE FILI ELVOX” (two wire speech unit “DUE FILI ELVOX” (two wire Elvox) type 6931 in one entrance panel se- Elvox) type 6931 in one entrance panel ries 8100 (Ref.
-
Page 40: Installation Rules
The instruction manual is downloadable from the site www.vimar.com INSTALLATION RULES Installation should be carried out observing current installation regulations for electrical systems in the country where the products are installed. CONFORMITY EMC directive Standards EN 61000-6-1 and EN 61000-6-3. - Page 42 Vimar SpA: Viale Vicenza, 14 36063 Marostica VI - Italy Tel. +39 0424 488 600 - Fax (Italia) 0424 488 188 49400621B0_MI_EN 00 16 01 Fax (Export) 0424 488 709 VIMAR - Marostica - Italy www.vimar.com...
Need help?
Do you have a question about the ELVOX 6931 and is the answer not in the manual?
Questions and answers