Table of Contents
Advertisement
Quick Links
Advertisement
Chapters
Table of Contents

Related Manuals for Terex AL4L Series


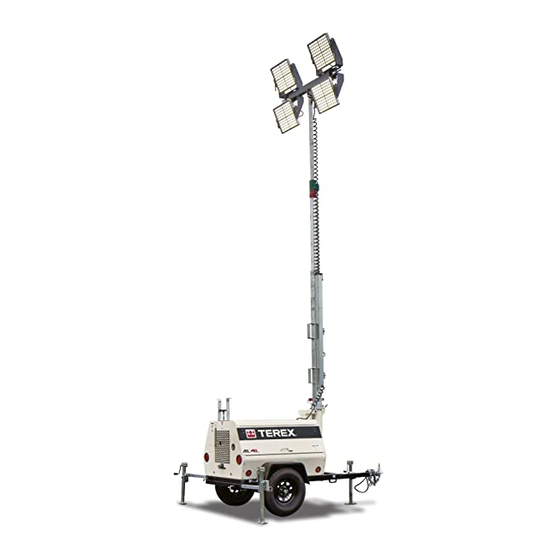
Summary of Contents for Terex AL4L Series
- Page 2 Copyright © 2011 by Terex Corporation 229171 Rev B August 2016 First Edition, Second Printing "Terex" is a registered trademarks of Terex USA, LLC in the USA and many other countries. Printed on recycled paper Printed in U.S.A. AL4L • AL5L Part No.
-
Page 3: Introduction
August 2016 INTRODUCTION Serial Number Legend Part No. 229171 AL4L • AL5L... - Page 4 August 2016 This page intentionally left blank. AL4L • AL5L Part No. 229171...
-
Page 5: Safety Rules
August 2016 Section 1 • Safety Rules Safety Rules Danger Failure to obey the instructions and safety rules in this manual, and the appropriate operator's manual on your machine will result in death or serious injury. Many of the hazards identifi ed in the operator's manual are also safety hazards when maintenance and repair procedures are performed. - Page 6 Section 1 • Safety Rules August 2016 SAFETY RULES Personal Safety Workplace Safety Any person working on or around a machine must Be sure to keep sparks, fl ames and be aware of all known safety hazards. Personal lighted tobacco away from fl ammable safety and the continued safe operation of the and combustible materials like battery machine should be your top priority.
-
Page 7: Table Of Contents
August 2016 Table of Contents Introduction Important Information ....................ii Serial Number Legend ....................iii Section 1 Safety Rules General Safety Rules ....................v Section 2 Specifi cations Machine Specifi cations, AL4L .................2 - 1 Machine Specifi cations, AL5L .................2 - 1 Performance Specifi... - Page 8 August 2016 TABLE OF CONTENTS Section 3 Scheduled Maintenance Procedures, continued Perform Engine Maintenance ................3 - 6 Perform Coupler Maintenance ...............3 - 6 Test the Brakes (if equipped) .................3 - 7 Torque the Wheel Lug Nuts ................3 - 7 Check the Tires and Wheels ................3 - 8 Inspect the Cable and Cable Pulleys .............3 - 8 A-10 Perform Engine Maintenance ................3 - 9 A-11 Perform Lighting-battery Maintenance (if equipped) ........3 - 10...
- Page 9 August 2016 TABLE OF CONTENTS Section 3 Scheduled Maintenance Procedures, continued Checklist C Procedures Perform Engine Maintenance ..............3 - 21 Clean the Light Assemblies .................3 - 21 Grease the Wheel Bearings ................3 - 22 Inspect the Electric Brake Magnets (if equipped) ........3 - 23 Perform Engine Maintenance ..............3 - 24 Checklist D Procedures Perform Engine Maintenance ..............3 - 25...
- Page 10 August 2016 TABLE OF CONTENTS Section 5 Troubleshooting Introduction ......................5 - 1 Troubleshooting .......................5 - 2 Section 6 Schematics Introduction ......................6 - 1 Electrical Component and Wire Color Legend ............6 - 2 Trailer Lighting Wiring Diagram ................6 - 3 Electrical Schematic, AL5L ..................6 - 4 Electrical Schematic, AL4L ..................6 - 6 AL4L •...
-
Page 11: Machine Specifi Cations, Al4L
August 2016 Section 2 • Specifi cations Specifi cations REV B Machine Specifi cations, AL4L Machine Specifi cations, AL5L Total lighting wattage 4 x 270 watts Total lighting wattage 4 x 270 watts Batteries - Lighting Fuel capacities Type 6V DC Single tank 30 gallons 114 liters... -
Page 12: Performance Specifi Cations
Section 2 • Specifi cations August 2016 SPECIFICATIONS REV B Performance Specifi cations Marathon Generator, AL4L Tongue weight, maximum Generator speed @ full load 60 Hz 1800 rpm AL4L with batteries 110 lbs Temperature, ambient maximum 104°F 50 kg 40°C AL5L with no fuel 146 lbs Power... - Page 13 August 2016 Section 2 • Specifi cations REV B SPECIFICATIONS Lubrication system Kubota D1105-D3BG Engine Displacement 68.53 cu in Oil pressure 28 to 64 psi 1.123 liters 1.93 to 4.41 bar Number of cylinders Oil capacity (including fi lter) 5.4 quarts 5.1 liters Bore and stroke 3.07 x 3.09 inches...
- Page 14 Section 2 • Specifi cations August 2016 SPECIFICATIONS REV B 2 - 4 AL4L • AL5L Part No. 229171...
-
Page 15: Observe And Obey
Use only Terex approved replacement parts. Indicates a potentially hazardous NOTICE Machines that have been out of service for a situation which, if not avoided, period longer than 3 months must complete the may result in property damage. - Page 16 Section 3 • Scheduled Maintenance Procedures August 2016 SCHEDULED MAINTENANCE PROCEDURES REV B Maintenance Symbols Legend Maintenance Schedule Note: The following symbols have been used in There are fi ve types of maintenance inspections this manual to help communicate the intent of the that must be performed according to a schedule—...
-
Page 17: Maintenance Inspection Report
August 2016 Section 3 • Scheduled Maintenance Procedures Maintenance Inspection Report Model Checklist A - Rev A Y N R Checklist C - Rev A Y N R A-1 Manuals and decals C-1 Engine maintenance - Serial number A-2 Pre-operation inspect Kubota models A-3 Function tests C-2 Lights... -
Page 18: Checklist A Procedures
Result: The machine is equipped with all required decals, and all decals are legible and Terex specifi cations require that this procedure be in good condition. performed at the beginning of every work shift or daily, whichever comes fi rst. -
Page 19: Perform Pre-Operation Inspection
CHECKLIST A PROCEDURES Perform Pre-operation Inspection Perform Function Tests Terex specifi cations require that this procedure be Terex specifi cations require that this procedure be performed at the beginning of every work shift or performed at the beginning of every work shift or daily, whichever comes fi... -
Page 20: Perform Engine Maintenance
Kubota D1105-D3BG Models Coupler specifi cations require that this procedure be performed before towing. Terex specifi cations require that this procedure be performed at the beginning of every work shift or Maintaining the coupler in good condition is daily, whichever comes fi rst. -
Page 21: Test The Brakes (If Equipped)
August 2016 Section 3 • Scheduled Maintenance Procedures REV B CHECKLIST A PROCEDURES Test the Brakes (if equipped) Torque the Wheel Lug Nuts Axle specifi cations require that this procedure be Axle specifi cations require that this procedure be performed before towing. performed initially at 10, 25 and 50 miles of use, or after reinstallation of a tire. -
Page 22: Check The Tires And Wheels
Inspect the Cable and Cable Pulleys Axle specifi cations require that this procedure be performed weekly. Terex specifi cations require that this procedure be performed monthly. Maintaining the tires and wheels in good condition and the tires at the correct pressure is Detection of damage to the cable or pulleys is essential to safe operation and good performance. -
Page 23: Perform Engine Maintenance
August 2016 Section 3 • Scheduled Maintenance Procedures REV B CHECKLIST A PROCEDURES 5 Visually inspect the winch cable for the A-10 following: Perform Engine Maintenance - • nicks (partial strand cut through) Kubota D1105-D3BG Models • kinks in the cable (permanent bends) •... -
Page 24: Perform Lighting-Battery Maintenance (If Equipped)
Perform Engine Maintenance - Maintenance (if equipped) Kubota D1105-D3BG Models Terex specifi cations require that this procedure be Engine specifi cations require that this procedure performed for the batteries which supply power to be performed every 200 hours or quarterly, the lighting every 160 hours or monthly, whichever whichever comes fi... -
Page 25: Perform Generator Maintenance
August 2016 Section 3 • Scheduled Maintenance Procedures REV B CHECKLIST A PROCEDURES A-13 A-14 Perform Generator Maintenance- Adjust the Brakes (if equipped) Marathon Models Axle specifi cations require that this procedure be performed initially at 250 miles of use. Generator specifi... - Page 26 Section 3 • Scheduled Maintenance Procedures August 2016 CHECKLIST A PROCEDURES REV B 5 Repeatedly move the tip of the adjuster tool in an upwards direction to tighten the brakes until the wheel locks up and will no longer turn. Note: This centers the brake shoes on the brake drum, ensuring the shoes are positioned correctly.
-
Page 27: Checklist B Procedures
24 hours before performing this procedure to allow the battery cells to equalize. 5 Put on protective clothing and eye wear. Terex specifi cations requires that this procedure be 6 Remove the battery vent caps and check the performed every 250 hours or quarterly, whichever specifi... -
Page 28: Inspect The Electrical Wiring
• Add 0.004 to the reading of each cell for every 10° / 5.5° C above 80° F / 26.7° C. Terex specifi cations requires that this procedure be • Subtract 0.004 from the reading of each cell for performed every 250 hours or quarterly, whichever every 10°... -
Page 29: Inspect The Battery Watering System (If Equipped)
CHECKLIST B PROCEDURES Inspect the Battery Watering Torque the Wheel Lug Nuts System (if equipped) Terex specifi cations requires that this procedure be performed every 250 hours or quarterly, whichever Battery specifi cations requires that this procedure comes fi rst. -
Page 30: Perform Jack Maintenance
Perform Jack Maintenance Inspect and Lubricate the Winch Jack specifi cations require that this procedure be Terex specifi cations require that this procedure be performed every 250 hours or quarterly, whichever performed every 250 hours or quarterly, whichever comes fi rst. -
Page 31: Lubricate The T-Bolt
CHECKLIST B PROCEDURES Lubricate the T-bolt Inspect and Adjust the Brakes (if equipped) Terex specifi cations require that this procedure be performed every 250 hours or quarterly, whichever Axle specifi cations require that this procedure comes fi rst. be performed every 3000 miles or quarterly, whichever comes fi... - Page 32 Section 3 • Scheduled Maintenance Procedures August 2016 CHECKLIST B PROCEDURES REV B 7 Inspect the brake lining for wear (if equipped). 12 Fully loosen the castle nut. Do not rotate the hub. Result: The thickness of the brake lining is greater than inch / 1.6 mm.
-
Page 33: Inspect The Suspension
August 2016 Section 3 • Scheduled Maintenance Procedures REV B CHECKLIST B PROCEDURES 20 Securely install the small rubber plug into the brake backing plate. Inspect the Suspension 21 Check for wheel bearing wear by attempting to move wheel hub side to side, then up and down. -
Page 34: Perform Engine Maintenance
Section 3 • Scheduled Maintenance Procedures August 2016 CHECKLIST B PROCEDURES REV B B-10 Perform Engine Maintenance - Kubota D1105-D3BG Models Engine specifi cations require that this procedure be performed every 400 hours or semi-annually, whichever comes fi rst. • Replace oil fi lter •... -
Page 35: Checklist C Procedures
REV B Perform Engine Maintenance - Clean the Light Assemblies Kubota D1105-D3BG Models Terex specifi cations require that this procedure be performed every 500 hours or semi-annually, Engine specifi cations require that this procedure whichever comes fi rst. be performed every 500 hours or semi-annually, whichever comes fi... -
Page 36: Grease The Wheel Bearings
Section 3 • Scheduled Maintenance Procedures August 2016 CHECKLIST C PROCEDURES REV B the hub. Grease the Wheel Bearings 11 Install a new bearing grease seal into the hub by pressing it evenly into the hub until it is fl ush. Note: Always replace the bearing grease seal when removing the hub. -
Page 37: Inspect The Electric Brake Magnets (If Equipped)
August 2016 Section 3 • Scheduled Maintenance Procedures REV B CHECKLIST C PROCEDURES 3 With the engine running, press down on the brake pedal and use a multimeter to measure Inspect the Electric Brake the total amp draw of the brake circuit by Magnets (if equipped) positioning an amp clamp around the brake wire lead near the trailer connector. -
Page 38: Perform Engine Maintenance
Section 3 • Scheduled Maintenance Procedures August 2016 CHECKLIST C PROCEDURES REV B 12 Inspect the copper coil at the center of the magnet. Perform Engine Maintenance - Result: Replace the magnets and magnet Kubota D1105-D3BG Models springs on both sides of the axle if the exposed copper coil is visible in any way, and resurface the drake drums. -
Page 39: Checklist D Procedures
August 2016 Section 3 • Scheduled Maintenance Procedures Checklist D Procedures REV B Perform Engine Maintenance - Perform Coupler Maintenance Kubota D1105-D3BG Models Coupler specifi cations require that this procedure be performed annually. Engine specifi cations require that this procedure be performed every 1500 hours or bi-annually, Maintaining the coupler in good condition is whichever comes fi... -
Page 40: Checklist E Procedures
REV B Replace the Mast Lift Cable Perform Engine Maintenance - Kubota D1105-D3BG Models Terex specifi cations require that this procedure be performed every two years. Engine specifi cations require that this procedure be performed every 2000 hours or bi-annually, The mast cable is responsible for the raising whichever comes fi... -
Page 41: Perform Engine Maintenance
August 2016 Section 3 • Scheduled Maintenance Procedures REV B CHECKLIST E PROCEDURES Perform Engine Maintenance - Perform Generator Maintenance- Kubota D1105-D3BG Models Marathon Models Engine specifi cations require that this procedure Generator specifi cations require that this be performed every 3000 hours. procedure be performed every 10,000 hours. - Page 42 Section 3 • Scheduled Maintenance Procedures August 2016 This page intentionally left blank. 3 -LM AL4L • AL5L Part No. 229171...
- Page 43 Indicates a potentially hazardous WARNING available and ready for use. situation which, if not avoided, Use only Terex approved replacement parts. could result in death or serious injury. Read each procedure completely and adhere to the instructions. Attempting shortcuts may...
-
Page 44: Mast
Section 4 • Repair Procedures August 2016 Mast REV B 5 Remove the light head mount from the top of the mast. Mast 6 Remove the junction box from the top of the How to Remove the Mast mast. Lay the coil cord and junction box to the side. - Page 45 August 2016 Section 4 • Repair Procedures REV B MAST 8 Working at the top of the 4 inch / 10 cm and How to Disassemble the Mast 3 inch / 7.5 cm mast sections, use a drill to 1 Remove the mast assembly. See 1-1, How to remove the rivets securing the wear pads in Remove the Mast Assembly.
- Page 46 Section 4 • Repair Procedures August 2016 MAST REV B How to Replace the Mast Lift Cable See 1-1, How to Disassemble the Mast. Note: Refer to the illustration below for cable routing detail. 4 inch 3 inch 2 inch (10 cm) (7.5 cm) (5 cm)
-
Page 47: Winch
August 2016 Section 4 • Repair Procedures Winch REV B How to Disassemble the Winch Winch Note: For ease of disassembly, refer to the illustration on the next page. How to Remove the Winch 1 Remove the winch. See 2-1, How to Remove 1 Turn the handle of the mast pivot winch and the Winch. - Page 48 Section 4 • Repair Procedures August 2016 WINCH REV B How to Assemble the Winch 1 Clean and inspect the winch components before installing. 2 Install the pinion shaft bushings. Use a soft metal drift equal to the outside diameter of the bushing and tap with a rubber mallet until fully seated.
- Page 49 August 2016 Section 4 • Repair Procedures REV B WINCH 9 Install the two jam nuts onto the pinion shaft and tighten. Component damage hazard. Be NOTICE sure the pinion shaft is threaded all the way into the winch drum before tightening the two jam nuts.
-
Page 50: Generator
Section 4 • Repair Procedures August 2016 Generator REV B 5 Attach a lifting strap from an overhead crane to the top panel and doors assembly. Support the Generator assembly. Do not apply any lifting pressure. How to Remove the Generator Notice: Component damage hazard. - Page 51 August 2016 Section 4 • Repair Procedures REV B GENERATOR 9 Tag and disconnect all external wires from the How to Install the Generator generator. 1 Using a liquid threadlocker on the fastener 10 Use a lifting jack to support the rear of the threads, install the fasteners securing the engine.
- Page 52 Section 4 • Repair Procedures August 2016 GENERATOR REV B 3 Tag and disconnect the wires attached to the How to Check a capacitor(s). Generator Capacitor 4 With an ohmmeter set to its highest resistance High voltage. Exposure to DANGER scale, connect the ohmmeter leads to the electrical wires or electrical capacitor terminals and observe the reading on...
- Page 53 August 2016 Section 4 • Repair Procedures REV B GENERATOR 4 With a multimeter set to test diodes, connect How to Check a Generator Diode one multimeter lead to the diode terminal DANGER High voltage. Exposure to and the other multimeter lead to the 'Q' lead electrical wires or electrical terminal of the generator.
-
Page 54: Engine
Section 4 • Repair Procedures August 2016 Engine REV B Engine RPM How to Adjust the Engine RPM Note: Perform this procedure with the light switches in the off position and with no external AC power devices connected to the power outlets at the control box. -
Page 55: Troubleshooting
August 2016 Section 5 • Troubleshooting Troubleshooting Before Troubleshooting: Read, understand and obey the safety rules and operating instructions in the appropriate operator's manual on your machine. Be sure that all necessary tools and test equipment are available and ready for use. Observe and Obey: Be aware of the following hazards and follow generally accepted safe workshop practices. - Page 56 Section 5 • Troubleshooting August 2016 Troubleshooting REV B Problem Possible Cause Solution Boom will not rise to the Yoke pin is in place Remove yoke pin operating position Faulty cable or pulley Inspect and repair as needed Faulty winch Inspect and repair as needed Boom will not telescope Telescope lock pin closed...
- Page 57 August 2016 Section 5 • Troubleshooting REV B TROUBLESHOOTING Problem Possible Cause Solution Engine runs rough Air or contaminated fuel in fuel Inspect and repair as needed system Clogged or leaking fuel system Replace fuel lines, tighten all connections, inspect the fuel pickup tube and inspect the fuel fi...
- Page 58 Section 5 • Troubleshooting August 2016 TROUBLESHOOTING REV B Problem Possible Cause Solution Engine runs but battery voltage Faulty alternator Inspect and repair as needed is low Engine runs but lights will not Circuit breaker has tripped Reset circuit breaker operate Loose wiring connections Inspect and repair as needed...
- Page 59 August 2016 Section 5 • Troubleshooting REV B TROUBLESHOOTING Problem Possible Cause Solution Generator will not hold voltage Machine has been unused for Flash the rotor (loss of residual magnetism) signifi cant length of time Rotor shorting out when unit gets Inspect rotor windings for broken and/or burned wires Pinched leads...
- Page 60 Section 5 • Troubleshooting August 2016 This page intentionally left blank. 5 - 6 AL4L • AL5L Part No. 229171...
- Page 61 August 2016 Section 6 • Schematics Schematics About This Section There is one group of schematics in this section. Electrical Schematics Electrocution/burn hazard. WARNING Contact with electrically charged Observe and Obey: circuits could result in death or serious injury. Remove all rings, Troubleshooting and repair procedures shall be watches and other jewelry.
-
Page 62: A Electrical Component And Wire Color Legend
Section 6 • Schematics August 2016 Electrical Component and Wire Color Legends REV B ELECTRICAL SCHEMATIC LEGEND WIRE COLOR Item Description LEGEND Battery Item Description B1 = Engine start Blue B8 = Battery pack Black Button Brown BN3 = Glow plug Green Circuit breaker Orange... -
Page 63: Trailer Lighting Wiring Diagram
August 2016 Section 6 • Schematics Trailer Lighting Wiring Diagram REV B MARKER LIGHT MARKER LIGHT RIGHT FRONT RIGHT REAR ELECTRIC BRAKE L35F RIGHT L35R BRAKE LIGHT RIGHT LICENSE PLATE LIGHT BRAKE LIGHT LEFT L36F L36R ELECTRIC BRAKE LEFT MARKER LIGHT MARKER LIGHT LEFT FRONT LEFT REAR... -
Page 64: Electrical Schematic, Al5L
Section 6 • Schematics August 2016 Electrical Schematic, AL5L Page 1 of 2 REV B BREAKER, 30A CB11 CB12A CB12B CB12C CB12D BREAKER BREAKER BREAKER BREAKER U61A U61B U61C U61D 240V 120V 120V 120V 120V OUTLET 15A GFI 15A GFI 15A GFI 15A GFI RECEPTACLE... - Page 65 August 2016 Section 6 • Schematics Electrical Schematic, AL5L Page 2 of 2 REV B GENERATOR GENERATOR 120V GENERATOR 120V GENERATOR GROUND GENERATOR NEUTRAL EN12 JUNCTION BOX L30-1 L30-3 L30-2 L30-4 F9-30 BATTERY 30A FUSE N.C. WH/RD EMERGENCY STOP (OPTION) ALTERNATOR STARTER WH/BK...
-
Page 66: Electrical Schematic, Al4L
Section 6 • Schematics August 2016 Electrical Schematic, AL4L REV B EN12 JUNCTION BOX L30-3 L30-1 L30-2 L30-4 F9-50 BUSS BAR 50A FUSE SW45-1 LIGHT SW45-2 SWITCHES SW45-3 SW45-4 CR114 TIMER 48V DC HOUR METER (LIGHTS) BUSS BAR CONTROL BOX 120V PLUG BATTERY CHARGER...
Need help?
Do you have a question about the AL4L Series and is the answer not in the manual?
Questions and answers