Advertisement
Quick Links
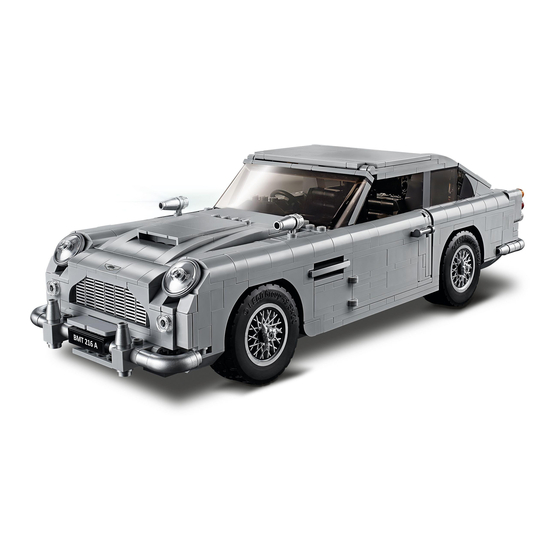
Light My Bricks: LEGO Aston Martin DB5 10262
Lighting Kit
The following page is the instructions for the
Light My Bricks LEGO Aston
Martin DB5 (10262) LED light kit.
If you run into any issues, please refer to the
online troubleshooting guide.
To ensure a trouble-free installation of your light kit, please read and follow each step carefully.
Please note: This page lists instructions for the LED light kit only.
Advertisement

Related Manuals for LIGHT MY BRICKS 10262


Summary of Contents for LIGHT MY BRICKS 10262
- Page 1 Light My Bricks: LEGO Aston Martin DB5 10262 Lighting Kit The following page is the instructions for the Light My Bricks LEGO Aston Martin DB5 (10262) LED light kit. If you run into any issues, please refer to the online troubleshooting guide.
- Page 3 CAUTION: Forcing LEGO® to connect over a cable can result in damaging the cable and light. Connecting cable connectors to Expansion Boards Take extra care when inserting connectors to ports of Expansion Boards. Connectors can be inserted only one way. With the expansion board facing up, look for the soldered “=” symbol on the left side of the port.
- Page 4 Incorrectly inserting the connector can can result in bent pins inside the port or possible overheating of the expansion board when connected. Connecting cable connectors to Strip Lights Take extra care when inserting connectors to ports on the Strip Lights. Connectors can be inserted only one way.
- Page 6 Disassemble the two sections as per below:...
- Page 9 4.) Take a White 15cm Bit Light and thread the connector end of the Bit Light through the front hole of the light grey brick. Thread the cable all the way through and then out the bottom of the brick. Secure the Bit Light in place by connecting a provided Trans Clear Round Plate 1×1 over the top.
- Page 10 Reconnect the brick back to the rest of the section it was connected to ensuring the cable is facing the inside (toward the right).
- Page 11 Repeat this process to install another White 15cm Bit Light to the other light section using another provided Trans Clear Round Plate 1×1, this time ensuring the cable is facing toward the left. 5.) Reconnect one of the light sections we just installed to the front of the carthen thread the cable back behind the wheel as shown below.
- Page 12 6.) Reconnect the two long sections (headlights) ensuring you first thread theBit Light cable behind the wheel as shown below:...
- Page 13 Pull the two light cables all the way out from underneath behind each front wheel. 7.) Take a 6-Port Expansion Board and connect all four Bit Light cables to it.
- Page 14 Take the Flat Battery Pack and insert 2x CR2032 Batteries to it. Connect the battery pack cable to the expansion board and turn the battery pack ON to verify all the lights installed so far are working OK.
- Page 15 8.) Disconnect the Flat Battery Pack and connect a 30cm Connecting Cable to the expansion board. Take the other end of the connecting cable and thread it through the following technic brick holes underneath the vehicle to lead to the back.
- Page 16 9.) To neaten up cabling underneath and to also ensure we have enough cableslack to easily flick the bottom head lights up and down, flick the headlights down and then from underneath the vehicle, pull the cables down and tuck the 6-port expansion board up into the following space.
- Page 17 Take the provided Plate 2×8 and then connect it over the top of the cables to prevent components and cabling from dropping down. Ensure the cables are laid in between studs before securing the plate down.
- Page 19 Thread the other end of the 30cm Connecting Cable (underneath the car) up the following space which leads to the back of the boot. Pull the cable all the way up from the other side and then push the rear wall of the boot back down to original position.
- Page 20 Connect the cable to the far end port of the 12-Port Expansion Board 11.) Lift up the passenger roof section then place a finger/thumb underneath the roof to allow you to disconnect the main roof section as shown below:...
- Page 21 12.) Turn the roof section over and then take a White 15cm Bit Light and place it over the following stud opening ensuring the LED is facing up. Secure the Bit Light in place by connecting a provided Trans Clear Plate with rounded bottom 2×2 over the top.
- Page 22 13.) Lift up the rear wall of the boot and then take the roof over the car. Threadthe Bit Light cable down the following section that leads to the inside of the boot. Pull the cable out from the rear of the boot before securely reconnecting the roof.
- Page 23 Connect the cable to the next available port on the 12-port expansion board then push down the rear wall of the boot.
- Page 24 Take the Flat Battery Pack and connect it to the expansion board. Turn ON the battery pack to test the interior light is working OK. 14.) We will now install the tail lights. First disconnect each tail light section asper below:...
- Page 25 Lift up the boot door and disconnect the following section from each side...
- Page 26 15.) Take the left tail light section and disconnect the trans coloured pieces fromit.
- Page 27 Take a White 15cm Bit Light and carefully bend the Bit Light component on a 90 degree angle as shown below: Place the Bit Light inside the tail light section and then secure it in place by reconnecting the trans orange round plate over the top. Ensure the cable is facing the inside of the car (right side) 16.) Take another White 15cm Bit Light and thread the connector side of the cable through the hole of the blue technic stud.
- Page 28 17.) Take another White 15cm Bit Light and with the cable facing inward, place it directly over the tan coloured technic stud. Secure it in place by connecting a provided Trans Clear Round Plate 1×1 over the top.
- Page 29 18.) Repeat previous steps to install another 3x White 15cm Bit Lights to the right tail light section using another provided Trans Red and Trans Clear round plate. Ensure you lay the cables toward the inside of the car (left side of the section) 19.) Take the left tail light section and reconnect it to the back of the car.
- Page 30 Connect the three cables to the 12-Port Expansion board. 20.) Repeat previous step to reconnect the right tail light section. Connect thethree bit light cables to the right ports on the expansion board...
- Page 32 21.) Neaten up excess cabling by grouping the three cables from each side andfolding/twisting them around each other as shown below. Neatly tuck everything in toward the rear of the boot.
- Page 33 22.) Take the Flat Battery Pack and connect the battery pack cable to a spareport on the expansion board. Turn the battery pack ON to verify all tail lights are working OK then neatly place the battery pack in the boot of the car before closing the boot door.
- Page 34 This finally completes installation of the Light My Bricks LEGO Aston Martin light kit. We hope you enjoy this product!
Need help?
Do you have a question about the 10262 and is the answer not in the manual?
Questions and answers