BLUE EMBER GRILLS FG50069 Assembly Manual And Use And Care
Outdoor
Hide thumbs
Also See for FG50069:
- Assembly manual and use and care (32 pages) ,
- Assembly manual and use and care (32 pages)
Table of Contents
Advertisement
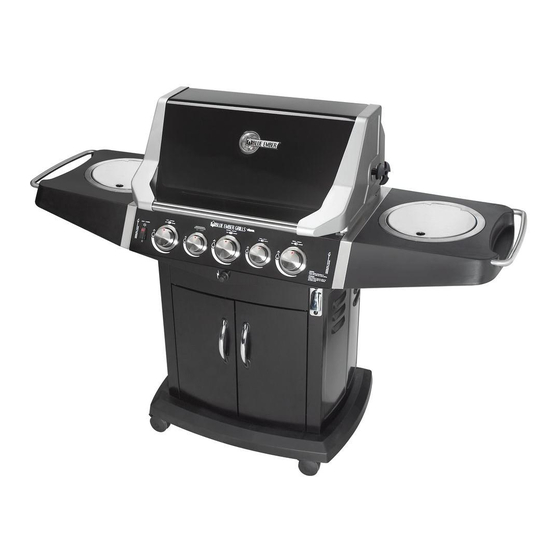
Outdoor Gas Barbeque/Grill
Assembly manual and Use and Care
MODEL
FG50069
&
(Propane Series
Natural Gas Series
MODEL MAY NOT BE EXACTLY AS SHOWN.
The models and illustrations shown throughout this manual
are intended for general visual demonstration purposes
only. The model you have purchased may not be exactly as
shown throughout these instructions.
!
WARNING!
Hazardous Fire or Explosion may result if
these instructions are ignored.
It is your responsibility to see that your new barbeque
is assembled, installed, maintained and cared for
properly. Failing to carefully follow the instructions in
this manual could result in serious bodily injury and/or
property damage. Any modifications to the barbecue is
dangerous and is not permitted
WARRANTY INFORMATION
Full Model No. from outer carton:_______________________
Date Purchased:_____________________________________
Serial Number
(
: _____________________________________
from rating plate)
SAVE THIS MANUAL FOR FUTURE REFERENCE
Installer must leave instructions with the consumer for future reference.
KEEP YOUR RECEIPT AS PROOF OF PURCHASE TO VALIDATE THE WARRANTY.
ATTACH YOUR RECEIPT TO THE INSIDE COVER OF THIS MANUAL FOR EASY
REFERENCE.
Manufactured for
Fiesta Barbeques A Division of Wolfedale Engineering Ltd
2 Walker Drive, Brampton, Ontario, L6T 5E1 Canada
THIS APPLIANCE IS FOR OUTDOOR USE ONLY
Made in China
)
IMPORTANT SAFETY INSTRUCTIONS
READ AND FOLLOW ALL SAFETY INSTRUCTIONS
Read and follow all instructions that are on the product or
provided with product.
SAVE THESE INSTRUCTIONS
important safety and operating instruction for power units.
IF YOU SMELL GAS:
1. Shut off gas supply to the appliance.
2. Extinguish any open flame.
3. Open lid.
4. If odour continues, keep away from the appliance and
.
1. Do not store or use gasoline or other flammable liquids or
2 An LP cylinder not connected for use shall not be stored
Some parts may contain sharp edges-especially if noted in
the manual! Wear protective gloves if necessary.
1-800-396-3838
DANGER!
!
immediately call your gas supplier or your fire
department.
WARNING!
!
vapours in the vicinity of this or any other appliance.
in the vicinity of this or any other appliance.
!
CAUTION!
- This manual contains
www.blueembergrills.com
SP1781-37
CA-011110
EN
Advertisement
Table of Contents

Related Manuals for BLUE EMBER GRILLS FG50069


Summary of Contents for BLUE EMBER GRILLS FG50069
- Page 1 Outdoor Gas Barbeque/Grill Assembly manual and Use and Care MODEL FG50069 & (Propane Series Natural Gas Series IMPORTANT SAFETY INSTRUCTIONS MODEL MAY NOT BE EXACTLY AS SHOWN. The models and illustrations shown throughout this manual READ AND FOLLOW ALL SAFETY INSTRUCTIONS...
-
Page 2: Table Of Contents
Combustion by-products produced when THANK YOU FOR using this product contain chemicals known to the state of California to cause cancer, birth PURCHASING THIS BARBEQUE WARNING defects, or other reproductive harm. We are dedicated to creating the ultimate barbeque Safety Symbols experience by providing you with all the right tools, The symbols and boxes shown below explain what each starting with this manual. -
Page 3: Getting Familiar With Your Barbeque
FOR YOUR OWN SAFETY: • Liquid propane gas is not natural gas. The conversion or attempted use of natural gas in a liquid propane unit or • Only use your barbeque OUTDOORS in a well-ventilated liquid propane gas in a natural gas unit is dangerous and area and shall not be used in a building garage or any other will void your warranty. -
Page 4: Caring For Your Equipment
CARING FOR YOUR EQUIPMENT INSTALLATION WHEN DECIDING WHERE TO PLACE YOUR APPLIANCE, FOLLOW THESE MINIMUM THE INSTALLATION OF THIS APPLIANCE MUST CONFORM WITH LOCAL CLEARANCE DISTANCES TO ADJACENT WARNING CODES OR, IN THE ABSENCE OF LOCAL CODES: COMBUSTIBLE MATERIALS: • In Canada: must conform to CSA-B149.2 Propane Installation code or CSA B149.1 Natural Gas Installation 1 m (36") Fig. -
Page 5: L.p. Gas Cylinder
into the Type 1 system. The connection of a #510 P.O.L. fitting will not L.P. GAS CYLINDER provide the flow control or temperature shut-off features built into the complete Type 1 system. Gas cylinders manufactured today have mechanisms to provide We strongly recommend use of a propane cylinder with Q.C.C.I and worry free barbequing year round: O.P.D. - Page 6 TRANSPORTATION AND STORAGE: ALTHOUGH IT IS SAFE WHEN USED PROPERLY, CARELESS HANDLING OF THE PROPANE GAS CYLINDER COULD RESULT IN WARNING FIRE, EXPLOSION, AND/OR SERIOUS INJURY. PROPANE GAS IS HEAVIER THAN AIR, AND WILL COLLECT IN LOW AREAS, INCREASING THE ABOVE RISKS. THEREFORE: •...
-
Page 7: Hose & Regulator
LP CYLINDER EXCHANGE • Never attempt to attach this grill to the Many retailers that sell grills offer you the option of replacing self-contained LP gas system of a your empty LP cylinder through an exchange service. Use only home, camper trailer or motor home. those reputable exchange companies that inspect, precision fill, •... -
Page 8: Cleaning & Maintenance
• Follow the ‘LEAK TEST’ instructions before lighting your NATURAL GAS MODELS: barbeque for the first time, every time a propane cylinder is • Never use with propane, or any other gases. refilled, if any gas component is changed, if the regulator flow- •... -
Page 9: Perform A Leak Test
CLEANING & MAINTENANCE To keep your barbeque working at its peak efficiency as well as contribute HOW TO DO THE TESTING: to the safe operation of this unit, perform all of the operations below at 1. With the barbeque console control knobs in the ‘OFF’ position, least once a year - preferably at the start of each cooking season. -
Page 10: Cleaning Grease Pan
PROPER INSTALLATION OF FAILURE TO FOLLOW ALL INSTRUCTIONS MAY RESULT IN A HAZARDOUS FIRE OR THE GREASE PAN EXPLOSION CAUSING SERIOUS BODILY WARNING SECURING THE GREASE PAN INJURY AND/OR PROPERTY DAMAGE 1 - Look at the back of your grill. With the grease pan removed, you CLEANING GREASE PAN should become familiar with the rail and locking system. -
Page 11: Cleaning Other Parts Of Your Appliance
CASTING INTERIOR AND WARMING RACK: CLEANING OTHER PARTS OF At least once a year remove all components from inside your barbeque. YOUR APPLIANCE Loosen any cooking residue with a scraping tool for large particles and a brass barbeque brush for smaller particles. Scrub with hot water and a General Grill Cleaning: Do not mistake brown or black accumulation of strong detergent, then rinse thoroughly or spray barbeque degreaser grease and smoke for paint. -
Page 12: Using Your Appliance Correctly
USING YOUR APPLIANCE CORRECTLY BEFORE USING YOUR APPLIANCE READ ALL INSTRUCTIONS IN THIS MANUAL Fig. 9A WARNING: ENSURE SIDE BURNER LID IS UP BEFORE LIGHTING SIDE BURNER. LEFT BURNER ROTISSERIE BURNER CENTER BURNER IGNITOR MODEL MAY NOT BE EXACTLY AS SHOWN. SIDE BURNER PARTS OPTIONAL (READ WARNING) -
Page 13: Lighting
LIGHTING IF LIGHTING MAIN BURNERS ONLY, ENSURE SIDE BURNER KNOB Prior to lighting your barbeque, visually check all hoses before each CAUTION IS IN THE OFF POSITION. use for nicks, cracking, abrasions or cuts. If the hose is found to be damaged in any way, DO NOT USE YOUR BARBEQUE. - Page 14 SIDE BURNER (OPTIONAL) USING THE IGNITOR 1. Read instructions before lighting. 2. Raise side burner lid. 3. Push in and turn the side burner control knob to 'HIGH'. 4. Depress ignitor. Repeat if necessary (Figure 12A). 5. If burner does not light immediately (within five seconds), turn the burner control knob off, and wait 5 minutes to clear the gas.
- Page 15 Fig. 12D REAR ROTISSERIE BURNER (Optional) USING THE IGNITOR 1. Read instructions before lighting. 2. Open the lid before lighting. 3. Push in and turn the rotisserie control knob to 'HIGH'. 4. Depress ignitor. Repeat if necessary (see Fig 12D). 5.
-
Page 16: Relighting
POSITIONING COOKING GRIDS Fig. 18 Cooking grids can be put into 3 different positions as shown in Figure 18. of time without any food. To "break in" your barbeque light the RELIGHTING barbeque following the lighting instructions as outlined on the console or in this manual. - Page 17 IMPORTANT SAFEGUARDS READ AND FOLLOW ALL SAFETY INSTRUCTIONS Read and follow all instructions that are on the product or provided with product. The following basic safety precautions apply when using electrical appliances: • Read all instructions. • Do not touch surfaces that may be hot. Use handles or knobs provided. •...
-
Page 18: Cooking Techniques
COOKING TECHNIQUES DIRECT COOKING Direct Cooking is also known as grilling and involves cooking food PREHEATING THE BARBEQUE directly over the flame, such as searing a steak (see below). It should take under 25 minutes and food should be turned once The cooking system and grids require heating prior to adding food. - Page 19 WARMING RACKS A warming rack may be included with your barbeque and provides you with additional cooking space away from direct heat. This is useful when cooking delicate items such as fish, boneless chicken breasts or vegetables. Warming racks are also a great place to keep food warm that is already done so you can serve your entire meal at the same time.
-
Page 20: Troubleshooting Guide
TROUBLESHOOTING GUIDE PROBLEM POSSIBLE CAUSES CORRECTION Burner Will Not Light (match or ignitor) • Blocked venturi tubes • Clean out blockage (Page 8) or Burners Not Hot Enough • Cylinder or gas supply valve turned off • Open cylinder or gas supply valve •... -
Page 21: Warranty Information
LIMITED WARRANTY 1. LIMITED WARRANTY COVERAGE 5 YEAR LIMITED WARRANTY - STAINLESS STEEL BURNERS 1 YEAR LIMITED WARRANTY - ALL OTHER PARTS Blue Ember gas barbeque owners have the benefit of a limited warranty from the date of purchase against any and all defects in materials and workmanship during the period of warranty coverage specified. - Page 22 BASE ASSEMBLY FIG.1 NOTE: Assembled Some grill parts shown in the assembly steps View may differ slightly in appearance from those on your particular grill model. However, the method of assembly remains the same. ADJUSTABLE WRENCH TOOLS REQUIRED: • Extra Common Nuts & Bolts are supplied.
- Page 23 CASTER ASSEMBLY FIG.2 Assembled • Attach casters to bottom of base as shown. View...
- Page 24 BASE CABINET ASSEMBLY • Attach Cabinet side panels to base as shown. Assembled NOTE: Right panel has two holes located on View the top right corner for bottle opener. • Attach bottle opener to right panel as shown. SP53-16 (2) 1/4-20 NUT HEX HD FLANGED Right hand Panel...
- Page 25 REAR PANEL ASSEMBLY • Attach rear panel by sliding notches over screws on side panels as shown. Tighten screws. • Install Electrical box with Screws and Nuts as shown. Ensure Electrical box is installed so outlet covers open upwards. • Install Transformer box into rear panel holes as shown. Assembled View INSTALL SO OUTLET...
- Page 26 TRIM PANEL & HEAT SHIELD ASSEMBLY • Attach top trim panel as shown. Assembled Tighten screws. View • Attach heat shield as shown. Tighten screws SP61-21 (7) 10-B X .375 SCREW SELF TAP SP53-16 (4) 1/4-20 NUT HEX HD FLANGED SP83-18 (4) 1/4"-20X.50"...
- Page 27 FRONT DOOR ASSEMBLY Assembled View • Install door handles as shown. • Slide top pins on doors into upper holes as shown. • A) Drop locking pins through lower holes in door into base assembly. #10-24 NUT HEX HD • B) Once in position rotate pins into FLANGED HANDLE locked position as shown.
- Page 28 CASTING ASSEMBLY REGARDING IMPROPER ASSEMBLY OF HOSE ON PROPANE AND NATURAL GAS FG/FGQ/FGF500 MODELS DURING THE ASSEMBLY PROCESS OF THE BASE ASSEMBLY STEP, THE CUSTOMER NEEDS TO ENSURE THAT THE HOSE IS UNTIED FROM BURNER BEFORE FINAL ASSEMBLY. CUSTOMER SHOULD RELEASE THE TIE AND PASS THE HOSE THROUGH THE GAP BETWEEN HEAT SHIELD WARNING AND FRONT PANEL BEFORE ASSEMBLING THE FIREBOX (BASE) TO THE CART (CABINET).
- Page 29 CASTING ASSEMBLY .• Using two people, lower the top cover assembly FAILURE TO ENSURE ANY OF THESE WARNINGS carefully onto base and attach as shown. MAY RESULT IN HAZARDOUS FIRE OR • Push wiring harness with jack and hose assembly EXPLOSION CAUSING SERIOUS BODILY INJURY WARNING through front of cart assembly ensuring it goes...
- Page 30 CASTING ASSEMBLY CONTINUED FIG.8 FOR NATURAL GAS MODELS • Secure base casting as shown. Important For Natural Gas models, direct the hose through the hole in the base as shown. DANGER: DO NOT PASS HOSE ABOVE SHIELD HOSE MUST NOT TOUCH ANY PART OF THE BASE WARNING: DANGER...
- Page 31 GRID ASSEMBLY FIG.9 Step 2 Step 1 Step 1 • Rest the ends of heat plates into notches inside casting as shown. Step 2 • Install 3 grids as shown. Step 3 • Install warming rack into supports as shown. Step 4 •...
- Page 32 SIDE SHELF ASSEMBLY Assembled View FIG.10 • Position side shelves onto shelf brackets as shown (A). Lift shelf and drop into locking position (B). Insert wingbolt into middle hole in bracket to lock shelf in position (C). • Position ice/wine bucket and condiment tray as shown SP87-18 1/4 20 X .5...
- Page 33 SIDE BURNER HOSE ASSEMBLY • Position hose into end of side burner venturi tube until groves line up (A). Snap clip into the groove on side burner tube to secure parts (B). • Check hose to ensure it is securely positioned in tube end. •...
- Page 34 SECURING THE GREASE PAN ASSEMBLY FIG.12 SP43-21 .375 self tap screw Grease Pan Bracket Grease Tray • Assemble grease pan with brackets as shown using 10-b x .375 screw self tap screw (if not factory installed). Step 1 Step 3 Step 1-Look at the back of your grill.
- Page 35 SECURING THE GREASE PAN ASSEMBLY CORRECT INSTALLATION Push the grease pan forward as far as possible. When properly installed, the edge of the grease pan should not extend no more than one inch (2.5 cm) beyond the rear panel of the BBQ/grill box. The tabs of the grease pan will lock in place, securing it. INCORRECT INSTALLATION This picture shows a Grease Pan that is not properly installed.
- Page 36 PROVIDING POWER TO YOUR BARBEQUE Step 1 Plug the factory supplied, • three prong plug for the transformer into the receptacle box at the back of the unit. Transformer Cord Light Switch Wires Transformer Step 2 IMPORTANT: Assemble light switch wires to Internal Transformer box as shown.
- Page 37 TANK ASSEMBLY FOR PROPANE MODELS PLEASE FOLLOW THE FOLLOWING STEPS FOR NG MODELS PLEASE FOLLOW THE FOLLOWING STEPS BEFORE PROCEEDING WITH THE FOLLOWING STEPS, ENSURE YOU HAVE READ-NATURAL GAS WARNING SECTIONS OF THE USE AND CARE INSTRUCTIONS. Important For NG models, direct the hose through the hole in the base as shown.
- Page 38 ADDITIONAL SAFTY PRECAUTIONS TO PREFORM When using your grill, it is best to: 1 - Place the propane tank into the tank pocket as shown, with the propane tank valve facing towards the FRONT of the cart. 2 - Attach hose and regulator as shown, facing towards the FRONT of the cart at all times during operation.
- Page 39 1. The Part Number SECTION 02 FIRE BOX ASSEMBLY 2. The Model Description 2.01A SP461-42 FG50069 LP FIRE BOX - DOMESTIC 5 3. The Serial Number VALVE NO LIGHT 2.01B SP462-42 FG50069 NG FIRE BOX - DOMESTIC 5 4. The Part Description VALVE NO LIGHT 5.
- Page 40 Gas Barbeque Grill: ITEM QTY. PART NO. DESCRIPTION SECTION 06 LOOSE COMPONENTS AND BAG PACKS Model FG50069 6.01 SP182-24 500 MASTER BAG 6.05 SP56-45 AA BATTERY 6.06 SP164A-3 CAST IRON COOK GRATE (FG MODELS) HOW TO ORDER 6.07 SP94A-9 SMART BAR SPARE PARTS: 6.08...
- Page 41 BEFORE OPERATING THE BARBECUE Grilling Safety Checklist Read and understand owner’s manual. Follow the “Important Safeguards” found in the Owner’s Manual. damaged hose. The grease pan and grease tray should be checked, cleaned and replaced regularly to prevent touch WARNING FAILURE TO ENSURE THE ABOVE MAY RESULT IN A HAZARDOUS FIRE OR EXPLOSION CAUSING SERIOUS BODILY INJURY AND/OR PROPERTY DAMAGE AND INVALIDATES WARRANTY...
Need help?
Do you have a question about the FG50069 and is the answer not in the manual?
Questions and answers