
Related Manuals for La Crosse CA80765


Summary of Contents for La Crosse CA80765
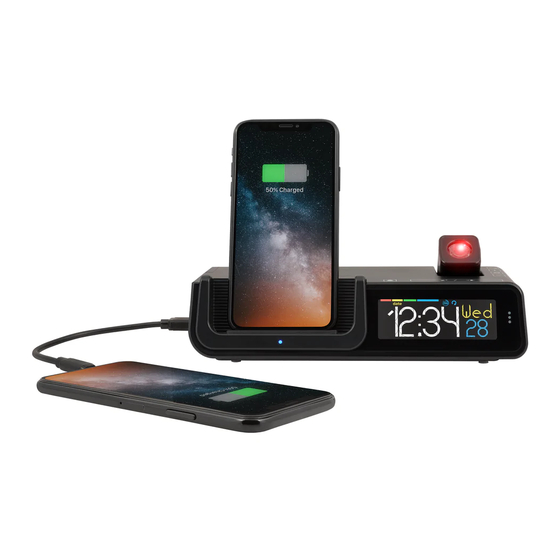
- Page 1 4-in-1 projection alarm clock SET UP GUIDE MODEL NUMBER CA80765...
-
Page 2: Table Of Contents
Table of Contents BASICS ALARM PROJECTION Initial Setup Setting the Alarm Projection Brightness Buttons Activate/Deactivate Adjusting the Projection LCD Display Snooze Duration Projection Image Options Ports CHARGING MISC. LCD Display Brightness Auto-Dim Settings Charging Your Devices Cable Organizer Display Modes Phone Compatibility Smart Watch Stand Display Mode Options... -
Page 3: Basics
BASICS Initial Setup Power Up Insert the 5V Power Adapter into an outlet, and then plug it into the Power Jack on the bottom of the alarm clock. A greeting will appear on the LCD display and then your clock will move into the Settings Menu. -
Page 4: Buttons
BASICS Buttons Top View 1. DISPLAY OPTION ( ) 2. ALARM ( 3. SNOOZE/BACKLIGHT ( Tap to select LCD display Tap to activate/deactivate or Tap to snooze sounding alarm, mode options hold to enter alarm settings adjust backlight, or hold for Auto-Dim Settings 4. -
Page 5: Lcd Display
BASICS LCD Display Auto-Dim Indicator Display Mode Cycle Mode Indicator Icon 1.88 cm Display Mode Time Digits Section Alarm Icon Ports 1A USB Charging Port Power Jack Left View Bottom View Factory Reset Note: To enter the Settings Menu after the initial setup, hold the button on the top of the clock. -
Page 6: Lcd Display Brightness
BASICS LCD Display Brightness Adjusting the LCD Display Brightness Tap the button on the top of the clock to adjust the backlight intensity. There are 4 brightness levels, plus an off option. Auto-Dim Settings Program your LCD display to automatically dim during preselected times. Hold the button to enter the Auto-Dim Settings Menu. -
Page 7: Display Modes
BASICS Display Modes Selecting the Display Mode Tap the button on the front of the clock to select a display mode or automatically cycle through all of the available options. The Color Bars above the time on the LCD icon will appear on the LCD when the indicate the current display mode. -
Page 8: Alarm
ALARM Time Alarm Setting the Alarm Hold the button on the top of the clock to enter the Alarm Settings Menu. Use the buttons to set your desired time. Tap to confirm. Next, use the buttons to set your desired snooze duration (5 to 120 minutes). -
Page 9: Snooze Duration
ALARM Time Alarm Crescendo Alarm The alarm will increase in volume over a 2-minute period. After the 2-minute time frame, the alarm will stop if not snoozed or turned off. Example: 7:15 7:16 7:17 Based on 7:15am alarm time Snooze Duration Countdown When your alarm sounds, tap the button to snooze your alarm for your preselected snooze duration. -
Page 10: Projection Brightness
PROJECTION Adjusting the Projection Image Tap the button to adjust the The Projection Arm tilts forwards and projection’s brightness (HI/LOW/OFF). backwards to adjust the location of the projection image. Use the Rotation Wheel on the top of the Projection Arm to rotate viewing angle of the image. -
Page 11: Projection Image Options
PROJECTION Projection Options Projection Image Options You can choose to see the (1) time, (2) indoor temperature and humidity, or (3) cycle through both options (indicated by the icon on the LCD). Current Time Selecting Your Projection Image Hold the button on the top of the clock to toggle between the projection options. -
Page 12: Charging
CHARGING 5W Wireless Charger Charging your Qi-Enabled Phone • Place your Qi-Enabled phone on the platform. Your phone should be centered and should sit flush to the charging cradle. • The blue Charging Indicator Light below the platform will be solid when your phone is successfully charging. -
Page 13: Usb Charging Port
CHARGING USB Charging Port There is a 1 Amp USB Charging Port located on the left side of your alarm clock. • Connect your external device’s USB charging cable (not included) into the USB Charging Port. • Charging times may vary. •... -
Page 14: Smart Watch Stand
MISC. Smart Watch Stand The removable Smart Watch Stand is engineered to fit a variety of smart watch brands. Its open design allows for easy access to your device’s unique charging port location, for use with the included USB Charging Port. How to attach the Smart Watch Stand The open design fits the Apple... -
Page 15: Specifications
APPENDIX Specifications 4.50 cm. (1.77-in.) 21.31 cm. (8.39-in.) 9.53 cm. 1.00 cm. (3.75-in.) (0.39-in.) Power Requirements: 5.0V Power Cord Indoor Temperature Range: (Included) HX13-0502500-AU-001 0°C to 50°C (32°F to 122°F) Projection Brightness: 2 Intensity Levels + OFF Indoor Humidity Range: 10% to 99% RH LCD Brightness: 4 Intensity Levels + OFF... -
Page 16: Warranty
APPENDIX Warranty Springfield warrants this instrument to be free from defects in workmanship and material for a period of 1 year from date of purchase, and will repair or replace it at our option, without charge. For warranty issues please contact Springfield Instruments, Inc.: Phone: 1-844-687-4040 •... - Page 17 APPENDIX Canada Statement Trademarks and Warning La Crosse Technology is not responsible for any damage or This device contains licence-exempt transmitter(s)/ loss of performance with iPhone, iPod, or iPad while being receiver(s) that comply with Innovation, Science used in associated with this accessory.
Need help?
Do you have a question about the CA80765 and is the answer not in the manual?
Questions and answers