
Related Manuals for LS LSLV-iV5 Series


Summary of Contents for LS LSLV-iV5 Series
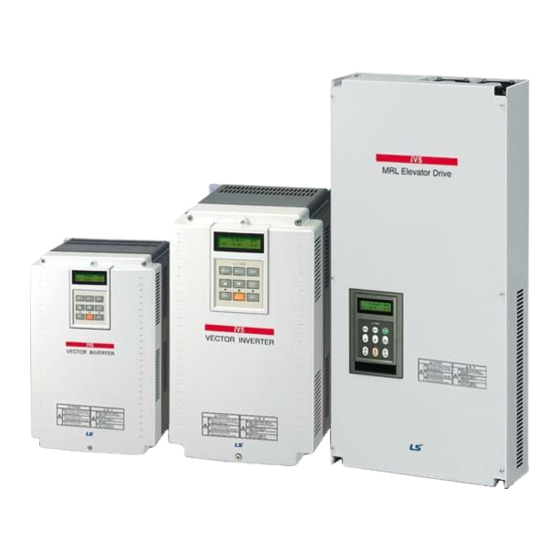
- Page 1 LS ELECTRIC strives to maximize your profits in gratitude for choosing us as your partner. AC Variable Speed Drive LSLV-iV5 series 2.2-37kW [200V] 2.2-500kW [400V]...
-
Page 2: Safety Instructions
Safety Instructions Safety Instructions To prevent injury and property damage, follow these instructions. Incor- rect operation due to ignoring instructions will cause harm or damage. The seriousness of which is indicated by the following symbols. Symbol Meaning This symbol indicates the possibility of death or serious Warning injury. - Page 3 Safety Instructions WARNING after disconnecting the input power and after checking the DC link voltage is discharged with a meter (below DC 30V). Otherwise, you may get an electric shock. Operate the switches with dry hands. Otherwise, you may get an electric shock. ...
-
Page 4: Caution For Use
Safety Instructions Caution for Use Transportation and Installation Be sure to carry inverter in a proper way suitable for its weight, or it may result in damage to inverter. Be sure to use heat-treated wooden crate when you adopt wooden packaging for the product. -
Page 5: How To Use
Safety Instructions Wiring Caution A professional installer should have done the wiring and checking. Do wiring after installing the inverter body. Do not connect phase-leading capacitors, surge filter, radio noise filter to the output of inverter. ... - Page 6 Safety Instructions Noise filter should be used for the minimization of troubles by electro-magnetic noise. Electronic equipments close to the inverter should be protected against the damage caused by troubles. Be sure to install the AC reactor at the input of inverter in case of input voltage un- balance.
-
Page 7: General Instruction
Safety Instructions General Instruction The drawing in this user manual is represented the details of the inner inverter, so, the drawing is described without cover part and circuit breaker. But, cover and cir- cuit breaker should be mounted before the operation following to the instruction of user manual. -
Page 8: Chapter 1 - Introduction
1. Introduction Chapter 1 - Introduction This instruction manual is designed for LS STARVERT-iV5 series Vector Control Inverters, which have excellent characteristics in speed and torque control with pulse encoder mounted on the shaft of 3 phase induction motor, and covers installation, maintenance, wiring and operation for these inverters. -
Page 9: Encoder Type
Inspected by [].[].[][][] 1.2.2 Inverter model name iV5 – 2 [][][][] DB (MD) (380V) (ENC) LS STARVERT Series Max. Applicable Motor 022 : 2.2kW ~ 5000 : 500kW iV5 Series Input Voltage 2 : 200V Class (200 ~ 230V) , 4 : 400V Class (380 ~ 480V) ... -
Page 10: Chapter 2 - Specification
2. Specification Chapter 2 - Specification 2.1 Standard Specification 2.1.1 200V Class (AC power input type) SV[][][]iV5-2(DB) 037 055 075 110 150 185 220 300 370 [HP] Max. applicable Note1) motor output [kW] 18.5 Note2) Capacity [kVA] 9.1 12.2 17.5 22.5 28.2 33.1 Rated current [A] 122 146 Speed... - Page 11 2. Specification SV[][][][]iV5-4 900 1100 1320 1600 2200 2800 3150 3750 5000 Inverter weight [kg(lbs)] (139) (150) (216) (216) (269) (269) (386) (536) (838) (838) (1050) Note4) Voltage 3 380 ~ 480V (-10% ~ +10%) Input Frequency 50 ~ 60 Hz (5%) ※...
-
Page 12: Common Specification
2. Specification Note) 1. It represents the output capacity of maximum applicable motor in case 4-pole motor is used. (220V is based on 220V and 400V is based on 440V.) 2. Rated capacity (=√3*V*I) is calculated based on 220V for 200V class, 440V for 400V class. - Page 13 2. Specification Items Detailed Specification 3 channels (AI1, AI2, AI3*, (AI4,AI5: Extended I/O)) -1010V, 1010V, 010V, 100V,020mA, 200mA, Motor NTC (*Only AI3(AI5:Extended I/O) Analog input selectable) Selectable among 17 different user-defined functions AI3(AI5): Motor NTC only available with Higen motors ...
-
Page 14: Chapter 3 - Installation And Wiring
3. Installation and Wiring Chapter 3 – Installation and Wiring This chapter describes general items for the installation and wiring of an inverter and includes instruction for wiring to power terminal and control one and caution in case of wiring, and also explains the function of each terminal for both power and control. - Page 15 3. Installation and Wiring 3.1 Caution on Installation 3.1.1 Do not install the inverter in a location where excessive vibration is present. Be cautious when installing on presses or moving equipment. 3.1.2 Caution on ambient temperature Ambient temperature greatly affects inverter lifetime, therefore be sure to keep the ambient temperature of installation location at –10 to 40℃.
- Page 16 3. Installation and Wiring 3.1.6 Secure the installation space enough to protect the inverter against the overheating. Min. 10 cm SV-iV5 Min. 5 cm Min. 5cm Min. 10 cm At least the room that 30 cm from upper and lower of inverter and 20 cm from left and right of inverter is required for installing more than 30 kW products.
-
Page 17: Basic Wiring
3. Installation and Wiring 3.2 Basic Wiring Do the wiring of inverter and then check the wiring of main circuit and control circuit before starting it. Read through the checking list as below. Checking List Inverter, Peripherals, Option card Is the inverter supplied in the form as ordered? ... - Page 18 3. Installation and Wiring Checking List Control Circuit Wiring Is a twisted pair shielded wire adopted for the inverter control circuit wiring Is the covered wire with shield connected with the ground terminal In the event it is operated in 3-Wire sequence, is the control circuit wiring done after the parameter of multi-function contact input terminal is modified ...
- Page 19 3. Installation and Wiring AC Power Input Type SV022, 037, 055, 075, 110, 150, 185, 220iV5-2(DB) SV022, 037, 055, 075, 110, 150, 185, 220iV5-4(DB) Main Power Circuit DB Resistor (optional ) MCCB 3P AC input (220/440V) (50/ 60Hz) STARVERT - iV5 Control Circuit Encoder Note 1)
- Page 20 3. Installation and Wiring AC Power Input Type SV300, 370iV5-2 SV300, 370, 450, 550, 750, 900, 1100, 1320, 1600, 2200, 2800, 3150, 3750iV5-4 Note: AC Fans for 300~2200iV5-4 series should be changed the input power source of transformer 1 tap corresponding with that of inverter.
- Page 21 3. Installation and Wiring AC Power Input Type SV5000iV5-4 Note: AC220V (50/60 Hz) must be supplied to FAN1 and FAN2 because 500kW-4 type of inverter has an AC fan of 220V internally. If not use AC220V power, the inverter is not operated because of ‘FAN PWR’ until the trip is released after inputting of AC220V.
- Page 22 3. Installation and Wiring Note 2) The power of 220 VAC is muset be supplied bacause it is for the operation of internal cooling fan. Use insulated transformer to separate from main power supply. (Transformer capacity: above 500VA recommended) ■ DC Power Input Type SV055, 075, 110, 150, 185, 220, 2800, 3150, 3700iV5-4DC Main Power Circuit P (+)
- Page 23 3. Installation and Wiring ■ DC Power Input Type SV300, 370, 450, 550, 750, 900, 1100, 1320, 1600, 2200, 5000iV5-4DC Warning) It must be energized AC220V (50/60Hz) to terminal of FAN1 and FAN2 because 30 ~ 500 kW-4DC series have a cooling fan for AC power drive and MC. If not, Trip (30~160kW: “FAN/MC PWR”, 220kW: “FAN PWR”) will be occurred.
- Page 24 3. Installation and Wiring Note 2) The power of 220VAC is must be supplied for the operation of internal cooling fan and/or Magnetic contactor. Use insulated transformer to separate from main power supply. (30 ~ 160 kW: for the operation of FAN and MC, 220/500kW: for the operation of FAN) (Transformer capacity: above 30~75kW(100VA), 90~160kW(150VA), 220/500kW(500VA) recommended )
- Page 25 3. Installation and Wiring SV900, 1100, 1320, 1600, 2200iV5-4 P1(+) P2(+) N(-) SV2800, 3150, 3750, 5000 iV5-4 R(L1) S(L2) T(L3) P1(+) P2(+) N(-) (2) DC power input type SV055, 075iV5-4DC N(-) P(+) SV110, 150, 185, 220iV5-4DC P(+) N(-) ...
- Page 26 3. Installation and Wiring 3.3.2 Power circuit terminal description (1) AC power input type Name Function Description 3 Phase input Connected to 3 phase input power supply R, S, T power supply U, V, W Inverter Output Connected to 3 phase induction motor Grounding Used for inverter frame earth B1, B2...
- Page 27 3. Installation and Wiring ② Never connect the phase advancing capacitor to the inverter output. If already installed, remove the phase advancing capacitor clearly. Phase advancing SV-iV5 capacitor ③ Cable between inverter output and motor should be less than 30m long. If cable gets long, surge voltage appears across motor terminals depending on the cable parameters.
- Page 28 3. Installation and Wiring 3.3.4 Main power circuit wire sizes and grounding wire size ① Main Power Circuit Wire Sizes If wiring for the main power terminal is not performed properly, it may cause severe damage to inverter or lethal injury to inverter operator. (Standards of IEC 60227-3 or UL508C) Wire Size Inverter Capacity...
- Page 29 3. Installation and Wiring Wire Size Inverter Capacity AWG or kcmil R, S, T U, V, W R, S, T U, V, W 160 kW 220 kW 280 kW 2 X 240 2 X 240 2 X 500 2 X 500 315 kW 2 X 240 2 X 240...
- Page 30 3. Installation and Wiring 3.3.5 Wiring DC Reactor (Option) (AC power input: 30kW and higher) P1(+) P2(+) DC Reactor 3.3.6 Wiring DB Unit (Option) (AC power input: 30kW and higher) DB UNIT P1(+)P2(+)N(-) P/B1 DB resistor 3.3.7 Wiring guide when using both of DC reactor (Option) and DB Unit(option) (AC power input: 30kW and higher) DB UNIT P1 P2 N...
- Page 31 3. Installation and Wiring 3.4 Control Board and Terminal 3.4.1 Control circuit terminal arrangement SV022 ~ 5000iV5 3-18...
-
Page 32: Voltage Input
3. Installation and Wiring 3.4.2 Control circuit terminal function description Item Name Function Description Forward Run/Stop Forward/Reverse RUN Command is ON Command when closed to CM in NPN input mode. Motor stops when FX/RX is ON or OFF at the Reverse Run/Stop same time. - Page 33 3. Installation and Wiring Item Name Function Description Motor NTC is selectable function. Jumper setting in Voltage Input: Jumper set as default) AI1, AI2: Jumper set on left side, AI3: Switch set on left(“V”) side Jumper setting in Current Input ...
- Page 34 3. Installation and Wiring Item Name Function Description Encoder signal output : A-phase Output Common Encoder A, B phase signal output – Open Note1) Collector Type Encoder signal output : B-phase Output Common -10V 10V, 10 -10V, 0 10V, 10 0V output ...
- Page 35 Wiring must be A-phase input considered with input circuit . Because A-phase encoder output is open collector type. The figure is shown the B-phase input wiring when inverter is connected with High- B-phase speed counter of LS ELECTRIC PLC. 3-22...
- Page 36 3. Installation and Wiring Additional Functions of Extended I/O(EXTN _ I/O) Control board terminal Item Name Function Description Extended I/O(EXTN_I/O) board is added analog input AI4, AI5. Voltage Input How to use terminal Pin : Current Input - Voltage Input : AI1, AI2,AI3, AI4, AI5 - Current Input : AI1, AI2, AI3, AI4 - Motro NTC input : AI5...
- Page 37 3. Installation and Wiring 3.4.3 Wiring the control circuit terminal ① Shield wire or vinyl insulated wire are highly recommended to be used for the control circuit terminal. ② Be sure to use twisted shield wire if wiring distance gets too long. ③...
- Page 38 3. Installation and Wiring 3.4.5 Encodder wiring and switch setting method (+15V Complementary / Open Collector Type) +15V Open Colletcor (OC) Shielded Wire 3.4.6 Encoder wiring and switch setting method (+5V Line Drive) ※ Jumper set as default +5V Line Drive (LD) Shielded Wire CAUTION ...
- Page 39 3. Installation and Wiring 3.4.7 Analog input jumper setting (Voltage/Current/Motor NTC Input) and PNP/NPN input mode switch setting ※ Jumper set as default : Voltage Input (Left) AI1, AI2 Voltage input : Left Current input : Right AI3 Switch Voltage input : Left Motor NTC input : Right PNP : ※...
- Page 40 3. Installation and Wiring CAUTION NEVER change the jumper setting during inverter run. Otherwise, it may cause inverter trip, adversely affecting the entire system. Motor NTC input for Analog Input 3 (AI3) is ONLY available when OTIS Motor is connected. If user use a motor other than Higen motor with different NTC specification and use this function, it will lead to motor overheat and damage to the motor.
- Page 41 3. Installation and Wiring SV055 ~ 075iV5-4(Mold) Terminal of the Auxiliary Power Supply SV110 ~ 220iV5-4(Mold) SV900 ~ 2200iV5(Press) (for AC/DC products) Terminal of the Auxiliary Power Supply 3-28...
- Page 42 3. Installation and Wiring SV2800 ~ 5000iV5(Press) (for AC/DC products) Terminal of the Auxiliary Power Supply 3.5.2 Function description of auxiliary terminal block Symbol Terminal Name Terminal Description Input Power Auxiliary power Inputs single-phase 220V (-10 ~ +10%), AC1, C2 input AC input source 50/60Hz...
- Page 43 4. Trial Operation Chapter 4 - Trial Operation 4.1 Keypad Operation LCD Keypad can display up to 32 alphanumeric characters and monitor or set parameter values to operate the inverter and the motor properly. As follows are keypad view and explanation on each key/LED on the keypad. <Keypad View>...
-
Page 44: Group Display
4. Trial Operation 4.2 Keypad LCD Display 4.2.1 LCD Start-up display 0.0rpm SPD 0.0% 0.0A Function Description Real motor speed in RPM Motor speed (Revolution Per Minute) SPD : Speed control mode TRQ : Torque control mode Motor control WEB : WEB control mode Mode SLS : Sensorless control mode BX : Emergency stop... - Page 45 4. Trial Operation 4.3 Setting of Parameter Values In case inverter is to be in use using a keypad, proper parameter values can be set depending on the load and operation condition. First, move on to the code in a group where is intended to change parameter value.
-
Page 46: Data Groups
4. Trial Operation 4.4 Data Groups SV-iV5 series inverters use LCD keypad for user’s convenience. Data groups are divided into 12 groups for easy access depending on the inverter application. LCD keypad Name Description (on the upper left) Motor speed, Motor control mode, Generating torque, Display Output current, User selection display, Process PID group... - Page 47 4. Trial Operation Group transfer in the keypad For transfer to another group, [MODE] key is used and ▲(Up), ▼(Down) key is used to move up and down in the same group. isplay group I/O group Parameter group Function group Control group MODE...
-
Page 48: Auto Tuning
Parameters such as stator resistance (R ), stator leakage inductance (sL ), flux current (IF), rotor time constant (τ ) and stator self-inductance (Ls) are indispensable for obtaining an excellent control performance in the vector control and are automatically measured and set using auto-tuning function. - Page 49 30 ~ 60(Sec) I F Tu n i n g at 1500 rpm. Stator self-inductance (Ls) is PA R ▶ Auto tuning measured by rotating the motor 50 ~ 60(Sec) L s Tu n i n g...
- Page 50 Encoder Testing will be skipped. Motor constants of each can be selected and separately tuned. (Encoder Test, Rs Tuning, Lsigma, Flux Curr, Ls Tuning, Tr Tuning) If encoder phase (A, B) or inverter output wiring is switched during Auto-tuning, “...
- Page 51 If the [ ] [ ] E r r o r problem persists, contact LS representative. FWD/REV LED on keypad will blink during Auto-tuning. Motor constants of each can be selected and separately tuned. (Rs Tuning, Lsigma, If/Tr/Ls Tune)
- Page 52 4. Trial Operation 4.6 Pulse Encoder Check 4.6.1 The definition of forward rotation Forward rotation is of counter-clockwise from the side view of motor shaft. Motor 4.6.2 Forward rotation check Be sure to check if positive(+) speed is displayed when inverter power is on and rotates the motor in the forward direction.
- Page 53 4. Trial Operation 4.7 Operation by Keypad 4.7.1 Parameter setting for keypad operation to rotate the motor at 100 rpm FUN▶ Run/Stop Src ① RUN/STOP command setting by keypad Keypad FUN▶ Spd Ref Sel ② Operating speed reference setting by keypad Keypad1 FUN▶...
- Page 54 4. Trial Operation ② High Speed Operation Change the value of FUN_12 to 1000.0(rpm) and Check the display LCD by pressing [FWD], [REV] keys shown below. When pressing [FWD] key ; +1000.0rpm SPD When pressing [REV] key ; -1000.0rpm SPD 4.8 Operation by Control Terminal 4.8.1 Parameter setting...
- Page 55 4. Trial Operation 4.8.3 Adjusting Ai1 Gain and Bias (example of analog input Ai1 setting) ① Out Y2(Gain) Adjustment of Analog input Apply 10V or 20mA between AI1 ~ 5G (for setting by potentiometer, adjust it to Max). Adjust the other multi analog input terminals in same manner. Loader Display Description Handling...
- Page 56 4. Trial Operation 4.8.4 FX / RX operation 1) FX Operation (Forward Run Command by Control Terminal) ① Apply 0V between AI1 and 5G (for setting by potentiometer, adjust it to minimum value). ② Check the motor speed display in display group shows “+0.0rpm” after connecting the terminals FX and CM.
- Page 57 4. Trial Operation Operation Speed Setting via Keypad + Run/Stop via Terminal (FX/RX) Example (1) [Operation condition] -. Control mode : Speed control -. Ref. Speed : 1500[rpm] setting via keypad -. Accel/Decel time : Accel - 10[sec], Decel - 20[sec] -.
- Page 58 4. Trial Operation Operation Analog Voltage Input(AI1) + Run/Stop via Terminal (FX/RX) Example (2) [Operation condition] -. Control mode : Speed control -. Ref. Speed : 1500[rpm] analog input via AI1 (Potentiometer) -. Accel/Decel time : Accel - 10[sec], Decel - 20[sec] -.
- Page 59 4. Trial Operation 4-17...
-
Page 60: Chapter 5 - Function Code Table
5. Function Code Table Chapter 5 - Function Code Table * The number of page is for User’s manual uploaded at LSIS website. You can download the User’s manual which is described detailed function of parameter from website. (http://www.lselectric.co.kr) 5.1. Display Group (DIS_[][]) * ‘... - Page 61 5. Function Code Table SETTING DATA CODE Comm. Adjustment CODE NAME LCD DISPLAY Addr. During Run RANGE UNIT DEFAULT Out Amps RMS Out Volt RMS Power DC Bus Volt Proc PI Ref Proc PI F/B Proc PI Out MotTemp NTC Inv Temp Inv i2t MP Output...
- Page 62 5. Function Code Table 5.2. Digital DIO Group (DIO_[][]) SETTING DATA CODE Comm. Adjustment CODE NAME Addr DISPLAY During Run RANGE UNIT DEFAULT DIO_00 Jump for quick view Jump Code 1 ~ 98 0 (Not Used) 1 (Speed-L) 2 (Speed-M) 3 (Speed-H) 4 (Jog Speed) 5 (MOP Up)
- Page 63 5. Function Code Table SETTING DATA CODE Comm. Adjustment CODE NAME Addr DISPLAY During Run RANGE UNIT DEFAULT 46(TensionDisable) 47 (PI Gain Sel) 48 (PID ITerm Clr) 49 (Taper Disable) 50 (Stall Enable) 51 (Boost Enable) 52 (Quick Stop) 53 (Jog Web Fwd) 54 (Jog Web Rev) 55 (Under Wind) 56 (Unwinder)
- Page 64 5. Function Code Table SETTING DATA CODE Comm. Adjustment CODE NAME Addr DISPLAY During Run RANGE UNIT DEFAULT 11 (Inv OH Warn) 12 (Spd Agree) 13 (Trq Det.) 14 (Trq Lmt Det.) 15 (OverLoad) 16 (Stop) 17 (MC on/off) 18 (Steady) 19 (Brake Output) 25 (WEB Break) 26 (Up To Spd)
- Page 65 5. Function Code Table SETTING DATA CODE Comm. Adjustment CODE NAME Addr DISPLAY During Run RANGE UNIT DEFAULT Inverter overheat IH Warn DIO_62 723E 50 ~ 85 warning temp. Temp Inverter overheat IH Warn DIO_63 723F 0 ~ 10 warning band Band Motor overheat MH Warn...
- Page 66 5. Function Code Table 5.3. Parameter group (PAR_[][]) SETTING DATA CODE Comm. Adjustment CODE NAME Addr DISPLAY During Run RANGE UNIT DEFAULT PAR_00 Jump for quick view Jump Code 1 ~ 38 0 (No) 1 (All Groups) 2 (DIS) 3 (DIO) 4 (PAR) 5 (FUN) 7301 Initialize parameters...
- Page 67 None ALL1/ALL2 Encoder Test Rs Tuning Auto tuning range PAR_25 Auto Tuning Lsigma None setting Flux Curr Ls Tuning Tr Tuning Inertia Tuning PAR_26 731A Tuning Torque Tune Torque 10.0 ~ 100.0 Motor flux PAR_27 731B Flux-Curr 70% to 0.0 ~ PAR_22...
- Page 68 1) When PAR_07 is set to “User Define”, PAR_08 will be displayed. 2) If PAR_24 (Auto-tuning type selection) is set to No.1 “Standstill”, the order of display in PAR_25 (Auto-tuning range setting) will be None ALL1 Rs Tuning Lsigma If/Tr/Ls Tune.
- Page 69 5. Function Code Table SETTING DATA Adjustment CODE Comm. CODE NAME LCD DISPLAY Addr During Run RANGE UNIT DEFAULT FUN_22 7416 Dwell Time Dwell Time 0.00 ~ 100.00 0.00 Acc./Dec. reference 0 (Max Speed) 0 (Max FUN_33 7421 Acc/Dec Ref Speed 1 (Ref Speed) Speed)
- Page 70 5. Function Code Table SETTING DATA Adjustment CODE Comm. CODE NAME LCD DISPLAY Addr During Run RANGE UNIT DEFAULT According Switching frequency FUN_58 743A PWM Freq 2.5 ~ 10.0 to inverter select capacity FUN_59 743B Power on Run selection Power-on Run 0 (No) / 1 (Yes) 0 (No) FUN_60 743C Restart after fault reset...
- Page 71 5. Function Code Table SETTING DATA Adjustment CODE Comm. CODE NAME LCD DISPLAY Addr During Run RANGE UNIT DEFAULT Calculation method of FUN_82 7453 AuxSpeedType 0 ~ 1 auxiliary speed Acc. time of auxiliary FUN_83 7454 AuxAccTime 0.00 ~ 600.00 2.00 speed Dec.
- Page 72 5. Function Code Table 5) It will be displayed when FUN_03 (Stop method) is set to ‘Free-run’. 6) It will be displayed when the definition of DIO_41 to DIO_43 (Auxiliary output terminal of multi-funtion) is set to ‘Brake Output’. 7) It will be displayed when FUN_71 is set to ‘Yes’. 8) It can set for only 5.5 ~ 22 kW/2/4 products in case ‘Battery Run’...
- Page 73 5. Function Code Table SETTING DATA Adjustment CODE Comm. CODE NAME LCD DISPLAY Addr. During Run RANGE UNIT DEFAULT after ASR gain switch-over Reference CON_11 750B Proc PID Ref -100.0 ~ 100.0 (Loader) CON_12 750C Ramp time PID Ramp 0.00 ~ 600.0 0.00 CON_14 750E P gain...
- Page 74 5. Function Code Table SETTING DATA Adjustment CODE Comm. CODE NAME LCD DISPLAY Addr. During Run RANGE UNIT DEFAULT 5 (Ax Kpd Ax) 6 (Ax Ax Kpd) 7 (Ax Ax Ax) 8 (Opt Opt Opt) Limit in forward CON_34 7522 Pos Trq Lmt 150.0 Limit in reverse...
- Page 75 5. Function Code Table 5.6. User group (USR_[][]) SETTING DATA Adjustment CODE Comm. CODE NAME LCD DISPLAY During Run Addr. RANGE UNIT DEFAULT USR_00 Select Code number Jump Code 1 ~ 67 Initialize to the initial User Define User USR_01 value adequate to the Macro Init Define...
- Page 76 Rated current 2nd R-Curr 1.0 ~ 1000.0 0.0 ~ 2nd_26 781A Flux current 2nd Flx Cur 70% of 2nd_25 Motor time 2nd_27 781B 2nd Mot Tr 30 ~ 3000 constant Leakage 2nd_28 781C 2nd Mot Ls 0.00 ~ 500.00 nductance 5-17...
- Page 77 5. Function Code Table SETTING DATA CODE Comm. Adjustment CODE NAME LCD DISPLAY Addr. During Run RANGE UNIT DEFAULT Leakage 2nd_29 781D 2nd Mot sLs 0.00 ~ 300.00 coefficient 2nd_30 781E Stator resistance 2nd Mot Rs 0.000 ~ 15.000 Electronic thermal 2nd_35 7823 level...
- Page 78 5. Function Code Table SETTING DATA Adjustment CODE Comm. CODE NAME LCD DISPLAY During Run Addr. RANGE UNIT DEFAULT EXT_18 7612 Option output 8 Output 8 0000 ~ FFFF 0000 EXT_19 7613 Number of option input Input Num 0 ~ 8 EXT_20 7614 Option input 1 Input 1...
- Page 79 5. Function Code Table 5.9 Analog AIO Group (AIO_[][]) SETTING DATA Comm. Adjustment CODE CODE NAME LCD DISPLAY Addr. During Run RANGE UNIT DEFAULT AIO_00 Select code number Jump Code 1 ~ 83 00 (Not Used) 01 (Speed Ref) 02 (Proc PID Ref) 03 (Proc PID F/B) 04 (Draw Ref) 05 (Torque Ref)
- Page 80 5. Function Code Table SETTING DATA Adjustment CODE Comm. CODE NAME LCD DISPLAY During Run Addr. RANGE UNIT DEFAULT Multi-function Analog AIO_13 770D Ai2 Define input Ai2 Definition AIO_14 770E Source definition Ai2 Source AIO_15 770F Minimum Voltage Ai2 In X1 Minimum Voltage AIO_16 7710 Ai2 Out Y1...
- Page 81 5. Function Code Table CODE Comm. SETTING DATA Adjustment Code Name LCD DISPLAY Addr. During Run RANGE UNIT DEFAULT Multi-function Analog AIO_37 7725 Ai4 Define input Ai4 Definition AIO_38 7726 Source Definition Ai4 Source AIO_39 7727 Minimum Voltage Ai4 In X1 Minimum Voltage AIO_40 7728...
- Page 82 5. Function Code Table SETTING DATA CODE Comm. Adjustment CODE NAME LCD DISPLAY Addr During Run RANGE UNIT DEFAULT AIO_73 7749 Multi-function Analog Time out 0.1 ~ 120.0 input command loss time 0 (Not Used) 1 (Ai1 Value) 2 (Ai2 Value) 3 (Ai3 Value) 4 (Ai4 Value) 5 (Ai5 Value)
- Page 83 5. Function Code Table Setting Data Comm. Adjustment CODE CODE NAME Addr. DISPLAY During Run Range Unit Default 0 (-10 10V) 1 (10 -10V) 0 (-10 AIO_75 774B Source Definition AO1 Source 2 (0 10V) 10V) 3 (10 ...
- Page 84 5. Function Code Table 5.10 Sensorless control Group (SLS_[][]) Setting Data Adjustment Comm. CODE CODE NAME LCD DISPLAY Addr. During Run Range Unit Default SLS_00 Function code selection Jump Code 1 ~ 23 Flux estimation time SLS_01 7D01 Flux BD Time 100 ~ 60000 with sensorless control P gain for flux...
-
Page 85: Chapter 6 - Function Description
6. Function Description Chapter 6 – Function Description 6.1 Display Group (DIS_[][]) 6.1.1 DIS_00 (Motor control status monitoring) Displayed when Power ON. Motor control mode Motor speed 0.0rpm 0.0% 0.0A Output current Output torque Code Parameter name Unit Description Motor speed Actual motor rotating speed displayed in rpm. - Page 86 6. Function Description Code Parameter name LCD display Unit Description Positive Trq Limit Pos Trq Limit Positive torque limit to rated torque Negative Trq Limit Neg Trq Limit Negative torque limit to rated torque Regeneration Trq Limit Reg Trq Limit Regeneration torque limit to rated torque Torque Reference Torque Ref...
- Page 87 6. Function Description Code Parameter name LCD display Unit Description Running status Run Status Operating status displayed Decision value PhInOpenLvl for input open- Referenced value for FUN_79 PhInOpenLvl setting phase *1) In the case of using EXTN_I/O, it will be displayed up to Ai5. 6.1.3 DIS_04 (Process PID controller) Information on Output, reference, F/B values of Process PID controller is displayed in this code.
- Page 88 6. Function Description Trip information LCD display Trip information LCD display IGBT short circuit Arm Short H/W error HW-Diag Fuse open Fuse Open Input B contact for external trip External-B Communication error of option Ground fault Ground Fault Option ($$) board Over current Over Current...
- Page 89 6. Function Description 6.2 DIO Group (DIO_[][]) 6.2.1 Jump code (DIO_00) In I/O_00, jumping directly to any parameter code can be accomplished by entering the desired code number. (Example) Moving to DIO_05 Press [PROG] and set to 5 using [SHIFT/ESC] / [▲(Up)] / [▼(Down)] and press [ENT] key to move to I/O_05. If the desired code cannot be set, the closest code will be displayed.
- Page 90 6. Function Description 1.1) Speed-L / Speed-M / Speed-H / JOG operation By defining P1 ~ P4 as “Speed-L”, “Speed-M”, “Speed-H” and “Jog Speed”, the selected references in FUN goup 12 ~ 20 (Multi-step speed 0 ~ 7 and Jog speed) become active as speed reference. (Example) To define Multi-function input terminals P1, P2, P3 as Speed-L, Speed-M, Speed-H and P4 as Jog Speed;...
- Page 91 6. Function Description (Example) MOP function setting and operation method is as follows; Setting Code Description Unit Set value display range DIO_01 P1 define Multi-function input terminal P1 define MOP Up DIO_02 P2 define Multi-function input terminal P1 define MOP Down DIO_03 P3 define Multi-function input terminal P3 define...
- Page 92 6. Function Description (MOP Save example 2) In case terminal input assigned to MOP Save function is ON, operation speed at that instant is memorized and operates at the saved speed when operation resumes. Saved speed ref. by “MOP Save” Motor Speed MOP Down...
- Page 93 6. Function Description (MOP Clear setting example 3) To clear the saved speed by MOP Save function, use “MOP Clear ON/OFF”. If MOP Clear is ON during running, the inverter decelerates its speed to zero speed. If MOP is ON during stop, this function resets the speed reference to “0”.
- Page 94 6. Function Description 1.4) Main Drive Each inverter linked to system can be controlled separately. When this terminal is turned On, changing operating speed reference, operating method, and torque limit is done via only Keypad without changing the user-setting parameter value. When ‘Main Drive’...
- Page 95 6. Function Description 1.6) XCEL-L / XCEL-H Refer to FUN_41 ~ 48 (Accel/ Decel time 1, 2, 3, 4). (The factory default value is different from the capacity of inverter.) Factory default value Code LCD display Description Unit 2.2~37 45~75 90~220 280~375 FUN_40...
- Page 96 6. Function Description 1.7) 3-Wire operation When FX or RX terminal is turned ON and turned OFF, the terminal is maintained ON using this parameter. Simple sequence circuit can be comprised with push button switch. If 3-wire is turned off when multi-function input is 3-wire, operation is inactive even though pulse input of FX and RX is inputted.
- Page 97 6. Function Description 1.9) Prohibit FWD (Prohibition of forward rotation) / Prohibit REV (Prohibition of reverse rotation) If Prohibit FWD or Prohibit REV is set, it prohibits forward or reverse rotation, respectively. If Prohibit FWD is used, speed command becomes 0 when it has positive value. Similarly, If Prohibit REV is used, speed command becomes 0 when it has negative value.
- Page 98 6. Function Description Proc PID Dis Operating reference CON_23 Multi-function input signal Disable Disable Terminal Enable Disable Enable Enable Disable Disable Disable Disable 1.11) Timer input The multi-function input terminals P1~P7 can generate the timer output based on the timer ON delay time at DIO_55 and timer Off delay time at DIO_56.
- Page 99 6. Function Description (Example) Programming P3 as SoftStrtCncl P1 (Xcel-L) P2 (Xcel-H) P3 (SoftStartCncl) Accel/Decel time Accel/Decel 1 Accel/Decel 2 Accel/Decel 3 Accel/Decel 4 The shortest Accel./Decel. 1.13) ASR Gain Sel (Switch automatic seed regulator PI gain) Using ‘ASR Gain Sel’ function, one of the two P and I gains can be selected for PI speed controller (ASR). (Example) Programming P5 as ASR PI Gain Code LCD display...
- Page 100 6. Function Description 1.17) Spd/Trq Sel (Speed/Torque Control Transfer) Speed and torque control can be switched using this function. This terminal input overrides the input from the keypad. Control mode can be switched only during stop state. Despite multi-function terminal input during running, the control mode can be switched only after stopping.
- Page 101 6. Function Description auxiliary power source operates as shown below at each condition (‘INV Ready’ ouput, FAN fault detection and H/W fault detection etc.) Main power FAN fault H/W fault detection except for “LVT Disable” ‘INV Ready’ output source detection Low voltage and FAN fault Before input Not availblae...
- Page 102 6. Function Description Set value Set value Set value Spd Det. INV OH Warn Brake Output Spd Det (ABS) Speed Agree Spd Arrival Trq Det. Timer Out Trq Lmt Det. LV Warn OverLoad 2.1) Not used It is set unless multi-function output is not used as any function listed above. 2.2) INV ready INV Ready becomes ON when inverter is ready to operate normally.
- Page 103 6. Function Description But, the polarity is invalid for Spd Det(ABS). Code Display Description Range Unit Default DIO_49 SD Level Speed Detect Level -3600 ~ 3600 DIO_50 SD Band Speed Hysterisis Band 0.1 ~ 10.0 DIO_50(SD Band) is set as the percentage of FUN_04 Max motor speed. ...
- Page 104 6. Function Description Speed DIO_52 _ Motor speed Speed Arrival Speed Deviation TIME 2.7) Timer out Timer Out acts as an output signal to the timer input signal defined in the one of the multi-function input terminals P1~P7 and it uses the set values of Timer On delay time at DIO_55 and of Timer Off delay time at DIO_56. The example of code setting is shown in the table below when DIO_07 is set to Timer Input and DIO_41 is set to Timer Output.
- Page 105 6. Function Description 2.8) LV LV is enabled when the DC link voltage of the inverter is less than the detecting level of low voltage alarm. 2.9) Run It is ON when the inverter is running. 2.10) Regenerating It is ON when the motor is regenerating. 2.11) Mot OH Warn (Motor Overheat Warning) Using NTC or PTC signal built in the motor, Motor Overheat is ON when the temperature inside the motor is higher than the overheat alarm level.
- Page 106 6. Function Description Overload warning signal Output current current I/O_58 Multi-function output (OverLoad) TIME Code Display Description Range Unit Default DIO_57 OL level Overload warning level 30 ~ 250 DIO_58 OL time Overload warning time 0 ~ 30 Note: The set value of overload alarm level is of percentage(%) to the rated current of the motor. ...
- Page 107 6. Function Description RUN Input STOP Output (Operation by keypad and terminal) Run command STOP STOP (Internal) Initial excitation time (FUN_53) Speed Hold time (FUN_54) MC Signal MC On Time MC Off Time (DIO_67) (DIO_68) 2.18) Steady This is ON when the inverter is running at the constant speed. 6-23...
- Page 108 6. Function Description 2.20) Brake output Output the signal of opening or closing of brake. (FX) FUN_70 FUN_67 FUN_68 Relay Mechanical FUN_66 FUN_69 FUN_54 FUN_53 Code Display Decription Range Unit Default FUN_66 BKOpen Time Brake opening time 0.00 ~ 30.00 0.00 FUN_67 BKOpen Spd...
- Page 109 6. Function Description 3) DIO_46 (Fault output relay (30A, 30B, 30C)) This function can be used when the inverter fault signal is generated through the relay contact. the fault alarm is triggered differently by setting the bits related to the low voltage trip, inverter trip and the number of retry. Code Display Description...
- Page 110 6. Function Description If Lost command has happened, the word ‘LOAI_’ is displayed on initial display. The value of percentage in second line means the input value of analog. Adjust the value of criteria of loss judging, the state is available to run after LOAI_ is disappeared 0.0rpm LOAI1...
- Page 111 6. Function Description 6.3 Parameter Group (PAR_[][]) 6.3.1 Jump code (PAR_00) PAR_00, jumping directly to any parameter code can be accomplished. (Example) Moving to PAR_30 Press [PROG] and set to 30 using [SHIFT/ESC] / [▲(Up)] / [▼(Down)] and press [ENT] key. If the desired code cannot be set (void), the nearest code will be displayed.
- Page 112 6. Function Description PAR▶ Para. read --- Yes --- Remove the keypad. PAR▶ Para. write --- Yes --- Install it to the copied inverter. 3) PAR_04 (Parameter Lock) Set it to “12” to disable “paramter change”. Factory Code LCD display Description Setting range Unit...
- Page 113 6. Function Description 6.3.3 Motor parameters setting 1) PAR_07(Motor rating setting) / PAR_08(Motor cap. selection of user) Select the motor rating. Its factory default value is the same as inverter capacity. If this is set, motor parameters are automatically set. These are designed to fit for LG-OTIS vector motor. When other makers’ motor is used, program the motor parameters properly.
- Page 114 6. Function Description is detected and show the encoder abnormity sign. In the case of open collector method of encoder, it isn’t possible to detect encoder error. So set PAR-12 to “No”. Noise from encoder input will be reduced by adjusting PAR_13 Encoder LPF time constant. Improper setting of encoder parameters may deteriorate accurate speed control and lead to “overcurrent”...
- Page 115 6. Function Description Encoder S/W error detection is performed only once after operation starts and activates when target speed becomes twice the rated slip. For example, when target speed is 500(rpm) and rated slip is 40(rpm), the detection active level is 80(rpm).
- Page 116 6. Function Description 6.3.5 Auto-tuning The motor parameters for the Vector Control are autotuned by Starvert-iV5. The stator resistance, Stator Inductance, Leakage Inductance and Rotor time constant are found and saved. User can select the type of Auto-tuning in Rotational or Standstill mode. 1) Motor and encoder parameters setting for auto-tuning The following paramters should be set according to motor nameplate to find motor parameters correctly.
- Page 117 Inertial Tuning will be displayed when PAR_35 is Yes. Rs, Lsigma, Flux Current, Ls, Tr, Inertia: Perform each parameter seperately. Tr follows Rs, Ls auto-tuning to find exact value. To save tuning time, increase PAR_25 “Tuning torque for Auto-tuning” when load inertia is high during Tr tuning.
- Page 118 30~60(Sec) the motor at base speed. I F Tu n i n g PA R ▶ Auto tuning Stator self-inductance (Ls) is measured by 50~60(Sec) rotating the motor at base speed. L s Tu n i n g Accel/Decel is performed repeatedly to find PA R ▶...
- Page 119 There are 4 modes for Standstill auto-tuning. ALL1: Rs Lsigma If Ls Tr Rs Tuning, Lsigma, If/Tr/Ls Tune: Perform each parameter seperately. Encoder test is not performed. PAR_25 Inertia Tuning will be displayed when PAR_35 is Yes.
- Page 120 L Tu n i n g Flux current (IF), rotor time constant (τr) and PA R ▶ Auto tuning stator self-inductance (Ls) is measured 15-60 Sec I f / Tr / L s Tu n i n g simultaneously without rotating the motor.
- Page 121 6. Function Description 4) Motor parameters The following parameters are found during Auto-tuning. Motor parameters described below are entered based on LG-OTIS vector motor. Factory Code LCD display Description Setting range Unit setting 0.0 ~ 70% of PAR_27 Flux-Curr Motor flux current motor rated current PAR_28...
- Page 122 Displayed when motor rpm exceeds 1650 rpm (1800 rpm PA R ▶ Auto tuning rated motor) during Ls calculation or Ls is not measured for a long time. Check for wiring of inverter and motor L s E r r o r and number of motor phase.
- Page 123 6. Function Description 6.4 Function group (FUN_[][]) 6.4.1 Jump code (FUN_00) Jumping directly to any parameter code can be accomplished using FUN_00 [Jump code]. Press [PROG] key first and set 2 using [ ▲ (Up)], [ ▼ (Down)], [SHITF/ESC] and press [ENT] key to jump to FUN_02. If the desired code cannot be accessed or void, it automatically jumps to closest code.
- Page 124 6. Function Description 2) FUN_02 (Speed setting method) There are four methods to set operating speed. Keypad 1/Keypad 2: Digital setting via keypad Analog: speed setting via analog input terminal define Option: speed setting via option card To change speed reference in Keypad 1 method, change the value in FUN_12 Speed 0 using [▲(Up)], [▼(Down)] key and press [ENT] key to enter the value into memory.
- Page 125 6. Function Description 6.4.5 Multi-step speed and Dwell speed setting methods 1) FUN_12 ~ 19(Multi-step speed 0 ~ 7) / FUN_20(JOG speed command) If the multi-function terminal is selected as a multi-step speed setting or jog operation, the speed command is determined by the combination of multi-function terminals P1 to P7 and jog speed command.
- Page 126 6. Function Description 2) FUN_21(Dwell Speed), FUN_22(Dwell Time) Acceleration is instantly stopped and restarted before driving a heavy load such as hoists when selected. Factory Code LCD display Description Setting range Unit setting FUN_21 Dwell Speed Dwell Speed 0.0 ~ FUN_04 100.0 FUN_22 Dwell Time...
- Page 127 6. Function Description 2) FUN_41 ~ 48(Accel/Decel time 1 ~ 4) Accel/Decel time 1-4 can be set in SV-iV5 as shown below. (The factory default value is different from the capacity of inverter.) Factory default value Setting Code Description Unit display range 2.2~37...
- Page 128 6. Function Description 3) FUN_36 ~ 39(S curve ratio during Accel/Decel 1 ~ 2) The ramping pattern of the Linear and S Curve could be used by setting the parameters below. S Curve pattern is used to control the acceleration of the machine as linear to minimize the shock at the start. The parameters, FUN_36 ~ 39 determine the rate of S Curve pattern as in the figure below.
- Page 129 6. Function Description Calculation 1 Δ rpm ≥ St1_ Δ rpm + St2_ Δ rpm rpm = The difference between the current speed and the target speed L_time = ( Δ rpm – St1_ Δ rpm – St2_ Δ rpm) * (AccTime / MaxSpeed) Effective Acceleration Time = St1_time + L_time + St2_time ...
- Page 130 6. Function Description Code LCD display Description Setting range Unit Factory setting Deceleration time FUN_52 BX Time 0.0 ~ 6000.0 for emergency stop 6) FUN_53 (Pre-excitation) FUN_52 (Motor Pre-excitation Time) can be used for the flux build-up in the induction motor to obtain the best control characteristic.
-
Page 131: Electronic Thermal
6. Function Description 6.4.7 Electronic thermal (motor ) selection These functions are required when the motor should be protected against the overheat without installing the thermal relay between the inverter and the motor. If electronic thermal protection is ON, the inverter blocks the IGBT gating signals and issues the trip message. - Page 132 6. Function Description Load Current (%) [ETH 1min] [ETH cont] FUN_55 FUN_56 Trip Time 1 minute [Motor i2t Characteristic Curve] The motor protection is possible by calculating and accumulating I t even in load variation and frequent run/stop. 6.4.8 Inverter switching frequency select 1) FUN_58 (Inverter switching frequency select) This parameter affects the audible sound of the motor, noise emission from the inverter, inverter termperature, and leakage current.
- Page 133 6. Function Description Continuous Operation Derating Information 15kW-400V(MD) class model among 5.5 ~ 22kW-200/400V class MD type models applies the following load rating. ① Rated load classified by the switching frequency 2.2 ~ 22kW-200/400V 15kW-400V(MD) Output Output current current 100% 100% 10kHz...
- Page 134 6. Function Description CAUTION Take caution for this function. When FUN_59 is set, motor runs immediately upon fault is reset. 2) FUN_61 (number of auto restart try) / FUN_62 (delay time before auto restart) This function prevents the permanet stop of the inverter due to the trip. The inverter automatically resets the fault and restarts and continues to run after the fault occurs if the number of automatic restart is set and the inveter operation is possible.
- Page 135 6. Function Description CAUTION ⑪ FAN/MC PWR, FAN PWR (AC FAN and M/C power source fault) If trip does occur in 30 sec after restart, inverter adds the number of restart by one automatically and this cannot exceed setting value. 6.4.11 Wait time for restart upon stop Only active when FUN_03 is set to ‘Free-run’...
- Page 136 6. Function Description 6.4.13 Brake opening and closing setting 1) FUN_66(Brake opening time) / FUN_67(Brake opening speed) / FUN_68(Brake opening current) / FUN_69(Brake closing time) / FUN_70(Brake closing speed) It only operates when multi-aux ouput terminal(DIO_41 ~ DIO_43)is set to Brake Output. ...
- Page 137 6. Function Description Operation command (FX) Speed command FUN_69 Motor speed FUN_66 PWM Output Output current FUN_67 Relay Output Mechanical Output FUN_65 FUN_68 FUN_53 FUN_52 6-53...
- Page 138 6. Function Description 6.4.14 Regerneration prevention for press This function is to prevent the regerneration in press application. It rises the motor speed automatically in motor regeneration. Code LCD display Description Setting range Unit Factory setting Selection of regeneration FUN_71 RegenAvd Sel 0 (No) / 1 (Yes) 0 (No)
- Page 139 6. Function Description To return to normal mode, release the signal from ‘Battery Run’ mode of multi-function input turned On. Additional wiring for battery-operated mode is as shown below. -. Connect the 2 terminals among main circuit input terminal R, S, T to battery positive through MC (Magnetic Contactor).
- Page 140 6. Function Description 6.4.16 Detection function of input/output open-phase This function detects disconnection of input or output wire. If input open-phase error occurs when it is not open-phase condition, increase the FUN_79 setting value. For the standard setting value, refer to the item PhInOpenLvl in 01 ~ 03 of the DIS group.
- Page 141 6. Function Description 6.5 Control Group (CON_[][]) 6.5.1 Jump code (CON_00) Jumping directly to any parameter code can be accomplished using CON_00 [Jump code]. Jumping to CON_11 Example Press [PROG] key first and set 11 using [▲(Up)], [▼(Down)], [SHITF/ESC] and press [ENT] key to jump to CON_11. If the desired code cannot be accessed or void, it automatically jumps to closest code.
- Page 142 6. Function Description (Example) Programming P4 as ASR PI Gain Code LCD display Description Setting range Unit Set value Multi-function input terminal DIO_04 P4 define ASR Gain Sel P4 definition The two sets of Lowpass Filter are as follow: Code LCD display Description Setting range...
- Page 143 6. Function Description Code LCD display Description Setting range Unit Factory setting Ramp time for ASR gain CON_09 ASR Ramp 10 ~ 10000 1000 switch-over Target Speed after ASR CON_10 ASR TarSpd 0.0 ~ 3600.0 gain switch-over Gain Ramp time CON_09 CON_03 CON_06...
- Page 144 6. Function Description 6.5.5 Process PID control Process PID controller is added ouside the speed control loop and a wide variety of process control can be implemented without using the stand-alone PID controller outside the speed control loop or PLC. ‘Process PID Enb’ at CON_23 determines whether Process PID controller is enabled or not.
- Page 145 6. Function Description The definition of P gain and I gain in the Process PID controller is as follows. If P gain is 100% and I gain is 0% and the input error of the Process PID controller (CON_11 + Proc PID Ref - Proc PID F/B) is 100%, the output of Process PID controller is 100%.
- Page 146 6. Function Description If the output error of Process PID exists at stopping, it keeps current motor speed during “PID Hold Time” and then free- runs and stops by stopping friction power. If output error is “0”, motor is stopped regardless of “PID Hold Time“ setting. Code LCD display Description...
- Page 147 6. Function Description Draw reference multiplied by draw quantity set at CON_22 is added up to the speed command and the sum acts as the final speed command. Acc/Dec Speed Ref. Routine Draw quantity (%) Process PI Output Value CON_2 -100 ~ 100% Draw Ref Draw Control Setting...
-
Page 148: Droop Control
6. Function Description 6.5.7 Droop control Droop control uses the drooping characteristic of the speed with respect to the torque reference. This control method is used to prevent the saturation of the speed controller due to the difference between the speed reference and the real speed when the inverter is used for load balancing of the multiple motors and helper roll, which is the auxiliary device of the main roll. -
Page 149: Torque Control
6. Function Description Droop Control Calculation Example When Torque Ref is Positive: Droop Ref speed = ( Torque Ref [%] - Droop Starting Torque[%] ) * Droop Quantity[%] The result value becomes positive. Therefore, final speed ref value decreases and it should be, (Speed Ref –... - Page 150 6. Function Description Code LCD display Description Setting range Unit Factory setting None/Analog Torque reference source CON_31 Trq Ref Src Keypad/Option None selection Int485 CON_32 Torque Ref Torque Ref (keypad) -180.0 ~180.0 2) CON_37 (Torque Bias Source Select) / CON_38 (Torque Bias quantity) The Torque Bias is the feedforward compensation which is added to the Torque Reference.
- Page 151 6. Function Description Code LCD display Description Setting range Unit Factory setting Multi-function input terminal DIO_05 P5 define Use Trq Bias P5 definition 5) CON_39(Torque Bias F/F) This is the torque bias quantity to compensate for the friction loss, which varies with the rotational direction of the motor and added up to the torque bias quantity.
- Page 152 6. Function Description CON_33 Regenerating Positive Torque Limit Negative Torque Limit set value Torque Limit Ax Kpd Ax CON_30 Ax Ax Kpd CON_31 Ax Ax Ax Positive Torque Limit of Negative Torque Limit of Regenerating Torque Limit Opt Opt Opt Option Option of Option...
- Page 153 6. Function Description 6.5.9 Speed search This is used to restart the motor during coasting without stopping the motor. The setting for using this function is related to setting of FUN_59 and FUN_60. CON_54 are required for this function. The proper values should be set depending on the inertia moment (GD²) of the load and the torque of the motor in use.
- Page 154 6. Function Description 6.6 User Group (USR_[][]) User group can be generated by collecting the frequently-used function codes, and it also can be created by using the existing function codes for the specific application. 6.6.1 Jump code (USR_00) Jumping directly to any parameter code can be accomplished using USR_00. (Example) Jumping to USR_03 Press [PROG] key first and set 3 using [▲(Up)], [▼(Down)], [SHITF/ESC] and press [ENT] key to jump to USR_03.
- Page 155 6. Function Description Code LCD display Description Setting range Unit Factory setting USR_02 User Save User data save selection USR_03 User Recall Recall saved user data 6.6.3 User code define (USR_04 ~ 67) It displays the type and value of the user code when [PROG] key is pressed. The code can be set in the same manner as the codes in the other group can be.
- Page 156 6. Function Description 6.7 2nd Function Group (2nd_[][]) function group is equivalent to the parameter group which includes the data related to the 2 motor in case single inverter controls 2 motors. One of the multi-function terminal input P1 ~ P7 (DIO_01 ~ DIO_07) should be set to “2nd Func”...
- Page 157 2nd Flx Cur motor magnetizing current rated current 2nd_24 2nd Mot Tr motor rotor time constant 30 ~ 3000 2nd_25 2nd Mot Ls motor stator inductance 0.00 ~ 500.00 2nd_26 2nd Mot sLs motor leakage coefficient 0.00 ~ 10.00 2nd_27...
- Page 158 6. Function Description 6.7.7 2nd motor miscellaneous parameters Code LCD display Function Setting range Unit Factory setting Same as the 1 2nd_11 2nd Cool Mtd motor cooling method Self-cool motor motor 1 min. level for electronic Same as the 1 2nd_35 2nd ETH 1min thermal protection...
- Page 159 6. Function Description 6.8 Analog AIO Group (AIO_[][]) 6.8.1 Jump code (AIO_00) In AIO_00, jumping directly to any parameter code can be accomplished by entering the desired code number. (Example) Moving to AIO_13 Press [PROG] and set to 5 using [SHIFT/ESC] / [▲(Up)] / [▼(Down)] and press [ENT] key to move to AIO_13. If the desired code cannot be set, the closest code will be displayed.
- Page 160 6. Function Description Definition Code Display Unit Function Description Setting Name range Speed Ref Aux Spd Ref Proc PID Ref Definition Proc PID F/B It defines the type of Multi function analog AIO_01 Ai1 Define of Multi function Draw Ref input Ai1.
- Page 161 6. Function Description AIO_04 Ai1 Out Y1 sets the min. level of analog input voltage or current that inverter actually recognizes. For example, if you set AIO_03 Ai1 In X1 as 0[%] and set AIO_04 Ai1 Out Y1 as 20[%] and then, you feed into analog input terminal voltage 2[V] or current 4[mA], when the actual analog input voltage or current that inverter recognizes is 0, inverter recognizes as 20[%].
- Page 162 6. Function Description 2) Adjusting Bias: Out Y1 and Gain: Out Y2 by Loader AIO_04 Ai1 Out Y1 adjustment Connect the voltage source or current source between Ai1 ~ 5G, multi-analog terminals of standard I/O devices. Feed 0[V] or 0[mA] with the AIO_03 In X1 set as 0% and then follow as below. LCD Display Description AIO▶...
- Page 163 6. Function Description The same procedure is applied to AIO_08 Ai1 –Out Y1 and AIO_10 Ai1 –Out Y2 and also to the other multi-function analog input For example about multi-function analog input setting , In X1 : 20%, In X2 : 70%, Out Y1 : 30%, Out Y2 : 80% for the 0 ~ 10V input, analog command changes are as follows.
- Page 164 6. Function Description Definition Code Display Unit Function description Setting Name range 0 → 10V 0 ~ (AIO_03 Ai1 In X1)/2 10 → 0V 0 ~ (AIO_03 Ai1 In X1)/2 0 → 20mA 0 ~ (AIO_03 Ai1 In X1)/2 20 → 0mA 0 ~ (AIO_03 Ai1 In X1)/2 If the analog input according to AIO_02 Ai1 Source is under the range of below, it means...
-
Page 165: Analog Output
6. Function Description 6.8.3 Analog output 1) AIO_74 ~ 87 (description for multi-function analog output terminal, output source , Bias, Gain, setting absolute value) SV-iV5 offers 2 analog outputs and according to the options of user, you can vary the description for using. The output rage is -10V ~ +10V and the types are as follows. - Page 166 6. Function Description Adjusting Gain and Bias by Keypad AIO_76 AO1 Bias setting It can be set the Bias value of analog output value. It can occur actual output more than the Bias value. LCD Display Description AIO▶ A01 Bias Initial Gain (Factory setting) 0.0 % When pressing the [PROG] key, current output [%] to input...
- Page 167 6. Function Description -100% 100% -10V Initail Value (Bias : 0%, Gain : 100%) Bias 30% setting AO Bias -100% -50% 100% -10V Gain 200% setting Absolute value setting Multi-function analog output setting types and range are as below Setting Description Output signal level AiX Value...
- Page 168 6. Function Description Setting Description Output signal level ACR_Q Out ACR output of axis Q +10 V: 300/600 ACR_D Out ACR output of axis D +10 V: 300/600 VdeRef Voltage reference of axis D +10 V: 300/600 VqeRef Voltage reference of axis Q +10 V: 300/600 Out Amps RMS Output current...
- Page 169 6. Function Description 6.9.2 Magnetic flux building time SLS_01(Flux BD Time) Before the motor starts to run, DC voltage is applied to the stator winding in order that the stator winding carries current at a certain level (exiting current). 6.9.3 Magnetic flux estimator gain control SLS_02(FlxEst PGain) / SLS_03(FlxEst IGain) ...
- Page 170 7. WEB Control Application Chapter 7 WEB Control Application 7.1 Change into WEB control mode LCD loader display is indicated up to 32 digits in English letters and Arabic numerals, allowing you to directly check a variety of settings on screen. Shown below are the appearance of LCD loader and the functions of each part.
- Page 171 7. WEB Control Application in WEB Control Mode Loader Display 7.2.1 Home Screen 0.0rpm WEB Tq 0.0% 0.0A The status of the screen as above is called “Home Screen of Display Group” or “Home Screen”, and you can return to this home screen by pressing SHIFT/ESC key. Each item on the screen shows the associated information as shown in the table below.
- Page 172 7. WEB Control Application 7.4 Parameter Setting required for Web Control To conduct WEB control, be sure to set inverter parameters in following sequence. For further details of the function, please refer to the explanation on WEB group function. 7.4.1 WEB Control Mode Setting (Compulsory) “WEB Control”.
- Page 173 7. WEB Control Application 7.4.4 Diameter Initialization Function Setting (Compulsory) When rewound to full diameter or web is completely unwound from the core, core should be replaced. In this case, you need to inform inverter of the core being replaced. A diameter initialization function can be selected out of multi-function input (DIO_01 ~ DIO_07), analog input, and communication.
- Page 174 7. WEB Control Application ③ Diameter Initialization by Communication To conduct the diameter initialization by communication, WEB_03 DiaPresetSrc should be set to “Option”. In this case, command can be set in communication common area 0x0510. For further detail of communication, please refer to communication common area of communication option borad manual.
- Page 175 7. WEB Control Application WEB▶ MinLine SPD 10.0 % 7.4.8 Minimum Diameter Setting (Compulsory) Minimum diameter indicates the diameter of the smallest core in % against the maximum diameter in full diameter. Minimum diameter is used as the minimum limit of diameter computation during operation, and the selected initial core value is restricted by the minimum diameter.
- Page 176 7. WEB Control Application 7.4.10 Rewind/Unwind Function Setting (Compulsory) Tension control is divided into three (3) method; First, Unwind Function – tension control in such manner as time goes by the diameter of material gets smaller keeping rewinding; Second, tension control of a fixed roll such as Bridle Roll or Nip Roll;...
- Page 177 7. WEB Control Application Figure 1. Roll Rotating Direction at the time of Rewind/Overwind Setting, Forward Direction Operation Command Rewind(Under wind) with Forward Run command Reverse direction Winder Line Direction Line Speed Motor Motor command Speed making PID output Speed Splicing % Feedback Figure 2.
- Page 178 7. WEB Control Application Unwind(Under wind) with Forward Run command Unwin Line Direction Reverse direction Line Speed Motor Motor command Speed making PID output Speed Splicing % Feedback Figure 4. Roll Rotating Direction at the time of Unwind/Overwind Setting, Forward Direction Operation Command 7.4.12 tension Reference input Setting (Compulsory) In case of using loadcell for tension control sensor, tension reference is used for setting the set point of actual tension.
- Page 179 7. WEB Control Application ③ Tension Reference Input Setting by Communication (In case of using loadcell) To conduct tension reference input setting by communication, you may use communication common area Address 0x0511. For further detail, please refer to communication common area data. ④...
- Page 180 7. WEB Control Application 7.4.13 PID Control Feedback Source Setting (Compulsory) Setting the amount of feedback at the time of PID control can be conducted in two ways; First, PID feedback by analog input, Second, PID feedback by communication. You can set it in WEB_47 PID F/B Src. ①...
- Page 181 7. WEB Control Application 7.5.2 Digital Input/Output Group (DIO_[][]) 1) DIO_01 ~ DIO_07 (Definition of multi-function input P1~7) In case of selecting CON_02 Application of Control(CON) Group as “WEB Control”, you may select the following function in addition. For further detail, please refer to the explanation on WEB group function. Function Loader Display Name of Function...
- Page 182 7. WEB Control Application (1) Diameter Hold function : If the multi-function input terminal set to “Dia Hold” is On, it stops diameter computation and maintains the diameter value. At this time, the diameter hold function operates if one of the following conditions is satisfied.
- Page 183 7. WEB Control Application uxiliary 2) Multi-function A Output Terminal Definition (AX1~AX2) and Open collector (OC1) output When CON_02 Application of Control (CON) Group is selected as “WEB Control”, you can select the following function in addition. For further detail, please refer to WEB group function explanation. Definition of Function Functio Loader...
- Page 184 7. WEB Control Application 7.5.4 Function Group (FUN_[][]) If CON_02 Application of Control (CON) Group is selected as “WEB Control”, you may select the following function in addition. For further detail, please refer to the explanation on WEB group function. Definition of Function Function Loader...
- Page 185 7. WEB Control Application 7.6 Function Code of WEB Application Group (WEB_[][]) Setting Data Code Comm. Adjustment Code Name LCD DISPLAY PAGE Addr During Run Range Unit Default WEB_00 Selection of Function Code Jump Code 1 ~ 59 WEB_01 7C01 Diameter Size Display Diameter 5.0 ~ 100.0...
- Page 186 7. WEB Control Application Setting Data Code Comm. Adjustment Code Name LCD DISPLAY PAGE Addr During Run Range Unit Default Gain Ramp Time WEB_34 7C22 PIDGain RAMP 0.1 ~ 100.0 7-32 Setting 0 (Linear) Process PID P Gain Profiler 1 (Square) WEB_35 7C23 P Profiler...
- Page 187 7. WEB Control Application 7.7 WEB Group Function 7.7.1 Jump code(WEB_00) You may directly jump into the code desired using WEB_00. (Example) If you want to move to WEB_03; Press [PROG] key, and then press [SHIFT/ESC] / [▲UP] / [▼DOWN] keys to set 3. Then you may move to the following mode by pressing [ENT] key.
- Page 188 7. WEB Control Application function input terminal, by analog input terminal , and by communication. Function Factory Loader Display Name of Function Set Range Unit Code Default Keypad Diameter Initialization Type WEB_03 DiaPresetSrc Analog Keypad Setting Option ① Initialization of Core by Multi-function Input Terminal -.
- Page 189 7. WEB Control Application ② Initialization of Core by Analog Input Terminal -. Initialization of Core by Analog Input Terminal requires setting of WEB_03 to “Analog” first. -. Select one of multi-function input terminals (DIO_01 ~ DIO_07) and then set it to “Dia Preset”. -.
- Page 190 7. WEB Control Application Function Factory Loader Display Name of Function Set Range Unit Code Default WEB_04 Diam Preset 1 1st Core initial value WEB_10 ~ 100.0 10.0 WEB_05 Diam Preset 2 2nd Core initial value WEB_10 ~ 100.0 15.0 WEB_06 Diam Preset 3 3rd Core initial value...
- Page 191 7. WEB Control Application computation is not conducted. If the line speed command is smaller than the set value, and the multi-function input terminal set to “Dia Preset” is On, the diameter can be initialized. The reference of the set value is the [%] of maximum line speed.
- Page 192 7. WEB Control Application 7.7.5 Diameter Computation 1) WEB_14 Diameter Src : Diameter Computation Type Setting This function is the function code that determine whether to calculate the diameter computation by inverter internal S/W or to receive the input diameter via the analog output of the diameter sensor attached to the system through the analog input terminal of the inverter.
- Page 193 7. WEB Control Application tension of the fixed roll using Bridle Roll or Nip Roll while set to “Unwind” in case of unwinding the web as in the Unwinder. Function Factory Loader Display Name of Function Set Range Unit Code Default Rewind WEB_17...
- Page 194 7. WEB Control Application Rewind/Overwind Setting, Roll Rotating Direction in case of Forward Direction Operation Rewind/Underwind Setting, Roll Rotating Direction in case of Forward Direction Operation Unwind(Over wind) with Forward Run command Line Direction Forward direction Unwin Line Speed Motor Motor command Speed...
- Page 195 7. WEB Control Application Unwind/Underwind Setting, Roll Rotating Direction in case of Forward Direction Operation 7.7.7 Tension controlling setting WEB_19 Tension Input : tension Reference Input Setting In case of using loadcell in the tension control you have to set tension reference. If using dancer, you have to set the position reference of dancer.
- Page 196 7. WEB Control Application changes showing non-linear behavior depending of the diameter. Third; it is to set to “Linear”, when the tension changes showing linear behavior depending on the diameter. By inputting the amount of taper, the sum of the set value of WEB_21 Taper Input, the input value of analog input terminal set to Taper Ref”, and the set value of address 0x0514 in the common area is decided as the amount of final taper.
- Page 197 7. WEB Control Application value of final tension becomes 60[%]. In the boost function, the set value of WEB_23 Boost Input is not always 0, but it just operates in case of the multi-function input terminal (DIO_01 ~ DIO_07) set to “Boost Enable” being On. Function Factory Loader Display...
-
Page 198: Taper Calculator
7. WEB Control Application Taper Disable (P1 ~ P7) Taper Type WEB_20 None Taper Input(WEB_21) Core Size Linear Taper Calculator Diameter Hyperbolic Tension Input(WEB_19) Boost Enable (P1 ~ P7) Boost Type WEB_22 Boost Input (WEB_23) Tension set point Stall Enable (P1 ~ P7) Stall Type WEB_24 Stall Input (WEB_25) - Page 199 7. WEB Control Application Tension Command where Ramp Time is applied WEB_27 Tension Enb : Setting of Tension Control Enable Function This is the function of conducting On/Off of the final output of PID controller. If the multi-function input terminal (I/O_01 ~I/O_07) set to “TensionDisable”...
- Page 200 7. WEB Control Application 2) WEB_29 Dancer Pos : Dancer Reference Position Setting To maintain the desired tension, you should set the reference position of dancer. In this case it follows the reference position value of dancer with the deviation between the reference position of dancer set to WEB_29 Dancer Pos and the actual dancer position fed back from outside using PID controller.
- Page 201 7. WEB Control Application I controller 7) WEB_34 PIDGain RAMP : PID Gain Ramp Time Setting Sudden change in PI Gain may cause unexpected oscillation. To avoid such phenomenon, you need to carry out setting in slow way for a certain period of time when you transfer gain. This is the function of transferring the gain as shown in the Figure when setting multi-function input(DIO_01 ~ DIO_07) to “PI Gain Sel”...
- Page 202 7. WEB Control Application Function Loader Factory Name of Function Set Range Unit Code Display Default Linear Square WEB_35 P Profiler Process PID P Gain Profiler Type Setting Linear Cubed Quadratic WEB_36 P Apt Gain Process PID P Gain Profiler Gain Setting -1.00 ~ 10.00 0.00 P gain adaptation...
- Page 203 7. WEB Control Application 200[%]. If the upper limit of PID controller is set as 100[%], however, the final output of PID controller becomes 100[%]. Function Factory Loader Display Name of Function Set Range Unit Code Default WEB_39 Proc Pos Lmt Process PID Positive Limit -100.0 ~ 100.0 100.0...
- Page 204 7. WEB Control Application to 60[%], the final line speed command becomes 70[%]. When WEB_44 PID Type is “Fixed”, the final line speed command is; Final Line Speed Command [%] = Line Speed Command [%] + PID Output [%] When WEB_44 PID Type is set to “Proportional”, PID output is generated in proportion with the line speed command.
- Page 205 7. WEB Control Application Line Speed direction from reference block Line Speed from reference block If Line Speed is lower than WEB_45, PID Type Output is WEB_45. WEB-44 PID output from PID block PID direction from reference block PID Type Block Diagram 19) WEB_46 PIDHoldTime : PID controller Maintenance Time after Hold In case of Inverter Hold Command, the motor speed is reduced to 0.
- Page 206 7. WEB Control Application 7-37...
- Page 207 7. WEB Control Application 7.7.9 WEB Break Setting 1) WEB_48 WB Enable : WEB Break Detection Function Setting 2) WEB_49 INV WB Delay : Setting of Delayed Time until WEB Break Detection after Inverter Operation 3) WEB_50 WB Delay : Delayed Time in WEB Break Detection 4) WEB_51 WB Level : WEB Break Detection Level In the web control mode, the web is broken if it has tension it can bear.
- Page 208 7. WEB Control Application 7.7.10 Up to Speed Setting 1) WEB_52 UTS Enable : Up to Speed Judgment Setting 2) WEB_53 UTS Level : Up to Speed Level Setting When Web control is operates in smooth manner, the line speed command is almost similar to the actual line speed.
- Page 209 7. WEB Control Application roll speed is 140[rpm] and the gear ratio is 11:1, the motor rotating speed is 1540[rpm]. In this case, if the set value of WEB_54 Quick Stop of such two inverters is 5[sec], it stops after 5[sec] although the rotating speed of two motors are not same where the multi-function input terminal (DIO_01 ~ DIO_07) set to “Quick Stop”...
- Page 210 7. WEB Control Application is 10[%], the final line speed command of the empty core at the time of splicing operation becomes 55[m/m]. Function Factory Loader Display Name of Function Set Range Unit Code Default WEB_59 Splice Level Splicing Level Setting 0.0 ~ 100.0 Splicing Operation Status Diagram 7-41...
- Page 211 7. WEB Control Application Speed Calculator Diameter from Diameter calculation block Line Speed Speed reference Diameter Diameter Line Speed direction from reference block Line Speed from reference block If Line Speed is lower than WEB_45, PID Type Output is WEB_45 WEB-44 PID output from PID block PID direction from...
-
Page 212: Chapter 8 Communication Function
Chapter 8 Communication Function Chapter 8 - Communication Functions 8.1 Introduction This chapter is to explain SV-iV5 inverter serial communication’s standard, installation, and program with PC or FA computers. The communication method was designed to drive or monitor SV- iV5 inverter series in long distance through PC or FA computers. 1) Benefits under the communication method It is easy to apply inverters into automations in factories, because inverters can be driven or monitored according to user’s programs. - Page 213 Select out of 1,200/2,400/9,600/19,200/38,400 bps Control procedure Unsynchronized communication system Communication system Half duplex system Letter system Modbus-RTU: BINARY LS Bus: ASCII Stop bit length 1 bit/2 bit Sum check 2 byte Parity check None/Even/Odd 8.3 Structure of communication system...
- Page 214 8 bit data / odd No. parity check / 1 stop bit COM-35 Resp Delay: the 485 communication(Modbus-RTU or LS INV 485) built in iV5 acts as a slave. The slave iV5 responds to the Master after the period of time set in this function code. The communication between the master and slave can be kept smooth by setting this function code properly in a system in which the master is not able to deal with the quick response of the slave.
- Page 215 Chapter 8 Communication Function Judgment standard and Protection in case of a problem with the communication for a certain period of time If communication is lost for a time set inEXT_37 when command is set at EXT_36, inverter will be operated as below. Setting Item Function None...
- Page 216 Chapter 8 Communication Function 8.6 Communication Protocol 8.6.1 LS INV 485 protocol Computer and other hosts are the master and the inverter is the slave. The slave inverter responds to the master’s request for writing/reading. [Basic Form] Request: Address No.
- Page 217 Chapter 8 Communication Function E.g.) Request for reading of one of 3000 address numbers as follows Number of Address No. Address No. Addresses “01” “R” “3000” “1” “AC” SUM = ‘0’ + ‘1’ + ’R’ + ‘3’ + ‘0’ + ‘0’ + ‘0’ + ‘1’ = 05h + 30h + 31h + 52h + 33h + 30h + 30h + 30h + 31h = 1A7h (Control value excluded: ENQ, ACK, NAK, etc.) ASCII...
- Page 218 Chapter 8 Communication Function BroadCast Function used to give command to all the inverters bound by the network at a time Method: give command at Address No. 255 Action: Each inverter receives and replies to it though it’s not their own set address No. 8.6.2 Detailed reading protocol Reading Request: Request for reading of n number of Word data consecutive from xxxx address No.
- Page 219 Chapter 8 Communication Function 8.6.3 Detailed writing protocol Writing Request: Number of Address No. Address No. Data Addresses “01” ~ “1F” “W” “XXXX” “1” ~ “8” = n “XXXX…” “XX” n * 4 Total byte = 12 + n * 4 = 44 at maximum Normal Writing Response: Address No.
- Page 220 Chapter 8 Communication Function 8.6.5 Existing iS5/iG5/ iG5A compatible common area parameter Address Parameter Scale unit Allotment for Bits 0000h Inverter model B: iV5 2: 2.2kW 3: 3.7kW 4: 5.5kW 5: 7.5kW 6: 11kW 7: 15kW 8: 18.5kW 9: 22kW 10: 30kW 11: 37kW 12: 45kW...
- Page 221 Chapter 8 Communication Function Address Parameter Scale unit Allotment for Bits 000Ch DC Link voltage 000Dh output power PID Enable (Available on operation) External communication speed reference External communication option Run/Stop command Reverse direction run command Forward direction run command Torque Limit state Forward operation Stop...
- Page 222 Chapter 8 Communication Function Address Parameter Scale unit Allotment for Bits 0011h output terminal information OC1-EG 2A-2B 1A-1B 30A-30C 0012h Analog input 1 0.01 -100.0%(0xFC18) ~ 100.0%(0x03E8) 0013h Analog input 2 0.01 -100.0%(0xFC18) ~ 100.0%(0x03E8) 0014h Analog input 3 0.01 -100.0%(0xFC18) ~ 100.0%(0x03E8) 0015h Motor rotation speed...
- Page 223 Chapter 8 Communication Function Address Parameter Scale unit Allotment for Bits 0017h Speed command Write is available when FUN_02 is Option/Int485. 0018h ~001Ch 001Dh Speed command 1 Target speed command 001Eh Speed command 2 Ramp speed command Input command of speed 001Fh Speed command of speed controller controller...
- Page 224 Chapter 8 Communication Function 8.6.6 iS7 extended common area parameter 1) Inverter Monitoring Area Parameter (Reading only) Address Parameter Scale unit R/W Allotment for Bits 0300h Inverter model iV5: 0005h 2.2kW: 4022h, 3.7kW: 4037h, 5.5kW: 4055h, 7.5kW: 4075h, 11kW: 40B0h, 15kW: 40F0h, 18.5kW: 4125h, 22kW: 4160h,...
- Page 225 Chapter 8 Communication Function Address Parameter Scale unit R/W Allotment for Bits 0: Keypad 1: Communication option 2: N/A 3: Built-in 485 4: Terminal Block 5~127: N/A Frequency command source 0: Keypad speed 1: Keypad torque 2: MOP UP 3: MOP DOWN 4: MOP UP/DOWN 5: Analog 6: N/A...
- Page 226 Chapter 8 Communication Function Address Parameter Scale unit R/W Allotment for Bits 0320h Digital input information 0321h Digital output information Open Collector output (OC1 ~ EG) Relay2 (2A ~ 2B) Relay 1 (1A ~ 1B) Fault output (30A ~ 30B) 0322h 0323h Selected motor display...
- Page 227 Chapter 8 Communication Function Address Parameter Scale unit R/W Allotment for Bits 0325h 0.01 Analog input2 (Basic I/O) 0326h 0.01 Analog input3 (Basic I/O) 0327h 0.01 Analog input4 (Extended I/O) 0328h 0.01 Analog output1 (Basic I/O) 0329h 0.01 Analog output2 (Basic I/O) 032Ah 0.01 Analog output3 (Extended I/O)
- Page 228 Chapter 8 Communication Function Address Parameter Scale unit R/W Allotment for Bits Encoder error trip 0332h Level type trip information Lost command 0333h H/W Diagnosis Trip information 8-17...
- Page 229 Chapter 8 Communication Function Address Parameter Scale unit R/W Allotment for Bits H/W Diag 0334h 0335h~ 033Fh 0340h On Time date Total number date of inverter power On 0341h On Time minute Total minute except for total date of inverter On Time 0342h Run Time date Total number day of inverter run...
- Page 230 Chapter 8 Communication Function Address Parameter Scale unit R/W Allotment for Bits 0385h 0386h Relay1 (A – 1B) Relay2 (2A – 2B) Open collector 1 (OC1 – EG) Open collector 2 (OC2 – EG) Open collector 3 (OC3 – EG) 0387h 0388h PID command...
- Page 231 Chapter 8 Communication Function 8.6.7 iV5 Common area parameter Address Parameter Scale Unit R/W Allotment for Bits 0500h Input terminal command Stop Output terminal command 0501h OC1(OC1 – EG) AX2(2A – 2B) AX1(1A – 1B) 0502h Speed reference It operates when FUN_02 is Option/Int485. 0503h Acceleration time 0.01...
- Page 232 Chapter 8 Communication Function Address Parameter Scale Unit R/W Allotment for Bits 0506h Forward torque limit Forward torque limit 0507h Reverse torque limit Reverse torque limit 0508h Regeneratin torque limit Regeneratin torque limit 0509h Torque bias Torque bias 050Ah No-load current command No-load current command 050Bh PID input command...
- Page 233 Chapter 8 Communication Function Note1) Run command and multi-function input command can be available by communication.DIO_01 ~ DIO_07 must be set to multi- function input to use multi-function input command (P1~P7). Note2) Multi function output terminal (DIO_41~DIO_43) must be set to ‘Not Used’ to use output terminal command by communication. If not, inverter will be operated in accordance with current setting and can not use multi-function output.
-
Page 234: Chapter 9 -Inspection And Replacement
9. Inspection and Replacement Chapter 9 –Inspection and Replacement LS Vector Inverter, STARVERT-iV5, is an industrial electronic product that adopts up-to-date semiconductor device. It may have a failure caused by the ambient environment such as temperature, humidity, vibration, etc. or an excessive use of the component over its duration. It requires a routine checking to prevent such failure in advance. - Page 235 9. Inspection and Replacement CAUTION The failure of the device used in the inverter may not be predicted in advance. The failure of the device may cause the error of input power fuse or the fault trip. If you are suspicious of the failure of device, please contact our sales representative.
- Page 236 9. Inspection and Replacement Description How to Check Judgment Criterion 1) Isn't there any 1) Check by eyes. 1) There must be no damage to the insulation 2) Remove the unusual record resistance? connection at one side, 2) It should be within 2) Check the existence and measure it using a ±10% tolerance range...
- Page 237 9. Inspection and Replacement Description How to Check Judgment Criterion Check the indicator Check the value under Is the indicator value value on the display of the regulation and normal? the panel surface. standard value 9.4 Regular Checking (1 year interval) Description How to Check Judgment Criterion...
- Page 238 9. Inspection and Replacement Description How to Check Judgment Criterion 1) Isn't there any 1) Check by eyes. 1) There must be no damage to the insulation 2) Remove the unusual record resistance? connection at one side, 2) It should be within 2) Check the existence and measure it using a ±10% tolerance range...
- Page 239 9. Inspection and Replacement 9.5 Regular Checking (2 year interval) Description How to Check Judgment Criterion Unfasten the connection of the Megger Checking inverter, and then (between the main measure the gap 5MΩ or more circuit terminal and the among R, S, T, U, V, ground terminal and W terminals and this area after having...
- Page 240 9. Inspection and Replacement 9.7 Replacement Interval and Maintenance of the Key Components Inverter constitutes a number of electronic parts including semiconductor device. The parts used in the inverter are subject to change as time elapses for its construction or nature. Therefore without any replacement of parts, it may cause failure or deterioration in the performance the inverter.
- Page 241 9. Inspection and Replacement 9.8 How to Check at Diode Module & IGBT Inspection 1. Remove the power source wire (R, S, T) and the motor output wire (U, V, W) connected from the outside 2. Check and determine whether R, S, T, U, V, W, B1 (or P/L1), N of the inverter terminal block are turned on or not by changing the polarity of the tester between each other.
-
Page 242: Chapter 10 - Troubleshooting And Maintenance
10. Troubleshooting and Maintenance Chapter 10 – Troubleshooting and Maintenance 10.1 Fault Display CAUTION When a fault occurs, the inverter turns off its output and displays the fault status described below. In this case, the cause must be corrected before the fault can be cleared. If protective function keeps active, it could lead to reduction in product life and damage to the equipment. -
Page 243: Monitoring Fault Condition
10. Troubleshooting and Maintenance Protective Keypad Type Description display function Latch Arm Short Inverter output is stopped when IGBT Arm short or output short occurs. IGBT Short Arm Short-DB (Arm Short-DB is only come under SV110~220iV5) The inverter turns off its output by opening the fuse when something is wrong Fuse Open Fuse Open Latch... -
Page 244: Fault Reset
10. Troubleshooting and Maintenance 10.2.2 Monitoring previous faults Previous 2 faults are saved in DIS_05 “Last fault 1/2“. Last fault 1 is more recent fault than Last fault 2. Refer to “8.2.1 monitoring fault display” to check the fault contents. Code LCD display Description... -
Page 245: Check List Before Installation
10. Troubleshooting and Maintenance 10.4.2 Check list before installation Check (1) ~ (9) before installation. Check (10) ~ (16) when problem has occurred during use. 1) The Motor Does Not Rotate ① Is red lamp blinking ? ☞ Check whether other trips occur in DIS_05. If fault occurs, press [RESET] key to clear trip status and try operation. - Page 246 ⑦ Is PAR_27 [motor flux current] properly set? ☞ If LG-OTIS vector motor is not used, consult LS representative or set the correct value in accordance with application. However, it cannot set to exceed PAR_22 [motor rated current]. Normally it is 30~40 % of rated motor current.
- Page 247 10. Troubleshooting and Maintenance ② FUN_01 is set to “Keypad”,FUN_02 to “Keypad1”, FUN_12(Speed 0) to 100.0rpm and press [FWD] key but motor speed is not 100.0rpm. In this case, check for encoder wiring. ☞ If encoder wiring is disconnected or switched, it rotates only uni-direction with low speed (30.0 ~ 60.0rpm) and over 150% its rated current.
- Page 248 10. Troubleshooting and Maintenance LS representatives. ② When [STOP] key is blinking ☞ This marks trip condition or BX active status. Check any other trips occur in DIS_05. Reset the trip and try run. Check BX signal is ON on the keypad and input terminal signal in DIS_01 ~ DIS_03. Reset BX and try run.
- Page 249 ☞ Check the inverter and Keypad connection. ② Is input power turned on ? ☞ Check inverter power is applied. If nothing is displayed on the LCD in this condition, contact LS representatives. 11) Motor speed oscillates and speed is not constant during constant Run.
- Page 250 ☞ Poor encoder and motor connection may generate slip. Check the connection is tight. 12) Parameter change is not saved. ☞ Turn the power off and turn it on. If problem persists, contact LS representatives. 13) “Fuse Open” trip occurs constantly.
- Page 251 10. Troubleshooting and Maintenance 14) Motor input current is too large. ① Check the motor wiring. ☞ Check the motor wiring for the use of 220V / 380V transition type motor. (Refer to Main circuit terminal) ② Are motor and inverter capacity set correctly? ③...
-
Page 252: Chapter 11 - Option Devices
11. Option Devices Chapter 11 - Option Devices 11.1 Encoder Division Option Board 11.1.1 Encoder division option board installation and WIRING guide. Connect the option card’s CN2 connector to CN4 on the control board. ▶ Control Board ▶ Encoder Division Option Board ▶... - Page 253 A-phase input RT_A considered with input PA_IN circuit . Because A-phase encoder output is open collector type. The figure is shown the B-phase input RT_B wiring when inverter is PB_IN connected with High- B-phase speed counter of LS ELECTRIC PLC. 11-2...
- Page 254 11. Option Devices 11.1.3 Encoder division output Only available when Encoder Division Output Option Card is installed. Sets the division ratio for monitoring the Encoder pulse signals. Factory Code Address Description Setting range Unit display setting PAR_32 7320 EncDiv Ratio Encoder Pulse Output Division Rate 1 ~ 1128 PAR_33...
- Page 255 11. Option Devices 11.2 iV5 Option Board List 11.2.1 Dedicated option board for iV5 Option board Product Code ENC DIV(OC) Encoder division option board 64070003 EL I/O Elevator function otion board 64070004 SYNC I/O Synchronization option board 64070006 SIN/COS(Encoder) SIN/COS encoder option board 64070007 EXTN I/O Extension I/O option board...
-
Page 256: Chapter 12 - Accessories
12. Accessories Chapter 12 – Accessories 12.1 MCCB(LS), ELB(LS), Magnetic Contactor(LS), input/output Wire specifications Motor MCCB, Magnetic contactor Voltage Inverter models (kW) ELB (LS) (LS) SV022iV5-2DB TD125U/30A, EBS33b30A MC-18a SV037iV5-2DB TD125U/30A, EBS33b30A MC-32a SV055iV5-2DB TD125U/50A, EBS53b50A MC-40a SV075iV5-2DB TD125U/60A, EBS63b60A... - Page 257 12. Accessories ※ Please refer to our LSIS MCCB, ELB and MC catalog for the your order. The product indicated with only current will be released in the near future. 12.2 AC input fuse, AC reactor, DC reactor input Motor reactor reactor Voltage...
- Page 258 12. Accessories 12.3 The Selection of Braking Resistor and the Unit 12.3.1 The selection of dynamic braking resistor Resistor values shown in the following table is calculated on the basis of 150% of rated braking torque, 5% ED 1). Power rating of resistor should be doubled for resistor frequency 10% ED use. Additional braking unit should be installed for above SV 300iV5-2 / SV300iV5-4.
-
Page 259: Braking Unit
12. Accessories 12.3.3 Braking unit ① SV037DBH-2: 37kW/200V Class Braking Unit (10% ED) ② SV037DBH-4: 37kW/400V Class Braking Unit (10% ED) ③ SV075DBH-4: 75kW/400V Class Braking Unit (10% ED) ④ SV075DB-4 : 75kW/400V Class Braking Unit (100% ED) ⑤ SV220DB-4 : 220kW/400V Class Braking Unit (100% ED) - The Combination of two braking unit for 400V class is possible for more than SV900iV5-4 capacity. - Page 260 12. Accessories 12.3.5 Braking resistor for braking unit 100% of Braking Torque, 10% ED Braking Unit Resistance [] Rated Power [kW] 37kW-200V 37kW-400V 75kW-400V Refer to extra manual in 75kW-400V the case of 100% ED 220kW-400V braking unit. 12-5...
-
Page 261: Chapter 13 - Dimensions
13. Demensions Chapter 13 – Dimensions SV 022, 037, 055, 075, 110, 150, 185, 220iV5-2DB(MD) SV 022, 037, 055, 075, 110, 150, 185, 220iV5-4DB(MD) *MD: Mold type Dimensions (unit: mm [inches]) Models SV022iV5-2/4DB(MD) SV037iV5-2/4DB(MD) [11.18] [10.69] [8.15] SV055iV5-2/4DB(MD) [7.87] [7.09]... - Page 262 13. Demensions SV055, 075, 110, 150, 185, 220iV5-2DB SV055, 075, 110, 150, 185, 220iV5-4DB SV055, 075, 110, 150, 185, 220iV5-4DC *DC : DC power input type ECTOR ONTROL Dimensions (unit: mm [inches]) *DC has a same dimension as AC. Models SV055iV5-2/4DB 234.4...
- Page 263 13. Demensions SV300, 370iV5-2 SV300, 370, 450, 550, 750iV5-4 SV300, 370, 450, 550, 750iV5-4DC *DC : DC power input type STARVERT-iV5 Dimensions (unit: mm [inches]) *DC has a same dimension as AC. Models SV300iV5-2/4 319.2 256.6 308.2 16.9 SV370iV5-2/4...
- Page 264 13. Demensions SV900, 1100, 1320, 1600iV5-4 SV900, 1100, 1320, 1600iV5-4DC *DC : DC power input type STARVERT-iV5 Dimensions (unit : mm[inches]) *DC has a same dimension as AC. Models SV900iV5-4 83.2 234.6 286.2 23.5 SV1100iV5-4 [16.9] [19.9] [20.8] [28.7] [29.9]...
- Page 265 13. Demensions SV2200iV5-4 *DC : DC power input type SV2200iV5-4DC STARVERT-iV5 Dimensions (unit : mm[inches]) *DC has a same dimension as AC. Models 968.5 100.2 SV2200iV5-4 [21.26] [25.55] [26.77] [36.3] [38.13] [39.29] [5.91] [3.94] [10.67] [13.5] [15.87] [1.49] [0.47] 13-5...
- Page 266 13. Demensions SV2800, 3150, 3750iV5-4 *DC : DC power input type SV2800, 3150, 3750iV5-4DC Dimensions (unit : mm[inches]) *DC has a same dimension as AC. Models 1140.5 1110 SV2800iV5-4 [30.39] [19.69] [0.51] [19.69] [44.90] [43.70] [17.40] SV3150iV5-4 1302.5 1271.5 SV3750iV5-4...
-
Page 267: Control Block Diagram
14. Control Block Diagram 14-1... - Page 268 14. Control Block Diagram 14-2...
- Page 269 14. Control Block Diagram 14-3...
- Page 270 14. Control Block Diagram 14-4...
- Page 271 14. Control Block Diagram 14-5...
- Page 272 14. Control Block Diagram Accel/Decel WEB Control time Genceral Vect 14-6...
- Page 273 14. Control Block Diagram 14-7...
- Page 274 14. Control Block Diagram 14-8...
- Page 275 14. Control Block Diagram 14-9...
- Page 276 14. Control Block Diagram 14-10...
- Page 277 14. Control Block Diagram Operating Direction 14-11...
- Page 278 14. Control Block Diagram 14-12...
- Page 279 14. Control Block Diagram 14-13...
-
Page 280: Short Circuit Rating
ADDITIONAL UL MARKING 1. Short Circuit Rating “Suitable For Use On A Circuit Capable Of Delivering Not More Than Table1* RMS Symmetrical Amperes, 240 for rated 240V drives or 480 for rated 480V drives Volts Maximum,” or equivalent. Table1* Inverter Capacity Rating 200/400V Class: 5.5kW, 7.5kW, 11kW, 15kW, 18.5 kW, 22kW, 30kW, 37kW 5,000A... -
Page 281: Ec Declaration Of Conformity
EC DECLARATION OF CONFORMITY We, the undersigned, Representative: LS ELECTRIC Co., Ltd. Address : LS Tower, Hogye-dong, Dongan-gu, Anyang-si, Gyeonggi-do 1026-6, Korea Manufacturer: LS ELECTRIC Co., Ltd. Address : 181, Samsung-ri, Mokchon-Eup, Chonan, Chungnam, 330-845, Korea Certify and declare under our sole responsibility that the following... -
Page 282: Recommended Installation Instructions
LS inverters, iV5 series RFI FILTERS THE LS RANGE OF POWER LINE FILTERS FF ( Footprint ) - FE ( Standard ) SERIES, HAVE BEEN SPECIFICALLY DESIGNED WITH HIGH FREQUENCY LG INVERTERS. THE USE OF LS FILTERS, WITH THE INSTALLATION ADVICE OVERLEAF HELP TO ENSURE TROUBLE FREE USE ALONG SIDE SENSITIVE DEVICES AND COMPLIANCE TO CONDUCTED EMISSION AND IMMUNITY STANDARS TO EN 50081. - Page 283 series Footprint Filters LEAKAGE DIMENSIONS MOUNTING OUTPUT INVERTER POWER CODE CURRENT VOLTAGE WEIGHT MOUNT FIG CURRENT CHOKES THREE PHASE NOM. MAX. SV022iV5-2 (DB) 2.2kW FFV5-T020-(x) 250VAC 0.5mA 27mA 329x199.5x60 315x160 1.8Kg. FS-2 SV037iV5-2 (DB) 3.7kW SV055iV5-2 (DB) 5.5kW FFV5-T030-(x) 250VAC 0.5mA 27mA 451x234.5x60 437x190...
- Page 284 iV5 series / Standard Filters LEAKAGE DIMENSIONS MOUNTING MOUNT FIG. OUTPUT INVERTER POWER CODE CURRENT VOLTAGE WEIGHT CURRENT CHOKES NOM. THREE PHASE MAX. SV022iV5-2 (DB) 2.2kW FE-T020-(x) 250VAC 0.5mA 27mA 270x140x60 258x106 2.2Kg. FS-2 SV037iV5-2 (DB) 3.7kW SV055iV5-2 (DB) 5.5kW FE-T030-(x) 250VAC 0.5mA 27mA...
- Page 286 UL mark The UL mark applies to products in the United States and Canada. This mark indicates that UL has tested and evaluated the products and determined that the products satisfy the UL standards for product safety. If a product received UL certification, this means that all components inside the product had been certified for UL standards as well.
-
Page 287: Warranty
(Distributor) Tel. This product has been manufactured through a strict quality management and inspection process by LS Technical Team. The warranty period is 18 months from the date manufactured, provided that, the warranty period is subject change depending on the terms and condition of the agreement under separate cover. -
Page 288: Revision History
Ver. 3.20 / Short floor operation, Profibus April, 2013 Edition data Swap function added May, 2020 Edition Change LSIS -> LS ElECTRIC Disposable product Environment management LS inverter is designed for LS ELECTRIC regards the preserving environment. environmental preservation as a...
Need help?
Do you have a question about the LSLV-iV5 Series and is the answer not in the manual?
Questions and answers