peplink PEPWAVE HD2 Dome Installation Recommendations
For more information, please visit peplink.com
Hide thumbs
Also See for PEPWAVE HD2 Dome:
- User manual (436 pages) ,
- User manual (317 pages) ,
- User manual (260 pages)
Advertisement
©Peplink. All rights reserved.
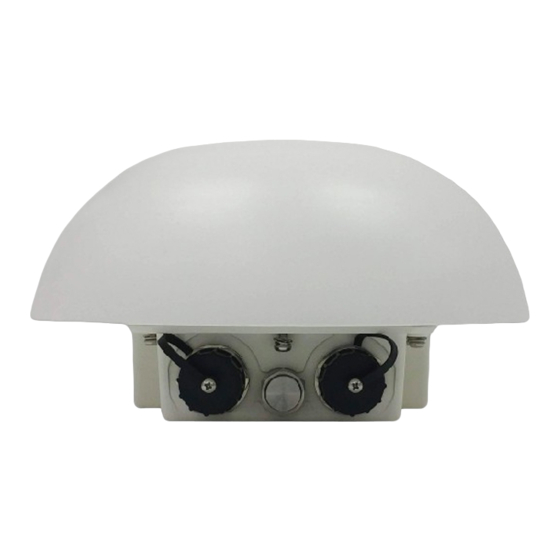
Steps:
1. Detach the unit underneath
the dome by removing the
screws.
2. Plug in the LAN wire to the
single Ethernet port within the
threaded screw.
3. With the M35 screw mount, it
can mount at the end of a
pole or on a rooftop.
4. Tighten the screw mount and
make sure it is secure.
Advertisement
Table of Contents

Related Manuals for peplink PEPWAVE HD2 Dome


Summary of Contents for peplink PEPWAVE HD2 Dome
- Page 1 Ethernet port within the threaded screw. 3. With the M35 screw mount, it can mount at the end of a pole or on a rooftop. 4. Tighten the screw mount and make sure it is secure. ©Peplink. All rights reserved.
- Page 2 3. Position the HD2 Dome to the mounting unit. 4. Place a washer in between each screw and hole on the mounting unit. 5. Tighten the screws into the back of the dome. ©Peplink. All rights reserved.
- Page 3 4. Secure the mounting unit to the wall with four screws. 5. Place a washer in between each screw and hole on the mounting unit. 6. Tighten the screws into the back of the dome ©Peplink. All rights reserved.
Need help?
Do you have a question about the PEPWAVE HD2 Dome and is the answer not in the manual?
Questions and answers