
Related Manuals for Peter electronic VS p III Series


Summary of Contents for Peter electronic VS p III Series
- Page 1 e l e c t r o n i c Assembly and Commissioning Instructions Soft Starters VS p III Quality is our Drive.
-
Page 2: Table Of Contents
User Manual Quality is our Drive. VersiStart p III Qualität ist unser Antrieb. Contents About This Manual ....................4 Disclaimer ......................... 4 Caution Statements ....................5 Electrical shock risk ....................5 Unexpected Operation ....................6 Avertissements à l'attention des clients canadiens ........... 7 Declaration of conformity .................. - Page 3 VersiStart p III Run simulation ......................33 Load/Save Settings ....................34 USB Save & Load ....................35 Auto-Start/Stop......................36 Network Address ..................... 36 Digital I/O State ....................... 37 6.10 Analog I/O State ...................... 38 6.11 Serial Number & Rating ..................38 6.12 Software Versions ....................
- Page 4 VersiStart p III 10.6 2 Motor Start/Stop ....................68 10.7 3 Motor Start/Stop-2 ....................71 10.8 4 Auto-Start/Stop..................... 74 10.9 5 Protection Levels ....................76 10.10 6 Protection Action ....................79 10.11 7 Inputs ........................82 10.12 8 Relay Outputs ...................... 85 10.13 9 Analog Output ......................
-
Page 5: About This Manual
VersiStart p III About This Manual WARNING Indicates a hazard that may cause personal injury or death. CAUTION Indicates a hazard that may damage the equipment or installation. NOTE Provides helpful information. Disclaimer The examples and diagrams in this manual are included solely for illustrative purposes. -
Page 6: Caution Statements
VersiStart p III Caution Statements Caution Statements cannot cover every potential cause of equipment damage but can highlight common causes of damage. It is the installer's responsibility to read and understand all instructions in this manual prior to installing, operating or maintaining the equipment, to follow good electrical practice including applying appropriate personal protective equipment and to seek advice before operating this equipment in a manner other than as described in this manual. -
Page 7: Unexpected Operation
VersiStart p III Unexpected Operation WARNING – ACCIDENTAL STARTS In some installations, accidental starts may pose an increased risk to safety of personnel or damage to the machines being driven. In such cases, it is recommended that the power supply to the soft starter is fitted with an isolating switch and a circuit-breaking device (eg power contactor) controllable through an external safety system (eg emergency stop, fault detector). -
Page 8: Avertissements À L'attention Des Clients Canadiens
VersiStart p III Avertissements à l'attention des clients canadiens AVERTISSEMENT L'icône AVERTISSEMENT ci-contre signale les informations concernant des risques pouvant entraîner des blessures graves, voire mortelles. Pour votre sécurité, veuillez consulter les avertissements sur cette page ou demander une copie du présent manuel en français auprès de votre distributeur local. AVERTISSEMENT –... - Page 9 VersiStart p III AVERTISSEMENT – DÉCONNECTER L'ALIMENTATION PRINCIPALE AVANT D'ACCÉDER AU DÉMARREUR OU À LA CHARGE Le démarreur progressif comporte des protections intégrées qui peuvent déclencher des mises en sécurité dans l'éventualité de défauts et ainsi arrêter le moteur. Des fluctuations de tension, des coupures d'alimentation et des blocages du moteur peuvent produire des mises en sécurité...
-
Page 10: Declaration Of Conformity
VersiStart p III Declaration of conformity In industrial linguistic usage the drive controllers of the type series VersiStart p III are called "devices", however, in the sense of the "law on the safety of equipment", the "EMC-law" or the "EC-machinery directive" they are not devices or machines ready for use or connection but they are components. -
Page 11: System Design
VersiStart p III System Design Feature List Streamlined setup process Versatile starting and stopping • Configuration profiles for common options • Scheduled start/stop applications • Built-in metering and inputs/outputs • Adaptive Control • Constant Current • Current Ramp Easy to understand interface •... -
Page 12: Model Code
VersiStart p III Model Code VS p III – – Control voltage C1 = 110~120 VAC or 220~240 VAC C2 = 24 VAC/VDC Bypass B = internally bypassed Nominal current rating Mains voltage 525 = 200~525 VAC 690 = 380~690 VAC Model Selection Starter sizing The soft starter must be the correct size for the motor and the application. - Page 13 VersiStart p III • Ratings All ratings are calculated at altitude of 1000 metres and ambient temperature of 40 ºC. In-line installation 3.0-10:350 3.5-15:345 4.0-10:350 4.0-20:340 5.0-5:355 VS p 24 VS p 42 VS p 52 3.0-10:590 3.5-15:585 4.0-10:590 4.0-20:580 5.0-5:595 VS p 64 VS p 69...
-
Page 14: Dimensions And Weights
VersiStart p III Dimensions and Weights B4 B5 10 11 12 13 14 15 21 22 33 34 41 42 44 53 54 B4 B5 10 B4 B5 10 11 12 13 14 15 21 22 11 12 13 14 15 21 22 33 34 41 42 44 53 54 33 34 41 42 44 53 54 A3 A1 A2... -
Page 15: Physical Installation
VersiStart p III Physical Installation 2/T1 4/T2 6/T3 33 34 41 42 44 53 54 B4 B5 10 1 1 12 13 14 15 21 22 B4 B5 10 1 1 12 13 14 15 21 22 33 34 41 42 44 53 54 B4 B5 10 1 1 12 13 14 15 21 22 33 34 41 42 44 53 54 B4 B5 10 1 1 12 13 14 15 21 22... -
Page 16: Main Contactor
VersiStart p III Finger Guard Kit Finger guards may be specified for personnel safety. Finger guards fit over the soft starter terminals to prevent accidental contact with live terminals. Finger guards provide IP20 protection when used with cable of diameter 22 mm or greater. Finger guards are compatible with models VS p 184 ~ VS p 580. -
Page 17: Power Factor Correction
VersiStart p III 4.10 Power Factor Correction If power factor correction is used, a dedicated contactor should be used to switch in the capacitors. To use the VersiStart p III to control power factor correction, connect the PFC contactor to a programmable relay set to Run. When the motor reaches full speed, the relay will close and power factor correction will be switched in. -
Page 18: Iec Coordination With Short Circuit Protection Devices
VersiStart p III CAUTION Integral solid state short circuit protection does not provide branch circuit protection. Branch circuit protection must be provided in accordance with the National Electrical Code and any additional local codes. 4.12 IEC Coordination with Short Circuit Protection Devices These fuses were selected based on start current of 300% FLC for 10 seconds. -
Page 19: Ul Coordination With Short Circuit Protection Devices
VersiStart p III 4.13 UL Coordination with Short Circuit Protection Devices Standard Fault Short Circuit Current Ratings Suitable for use on a circuit capable of delivering not more than the stated level of amperes (symmetrical rms, refer ##1 in table), 600 VAC maximum. •... - Page 20 VersiStart p III High Fault Short Circuit Current Ratings • Maximum fuse rating (A) – High fault short circuit current Suitable for use on a circuit capable of delivering not more than 65,000 rms symmetrical amperes, 480 VAC maximum, when protected by fuses of the stated class and rating (refer ##2 and ##3 in table).
- Page 21 VersiStart p III • Circuit breakers – High fault short circuit current Suitable for use on a circuit capable of delivering not more than 65,000 rms symmetrical amperes, 480 VAC maximum, when protected by circuit breaker models noted in ##4, ##5 or ##6. Breaker 1: Breaker 2: GE Breaker 3: LS...
-
Page 22: Fuse Selection For Type 2 Coordination
VersiStart p III 4.14 Fuse Selection for Type 2 Coordination Type 2 coordination is achieved by using semiconductor fuses. These fuses must be able to carry motor start current and have a total clearing I t less than the I t of the soft starter SCRs. -
Page 23: Specifications
VersiStart p III 4.15 Specifications Supply Mains voltage (L1, L2, L3) VS p 525 xxxB ............. 200~525 VAC (± 10%) VS p 690 xxxB ............. 380~690 VAC (± 10%) Control voltage (A1, A2, A3) VS p xxx xxxB-C1 (A1, A2) ....110~120 VAC (+10%/-15%), 600 mA VS p xxx xxxB-C1 (A2, A3) .... -
Page 24: Disposal Instructions
VersiStart p III Heat dissipation During Start ................. 4.5 watts per ampere During Run VS p 24~VS p 52 ..............≤ 35 watts approx VS p 64~VS p 135 .............. ≤ 50 watts approx VS p 184~VS p 250 ............≤ 120 watts approx VS p 352~VS p 580 ............ -
Page 25: Installation
VersiStart p III Installation WARNING Do not apply mains voltage to the starter until all wiring is complete. WARNING Always apply control voltage before (or with) mains voltage. Command Source The VersiStart p III can be started and stopped via the digital inputs, remote keypad, communication network, smart card or scheduled auto-start/stop. -
Page 26: Inputs
VersiStart p III Inputs CAUTION The control inputs are powered by the soft starter. Do not apply external voltage to the control input terminals. NOTE Cables to the control inputs must be segregated from mains voltage and motor cabling. Input Terminals B4 B5 10 11 12 13 14 15 21 22 B4 B5 10 11 12 13 14 15 21 22... - Page 27 VersiStart p III NOTE The thermistor input is disabled by default, but activates automatically when a thermistor is detected. If thermistors have previously been connected to the VersiStart p III but are no longer required, use the Thermistor Reset function to disable the thermistor. Thermistor Reset is accessed via the Setup Tools.
-
Page 28: Outputs
VersiStart p III Outputs Output Terminals B4 B5 10 11 12 13 14 15 21 22 B4 B5 10 11 12 13 14 15 21 22 33 34 41 42 44 53 54 33 34 41 42 44 53 54 A3 A1 A2 1/L1 3/L2... -
Page 29: Control Voltage
VersiStart p III Control Voltage Control Voltage Terminals B4 B5 10 11 12 13 14 15 21 22 33 34 41 42 44 53 54 A3 A1 A2 A3 A1 A2 1/L1 3/L2 5/L3 2/T1 4/T2 6/T3 Connect the control supply according to the supply voltage being used. •... -
Page 30: Power Terminations
VersiStart p III Power Terminations NOTE Some units use aluminium busbars. When connecting power terminations, we recommend cleaning the surface contact area thoroughly (using an emery or stainless steel brush) and using an appropriate jointing compound to prevent corrosion. The power input and output terminals are at the bottom of the unit. •... - Page 31 VersiStart p III Motor Connection The VersiStart p III can be connected to the motor in-line or inside delta (also called three-wire and six-wire connection). When connecting in inside delta, enter the motor full load current (FLC) for parameter 1B. The VersiStart p III will automatically detect whether the motor is connected in-line or inside delta and will calculate the correct inside delta current level.
-
Page 32: Typical Installation
VersiStart p III Typical Installation The VersiStart p III is installed with a main contactor (AC3 rated). Control voltage must be supplied from the input side of the contactor. The main contactor is controlled by the main contactor output (33, 34). 1/L1 2/T1 3/L2... -
Page 33: Quick Setup
VersiStart p III Quick Setup The Quick Setup Menu makes it easy to configure the VersiStart p III for common applications. The VersiStart p III guides you through the most common installation parameters, and suggests a typical setting for the application. You can adjust each parameter to suit your exact requirements. -
Page 34: Setup Tools
VersiStart p III Setup Tools Setup Tools includes options to load or save parameters to a backup file, set the starter's network address, check the status of the inputs and outputs, reset the thermal models or test operation using the Run Simulation. To access the Setup Tools, press MENU to open the Menu then select Setup Tools. -
Page 35: Load/Save Settings
VersiStart p III Run Simulation 2. Scroll to Run Simulation and press MENU/ENTER. Ready Apply Start Signal Run Simulation 3. Apply a start command from the selected Pre-Start Checks command source. The VersiStart p III simulates its MENU to Continue pre-start checks and closes the main contactor relay. -
Page 36: Usb Save & Load
VersiStart p III 4. At the confirmation prompt, select YES to confirm Load Defaults or NO to cancel, then press MENU/ENTER to proceed. When the action has been completed, the screen will briefly display a confirmation message, then return to the previous menu level. USB Save &... -
Page 37: Auto-Start/Stop
VersiStart p III Load Master Parameters: The VersiStart p III will load the file Master_Parameters.par from the top level of the USB drive. This file can be created or edited using WinMaster management software. Load Custom Message: The VersiStart p III will load the files Custom_Message_A.txt and Custom_Message_B.txt from the top level of the USB drive. -
Page 38: Digital I/O State
VersiStart p III To set the network addresses: 1. Press MENU to open the menu then select Setup Tools. 2. Scroll to Network Address and press the MENU/ENTER button. 3. Scroll to the required function and press the MENU/ENTER button. Set IP Address 4. -
Page 39: Analog I/O State
VersiStart p III 6.10 Analog I/O State Analog I/O State The top line of the screen shows the state of the motor Thermistor: 0 thermistor input. 4-20mA Output: 04.0 mA The bottom line of the screen shows the value of the analog output. -
Page 40: Logs
VersiStart p III Logs The Logs Menu provides information on events, trips and starter performance. To access the Logs Menu on the local keypad, press MENU to open the Menu then select Logs. On the remote keypad, press LOGS. Event Log The Event Log stores details of the starter's most recent trips, warnings, and operations (including starts, stops and configuration changes). -
Page 41: Keypad And Feedback
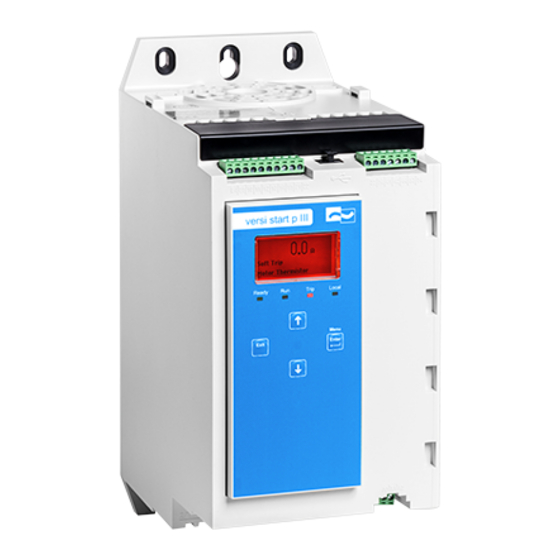
VersiStart p III Keypad and Feedback The Keypad Local keypad Remote keypad (if installed) versi start p Ready Trip Local Four-line display for status and programming details. Status LEDs Menu navigation buttons: EXIT: On the local Exit the menu or parameter, or cancel a parameter change. keypad, this button also resets a trip. -
Page 42: Remote Keypad
VersiStart p III Remote Keypad The remote keypad can be used to control the soft starter if parameter 1A Command Source is set to 'Remote Keypad'. • If the remote keypad is not selected as the command source, the START, STOP and RESET buttons will have no effect. -
Page 43: Displays
VersiStart p III Displays The keypad displays a wide range of performance information about the soft starter. To scroll through the feedback screens, press the buttons. Starter information At power-up, the starter information screen shows details of the starter's rating, software versions and serial number. - Page 44 VersiStart p III Date and Time The date/time screen shows the current system date and time (24 hour format). For details on setting the date and time, refer to Set Date and Time on page 33. Performance Graph The performance graph provides a real-time display of operating performance. Use parameters 10B~10E to format the graph.
-
Page 45: Operation
VersiStart p III Operation Start, Stop and Reset Commands The VersiStart p III can be started and stopped via the digital inputs, remote keypad, communication network, smart card or scheduled auto-start/stop. The command source can be set via the Setup Tools, or using parameter 1A Command Source. -
Page 46: Powerthrough
VersiStart p III Timer mode The starter can automatically stop the motor after a specified run time, then restart it after a specified off (stopped) time. The starter will repeat the cycle while the start signal remains active. For timer mode to operate: •... -
Page 47: Emergency Mode
Emergency mode can be used in conjunction with any command source. NOTE Although emergency mode operation satisfies the functionality requirements of Fire Mode, Peter Electronic does not recommend its use in situations that require testing and/or compliance with specific standards as it is not certified. -
Page 48: Typical Control Methods
VersiStart p III Typical Control Methods The requirements of an application differ between each installation, but the methods listed below are often a good starting point for common applications. Application Start Mode Stop Mode Bow thruster Constant Current Coast To Stop Centrifuge Constant Current Coast To Stop... - Page 49 VersiStart p III Application Start Mode Stop Mode Fan - centrifugal Constant Current Coast To Stop (undamped) Fan - high Constant Current Coast To Stop pressure Mill - ball Constant Current Coast To Stop Mill - hammer Constant Current Coast To Stop Adaptive Control Adaptive Control Pump - bore...
-
Page 50: Soft Start Methods
VersiStart p III Soft Start Methods Constant Current Constant current is the traditional form of soft starting, which raises the current from zero to a specified level and keeps the current stable at that level until the motor has accelerated. Constant current starting is ideal for applications where the start current must be kept below a particular level. - Page 51 VersiStart p III Adaptive Control for Starting In an adaptive control soft start, the VersiStart p III adjusts the current in order to start the motor within a specified time and using a selected acceleration profile. NOTE The VersiStart p III will apply the current limit on all soft starts, including adaptive control.
-
Page 52: Stop Methods
VersiStart p III Stop Methods Coast to Stop Coast to stop lets the motor slow at its natural rate, with no control from the soft starter. The time required to stop will depend on the type of load. Timed Voltage Ramp Soft Stop Timed voltage ramp stopping reduces the voltage to the motor gradually over a defined time. - Page 53 VersiStart p III 100% Adaptive Stop Profile (parameter 2K): 1. Early Deceleration 2. Constant Deceleration 3. Late Deceleration 4. Stop Time (parameter 2J) Time Adaptive Control is ideal for pumping applications, where it can minimise the damaging effects of fluid hammer. We recommend testing the three profiles to identify the best profile for the application.
- Page 54 VersiStart p III 100% 1: Stop Time (parameter 2J) 2: Brake Time (parameter 2P) 3: Coast to stop time Time Parameter settings: • Parameter 2I Stop Mode: set to 'DC Brake'. • Parameter 2J Stop Time: This is the total braking time (1) and must be set sufficiently longer than the brake time (parameter 2P) to allow the pre- braking stage to reduce motor speed to approximately 70%.
- Page 55 VersiStart p III Soft Brake For applications with high inertia and/or a variable load requiring the maximum possible braking torque, the VersiStart p III can be configured for soft braking. The VersiStart p III uses a changeover relay to control forward run and braking contactors.
-
Page 56: Pump Clean
VersiStart p III 9.10 Pump Clean The starter can perform a pump clean function before soft starting the motor. This can help dislodge debris from the impeller. Pump clean starts the motor in reverse then forward direction, then stops the motor. Pump clean can be configured to repeat the process up to 5 times. -
Page 57: Reverse Direction Operation
VersiStart p III 9.11 Reverse Direction Operation The starter can control a reversing contactor, to operate the motor in reverse direction. When reverse operation is selected, the starter will perform a soft start using the opposite phase sequence from normal operation. Reverse operation is controlled by the start/stop input (11, 12). -
Page 58: Jog Operation
VersiStart p III 9.12 Jog Operation Jog runs the motor at reduced speed, to allow alignment of the load or to assist servicing. The motor can be jogged in either forward or reverse direction. Jog is only available when the starter is controlled via the digital inputs (parameter 1A Command Source = 'Digital Input'). -
Page 59: Inside Delta Operation
VersiStart p III 9.13 Inside Delta Operation When connecting in inside delta, enter the motor full load current (FLC) for parameter 1B. The VersiStart p III will automatically detect whether the motor is connected in-line or inside delta and will calculate the correct inside delta current level. -
Page 60: Programmable Parameters
VersiStart p III Programmable Parameters 10.1 Main Menu The main menu lets you view and change programmable parameters that control how the VersiStart p III operates. To open the main menu, press the MENU/ENTER button then scroll to Main Menu and press MENU/ENTER again. -
Page 61: Parameter List
VersiStart p III 10.4 Parameter List Parameter Group Default Setting Motor Details Command Source Digital Input Motor Full Load Current Model dependent 0 kW Motor kW Locked Rotor Time 00:10 (mm:ss) Locked Rotor Current 600% Motor Service Factor 105% Reserved Motor Start/Stop Start Mode Constant Current... - Page 62 VersiStart p III Parameter Group Default Setting Kickstart Level-2 500% Jog Torque-2 Stop Mode-2 TVR Soft Stop Stop Time-2 00:00 (mm:ss) Adaptive Stop Profile-2 Constant Deceleration Adaptive Control Gain-2 Multi Pump-2 Single Pump Start Delay-2 00:00 (mm:ss) DC Brake Torque-2 DC Brake Time-2 00:01 (mm:ss) 250%...
- Page 63 VersiStart p III Parameter Group Default Setting Protection Levels Current Imbalance Current Imbalance Delay 00:03 (mm:ss) Undercurrent Undercurrent Delay 00:05 (mm:ss) Overcurrent 400% Overcurrent Delay 00:00 (mm:ss) Undervoltage 350 V 00:01 (mm:ss) Undervoltage Delay Overvoltage 500 V 00:01 (mm:ss) Overvoltage Delay Underpower Underpower Delay 00:01 (mm:ss)
- Page 64 VersiStart p III Parameter Group Default Setting Shorted SCR Action 3-Phase Control Only Battery/Clock Soft Trip and Log Inputs Input A Function Input Trip (N/O) Input A Trip Operating Only Input A Trip Delay 00:00 (mm:ss) Input A Initial Delay 00:00 (mm:ss) Input B Function Input Trip (N/O)
- Page 65 VersiStart p III Parameter Group Default Setting Adjustment Lock Read & Write User Parameter 1 Current User Parameter 2 Motor Voltage User Parameter 3 Mains Frequency User Parameter 4 Motor pf User Parameter 5 Motor Power User Parameter 6 Motor Temperature (%) Pump Clean Reverse Torque Reverse Time...
- Page 66 VersiStart p III Parameter Group Default Setting Advanced Tracking Gain Pedestal Detect Bypass Contactor Delay 150 ms Model Rating Model dependent Screen Timeout 1 minute Motor Connection Auto-detect Pump Input Configuration Pressure Sensor Type None Pressure Units Pressure at 4 mA Pressure at 20 mA Flow Sensor Type None...
- Page 67 VersiStart p III Parameter Group Default Setting Pressure Control Pressure Control Mode Start Pressure Level Start Response Delay 00:00:500 (mm:ss:ms) Stop Pressure Level Stop Response Delay 00:00:500 (mm:ss:ms) Depth Protection Depth Trip Level Depth Reset Level Depth Start Delay 00:00:500 (mm:ss:ms) Depth Response Delay 00:00:500 (mm:ss:ms) Thermal Protection...
-
Page 68: Motor Details
VersiStart p III 10.5 1 Motor Details 1A – Command Source Options: Digital Input The VersiStart p III will accept start and stop (default) commands from the digital inputs. Network The VersiStart p III will accept start and stop commands from the communication expansion card. -
Page 69: Motor Start/Stop
VersiStart p III 1E – Locked Rotor Current Range: 400% - 1200% FLC Default: 600% Description: Sets the locked rotor current of the connected motor, as a percentage of full load current. Set according to the motor datasheet. 1F – Motor Service Factor Range: 100% - 130% Default:... - Page 70 VersiStart p III 2D – Current Limit Range: 100% - 600% FLC Default: 350% Description: Sets the current limit for constant current and current ramp soft starting, as a percentage of motor full load current. 2E – Adaptive Start Profile Options: Early Acceleration Constant Acceleration (default)
- Page 71 VersiStart p III 2J – Stop Time Range: 0:00 - 4:00 (minutes:seconds) Default: 0 second Description: Sets the time for soft stopping the motor using timed voltage ramp or Adaptive Control. If a main contactor is installed, the contactor must remain closed until the end of the stop time.
-
Page 72: Motor Start/Stop-2
VersiStart p III 2R – Soft Brake Delay Range: 400 - 2000 milliseconds Default: 400 milliseconds Description: Sets the time the soft starter will wait after a stop signal is received, before it begins to supply braking current to the motor. Set to allow time for K1 and K2 to switch. - Page 73 VersiStart p III NOTE The VersiStart p III will apply the current limit on all soft starts, including adaptive control. If the current limit is too low or the start ramp time (parameter 2B) is too short, the motor may not start successfully. 3G –...
- Page 74 VersiStart p III 3M – Adaptive Stop Profile-2 Options: Early Deceleration Constant Deceleration (default) Late Deceleration Description: Selects which profile the VersiStart p III will use for an Adaptive Control soft stop. 3N – Adaptive Control Gain-2 Range: 1%~200% Default: Description: Adjusts the performance of Adaptive Control.
-
Page 75: Auto-Start/Stop
VersiStart p III 10.8 4 Auto-Start/Stop The starter can be configured to automatically start and/or stop the motor at a particular time, or run it in cycles of a specified duration. 4A – Auto-Start/Stop Mode Options: Disable (default) Enable Clock Mode Enable Timer Mode Description: Enable or disable auto-start/stop operation. - Page 76 VersiStart p III 4H – Monday Start Time Range: 00:00 - 23:59 Default: 00:00 Description: Sets the auto-start time for Monday (24 hour format). 4I – Monday Stop Time Range: 00:00 - 23:59 Default: 00:00 Description: Sets the auto-stop time for Monday (24 hour format). 4J –...
-
Page 77: Protection Levels
VersiStart p III 4R – Thursday Stop Time Range: 00:00 - 23:59 Default: 00:00 Description: Sets the auto-stop time for Thursday (24 hour format). 4S – Friday Mode Options: Start/Stop Disable (default) Stop Only Enable Start Only Enable Start/Stop Enable Description: Enables or disables auto-start/stop for Friday. - Page 78 VersiStart p III 5C – Undercurrent Range: 0% - 100% Default: Description: Sets the trip point for undercurrent protection, as a percentage of motor full load current. Set to a level between the motor's normal working range and the motor's magnetising (no load) current (typically 25% to 35% of full load current).
- Page 79 VersiStart p III 5K – Underpower Range: 10% -120% Default: Description: Sets the trip point for underpower protection. Set as required. 5L – Underpower Delay Range: 0:01 - 1:00 (minutes:seconds) Default: 1 second Description: Slows the VersiStart p III's response to underpower, avoiding trips due to momentary fluctuations.
-
Page 80: Protection Action
VersiStart p III 10.10 6 Protection Action 6A – Auto-Reset Count Range: 0 – 5 Default: Description: Sets how many times the soft starter will auto-reset, if it continues to trip. The reset counter increases by one each time the soft starter auto- resets, and resets after a successful start. - Page 81 VersiStart p III 6E – Overcurrent Options: Soft Trip and Log (default) Trip and Reset Soft Trip and Reset Warn and Log Trip Starter Log Only Description: Selects the soft starter's response to the protection event. 6F – Undervoltage Options: Soft Trip and Log (default) Trip and Reset Soft Trip and Reset...
- Page 82 VersiStart p III 6L – Input B Trip Options: Soft Trip and Log (default) Trip and Reset Soft Trip and Reset Warn and Log Trip Starter Log Only Description: Selects the soft starter's response to the protection event. 6M – Network Communications Options: Soft Trip and Log (default) Warn and Log...
-
Page 83: Inputs
VersiStart p III 6R – Motor Thermistor Circuit Options: Soft Trip and Log (default) Trip and Reset Soft Trip and Reset Warn and Log Trip Starter Log Only Description: Selects the soft starter's response to the protection event. 6S – Shorted SCR Action Options: 3-Phase Control Only (default) PowerThrough... - Page 84 VersiStart p III Zero Speed Sensor An open circuit across 13, 14 indicates to the soft starter that the motor has reached a standstill. The soft starter requires a normally open zero speed sensor. Motor Set Select A closed circuit across 13, 14 instructs the starter to use the secondary motor configuration for the next start/stop cycle.
- Page 85 VersiStart p III 7F – Input B Trip Options: Always Active Operating Only (default) Run Only Description: Selects when an input trip can occur. 7G – Input B Trip Delay Range: 0:00 - 4:00 (minutes:seconds) Default: 0 second Description: Sets a delay between the input activating and the soft starter tripping. 7H –...
-
Page 86: Relay Outputs
VersiStart p III 7K – Input B Name Options: Input B Trip (default) Controller Low Pressure High Pressure Vibration Alarm Pump Fault Field Trip Low Level Interlock Trip High Level Motor Temperature No Flow Motor Protection Starter Disable Feeder Protection Custom Message Description: Selects a message for the keypad to display when Input B is active. - Page 87 VersiStart p III 8B – Relay A On Delay Range: 0:00 - 5:00 (minutes:seconds) Default: 0 second Description: Sets the delay for changing the state of Relay A. 8C – Relay A Off Delay Range: 0:00 - 5:00 (minutes:seconds) Default: 0 second Description: Sets the delay for changing the state of Relay A.
-
Page 88: Analog Output
VersiStart p III 8I – Motor Temperature Flag The VersiStart p III has a motor temperature flag to give early warning of abnormal operation. The flag can indicate that the motor is operating above its normal operating temperature but lower than the overload limit. The flag can signal the situation to external equipment via one of the programmable outputs. -
Page 89: Display
VersiStart p III 10.14 10 Display 10A – Language Options: English (default) Português Chinese Français Español Italiano Deutsch Russian Description: Selects which language the keypad will use to display messages and feedback. 10B – Temperature Scale Options: Celsius (default) Fahrenheit Description: Selects whether the VersiStart p III will display temperatures in degrees Celsius or Fahrenheit. - Page 90 VersiStart p III 10G – Adjustment Lock Options: Read & Write Allows users to alter parameter values in the (default) main menu. Read Only Prevents users altering parameter values in the main menu. Parameter values can still be viewed. Description: Selects whether the keypad will allow parameters to be changed via the main menu.
- Page 91 VersiStart p III Heatsink The soft starter's temperature, measured at the Temperature heatsink. Bypass Model (%) The percentage of thermal capacity remaining in the bypass contactor. SCR Temperature The temperature of the SCRs, calculated by the thermal model. Rating Capacity (%) The thermal capacity available in the soft starter for its next start.
-
Page 92: Pump Clean
VersiStart p III 10.15 11 Pump Clean 11A – Reverse Torque Range: 20% - 100% Default: Description: Sets the torque level for reverse jog operation during pump clean. 11B – Reverse Time Range: 0:00 - 1:00 (minutes:seconds) Default: 10 seconds Description: Sets the time for the starter to operate in reverse jog during a pump clean cycle. -
Page 93: Communications Card
VersiStart p III 10.16 12 Communications Card 12A – Modbus Address Range: 1 - 254 Default: Description: Sets the Modbus RTU network address for the soft starter. 12B – Modbus Baud Rate Options: 4800 9600 (default) 19200 38400 Description: Selects the baud rate for Modbus RTU communications. 12C –... - Page 94 VersiStart p III 12H – Gateway Address Range: 0 - 255 Default: Description: Sets the first component of the network gateway address. The gateway address is set using parameters 12H~12K and the default address is 192.168.0.100. 12I – Gateway Address 2 Range: 0 - 255 Default:...
- Page 95 VersiStart p III NOTE The network address can also be set via the Network Address options in the Setup Tools. Refer to Network Address on page 36 for details. 12P – Subnet Mask Range: 0 - 255 Default: Description: Sets the first component of the network subnet mask, for Ethernet communications.
-
Page 96: Advanced
VersiStart p III 10.17 20 Advanced 20A – Tracking Gain Range: 1% - 200% Default: Description: Fine-tunes the behaviour of the adaptive control algorithm. 20B – Pedestal Detect Range: 0% - 200% Default: Description: Adjusts the behaviour of the adaptive control algorithm for soft stop. 20C –... -
Page 97: Pump Input Configuration
VersiStart p III 10.18 30 Pump Input Configuration NOTE The parameters in this group are only active if a smart card is installed. 30A – Pressure Sensor Type Options: None (default) Switch Analog Description: Selects which type of sensor is associated with the pressure sensor input on the smart card. - Page 98 VersiStart p III 30G – Flow at 4 mA Range: 0 – 5000 Default: Description: Calibrates the soft starter to the 4 mA (0%) level of the flow sensor input. 30H – Flow at 20 mA Range: 0 – 5000 Default: Description: Calibrates the soft starter to the 20 mA (100%) level of the flow sensor input.
-
Page 99: Flow Protection
VersiStart p III 30O – Depth at 20 mA Range: 0 – 1000 Default: Description: Calibrates the soft starter to the 20 mA (100%) level of the depth sensor input. 10.19 31 Flow Protection NOTE The parameters in this group are only active if a smart card is installed. Flow protection uses terminals B33, B34 or C23, C24 on the smart card. -
Page 100: Pressure Control
VersiStart p III 32B – High Pressure Start Delay Range: 00:00:10 – 30:00:00 mm:ss:ms Default: 00:00:500 ms Description: Sets a delay before a high pressure protection trip can occur. The delay is counted from the time a start signal is received. The pressure is ignored until the start delay has elapsed. -
Page 101: Depth Protection
VersiStart p III 33B – Start Pressure Level Range: 1 – 5000 Default: Description: Sets the pressure level to trigger the soft starter to perform a soft start. 33C – Start Response Delay Range: 00:00:10 – 30:00:00 mm:ss:ms Default: 00:00:500 ms Description: Sets a delay between the pressure passing the pressure control start level, and the soft starter performing a soft start. -
Page 102: Thermal Protection
VersiStart p III 34D – Depth Response Delay Range: 00:00:10 – 30:00:00 mm:ss:ms Default: 00:00:500 ms Description: Sets a delay between the depth passing the depth protection trip level, and the soft starter tripping. 10.23 35 Thermal Protection NOTE The parameters in this group are only active if a smart card is installed. 35A –... - Page 103 VersiStart p III 36D – High Pressure Options: Soft Trip and Log (default) Trip and Reset Soft Trip and Reset Warn and Log Trip Starter Log Only Description: Selects the soft starter's response if the pressure exceeds the high pressure trip level (parameter 32A) or the high pressure switch sensor closes.
- Page 104 VersiStart p III 36I – Well Depth Options: Soft Trip and Log (default) Trip and Reset Soft Trip and Reset Warn and Log Trip Starter Log Only Description: Selects the soft starter's response if the depth falls below the depth trip level (parameter 34A) or the depth switch sensor closes.
-
Page 105: Application Examples
VersiStart p III Application Examples 11.1 Smart Card - Pump Control and Protection The VersiStart p III smart card is ideal for applications with extensive external inputs, such as pumping situations where external sensors provide additional protection to the pump and motor. In this example, the VersiStart p III controls a bore pump via scheduled start/stop operation. - Page 106 VersiStart p III Parameter settings: • Parameter 1A Command Source: select 'Smart Card + Clock'. • Parameters 4A~4X Auto-Start/Stop: Set as required. • Parameter 7A Input A Function: select 'Command Override: Digital'. • Parameters 30A~30O Pump Input Configuration: Set as required. •...
-
Page 107: Smart Card - Level Controlled Pump Activation
VersiStart p III 11.2 Smart Card - Level Controlled Pump Activation The VersiStart p III smart card can be used to control start/stop activation of the starter, based on information from external inputs. In this example, the VersiStart p III controls a pump which fills a tank, with maximum and minimum water levels. - Page 108 VersiStart p III Parameter settings: • Parameter 1A Command Source: select 'Smart Card'. • Parameter 7A Input A Function: select 'Command Override: Digital'. • Parameters 30A~30O Pump Input Configuration: Set as required. • Parameters 31A~31D Flow Protection: Set as required. •...
-
Page 109: Troubleshooting
VersiStart p III Troubleshooting 12.1 Protection Responses When a protection condition is detected, the VersiStart p III will write this to the event log and may also trip or issue a warning. The soft starter's response depends on the Protection Action setting (parameter group 6). Some protection responses cannot be adjusted by the user. - Page 110 VersiStart p III Display Possible cause/Suggested solution Current imbalance Current imbalance can be caused by problems with the motor, the environment or the installation, such as: • An imbalance in the incoming mains voltage • A problem with the motor windings •...
- Page 111 VersiStart p III Display Possible cause/Suggested solution Flow Sensor The smart card has detected a fault with the flow sensor. Related parameters: 30E, 36B Flow Switch The flow switch sensor (smart card terminals C23, C24) has closed. Related parameters: 30E, 36H Frequency This trip is not adjustable.
- Page 112 VersiStart p III Display Possible cause/Suggested solution Internal fault 88 The soft starter firmware does not match the hardware. Keypad disconnected Parameter 1A Command Source is set to Remote Keypad but the VersiStart p III cannot detect a remote keypad. If a remote keypad is installed, check the cable is firmly connected to the soft starter.
- Page 113 VersiStart p III Display Possible cause/Suggested solution Low Water The depth sensor connected to the smart card has activated depth protection. Related parameters: 30L, 30N, 30O, 34A, 34B, 34C, 36I Motor connection This trip is not adjustable. Motor Connection T1 The motor is not connected correctly to the soft starter.
- Page 114 VersiStart p III Display Possible cause/Suggested solution Network There is a network communication problem, or the network communication master may have sent a trip command to the starter. Check the network for causes of communication inactivity. Related parameters: 6M • The reset input may be active. If the reset input is Not ready active, the starter will not operate.
- Page 115 VersiStart p III Display Possible cause/Suggested solution Power loss This trip is not adjustable. The starter is not receiving mains supply on one or more phases. Check that the main contactor closes when a start command is given, and remains closed until the end of a soft stop.
- Page 116 VersiStart p III Display Possible cause/Suggested solution Thermistor circuit The thermistor input has been enabled and: • The resistance at the input has fallen below 20 Ω (the cold resistance of most thermistors will be over this value) or • A short circuit has occurred. Check and resolve this condition.
-
Page 117: General Faults
VersiStart p III 12.3 General Faults This table describes situations where the soft starter does not operate as expected but does not trip or give a warning. Symptom Probable Cause • The reset input may be active. If the reset input is Starter "Not Ready"... - Page 118 VersiStart p III Symptom Probable Cause • If the soft starter is connected to the motor using Erratic and noisy motor operation. inside delta configuration, the soft starter may not be correctly detecting the connection. Contact your local supplier for advice. Remote keypad shows The keypad is not receiving data from the control PCB.
- Page 119 VersiStart p III Symptom Probable Cause • The starter will trip on Lx-Tx Shorted on the first PowerThrough does not operate when selected. start attempt after control power is applied. PowerThrough will not operate if control power is cycled between starts. •...
Need help?
Do you have a question about the VS p III Series and is the answer not in the manual?
Questions and answers