Table of Contents
Advertisement
Quick Links
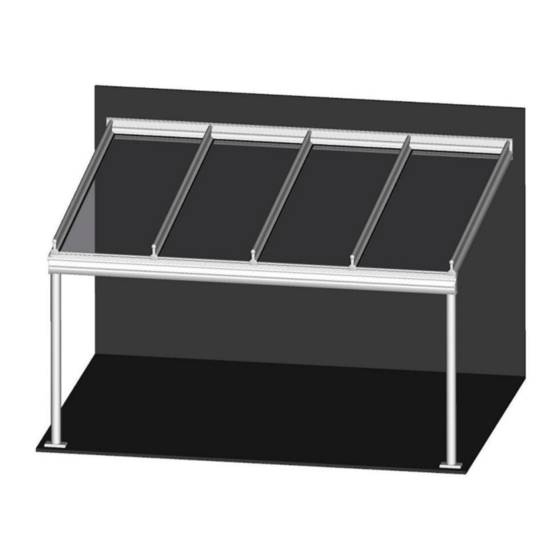
Terrazza Originale
Instructions for assembly
Pent roof type A / Gable roof / Head elements / Special shapes
Important notes for retailers/partners and end users
These instructions must be kept by the retailer/partner
Terrazza Originale
Instructions for assembly
We reserve the right to make technical changes
Please read carefully before using!
English
Version 5
12.06.2017
Item number
111361-0000
Page 1/104
Advertisement
Table of Contents

Related Manuals for weinor Terrazza Originale


Summary of Contents for weinor Terrazza Originale
- Page 1 Terrazza Originale Instructions for assembly Pent roof type A / Gable roof / Head elements / Special shapes English Important notes for retailers/partners and end users Please read carefully before using! These instructions must be kept by the retailer/partner Terrazza Originale...
-
Page 2: Table Of Contents
2.18 Unevenness and slopes on the on-site connections ............10 2.19 Explanation of symbols ....................11 3 Assembly – Terrazza Originale .................. 12 3.1 Notes on installing wall bracket + wall bracket glass bead ..........12 3.2 Affixing posts ........................16 3.3 Posts set in concrete ...................... - Page 3 5.4.3 Fitting the roof supports to an angled gutter ..............97 5.4.4 Fitting the stops for the roof covering ................99 5.4.5 Sealing, caulking ......................100 5.4.6 Miscellaneous installation notes .................. 100 6 Terrazza Originale exploded drawing ..............101 7 Disposal ........................103 Terrazza Originale Instructions for assembly Version 5 12.06.2017...
-
Page 4: Assembly Instructions
Unless otherwise stated, these Assembly Instructions always presume that the Terrazza is shown from the following angle: Figure: View template Exterior Interior Validity of these instructions The weinor roof has been approved for export and Germany. Terrazza Originale Instructions for assembly Version 5 12.06.2017 We reserve the right to make technical changes... -
Page 5: Depiction
IMPORTANT Product and property damage Risk of damage to the product and property due to improper use of the Terrazza. Please read and observe the safety instructions contained in this section. Terrazza Originale Instructions for assembly Version 5 12.06.2017 We reserve the right to make technical changes... -
Page 6: Qualifications
When unloaded, the weinor roof must be carried to the place of installation the right way round so it does not have to be turned round again in a confined space. The instructions on the packaging about which way up the product should be placed must be noted. -
Page 7: Intended Use
2.11 Intended use Alterations such as attaching items or conversions not envisaged by weinor may only be carried out with weinor's written consent. The type-specific structural standards can also be consulted in order to fit the weinor roof. ... -
Page 8: Handover
Detailed instruction on the safe and proper operation of the weinor roof must be given. If this is not adhered to and the product is operated incorrectly, the weinor roof may become damaged or accidents could result. -
Page 9: Notes On Creaking Sounds
3. Lay the roof covering 4. Fit the glazing elements If the guttering is being installed without weinor posts, e.g. on a wall, steps must be taken on-site to prevent the guttering from turning out of position. The guttering must always be handled from below in the region of the post fixation. -
Page 10: Unevenness And Slopes On The On-Site Connections
Possible resources / installation materials for levelling out unevenness: Support blocks Frame wideners igure: View of uneven wall from above View from above Uneven wall Terrazza Originale Instructions for assembly Version 5 12.06.2017 We reserve the right to make technical changes Item number 111361-0000 Page 10/104... -
Page 11: Explanation Of Symbols
2.19 Explanation of symbols In the illustrations shown below on how to install your weinor roof, symbols are used for some installation steps. Please consult the table below for details of what each symbol stands for: Table: Explanation of symbols... -
Page 12: Assembly - Terrazza Originale
Assembly – Terrazza Originale Notes on installing wall bracket + wall bracket glass bead There are two places where the wall bracket glazing bead can be installed: "top and bottom". Exactly where the wall bracket glazing bead should go depends on the thickness of the roof covering and the roof pitch. - Page 13 Choose the quantity and type of fixing materials required on-site based on the building conditions and structural safety. This will require drilling additional anchorage holes into the wall bracket on- site. Terrazza Originale Instructions for assembly Version 5 12.06.2017...
- Page 14 Wall bracket glazing bead position 1 = bottom Wall bracket glazing bead position 2 = top Wedge seal Wall bracket glazing bead Glass Web plate 16 mm Terrazza Originale Instructions for assembly Version 5 12.06.2017 We reserve the right to make technical changes Item number...
- Page 15 Installation tip for uneven facades: on uneven walls, secure the wall bracket in its intended place; do not tighten the fixing screws; insert the wall bracket glazing bead and affix using e.g. adhesive tape. Now tighten the fixing screws on the wall bracket. Terrazza Originale Instructions for assembly Version 5 12.06.2017...
-
Page 16: Affixing Posts
90 post Roof depth Roof depth Inner edge Inner edge post post Length of post Bottom edge of guttering Terrazza Originale Instructions for assembly Version 5 12.06.2017 We reserve the right to make technical changes Item number 111361-0000 Page 16/104... - Page 17 Post plate with holes for attachment to the assembly base and screws Optional If no posts are available, the guttering will need to be secured to prevent it from twisting/tipping over Terrazza Originale Instructions for assembly Version 5 12.06.2017 We reserve the right to make technical changes...
- Page 18 M5x16- Clip WS 4 profile Note: It is possible to selectively bend the clip profile up if it is too loose. Terrazza Originale Instructions for assembly Version 5 12.06.2017 We reserve the right to make technical changes Item number 111361-0000...
-
Page 19: Posts Set In Concrete
Figure: Setting the posts in concrete Trim the posts with stiffeners on site, taking the depth of the concrete encasing into account Bucket foundation Terrazza Originale Instructions for assembly Version 5 12.06.2017 We reserve the right to make technical changes... -
Page 20: Screw Foundation System
Screw foundation system Note: The Krinner company will install the screw foundation system Figure: Krinner screws + plates 90 post 115 post Terrazza Originale Instructions for assembly Version 5 12.06.2017 We reserve the right to make technical changes Item number... -
Page 21: Affixing The Aluminium Base With The 90 Post And 115 Post
Position of the downspout if a water drain is built into the post. Take care not to damage the downspout when attaching the screws. Length of plug-in unit profile Screws fitted on site; number and type of screws depends on on-site conditions Terrazza Originale Instructions for assembly Version 5 12.06.2017... - Page 22 Position of the downspout if a water drain is built into the post. Take care not to damage the downspout when attaching the screws. Length of plug-in unit profile Screws fitted on site; number and type of screws depends on on-site conditions Terrazza Originale Instructions for assembly Version 5 12.06.2017...
-
Page 23: Affixing The Roof Support
3.6.1 Affixing the roof support to the wall bracket Figure: Affixing the roof support to the wall bracket WS 8 Dubo retaining ring M5 Terrazza Originale Instructions for assembly Version 5 12.06.2017 We reserve the right to make technical changes... -
Page 24: Affixing The Side Roof Support
Figure: Affixing the side roof support 3.9x13 4.2x25 WS 8 If required, a screw can be added to affix the cover cap. Terrazza Originale Instructions for assembly Version 5 12.06.2017 We reserve the right to make technical changes Item number... -
Page 25: Affixing The Roof Support
The top profile for the glass must be installed behind the stop; remove the rubber to do so. Figure: Affixing the roof support WS 8 4.2x25 Dubo retaining ring M5 Terrazza Originale Instructions for assembly Version 5 12.06.2017 We reserve the right to make technical changes... -
Page 26: Sealing The Roof Supports To The Wall Bracket
To ensure that no water can penetrate between the roof support and the wall bracket, each roof support must be sealed all the way round the area joined to the wall bracket! Figure: Sealing the roof supports to the wall bracket Terrazza Originale Instructions for assembly Version 5 12.06.2017... -
Page 27: Affixing The Transom + Glass Butt End
Thickness of roof covering Glue the mounting shoe to the rubber glass support DIN7991 M5x16 10 mm M5x20 12 mm, 16 mm Terrazza Originale Instructions for assembly Version 5 12.06.2017 We reserve the right to make technical changes Item number 111361-0000... -
Page 28: Fitting The Roof Covering
On rectangular roof panels a variable shim stop must be fitted in the middle of each panel if the roof is pitched at > 15 degrees. Figure: Variable shim stop Terrazza Originale Instructions for assembly Version 5 12.06.2017 We reserve the right to make technical changes... - Page 29 Figure: Variable shim stop 2 Guttering Roof support Glass support with rubber Variable shim stop Terrazza Originale Instructions for assembly Version 5 12.06.2017 We reserve the right to make technical changes Item number 111361-0000 Page 29/104...
-
Page 30: Special Considerations When Using Web Plates
Figure: Multi-wall sheets and glass Insert spacer blocks and secure in place to prevent them from slipping Depending on the roof covering, silicone-free or siliconised seals may be used. Terrazza Originale Instructions for assembly Version 5 12.06.2017 We reserve the right to make technical changes... -
Page 31: Miscellaneous Installation Notes
Using your hand or a rubber mallet, tap on the cover plate from above (see direction of arrow); this will cause the cover strip to lock in place. Figure: Fitting the cover strips to the roof supports Figure: Fitting and removing the roof support cover strips Terrazza Originale Instructions for assembly Version 5 12.06.2017... -
Page 32: Fitting The Wall Bracket Glazing Bead
Secure the glazing bead in place using a wedge seal. igure: Fitting the glazing bead Wall bracket Roof support 150 Wall bracket glazing bead Terrazza Originale Instructions for assembly Version 5 12.06.2017 We reserve the right to make technical changes... -
Page 33: Fitting The Leaf Guard (Optional)
Screw the top section of the wall bracket onto the wall bracket. If the wall bracket protrudes to the side of the roof overhang, this end will need to be sealed. Figure: Installation below the roof overhang Terrazza Originale Instructions for assembly Version 5 12.06.2017... -
Page 34: Affixing Posts To A Side Wall
115 post centre / wall-mounting post plate cover cap 90 post: right wall-mounting post plate with screws 115 post: centre / wall-mounting post plate Optional Terrazza Originale Instructions for assembly Version 5 12.06.2017 We reserve the right to make technical changes... -
Page 35: Installation On A Side Wall
Trim the profiles on-site where the side wall bracket and the wall bracket meet at the rear wall. Figure: Installation on a side wall 4.2x16 4.2x16 Screwing the plate to the roof support prior to fitting the roof support Terrazza Originale Instructions for assembly Version 5 12.06.2017 We reserve the right to make technical changes... -
Page 36: Side Wall Bracket
Sealing the plastic profile joints on-site Apply butyl tape between the roof support and the wall bracket Seal all around the wall cover plate Optional Terrazza Originale Instructions for assembly Version 5 12.06.2017 We reserve the right to make technical changes... -
Page 37: Wall Bracket Coupling
Coupling joint on wall bracket profiles If coupling wall bracket profiles, the roof support does not necessarily need to be situated at the coupling joints Location of the clamping slider in the wall bracket Terrazza Originale Instructions for assembly Version 5 12.06.2017... -
Page 38: Gutter Coupling
Then place the gutter onto the post and screw in place. Figure: Gutter coupling Ø 8,4 Ø 8 Guttering Post Terrazza Originale Instructions for assembly Version 5 12.06.2017 We reserve the right to make technical changes Item number 111361-0000... -
Page 39: Side-Indented Posts
The post is affixed to the guttering and the guttering coupling profile. Figure: Side-indented posts 4,2x25 Ø 8,4 Ø 8 4.2x16 115 post 90 post Terrazza Originale Instructions for assembly Version 5 12.06.2017 We reserve the right to make technical changes Item number 111361-0000 Page 39/104... -
Page 40: Guttering Offset
The striker plate must always be fitted in such a way that the short edges of the drilled holes ALWAYS point upwards and outwards! Check the drill hole positions! Steel reinforcement on this side is 100 mm shorter than the gutter Terrazza Originale Instructions for assembly Version 5 12.06.2017... -
Page 41: Affixing The Roof Support To The Wall Bracket With Wall Offset
Figure: Affixing the roof support to the wall bracket on wall offsets The notches are added to the wall bracket before leaving the factory The notches on the top section of the wall bracket are added on-site Terrazza Originale Instructions for assembly Version 5 12.06.2017... -
Page 42: Screwing The Mounting Plates To The Roof Supports
Figure: Screwing the mounting plates to the roof support 5.5x19 Support bracket mounting plate for roof support 150 Roof support 150 Roof support 110 Terrazza Originale Instructions for assembly Version 5 12.06.2017 We reserve the right to make technical changes... -
Page 43: Installing Attachment Profiles For Glazing Elements
Glazing element with gap towards the attachment profile Glazing element Cut a notch in the guttering here Guttering stop Top profile Optional Terrazza Originale Instructions for assembly Version 5 12.06.2017 We reserve the right to make technical changes Item number... -
Page 44: Installing The Guttering Cover Cap
Remove the protective film from one side of the supplied contour sealing compound and stick it on the outside of the guttering cover cap stud. Affix the outside of the guttering cover cap to the inside of the guttering cover cap and screw on. Terrazza Originale Instructions for assembly Version 5 12.06.2017... -
Page 45: Gable Roof
Gable roof These Assembly Instructions contain features specific to the gable roof only. For all other installation details, please consult the standard assembly instructions for the Terrazza. Terrazza Originale Instructions for assembly Version 5 12.06.2017 We reserve the right to make technical changes... -
Page 46: Fitting The Locking Bar
Screw the threads approx. 35 mm deep into both sides of the posts Locking bar Front locking bar Rear locking bar, optional Front Rear Terrazza Originale Instructions for assembly Version 5 12.06.2017 We reserve the right to make technical changes Item number... -
Page 47: Gutter-To-Wall Anchorage
Figure: Gutter-to-wall anchorage 4,2x16 M6x16 Gutter-to-wall anchorage Wall Screws fitted on-site Spacing between guttering and wall Terrazza Originale Instructions for assembly Version 5 12.06.2017 We reserve the right to make technical changes Item number 111361-0000 Page 47/104... -
Page 48: Fitting The Roof Support To The Corner Connector
Once these are connected, clean off any residual adhesive and sealant on the outside of the roof support Corner connector Clamping slider Tapped hole; facing the ridge Countersunk hole; facing lower end of roof support Terrazza Originale Instructions for assembly Version 5 12.06.2017 We reserve the right to make technical changes Item number... -
Page 49: Fitting The Transom To The Ridge
Figure2: Fitting the transom to the ridge M5x8 Cut to match roof pitch Aluminium foil tape Mask the top profile of transom using mirror adhesive tape Terrazza Originale Instructions for assembly Version 5 12.06.2017 We reserve the right to make technical changes... -
Page 50: Fitting The Front-Mounted Guttering Wall Bracket
Gutter angle bracket, to be fitted on-site Cover cap for gutter angle bracket, to be fitted on-site Screws for wall installation; to be selected on-site based on state of building and structural safety requirements. Terrazza Originale Instructions for assembly Version 5 12.06.2017... -
Page 51: Fitting The Guttering Wall Bracket
If the roof pitch exceeds 20°, the roof supports will need to be adapted on-site (see Illustration In this case, the roof support caps can no longer be used. The roof supports will need to be covered and sealed on-site. Terrazza Originale Instructions for assembly Version 5 12.06.2017... - Page 52 Figure: Fitting the gutter wall bracket Roof support adjusted on-site Illustration A Illustration B Terrazza Originale Instructions for assembly Version 5 12.06.2017 We reserve the right to make technical changes Item number 111361-0000 Page 52/104...
-
Page 53: Exploded Drawing
Exploded drawing Figure: Exploded drawing Terrazza Originale Instructions for assembly Version 5 12.06.2017 We reserve the right to make technical changes Item number 111361-0000 Page 53/104... - Page 54 Pipe bend 87° 111870 111871 Clamp D53 101123 102233 Screw socket, complete None 112061 Side wall bracket 108113 101159 Terrazza Originale Instructions for assembly Version 5 12.06.2017 We reserve the right to make technical changes Item number 111361-0000 Page 54/104...
-
Page 55: Exploded Drawing - Options
Figure: Front-mounted gutter wall bracket 4.2x16 5.5x25 M10x30 Gutter angle bracket; gutter angle bracket cover cap Screws for wall installation; select on-site Terrazza Originale Instructions for assembly Version 5 12.06.2017 We reserve the right to make technical changes Item number... - Page 56 Figure: Gutter wall bracket Screws for wall installation; select on-site Terrazza Originale Instructions for assembly Version 5 12.06.2017 We reserve the right to make technical changes Item number 111361-0000 Page 56/104...
-
Page 57: Installation Notes For Custom-Shaped Roofs
Terrazza Type B / Head element Type B These Assembly Instructions contain features specific to the Type B only. For all other installation details, please consult the standard assembly instructions for the Terrazza. Terrazza Originale Instructions for assembly Version 5 12.06.2017... -
Page 58: Assembling The Kinked Side Roof Support
Figure: Assembling the side roof support M6x20 Corner connector Slide bottom end of roof support over corner connector Terrazza Originale Instructions for assembly Version 5 12.06.2017 We reserve the right to make technical changes Item number... -
Page 59: Fitting The Kinked Side Roof Support
This can also be done using the 135° post or 135° corner profile, both of which are available through weinor as optional extras. Adjust the profiles on-site and screw onto the kinked side roof support and the foundations. -
Page 60: Fitting The 135° Post
4.2x16 Attach D12x7 protective caps to all screws that remain visible. Angle bracket 40x40x5x20 Angle bracket 90x70x7x28 Cover cap D12x7 Terrazza Originale Instructions for assembly Version 5 12.06.2017 We reserve the right to make technical changes Item number 111361-0000... - Page 61 Affixing to the side roof support Affixing to the floor The 135-degree post below the kink should be fitted flush to the inner surfaces of the side roof support Terrazza Originale Instructions for assembly Version 5 12.06.2017 We reserve the right to make technical changes...
-
Page 62: Fitting The 135° Corner Profile
Figure: Fitting the 135° corner profile underneath the side roof support Corner profile, 135 degrees Do not fit the gutter cap before the kinked side roof support has been fitted Terrazza Originale Instructions for assembly Version 5 12.06.2017 We reserve the right to make technical changes... - Page 63 Option1 – Affixing the outer 90x70x7x28 angle bracket Option2 – Affixing the inner 90x70x7x28 angle bracket Round rod, D30x60 Angle bracket 90x70x7x28 Cover cap D12x7 Terrazza Originale Instructions for assembly Version 5 12.06.2017 We reserve the right to make technical changes...
- Page 64 If glazing elements are used on the Terrazza, there is no need to attach the 135° corner profile to the 90x70x7x28 angle bracket, provided that the glazing elements are bolted to the floor and the 135° corner section. Terrazza Originale Instructions for assembly Version 5 12.06.2017...
-
Page 65: Fitting The Angle Bracket Shim Stop
M5x10 Angle bracket, 20x20x5 Clamping slider Figure: Fitting the shim stop M5x10 Install glazing packers here before inserting the roof covering Terrazza Originale Instructions for assembly Version 5 12.06.2017 We reserve the right to make technical changes Item number 111361-0000... -
Page 66: Sealing The Kinked Side Roof Support To The Roof Covering
Make sure that the aluminium foil tape is applied from the roof covering to the roof support to ensure that no water can penetrate. Figure: Position of aluminium foil tape Aluminium foil tape Terrazza Originale Instructions for assembly Version 5 12.06.2017... -
Page 67: Fitting And Sealing The Guttering Cover Cap
4.2x16 On the standard Type B and Type B version with 135° corner profile, be sure to seal the guttering cover cap to the kinked side roof support and/or 135° corner profile. Terrazza Originale Instructions for assembly Version 5 12.06.2017... - Page 68 Figure: Sealing the guttering cover cap Type B with 135-degree post Type B with 135-degree corner profile Terrazza Originale Instructions for assembly Version 5 12.06.2017 We reserve the right to make technical changes Item number 111361-0000 Page 68/104...
-
Page 69: Sealing, Caulking
Figure: Sealing the glazing beads 5.1.9 Miscellaneous installation notes weinor needed the drill holes in the wall bracket in order to construct the roof. The drill holes are not intended to indicate how many mounting holes are actually required on-site or whether the wall bracket can be affixed using the existing drill holes. -
Page 70: Terrazza Type N / Head Element Type N
The type N head element can be created in one of two ways. The standard version involves fitting a 90° post beneath the gutter corner. Alternatively, two 180° posts can be used. The standard version is shown in the illustrations used in these instructions. Terrazza Originale Instructions for assembly Version 5 12.06.2017... -
Page 71: Installing The Wall Bracket Support Angle
Wall bracket support angle, 90 degrees Drill the holes and affix the 90° wall bracket support angle on-site; the number of fixings and their position must be determined at the site of installation Terrazza Originale Instructions for assembly Version 5 12.06.2017... - Page 72 Affix the 90° post plate to the 90° post using DIN7991-M8x40 countersunk screws. If using the "drainage through the post" option, drill an additional drainage hole to avoid frost damage. In this case, please follow the standard assembly instructions. Terrazza Originale Instructions for assembly Version 5 12.06.2017...
-
Page 73: Fitting The Gutter Corner To A 90° Post
Affix the loose ends of the clamps complete with nuts and washers to the support angles. Remove any excess adhesive and sealant. Terrazza Originale Instructions for assembly Version 5 12.06.2017 We reserve the right to make technical changes... -
Page 74: Installing The Gutter Corner And Two 180° Posts In The Corner
Attach the guttering to the posts. Remove any excess adhesive and sealant. Tension the two sections of guttering using the kinked threaded rods and tighten the nuts. Terrazza Originale Instructions for assembly Version 5 12.06.2017 We reserve the right to make technical changes... -
Page 75: Fitting The Roof Support To The Ridge
Glue a cover plate onto the front of the two roof supports where they join and also affix the cover plate to the shim stops. Figure: Fitting the front cover plate 4.2x16 Front cover plate Terrazza Originale Instructions for assembly Version 5 12.06.2017 We reserve the right to make technical changes... - Page 76 Upper part top section of wall bracket Figure: Fitting the top section of the wall bracket 4,2x16 Top cover plate Cover cap D12x7 Terrazza Originale Instructions for assembly Version 5 12.06.2017 We reserve the right to make technical changes Item number...
- Page 77 To do this, either trim the supplied stop profile to length and then glue to the area below the roof supports where the two meet or seal the gap using a suitable adhesive and sealant. Terrazza Originale Instructions for assembly Version 5 12.06.2017...
- Page 78 Fitting the T-shaped cover strip Terrazza Originale Instructions for assembly Version 5 12.06.2017 We reserve the right to make technical changes Item number 111361-0000 Page 78/104...
-
Page 79: Fitting The Roof Supports 110 (Small Roof Supports) To The Roof Ridge Supports
Holder for roof support 110 Affix the roof support 110 to the roof support 150 and seal around the two. Figure: Affixing the roof support 110 4,2x16 Terrazza Originale Instructions for assembly Version 5 12.06.2017 We reserve the right to make technical changes... -
Page 80: Fitting The Stops For The Roof Covering On The Roof Ridge Supports
M5x10 Angle bracket, 20x20x5 Clamping slider Figure: Fitting the shim stops M5x10 Install glazing packers here before inserting the roof covering Terrazza Originale Instructions for assembly Version 5 12.06.2017 We reserve the right to make technical changes Item number 111361-0000... -
Page 81: Fitting The Glazing Beads
In the case of the joists, first fit the glazing beads to the roof support 150 and then to the roof support 110. Figure: Fitting the glazing beads to the joists Glazing bead for roof support 110 Terrazza Originale Instructions for assembly Version 5 12.06.2017 We reserve the right to make technical changes... -
Page 82: Sealing, Caulking
to the area where the roof support 110 and roof support 150 join Figure: Position of aluminium foil tape Aluminium foil tape Terrazza Originale Instructions for assembly Version 5 12.06.2017 We reserve the right to make technical changes Item number... -
Page 83: Miscellaneous Installation Notes
If using the drain through a 90° post option, standard pipes and pipe bends can be used. Figure: Collar for 90-degree post Terrazza Originale Instructions for assembly Version 5 12.06.2017 We reserve the right to make technical changes... -
Page 84: Terrazza With Angled And Partially Angled Wall Bracket
On roofs with a side wall, the wall bracket ends 7 mm before the wall and is cut parallel to the side wall. A side cover cap is not fitted to the wall bracket in this case. Terrazza Originale Instructions for assembly Version 5 12.06.2017... - Page 85 No bolts or screws must be affixed behind any of the roof supports. Terrazza Originale Instructions for assembly Version 5 12.06.2017...
- Page 86 Straight wall bracket Interface between straight and angled wall Choose the fixing materials required on-site based on the building conditions and structural safety requirements. Terrazza Originale Instructions for assembly Version 5 12.06.2017 We reserve the right to make technical changes...
-
Page 87: Fitting The Wall Bracket Glazing Beads
Wall bracket glazing bead position 1 = bottom Wall bracket glazing bead position 2 = top Wedge seal Wall bracket glazing bead Glass Web plate 16 mm Terrazza Originale Instructions for assembly Version 5 12.06.2017 We reserve the right to make technical changes Item number... - Page 88 Figure: Wall bracket installation 2 Terrazza Originale Instructions for assembly Version 5 12.06.2017 We reserve the right to make technical changes Item number 111361-0000 Page 88/104...
-
Page 89: Fitting Roof Supports To An Angled Wall Bracket
Figure: Fitting roof supports to an angled wall bracket WS 8 Dubo retaining ring M5 Clamping slider Angled wall bracket Wall bracket glazing beads already fitted Terrazza Originale Instructions for assembly Version 5 12.06.2017 We reserve the right to make technical changes Item number... -
Page 90: Laying The Roof Covering
5.3.6 Miscellaneous installation notes weinor needed the drill holes in the wall bracket in order to construct the roof. The drill holes are not intended to indicate how many mounting holes are actually required on-site or whether the wall bracket can be affixed using the existing drill holes. -
Page 91: Terrazza With Angled Or Partially Angled Guttering
Terrazza with angled or partially angled guttering These Assembly Instructions contain features specific to angled and partially angled guttering. For all other installation details, please consult the standard assembly instructions for the Terrazza. Terrazza Originale Instructions for assembly Version 5 12.06.2017... -
Page 92: Fitting Angled And/Or Partially Angled Guttering
If the roof is being fitted to a side wall, the guttering will need to be cut parallel to the wall. A made-to-order cover plate is then glued onto the guttering to cover the guttering cut at an angle. Terrazza Originale Instructions for assembly Version 5 12.06.2017 We reserve the right to make technical changes... -
Page 93: Installation Of Posts
On a Terrazza with partially angled guttering, a notch is cut into the top of the post that is to be fitted below where two sections of guttering join. Figure: Notched post Terrazza Originale Instructions for assembly Version 5 12.06.2017... - Page 94 The post is affixed to the angled guttering using an ASS angle positioner. Straight guttering is affixed in the customary way. Terrazza Originale Instructions for assembly Version 5 12.06.2017 We reserve the right to make technical changes...
- Page 95 The post-to-guttering attachment can be used if the guttering pitch is β ≤ 5°. The posts are shortened and unnotched in this case. Terrazza Originale Instructions for assembly Version 5 12.06.2017 We reserve the right to make technical changes...
- Page 96 A guttering coupling profile must be inserted into the guttering next to each post (except below the guttering coupling) before the posts are fitted. Terrazza Originale Instructions for assembly Version 5 12.06.2017 We reserve the right to make technical changes...
-
Page 97: Fitting The Roof Supports To An Angled Gutter
Additional clamping slider to prevent guttering from sliding off to the side Dubo retaining ring M5 2-3 mm play to allow guttering to compress Terrazza Originale Instructions for assembly Version 5 12.06.2017 We reserve the right to make technical changes... - Page 98 The roof supports are covered using made-to-order plates. The cover plates must be glued onto the roof supports. Figure: Fitting the roof support cover plate Glue the cover plate to the roof support Terrazza Originale Instructions for assembly Version 5 12.06.2017...
-
Page 99: Fitting The Stops For The Roof Covering
Figure: Fitting the shim stop M5x10 Angle bracket, 20x20x5 Clamping slider Figure: Shim stop M5x10 Install glazing packers here before inserting the roof covering Terrazza Originale Instructions for assembly Version 5 12.06.2017 We reserve the right to make technical changes Item number 111361-0000... -
Page 100: Sealing, Caulking
5.4.6 Miscellaneous installation notes weinor needed the drill holes in the wall bracket in order to construct the roof. The drill holes are not intended to indicate how many mounting holes are actually required on-site or whether the wall bracket can be affixed using the existing drill holes. -
Page 101: Terrazza Originale Exploded Drawing
Terrazza Originale exploded drawing Figure: Terrazza Originale exploded drawing Terrazza Originale Instructions for assembly Version 5 12.06.2017 We reserve the right to make technical changes Item number 111361-0000 Page 101/104... - Page 102 Post plate for wall 108128 108320 Transom 101047 102216 Transom cover profile 100067 102144 Pipe bend 87° 111870 111871 Terrazza Originale Instructions for assembly Version 5 12.06.2017 We reserve the right to make technical changes Item number 111361-0000 Page 102/104...
-
Page 103: Disposal
101159 Disposal This product does not contain any materials which pose a risk or danger to other people or the environment. the roof parts should nevertheless be disposed of properly. Terrazza Originale Instructions for assembly Version 5 12.06.2017 We reserve the right to make technical changes... - Page 104 Terrazza Originale Instructions for assembly Pent roof type A / Gable roof / Head elements / Special shapes weinor GmbH & Co. KG Mathias-Brüggen-Straße 110 50829 Cologne (Germany) www.weinor.com Hotline: +49(0)221/5 97 09-214 Fax: +49(0)221/5 97 09-898 Terrazza Originale Instructions for assembly Version 5 12.06.2017...
Need help?
Do you have a question about the Terrazza Originale and is the answer not in the manual?
Questions and answers