Belleze 014-HG-PH00 Manual
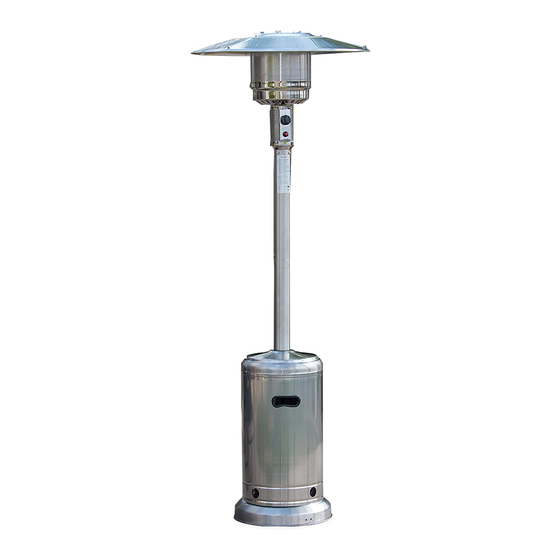
48000 btu stand patio heater
Hide thumbs
Also See for 014-HG-PH00:
- Owner's manual (23 pages) ,
- Owner's manual (24 pages) ,
- Manual (22 pages)
Advertisement
Quick Links
Advertisement

Subscribe to Our Youtube Channel
Related Manuals for Belleze 014-HG-PH00


Summary of Contents for Belleze 014-HG-PH00
- Page 1 48000 BTU Stand Patio Heater item no. 014-HG-PH00 www.bellezefurniture.com FOLLOW US: CONTACT INFO: NOTE: The instruction booklet contains IMPORTANT safety support@bellezefurniture.com @bellezefurniture information Please read and keep for future reference. 1-800-682-6376...
-
Page 2: Table Of Contents
Every Belleze product is carefully selected to ensure they meet our standards as well as your standards. We believe quality should never be determined by price which is why Belleze is committed to providing high end merchandise at the absolute lowest cost. PLEASE LIKE, COMMENT AND FOLLOW. - Page 3 DANGER If you smell gas: 1. Shut off gas to the appliance. 2. Extinguish any open flame. 3. If odor continues, keep away from the appliance and immediately call your gas supplier or fire department. WARNING Do not store or use gasoline or other flammable vapors and liquids in the vicinity of this or any other appliance.
- Page 4 PACKAGE CONTENT...
- Page 5 SAFETY INFORMATION Please read and understand this entire manual before attempting to assemble, operate or install the product. This manual contains important information about the assembly, operation and maintenance of this patio heater. General safety information is presented in these first few pages and is also located throughout the manual.
-
Page 6: Safety Information
SAFETY INFORMATION SAFETY INFORMATION DANGER DANGER combustion appliances produce carbon materials, paper or cardboard, a safe distance monoxide (CO) during the combustion away from the heater as recommended by the process. This product is designed to instructions. produce extremely minute, non-hazardous amounts of CO if used and maintained in openings into the combustion chamber. - Page 7 SAFETY INFORMATION WARNING WARNING We cannot foresee every use that may be Do not store or use gasoline or other flammable made of our heaters. vapors and liquids in the vicinity of this or any Check with your local fire safety authority if you other appliance.An LP-cylinder not connected have questions about heater use.
-
Page 8: Package Content
SAFETY INFORMATION WARNING WARNING gas is invisible, odorless, and flammable. An high surface temperatures. Stay away from odorant is normally added to help detect leaks these surfaces to avoid burning skin or igniting clothing. The odorant can fade over time so leaking gas is not always detectable by smell alone. -
Page 9: Assembly Instruction
ASSEMBLY INSTRUCTION Estimated Time for Assembly 60:00 Attach the wheel assembly to the base by lining up the holes and insert 2 M8x16 bolts, then tighten on the other side using 2 M8 flanged nuts Fill the bast with sand to improve the base stability. Loosely attach 3 brackets to the base with 3 M8x16 bolts. - Page 10 M6 Flange Nut Bolt M6 x 30 3. Install Lower Pole onto three Support Brackets. Attach Pole to Support Brackets using six Bolts M6 X 30 & six M6 Flange Nuts. Fully tighten all of the screws. 4. Load Cylinder Housing onto Pole. Slide Cylinder Housing down.
- Page 11 Reflector Spacer 5. Attach 3 washer and 3 reflector spacer on top of the screen cove. Tighten the reflective space. Then unscrew 4 bolts from the bottom of the control box. Screw 3/16” 6-1. Insert hose of Head Assembly into Upper Pole. Secure Head Assembly to pole with Stainless Steel Bolts.
- Page 12 Remove protective cover on the reflector . Slide 1 reflector panel to another, loosely tighten with M6x10 screws, washer, and cap nut. Repeat the procedure to complete assembling all 3 reflector panels together. Then assemble the round reflector plate on the reflector panels with M6x10 screws, washer an cap nut.
- Page 13 Φ8 washer Attach the reflector on top of the heater by putting on 3 washers on the reflector spacers, follow by the reflector, then another 3 washers. Secure the assembly with 3 wing nuts.
- Page 14 Connect hose and regulator to cylinder.The propane gas and cylinder are sold separately. Use a standard 20 lb. propane cylinder only. Use this heater only with a propane vapor withdrawal supply system. See chapter 5 of the standard for storage and handling of liquefied petroleum gas, ANS /NFPA 58. Your local library or fire department should have this book.
- Page 15 A dented, rusted or damaged propane cylinder may be hazardous and should be checked by your cylinder supplier. Never use a propane cylinder with a damaged valve connection. The propane cylinder must be constructed and marked in accordance with the specifications for LP gas cylinders of the U.S.
- Page 16 ⚠WARNING • A dented, rusted or damaged propane cylinder may be hazardous and should be checked by your propane supplier. DO NOT use a propane cylinder with a damaged valve connection. • The propane cylinder must be constructed and marked in accordance with the specifications for L gas cylinders of the U.S.
-
Page 17: Operation Instruction
OPERATION INSTRUCTION Leak Check ⚠WARNING • All leak test should be performs outdoors. • Extinguish all open flames before testing • DO NOT smoke when perform leak test. • DO NOT use the heater until all connections have been tested and do not leak. 1. - Page 18 Before Turning Gas Supply ON ⚠WARNING Carbon Monoxide Hazard, USE OUTDOOR ONLY • This appliance can produce carbon monoxide which has so smell. Using the appliance in an enclosed space would cause carbon monoxide poisoning, irreversible brain damage or even death. •...
- Page 19 Lighting Figure 2 Figure 1 Lighting: 1. Turn on the valve on the gas cylinder. 2. Press and turn the control knob to HI (maximum) position (counter-clockwise 90º). (Figure 1) 3. Holding down the control knob, press the igniter button several times until the main flame is ignited. Release the control knob 10 seconds after the ignition.
- Page 20 WARNIN G FOR YOUR SAFETY Be careful when attempting to manually ignite this heater. When Heater is ON: Emitter screen will become bright red due to intense heat. The color is more visible at night. Burner will display tongues of blue and yellow flame. These flames should not be yellow or produce thick black smoke, indicating an obstruction of airflow through the burners.
- Page 21 Operation Checklist For your safety, perform the following check before each use. 1. Make sure you are familiar with the entire user’s manual and understand all precautions notes. 2. All components are properly assembled and are in good condition to operate. 3.
-
Page 22: Care And Maintenance
CARE AND MAINTENANCE Visually checking portions of the hose assembly located within the confines of the heater post. Inspect the entire hose assembly at least annually, disassembling the reflector and burner. Inspect the hose assembly for evidence of excessive abrasion, cuts, or wear. Suspected areas should be leak tested. -
Page 23: Trouble Shooting
TROUBLE SHOOTING Problem Possible Cause Solution Propane cylinder is frosted Wait until the cylinder warms over Burner won’t light Blockage in orific Clear any blockage Control knob is not in “ON” Turn the knob to “ON” position position Problem Possible Cause Solution Gas pressure is low Replace with new cylinder... - Page 24 Warranty Belleze products come with a 1 year warranty from the date of purchase. In any event that the product arrives damaged or missing parts, we are more than happy to provide you with replacement part(s). Register your product on our website to enjoy extended warranty!!
Need help?
Do you have a question about the 014-HG-PH00 and is the answer not in the manual?
Questions and answers