
Related Manuals for weintek cMT-SVR-100


Summary of Contents for weintek cMT-SVR-100
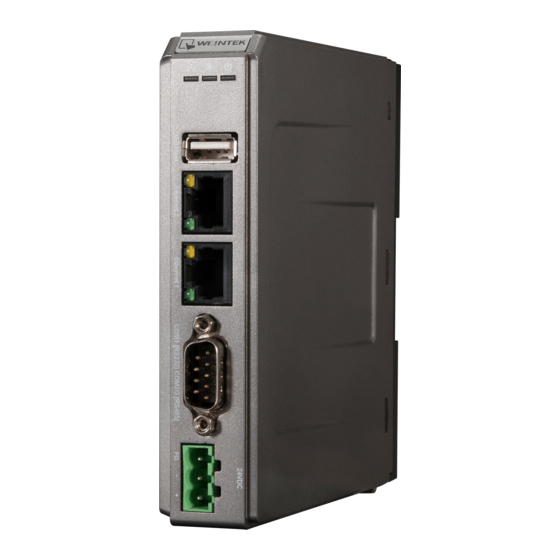
- Page 1 User Weintek USA, Inc. Manual www.WeintekUSA.com (425) 488-1100 cMT-SVR-100 Startup Guide Rev. SEP 8, 2020...
-
Page 2: Table Of Contents
Table of Contents Network Wiring Diagram………………………………………………………………………………………………………… 3 Web Interface....................……………………… 4 OS Upgrade..........................14 cMT-Viewer.…………………………………………………………………………………………………………………………… 15 Monitor Mode………………………………………………………………………………………………………………………… 23 cMT-Viewer Limitations…………………………………………………………………………………………………………… 27 cMT Objects Introduction ……………………………………………………………………………………………………….. 29 cMT-SVR Gestures Operation…………………………………………………………………………………………………… 35... -
Page 3: Network Wiring Diagram
1. Network Wiring Diagram Connect a cMT-SVR to a router via an Ethernet cable as the diagram shows below. The default IP address of LAN 1 is DHCP. The default IP address of LAN 2 is static IP 192.168.100.1. The IP addresses of LAN 1 and LAN 2 must be configured to different subnets. -
Page 4: Web Interface
2. Web Interface A cMT-SVR’s setting can be accessed via a web browser. Before configuration, connect cMT-SVR (LAN1) to a router via an Ethernet cable. Open a web browser (IE, Chrome, or Firefox) and enter the IP address of the cMT-SVR. - Page 5 On the top tool bar, it shows your identity and the name of the cMT-SVR. Click logout button to exist after finishing settings. The tabs of the web interface are displayed as shown. They are Network, Date/Time, HMI Name, History, Email, Project Management, System Password, Enhanced Security, EasyAccess2.0, and Misc.
- Page 6 [Ethernet2 (LAN)] - By default, the IP address of Ethernet 2 is 192.168.100.1. (Static IP) Date/Time [Sync with host.] - Synchronizes the HMI RTC with the PC RTC. To confirm the action, click on [Save].
- Page 7 HMI Name Change the name of the cMT-SVR to identify this HMI when retrieving historical data or loading a project on a PC. This saves time remembering the IP address of each cMT-SVR. [Identification light] - If clicking this button, the LED on the cMT-SVR will blink. History This page is used to clear historical data, recipe, and database information stored in the internal memory of a cMT-SVR.
- Page 8 Email This page provides setup of the SMTP server and email contact lists. For more information, refer to section 5.11 e-Mail in the Easybuilder pro user manual. [SMTP]- Enter your SMTP server, port number, user name, and password. Within “Sender information,” enter your name and mail address so that the recipients can know where the email comes from.
- Page 9 Project Management This page provides a way to restart the project of the cMT-SVR and restores it to its initial state without cycling power. [Restart Project] - Restarts cMT-SVR and restores it to its initial state. [Update Project]- Loads a project and recipes from the PC to the cMT-SVR.
- Page 10 [Backup Project]- Retrieves a project from the cMT-SVR to the PC. System Password There are three different levels of password protection, User, Update Project, and System Setting. This page is used to change the passwords for operating a project via cMT viewer, loading a project to the HMI, accessing FTP server and so on.
- Page 11 Open the option list to select an identity and change its password. Password hierarchy - System setting -for administrator Update project- for supervisors User- for operators Enhanced Security (Objects authorized to operators in HMI project) This page provides user passwords and security classes to prevent unauthorized operators from accessing objects that have the potential to cause damage or injury within your cMT-SVR HMI project.
- Page 12 [Import User Accounts] - User accounts can be updated via the file created by Administrator Tools. EasyAccess2.0. EasyAccess 2.0 is a tool that allows users to access and control a cMT-SVR remotely from anywhere in the world. cMT-SVR-100 is NOT a pre-licensed model, so purchasing an activation card is necessary. cMT-SVR-102 is a pre-licensed model.
- Page 13 For more information, refer to the EasyAccess2.0 user manual or EasyAccess2.0 help website https://support.ihmi.net/ Misc [FTP Client can modify USB/SD data] - If enabled, historical data stored in USB drive/SD card can be modified via FTP(File Transfer Protocol).
-
Page 14: Os Upgrade
3. OS Upgrade This section shows you how to update the OS image of a cMT-SVR. 1. Copy the MTfirmware.bin file to root folder of a SD card. 2. Flip DIP Switch 2 of the cMT-SVR to ON position. 3. To monitor the update progress, run HyperTerminal software on your PC and set the parameters to 115200, 8, N, 1. -
Page 15: Cmt-Viewer
App Store V6 or greater Windows PC Weintek USA official website Windows 7 or Windows 10 (Stand-alone App. or Easybuilder pro ) Note: cMT-Viewer is installed with Easybuilder pro package on a PC. To find it, launch Utility Manager »... - Page 16 cMT-Viewer App Interface Some operation options of the cMT-Viewer App opened on different operating systems may vary. This document discusses how to operate the cMT-Viewer App running on a PC. First, launch cMT-Viewer App. Note: 1.In this demonstration, version 2.6.38 of cMT-Viewer App is used. 2.Edit, Auto Play, and Page Indicator icons are only present when “Monitor Mode”...
- Page 17 After that, the corresponding project will be loaded. If you want to go back to Connect menu, click on the Start (Home) button at the top left corner.
- Page 18 Add a second project to cMT-viewer App to switch and view different projects. The small pictures of the images as shown below are images of the cMT-SVR projects before leaving the projects. On [History] tab, you can connect the recently accessed projects.
- Page 19 • Settings Menu - [Information] tab: Displays the current version of the cMT-Viewer App. [General] tab: Provides general settings. Change password- Allows users to change the password of “more settings” at the bottom left corner. Display datetime bar - Determines if the time bar will be displayed at the top of cMT-Viewer application.
- Page 20 [Language] tab: Select a language for cMT-Viewer menus. The language selected on the project of the cMT-SVR won’t be changed by this setting. To enable Monitor Mode and use Password Protection functionalities, click on “more settings” icon and log in with the password set on “Change password.” The default password is 111111. There are more options available on the General tab and the Password Protection tab.
- Page 21 [Show Start button] - If disabled, the “Home” icon on the project will be hidden. [Password Protection] - Accessing the protected actions will require the password if actions are selected below. Specify a password on [Change password] of this page. Open Project: The action to connect to the cMT-SVR and load its project.
- Page 22 In Password Protection mode, protected actions are locked. To access them, click on Password Protect icon and enter the corresponding password. The protected actions are accessible to users with knowledge of assigned password. There is a countdown timer displayed as shown below. When the time runs out, Password Protection mode will be activated.
-
Page 23: Monitor Mode
5. Monitor Mode The small images of the cMT-SVR project as shown below will be updated automatically, so users will see the latest data without entering each cMT-SVR project. Click on the Auto Play button. cMT-Viewer will automatically go to the next page. To pause Auto Play mode, click the Pause button highlighted in red. - Page 24 When clicking on the Device Information button, the names of each cMT-SVR, as well as their IP address, will be displayed as shown below. Tap the “Gear” (Setup) buttons to go to the web interface of each cMT- SVR. Click the Edit button to configure the page layout.
- Page 25 • Edit Menu - [Page] - Click the Add button to create a new page or delete the current page with the Delete button. Up to 9 pages can be created in each cMT-Viewer. [Move the current page] - Switch to the first page, the previous page, the next page, or the last page. [Layout] - Set up the maximum number of projects in each page.
- Page 26 6. Close [System Parameters] settings. Open the window no.3, titled Monitor Mode. 7. Place Text object, Bit Lamp object, Word Lamp object, Numeric Display object, ASCII Display object, Bar Graph object or Alarm Display object to show up-to-date data on this screen, so you can see the data shown and updated on the cMT-Viewer App while in monitor mode.
-
Page 27: Cmt-Viewer Limitations
6. cMT-Viewer Limitations Feature Limitation Some features do not work on a cMT Viewer client (PC, iOS, Android, cMT-iV5), even if they work on the local cMT HMI. Please take this into consideration when programming projects. Features (Objects) that do not work remotely on cMT Viewer App are listed below. •... - Page 28 Maximum Connect Count Three cMT-Viewer clients are allowed to remotely view and control the project of a cMT-SVR simultaneously by default. When the fourth cMT-Viewer client connects to the cMT-SVR, the warning message as shown below will pop up and reject the connection. The maximum capacity can be adjusted in Easybuilder pro software.
-
Page 29: Cmt Objects Introduction
7. cMT Objects Introduction Basic objects (Features): Bit type object • [Bit Lamp] displays the state of a designated bit. If the bit state is OFF, the State 0 shape will be displayed. If the bit state is ON, the State 1 shape will be displayed. •... - Page 30 • [Meter Display] displays the value of a designated word register with a meter. • [Moving Shape] is an object defined by the states and tracks of a program developer. The state and the location depend on consecutive word registers. Other basic objects - •...
- Page 31 • [Pie Chart] draws a pie chart that divides a circle into several slices to illustrate proportion, according to the value of a designated word register. • [Function Key] provides several functions, such as switching to another page, opening a pop-up window, keypad design, Macro execution and so on.
- Page 32 Recipe Database - Allows operators to view, add, update, delete, and use recipes.
- Page 33 Application This demo program demonstrates the application for a boiler system. Overview page [Flow block] displays the flow speed in a pipe or the speed in a transportation line. Trending chart page [Trend Display] displays data in a chart. The data must be predefined in Data Sampling object (Data logger).
- Page 34 Alarm page [Alarm Display] displays latest alarm messages which are predefined in Event Log object (Event detector) and have met a trigger condition. [Event Display] displays latest and historical alarm messages which are predefined in Event Log object (Event detector).
-
Page 35: Cmt-Svr Gestures Operation
8. cMT-SVR Gestures Operation Tap: This is the most common gesture. Briefly touch HMI screen with fingertip. Drag: Move fingertip over HMI screen without losing contact. Press: Touch HMI screen for extended period of time. Pinch: Touch HMI screen with two fingers and bring them closer together. Spread: Touch HMI screen with two fingers and move them apart. - Page 36 HMI-solutions that meet the needs of all industrial automation requirements while maintaining customer satisfaction by providing “on-demand” customer service. WEINTEK LABS brought their innovative technology to the United States in 2016, WEINTEK USA, INC., to provide quality and expedient solutions to the North American industrial market.
Need help?
Do you have a question about the cMT-SVR-100 and is the answer not in the manual?
Questions and answers