Subscribe to Our Youtube Channel
Summary of Contents for SCHEU Biostar
- Page 1 BIOSTAR® SCAN WITH LCD DISPLAY Operation Manual greatlakesdentaltech.com GREAT PEOPLE. GREAT PRODUCTS. GREAT LAKES. 800.828.7626...
-
Page 3: Installation
Congratulations on the purchase of your Biostar Scan With LCD Display. Before removing the machine and its components from the shipping box, determine the location for the Biostar in the laboratory. The machine’s size and weight are outlined above. Make sure sufficient workspace around the machine is available and that nothing will interfere with operation of the heating element. -
Page 4: Front View
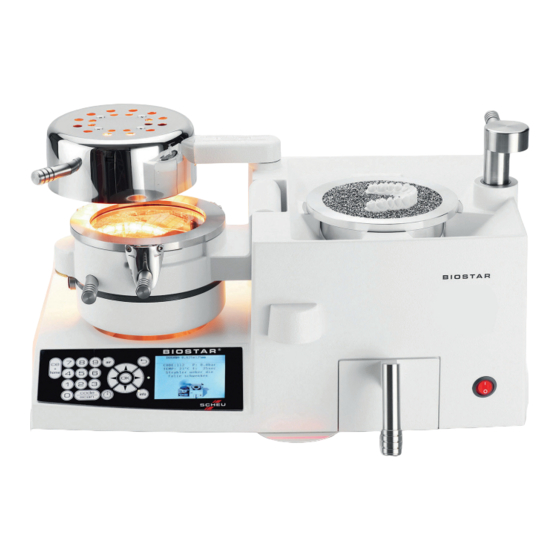
Pellet Cup: Used in every pressure-forming process and can be removed from the Biostar table for cleaning. The pellet cup holds the dental model, pellets, and platform. Platform*: Circular plate that is placed on the inner lip of the master pellet cup, to be used in place of pellets. -
Page 5: Back View
Compressed Air Supply: A ribbed air valve to clamp the air-pressure hose to the machine Pressure Regulator: Dial to increase or decrease air pressure used in the Biostar Fuse Holders: Two compartments that house miniature fuses Plug: Three-prong electrical socket for the... -
Page 6: Lcd Display Screen
2. Connect the Biostar to the air source using the high-pressure hose. Slip one end of the hose onto the air valve (C) of the Biostar, and slip the other end over the air pressure line. Secure each end in place with a hose clamp. - Page 7 • Reminder: DO NOT use material thicker than 5mm within the clamping mechanism. This may cause the Biostar to malfunction while pressure is in the chamber, and damage the internal chamber springs. • ALWAYS wear safety glasses when using this machine and during all fabrication procedures.
-
Page 8: Maintenance
A regular maintenance schedule should be followed. Proper maintenance will assure consistent fabrication results. Refrain from using water in the Biostar machine. Water may cause certain components to rust or corrode. When the machine is not being used, engage the clamping frame to the chamber and position the chamber on the pellet cup. -
Page 9: Operation
Always check the position of the chamber when heating materials. Operation There are three basic functions to operate the Biostar including: • Model preparation • Heating cycle •... - Page 10 Pellet Use A 2.5 pound container of zinc pellets (010-125) is supplied with each Biostar. Pellets are used to prevent the thermal-plastic materials from stretching over areas of the model that are not part of the appliance design. Stainless steel pellets (010-099) are also available. The pellets will prevent sealing the chamber to the cup, and inhibit the pressure-molding process if left on the pellet cup rim.
- Page 11 Work models are placed in cylindrical pellets to: • Support the base of the model so that the occlusal-incisal plane is parallel to the rim of the cup • Prevent the material from forming to the facial surfaces of the teeth, making it hard to remove the appliance from the work model, and overstretch of the thermal plastic •...
- Page 12 Use a Biostar Brush with Magnet (016-021), to remove excess pellets, and level the pellet line from the occlusal-incisal plane to the top rim of the cup. Hold the brush at an angle to sweep excess pellets from the rim of the cup and the palatal area of the model.
-
Page 13: Heating Cycle
Caution is advised to prevent skin burns. button again to enter. • You are now ready to heat the material. The Biostar provides instructions on the LCD display throughout the process. The programmed cooling time will automatically appear once the material is pressure formed. - Page 14 Position a 125mm diameter round disc on the spring-loaded adjusting ring of the pressure chamber. Align the clamping frame over the material so that the three clips slip under the bevel of the locking device on the sides of the chamber. Tighten by turning the handle clockwise, so that the chamber and clamping handles are parallel (curved red...
- Page 15 Great Lakes material, and printed directly on Scheu material. If the proper adaptation is not obtained, it may be necessary to extend or decrease the recommended heating times by 5-15 seconds.
- Page 16 Note: Not all pellets can be removed. Important Troubleshooting Advice Performing a Cold Test: A. Turn the Biostar on. Make sure the platform is in place. Clamp a sheet of 2mm (or thicker) hard material onto the pressure chamber. Secure the clamping frame. B. Enter seconds of heating time.
- Page 17 Biostar With LCD Display Codes Understanding 3-Digit Codes: • The first two digits represent the operating temperature of the heating element, and the length of heating time required prior to the thermal-forming process. • The third digit represents the cooling phase and the length of time that the thermal-formed material should be held under pressure.
-
Page 18: Reference Notes
Reference Notes... - Page 20 200 Cooper Avenue, Tonawanda, New York 14150 800.828.7626 U.S. & Canada | 716.871.1161 Worldwide | 716.871.0550 Fax greatlakesdentaltech.com | info@greatlakesdentaltech.com...


Need help?
Do you have a question about the Biostar and is the answer not in the manual?
Questions and answers
Is there any difference how the model arch is orientated? Like the anterior at 12:00 which is shown in the manual?
For the SCHEU Biostar, the orientation of the arch model depends on the type of foil used:
- Hard and hard-elastic foils: The models are placed in the model pot filled with granulate up to the upper sealing edge.
- Soft-elastic foils: The models are placed on the model support plate.
In both cases, the front teeth should face either right towards the closure shaft or left towards the pressure chamber. This positioning helps to avoid different foil thicknesses between the quadrants after molding.
This answer is automatically generated