Table of Contents
Advertisement
Quick Links
TM
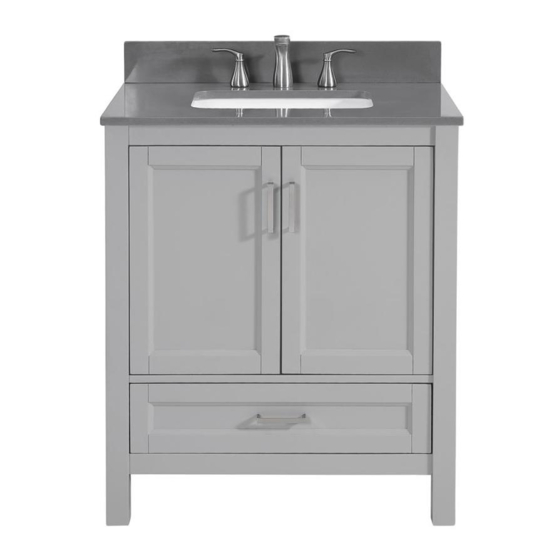
Durham Bathroom Vanity
30-IN Vanity Base and Top
( 30-IN W x 22-IN D x 35-IN H)
Date Purchased _______________________
Questions, problems, missing parts?
Before returning to your retailer,
call our customer service department at
1-855-571-1044 9 a.m. - 5 p.m., EST, Monday-Friday.
www.greentouchhome.com
Advertisement
Table of Contents

Related Manuals for Greentouch Scott Living Durham 1328VA-30-220


Summary of Contents for Greentouch Scott Living Durham 1328VA-30-220
- Page 1 Durham Bathroom Vanity 30-IN Vanity Base and Top ( 30-IN W x 22-IN D x 35-IN H) Date Purchased _______________________ Questions, problems, missing parts? Before returning to your retailer, call our customer service department at 1-855-571-1044 9 a.m. - 5 p.m., EST, Monday-Friday. www.greentouchhome.com...
- Page 2 MODEL NUMBER DESCRIPTION 1328VA-30-220 30" Chocolate Finish Vanity Base & Sink 1328VA-30-236 30" Espresso Finish Vanity Base & Sink 1328VA-30-241 30" White Oak Finish Vanity Base & Sink 1328VA-30-242 30" Light Gray Finish Vanity Base & Sink 1328VT-30-900 (2500VT-30-900) 30" Carrara Marble Top with Backsplash 1328VT-30-901 (2500VT-30-901) 30"...
-
Page 3: Package Contents
PACKAGE CONTENTS PART DESCRIPTION QUANTITY Vanity Backsplash Sink Left Door (preassembled to Vanity(A)) Right Door (preassembled to Vanity(A)) Shelf Large Drawer (preassembled to Vanity(A)) HARDWARE CONTENTS (NOT SHOWN ACTUAL SIZE) Bolt Sink Bracket Lock Washer Wrench Touch Up Pen Qty. 4 Qty. -
Page 4: Installation Instructions
PREPARATION Before beginning assembly of product, make sure all parts are present. Compare parts with package contents list and hardware contents list. If any part is missing or damaged, do not attempt to assemble the product. Estimated Installation Time: 45 minutes (24 hours for adhesive to dry). Tools Required for Installation (not included): Phillips screwdriver, utility knife or scissors, adhesive, power drill with drill bit, measuring tape, level INSTALLATION INSTRUCTIONS... - Page 5 INSTALLATION INSTRUCTIONS 3. Screw bolts (AA) into the threaded holes of stone top (B) Hardware Used Bolt 4. Lower the sink brackets (BB) over the bolts (AA) and allow to rest on the sink lip. Adjust location of bracket to firmly grasp sink lip. Lower lock washers (DD) over bolts (AA) and secure with nuts (CC).
- Page 6 INSTALLATION INSTRUCTIONS 5. Clean area where the vanity (A) will be permanently located prior to beginning installation, ensuring the vanity (A) will not interfere with any water supply and drain lines once mounted. Locate wall studs and mark locations. With the help of another adult, place completed Vanity Cabinet Assembly to its final location.
- Page 7 INSTALLATION INSTRUCTIONS 7. Apply adhesive (not included) to unpolished side and bottom of backsplash (C). Position backsplash (C) on top (B) and against wall. Clean any excess adhesive before allowing to dry. 8. Place shelf (G) on top of shelf pins.
- Page 8 INSTALLATION INSTRUCTIONS 9. If you need to adjust the doors, do so in the following manner. To adjust door up or down, loosen screws (a) on both hinges, adjust door, and retighten screws. To adjust door left or right, turn screws (b) on both hinges, in or out. To adjust door in or out, loosen screws (c) on both hinges, adjust door, and retighten screws.
- Page 9 INSTALLATION INSTRUCTIONS 11. Locate large drawer (H) and set aside. Fully extend lower drawer glide tracks. With the help of another adult, hold the extended glide in one hand and the drawer in the other. Gently place the back of the drawer box into the metal hook located on the back of the drawer track.
-
Page 10: Care And Maintenance
CARE AND MAINTENANCE • Dust the vanity regularly with a soft, non-lint producing cloth or household dusting product. • You can clean the vanity with a gentle, non-abrasive household cleaner. • Make sure to dry the wood immediately with a soft cloth or towel. •... - Page 11 REPLACEMENT PARTS FOR 1328VA-30-220 For replacement parts, call our customer service department at 1-855-571-1044, 9 a.m. - 5 p.m., EST, Monday - Friday. PART DESCRIPTION PART # PART DESCRIPTION PART # PUBS-25-900-30 Bolt PUBS-25-901-30 Sink Bracket Backsplash PUBS-25-905-30 PU-Sink Clips-002 PUBS-25-906-30 Lock Washer Wrench...
- Page 12 REPLACEMENT PARTS FOR 1328VA-30-236 For replacement parts, call our customer service department at 1-855-571-1044, 9 a.m. - 5 p.m., EST, Monday - Friday. PART DESCRIPTION PART # PART DESCRIPTION PART # PUBS-25-900-30 Bolt PUBS-25-901-30 Sink Bracket Backsplash PUBS-25-905-30 PU-Sink Clips-002 PUBS-25-906-30 Lock Washer Wrench...
- Page 13 REPLACEMENT PARTS FOR 1328VA-30-241 For replacement parts, call our customer service department at 1-855-571-1044, 9 a.m. - 5 p.m., EST, Monday - Friday. PART DESCRIPTION PART # PART DESCRIPTION PART # PUBS-25-900-30 Bolt PUBS-25-901-30 Sink Bracket Backsplash PUBS-25-905-30 PU-Sink Clips-002 PUBS-25-906-30 Lock Washer Wrench...
- Page 14 REPLACEMENT PARTS FOR 1328VA-30-242 For replacement parts, call our customer service department at 1-855-571-1044, 9 a.m. - 5 p.m., EST, Monday - Friday. PART DESCRIPTION PART # PART DESCRIPTION PART # PUBS-25-900-30 Bolt PUBS-25-901-30 Sink Bracket Backsplash PUBS-25-905-30 PU-Sink Clips-002 PUBS-25-906-30 Lock Washer Wrench...
Need help?
Do you have a question about the Scott Living Durham 1328VA-30-220 and is the answer not in the manual?
Questions and answers