Table of Contents
Advertisement
Quick Links
Advertisement
Table of Contents

Related Manuals for Jolly D6-WP

Summary of Contents for Jolly D6-WP
- Page 1 USER MANUAL V1.1...
-
Page 3: Table Of Contents
Table of content 1.Open-Package guidelines............... 1.1Package......................1 2.Safety instructions..................1 3.Operating determination.................3 4.Rigging the fixture...................4 4.1 Mounting......................4 4.2Installing the Clamps..................4 4.3 Power supply connection and cut off..............5 4.4 Power Connection.....................6 4.5 DMX-512 connection/connection between fixtures...........6 Description of the device............ - Page 4 Congratulations on choosing our products! Please carefully read this instruction manual in its entirety and keep it well for using reference. This manual contained about the installation and the relative using information of this products. Plese refere this manual's relative instruction when using this equipment.
-
Page 5: Open-Package Guidelines
1.Open-Package guidelines -This equipment is made of new style,high intensity plastic. It fully shows the modem times light charac teristic with teristic with beauty struture. And it is made accord to CE standard. Fully agree with the interna- tion standard of DMX 512 agreement. - Page 6 Never let the power-cord come into contact with other cables! Handle the power cord and all connections with particular caution! Make sure that the available voltage is not higher than stated on the rearpanel. Always plug in the power plug least. Make suer that the power-switch is set to off-position before you con ections with themains with particular caution! Make sure that the power-cord is never crimped or damaged by sharp edges.Check the decice and the p- ower-cord from time to time.
-
Page 7: Operating Determination
Disposing This product is supplied in compliance with European Directive 2012/19/EU-Waste Electrical and Electronic Equipment (WEEE). To preserve the environment please dispose/recycde this product at the end of its life according to the local regulation. Battery This product contains a rechargeable lead-acid or lithium iron tetraphosphate battery. To pre- serve the environment,please dispose the battery at the end of its life according to the regul- ation in force. -
Page 8: Rigging The Fixture
4.Rigging the fixture 4.1 Mounting Pay attention to the regulations of CE. Installation by qualified staff to complete. For the various mounting positions of the FIXTURE(standing on the floor, sideways or hanging different accessories kits are available. Through this a safe and firm installation is assured. You’ll find special connectors on the bottom side of the system which are put to use here. -
Page 9: Power Supply Connection And Cut Off
The projector can be placed directly on the stage floor or rigged in any orientation on atruss without alte- ring its operation characteristics. For overhead use,always install a safety-rope that can hold at least 10 times the weight of the fixture.You must only use safety-ropes with screw on carabines.Pull the safety-rope through the two apertures on the bottom of the base and over the trussing system etc. -
Page 10: Power Connection
4.4 Power Connection If you wish to change the power supply settings, see the chapter appendix Connect the fixture to the mains with the enclosed power cable and plug. Warning: please verify the power of the power supply equipment prior to the connection! Earth wire must be grounded! CABLE(EU) CABLE(US) -
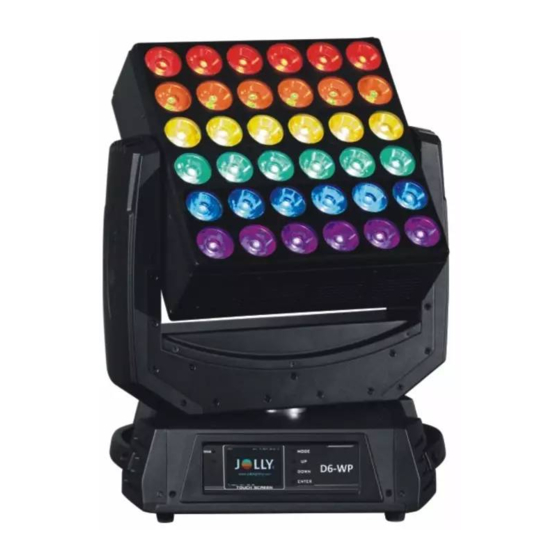
Page 11: Description Of The Device
DMX Terminator Diagram -For installations where the DMX cable has to run a long distance or is In an electrically noisy environment it is recommended to use a DMX terminator. This help in preventing corruption of the signal by electrical noise. The DMX terminato r is simply an XLR plug witha Ω... -
Page 12: Dimension
6.Dimension 4.49 ") 8.76 ") 12.20 " ) 21.14 ") 15.94 " ) 438.5 17.26 " ) 286.5 (11.28") (15.35") - 8 -... -
Page 13: Display Control
7.Display control 7.1 Navigation in the Menu Using the buttons or touch screen, and this can be simply and easily set the address code and functions code. If you view or modify the lighting feature set, then press ENTER button, the display will enter the menu interface. - Page 14 Click on the main interface of the icon, numerical to view view Settings related information of lamps and lanterns.Symbols such as the main interface appear “ “,the following error message indicates that there might be a lamps and lanterns,can click to view and control information content to modify the lamps and lanterns.
-
Page 15: Menu List
7.3 Menu list Remark Universe 0-255 Basic Engine DMX Address 000-XXX Mode RGBW Pixels 1 Engine Universe 0-255 DMX Address 000-XXX Pixels 2 Engine Universe 0-255 Fixture Id lnput Password:1702 0001-9999 Mode 1 1-25 Mode 2 1-38 Mode 3 1-46 Channel Mode Mode 4 1-69... -
Page 16: Dmx Protocol
8.DMX protocol Mode1 Fade Type Mode2 Fade Type Mode3 Fade Type Mode4 Fade Type Red fine Red fine Red fine Red fine Green Green Green Green Green fine Green fine Green fine Green fine Blue Blue Blue Blue Blue fine Blue fine Blue fine Blue fine... - Page 17 Mode4 Fade Type Mode5 Fade Type Mode6 Fade Type Mode7 Fade Type pixel blcok Colour 22 pixel blcok Colour 23 Red fine Red fine Red fine pixel blcok Colour 24 Green Green Green pixel blcok Colour 25 Green fine Green fine Green fine pixel blcok Colour 26 Blue...
- Page 18 Mode5 Fade Type Mode6 Fade Type Mode7 Fade Type pixel blcok Colour Red 7 White 8 pixel blcok Colour Green 7 Red 9 pixel blcok Colour Blue 7 Green 9 pixel blcok Colour Red 8 Blue 9 pixel blcok Colour Green 8 White 9 pixel blcok Colour...
- Page 19 Mode6 Fade Type Mode7 Fade Type Red 26 Red 23 Green 26 Green 23 Blue 26 Blue 23 Red 27 White 23 Green27 Red 24 Blue 27 Green 24 Red 28 Blue 24 Green 28 White 24 Blue 28 Red 25 Red 29 Green 25 Green 29...
-
Page 20: Maintance And Cleaning
9.Maintance and cleaning DANGER:Disconnect from the mains before starting any maintenance work. It is absolutely essential that the fixture is kept clean and that dust,dirt and smoke fluid residues must not buildup on or within the fixture. Otherwise, the fixtures light-output will be significantly reduced. Regular cleaning will not only ensure the maximum light-output, but will also allow the fixture to function reliably through out its life. -
Page 21: Menu Function
10.4 Menu Function 1.Touch screen,English menu. 2.DMX values and communication quality values can be displayed in each channel.. 3.Monitor could ON/OFF automatically. 4. Display the time using of lighting feature and lamp as well as the times of turning on for lamp. 5.... -
Page 22: Electronic Drawing
11.Electronic drawing DC48V DC5V Note: The above contents for reference only and is subject to change without prior notice, please take specification you have on hand and our company reserves the final right of interpretation. - 18 -... - Page 24 ht tp: //www.jol lyl ight ing. com Guangzhou hongcai stage equipment Co.,Ltd Tel:+862084558833 Fax:+862084559699 Email:info@jollylighting.com P.C:511450 Add:Building2,No.32,Changsha Street,Shachong Village,shiji Tow.Panyu District,Guangzhou,China...
Need help?
Do you have a question about the D6-WP and is the answer not in the manual?
Questions and answers