Table of Contents
Advertisement
Available languages
Available languages
Quick Links
Advertisement
Table of Contents

Related Manuals for KitchenAid KHB2351


Summary of Contents for KitchenAid KHB2351
- Page 1 Hand Blender KHB2351 W11321550A.indb 1 8/8/2019 4:15:18 PM...
-
Page 2: Parts And Features
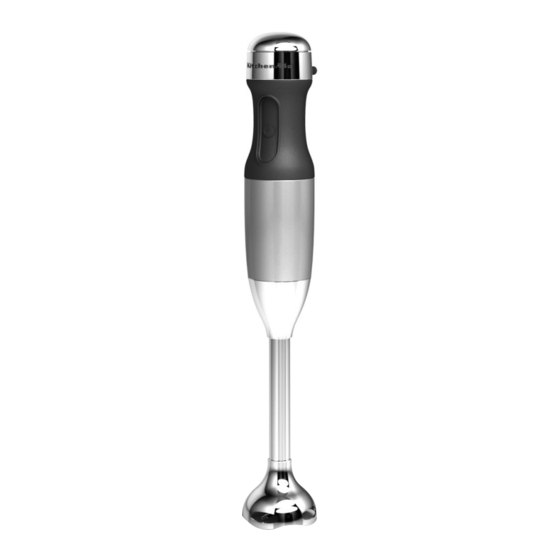
PARTS AND FEATURES HAND BLENDER PARTS Speed control dial One-touch power button Motor body 5-ft Power cord Whisk attachment Stainless steel blending arm Chopper attachment Storage bag 3 cup BPA free blending jar 2 | PARTS AND FEATURES W11321550A.indb 2 8/8/2019 4:15:18 PM... -
Page 3: Hand Blender Features
PARTS AND FEATURES HAND BLENDER FEATURES Speed Control Whisk attachment and adapter Provides easy adjustment of speed. Optimized for whipping egg whites and whipping cream. The whisk attachment One-Touch Power Button utilizes the same twist on and lock Located on the front of the motor body mounting system as the other attachments. -
Page 4: Hand Blender Safety
HAND BLENDER SAFETY IMPORTANT SAFEGUARDS When using electrical appliances, basic safety precautions should always be followed, including the following: 1. Read all instructions. 2. To protect against risk of electrical shock do not put motor body, cord, or electrical plug of this Hand Blender in water or other liquid. 3. -
Page 5: Electrical Requirements
SAVE THESE INSTRUCTIONS This product is designed for household use only ELECTRICAL REQUIREMENTS NOTE: Model KHB2351 have a polarized plug (one blade is wider than the other). To reduce the risk of electrical shock, this plug will fit in an outlet only one way. If the plug does not fit in the outlet, reverse the plug. -
Page 6: Operating Your Hand Blender
OPERATING YOUR HAND BLENDER ASSEMBLING THE HAND BLENDER ® Before using the KitchenAid Hand Blender for the first time, wipe the motor body and attachment adapters with a clean, damp cloth to remove any dirt or dust. Mild dish soap may be used, but do not use abrasive cleansers. -
Page 7: Using The Blending Arm
OPERATING YOUR HAND BLENDER USING THE BLENDING ARM Use the blending arm attachment for Blending: Insert Hand Blender with smoothies, milk shakes, soup, cooked blending arm attached into the jar vegetables, frosting, or baby food. containing ingredients at an angle. Use your free hand to cover the top of the blending jar for better stability and to avoid splattering. -
Page 8: Using The Whisk Attachment
OPERATING YOUR HAND BLENDER USING THE WHISK ATTACHMENT Use the Whisk to whip cream, beat egg 5. Insert the Hand Blender into the whites, mix instant puddings, vinaigrettes, mixture. mousse, or for making mayonnaise. The stainless steel Whisk may scratch or mark non-stick coatings;... -
Page 9: Using The Chopper Attachment
OPERATING YOUR HAND BLENDER USING THE CHOPPER ATTACHMENT 4. Align the Chopper bowl with the motor body and press together. 5. Hold the motor body with one hand and the Chopper bowl with the other while processing. Use the Chopper attachment to chop small amounts of food such as cooked meat, cheese, vegetables, herbs, crackers, bread, and nuts. -
Page 10: Processing Guide
OPERATING YOUR HAND BLENDER PROCESSING GUIDE Food Quantity Preparation Speed Time* Meats 7 oz (200 g) Cut into 3/4" (2 cm) Cubes 15 Seconds Almonds/Nuts 7 oz (200 g) Place in Whole Nutsw 25 Seconds Garlic 10–12 Cloves Place in Whole Cloves 15 Seconds Onions 3.5 oz (100 g) -
Page 11: Care And Cleaning
CARE AND CLEANING 1. Unplug Hand Blender before cleaning. Hand Blender Accessories and Attachments 2. Remove the adapters and attachments by twisting (see “Operating Your Hand Wash Blending Arms, Pitcher and Lid, Blender” section). Whisk, Chopper Bowl, Blades, and Pan Guard in hot, soapy water, or in the top 3. -
Page 12: Warranty And Service
IF THIS PRODUCT FAILS TO WORK AS WARRANTED, CUSTOMER’S SOLE AND EXCLUSIVE REMEDY SHALL BE REPAIR OR REPLACEMENT ACCORDING TO THE TERMS OF THIS LIMITED WARRANTY. KITCHENAID AND KITCHENAID CANADA DO NOT ASSUME ANY RESPONSIBILITY FOR INCIDENTAL OR CONSEQUENTIAL DAMAGES. This warranty gives you specific legal rights and you may also have other rights which vary from state to state or province to province. -
Page 13: Hassle-Free Replacement Warranty - Canada
P.O. Box 218, St. Joseph, MI 49085-0218 For service information in Canada: Call toll-free 1.800.807.6777. For service information in Mexico: Call toll-free 01.800.0022.767. ®/™ ©2019 KitchenAid. All rights reserved. Used under license in Canada. WARRANTY AND SERVICE | 13 W11321550A.indb 13 8/8/2019 4:15:20 PM... -
Page 14: Pièces Et Caractéristiques
PIÈCES ET CARACTÉRISTIQUES PIÈCES DU MÉLANGEUR À MAIN Bouton de contrôle de vitesse Bouton de mise sous tension à pression unique Corps du moteur Cordon Fouet d’alimentation de 5 pi Module de mixage en acier inoxydable Hachoir Sac de Récipient de 3 tasses sans BPA rangement 14 | PIÈCES ET CARACTÉRISTIQUES W11321550A.indb 14... - Page 15 PIÈCES ET CARACTÉRISTIQUES CARACTÉRISTIQUES DU MÉLANGEUR À MAIN Réglage de la vitesse Bol de mélange de 3 tasses sans BPA Permet un ajustement facile de la vitesse. Pratique et doté d’une base antidérapante, il permet d’effectuer plusieurs opérations Bouton de mise sous tension à pression de mélange.
-
Page 16: Sécurité Du Mélangeur À Main
SÉCURITÉ DU MÉLANGEUR À MAIN CONSIGNES DE SÉCURITÉ IMPORTANTES Lors de l’utilisation d’appareils électriques, il faut toujours observer certaines précautions élémentaires de sécurité, y compris les suivantes : 1. Lire toutes les instructions. 2. Pour éviter tout risque de décharge électrique, ne pas immerger le moteur, le cordon ou la prise du mélangeur à... -
Page 17: Spécifications Électriques
Ne jamais laisser l’appareil sans surveillance pendant son utilisation. CONSERVER CES INSTRUCTIONS Ce produit est conçu uniquement pour un usage domestique SPÉCIFICATIONS ÉLECTRIQUES REMARQUE : Le modèle KHB2351 est muni d’une fiche polarisée (une lame est plus large que l’autre). Pour réduire le risque de décharge électrique, cette fiche ne peut être insérée dans une prise que... - Page 18 UTILISATION DU MÉLANGEUR À MAIN ASSEMBLER LE MÉLANGEUR À MAIN Avant d’utiliser le mélangeur à main ® KitchenAid pour la première fois, essuyer le moteur ainsi que les adaptateurs à accessoires à l’aide d’un chiffon propre et humide pour éliminer toute saleté ou poussière. Un liquide à...
- Page 19 UTILISATION DU MÉLANGEUR À MAIN UTILISATION DU BRAS MÉLANGEUR Utiliser le module de mixage pour les Mixage: Dans le récipient contenant les smoothies, les laits frappés, les soupes, les ingrédients, insérer le mélangeur à main muni légumes cuits, le glaçage ou les aliments pour de l’axe mélangeur attaché, en l’inclinant.
- Page 20 UTILISATION DU MÉLANGEUR À MAIN UTILISATION DU FOUET Utiliser le fouet pour fouetter la crème ou Le fouet en acier inoxydable peut érafler les blancs d’œufs et mélanger les crèmes- ou déparer les revêtements antiadhésifs; desserts instantanées, les vinaigrettes, les éviter d’utiliser le fouet avec des récipients à...
-
Page 21: Utilisation Du Hachoir
UTILISATION DU MÉLANGEUR À MAIN UTILISATION DU HACHOIR 4. Insérer le bol du hachoir dans le corps du moteur et les emboîter. 5. Tenir le corps du moteur d’une main et le bol du hachoir de l’autre pendant le fonctionnement. Utiliser le hachoir pour hacher de petites quantités d’aliments, par exemple de la viande cuite, du fromage, des légumes, des... -
Page 22: Conseils D'utilisation
UTILISATION DU MÉLANGEUR À MAIN GUIDE D’UTILISATION Aliment Quantité Préparation Vitesse Durée* Viandes 200 g (7 oz) Coupez la viande en petits 15 secondes cubes de 2 cm (³/ ) de côté Amandes / Noix 200 g (7 oz) Placez les cerneaux de noix 25 secondes ou les amandes entières 10–12 gousses... -
Page 23: Entretien Et Nettoyage
ENTRETIEN ET NETTOYAGE Mélangeur à main accessoires 1. Débrancher le mélangeur à main avant le nettoyage. Laver les bras du mélangeur, le récipient et 2. Retirer les adaptateurs et les accessoires le couvercle, le fouet, le bol du hachoir, les en les faisant pivoter (voir la section lames et le couvercle de protection dans de “Utilisation du mélangeur à... -
Page 24: Garantie Et Dépannage
GARANTIE ET DÉPANNAGE GARANTIE ET DÉPANNAGE DU MÉLANGEUR À MAIN KITCHENAID ® POUR LES 50 ÉTATS DES ÉTATS-UNIS, LE DISTRICT FÉDÉRAL DE COLUMBIA, PORTO RICO ET LE CANADA La présente garantie couvre l’acheteur et les propriétaires suivants du mélangeur à main lorsqu’il est utilisé... - Page 25 Canada : MI 49085-0218 1-800-807-6777. Pour des informations concernant toute intervention de dépannage au Mexique : 01-800-0022-767. ®/™ ©2019 KitchenAid. Tous droits réservés. Utilisé sous licence au Canada. GARANTIE ET DÉPANNAGE | 25 W11321550A.indb 25 8/8/2019 4:15:23 PM...
-
Page 26: Piezas Y Características
PIEZAS Y CARACTERÍSTICAS PIEZAS DE LA LICUADORA DE INMERSIÓN Cuadrante de control de velocidad Botón de encendido de un solo toque Cuerpo del motor Cable eléctrico Accesorio para batir de 5 pies Brazo de licuado de acero inoxidable Accesorio para picar Frasco de licuado libre de BPA Bolsa de almacenaje con capacidad para 3 tazas... - Page 27 PIEZAS Y CARACTERÍSTICAS CARACTERÍSTICAS DE LA LICUADORA MANUAL Control de velocidad Aditamento para batir y adaptador Provee una regulación de velocidad fácil. Optimizado para batir claras de huevo y crema para batir. El aditamento para Botón de encendido de un solo toque batir utiliza el mismo sistema de montaje Ubicado en el frente del cuerpo del motor que se asegura al girarlo, como los otros...
-
Page 28: Seguridad De La Licuadora Manual
SEGURIDAD DE LA LICUADORA MANUAL SALVAGUARDIAS IMPORTANTES Al utilizar aparatos eléctricos, debe seguir las precauciones básicas de seguridad, entre las que se incluyen las siguientes: 1. Lea todas las instrucciones. 2. Para protegerse contra el riesgo de choque eléctrico, no coloque el cuerpo del motor, el cable ni el enchufe eléctrico de esta licuadora manual en agua ni en ningún otro líquido. -
Page 29: Requisitos Eléctricos
SEGURIDAD DE LA LICUADORA MANUAL 11. No permita que el cable toque las superficies calientes, incluida la estufa. 12. Cuando mezcle líquidos, en particular líquidos calientes, use un recipiente alto o mezcle cantidades pequeñas a la vez para reducir los derrames. 13. - Page 30 CÓMO UTILIZAR SU LICUADORA MANUAL CÓMO ENSAMBLAR SU LICUADORA MANUAL Antes de usar por primera vez la licuadora manual de KitchenAid, limpie el cuerpo del motor y los adaptadores de los aditamentos con un paño limpio y húmedo, para quitar el polvo o la suciedad. Puede utilizar jabón suave para platos pero no...
- Page 31 CÓMO UTILIZAR SU LICUADORA MANUAL USO DEL ADITAMENTO DE BRAZO PARA LICUAR Licuado: Use el brazo de licuado para preparar Inserte la licuadora manual con licuados, malteadas, sopas, vegetales el brazo de licuado sujeto a la misma en un ángulo, dentro el frasco que contiene los cocidos, glaseado o comida para bebé.
- Page 32 CÓMO UTILIZAR SU LICUADORA MANUAL USO DEL ADITAMENTO PARA BATIR Use el batidor para batir crema, claras 4. Ponga en marcha la licuadora manual de huevo, mezclar natillas instantáneas, en la velocidad 1. Regule la velocidad preparar vinagretas, mousse o para hacer girando el cuadrante de control de mayonesa.
- Page 33 CÓMO UTILIZAR SU LICUADORA MANUAL CÓMO USAR EL ADITAMENTO PARA PICAR 4. Alinee el tazón para picar con el cuerpo del motor y presiónelos para que se unan. 5. Mientras procesa los alimentos, sostenga el cuerpo del motor con una mano y el tazón para picar con la otra mano.
-
Page 34: Consejos Para El Funcionamiento
CÓMO UTILIZAR SU LICUADORA MANUAL GUÍA DE PROCESADO Alimento Cantidad Preparación Velocidad Tiempo* Carnes 7 oz (200 g) Corte en cubos de 3/4" (2 cm) segundos Almedras/ 7 oz (200 g) Coloque las nueces enteros 25 segundos Nueces 10–12 Cloves Coloque los dientes enteros 15 segundos Cebollas 3.5 oz (100 g) Corte en cuatro... -
Page 35: Cuidado Y Limpieza
CUIDADO Y LIMPIEZA 1. Desenchufe la licuadora manual antes Mélangeur à main accessoires de limpiarla. Lave los brazos de licuado, la jarra y tapa, 2. Saque los adaptadores y los el batidor, el tazón para picar, las cuchillas aditamentos girándolos (vea la sección y la cubierta para recipientes en agua “Cómo utilizar su licuadora manual”). -
Page 36: Garantía Y Servicio Técnico
El servicio deberá ser provisto por un centro de servicio autorizado por KitchenAid. KitchenAid no pagará por: A. Reparaciones cuando su licuadora de inmersión se use para fines ajenos al uso doméstico normal de una familia. - Page 37 Llame sin cargo al 1-800-807-6777. Para obtener información acerca del servicio en México: Llame sin cargo al 01.800.0022.767. ®/™ ©2019 KitchenAid. Todos los derechos reservados. Usada en Canadá bajo licencia. GARANTÍA Y SERVICIO TÉCNICO | 37 W11321550A.indb 37 8/8/2019 4:15:25 PM...
- Page 38 W11321550A.indb 38 8/8/2019 4:15:25 PM...
- Page 39 W11321550A.indb 39 8/8/2019 4:15:25 PM...
- Page 40 CANADA: 1.800.807.6777 | KitchenAid.ca MEXICO: KitchenAid.com.mx LATIN AMERICA: KitchenAid-Latam.com ®/™ ©2019 KitchenAid. All rights reserved. Used under license in Canada. Tous droits réservés. Utilisé sous licence au Canada. Todos los derechos reservados. Usada en Canadá bajo licencia. W11321550A 08/19 W11321550A.indb 40...
Need help?
Do you have a question about the KHB2351 and is the answer not in the manual?
Questions and answers