Table of Contents
Advertisement
Quick Links
Advertisement
Table of Contents

Related Manuals for XSPC RayStorm


Summary of Contents for XSPC RayStorm
- Page 1 ® XSpc RayStorm Kit Copyright © XSPC 2012...
-
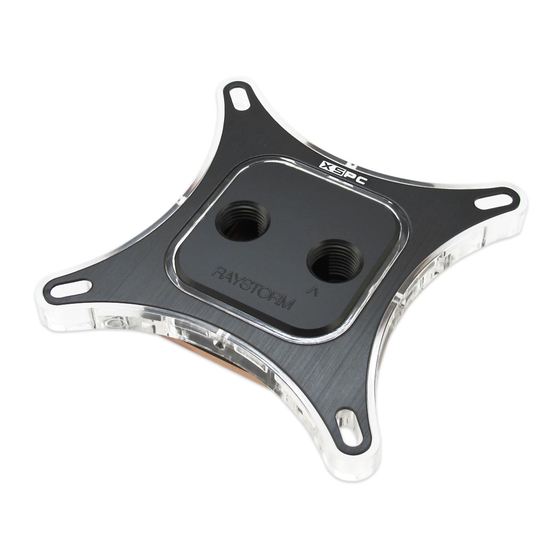
Page 2: Kit Components
- D5 Vario or X2O 750 Dual Bay Reservoir/Pump - Copper/Brass Radiator (See Box) - G1/4” Fittings (Black Chrome) x6 - XSPC 1650rpm 120mm or 1200rpm 140mm Fans - Fan Grills (Black) - Intel and AMD RayStorm Brackets - Socket 775, 1366 and 1155/1154 Backplates... -
Page 3: Installation Overview
It will make things easier in the long run This manual covers several versions of the RayStorm kit, so some steps may not be relevant to your kit. Wether you're using the D5 or X20 750 pump, a 120mm or 140mm radiator, the installation process is basically the same. - Page 4 Preparing Intel Socket 2011 1. If your motherboard has the 4 threaded holes 2. Screw the short end of the M4 post into each of the surrounding the socket use the M4 posts. Otherwise four holes around the socket. use the backplate method below. Preparing Intel Sockets 1366, 1155, 1156, 775 This installation method is suitable for the majority of intel motherboards.
-
Page 5: Preparing The Pump
Preparing the Radiator 1. Remove the plastic plugs from the G1/4” ports 2. If you're using compression fittings, use a small coin and rotate it clockwise until the o-ring is compressed. 3. If you're using barbed fittings, first hand tighten the 4. - Page 6 Layout and Tubing Routing Planning the layout of the watercooling loop is the most important part of the installation. It's worth spending some time here to work out the easiest route to connect the block, pump and radiator. Before you start cutting the tubing to size you should place the components into the best position in your case and when you're happy with the layout, measure and cut the tubing.
- Page 7 Internal Radiator Layout Ideally your case will have room to install the radiator internally. This could be at the top, bottom or front of the case. The air should always flow out of the case. Mounting the radiator internally won't give the best performance, but it's the neatest solution and we highly recommend using it where possible.
- Page 8 Cutting the Tubing Cutting the Tubing When you cut the tubing it's very important to get a straight clean cut. If you the cut is rough or uneven then it could stop the tubing sealing and cause a leak. You might find it useful to buy a hose cutter instead of using scissors. Attaching the Tubing (Barbed Fittings) 1.
- Page 9 Using the Radiator Brackets 1. Place a screw through the unthreaded hole on the The radiator brackets are useful for mounting the bracket and put an o-ring on the end of the screw. radiator outside of the case. The diagram above shows how to attach the brackets using the provided screws and o-rings.
- Page 10 Attaching the Radiator 1. Lift the radiator into position and line it up with the 2. Use four 6mm 6-32 screws in each of the four screw holes on the case panel. corner holes. Do not use screws longer then 6mm. Example Installation Walkthrough 1.
-
Page 11: Filling The System
1. Pull the pump forward so you can access the fill cap. 3. Use a small funnel to avoid spilling the coolant. 4. We recommend using a premixed coolant like XSPC EC6. This will protect the components and stop biological growth in the loop. -
Page 12: Attaching The Pump
Attaching the Pump 1. Push the pump back so the faceplate is flush with 2. If you have a case with quick release clips, we the front of the case. Fix the pump in place by using recommend removing them and using the screw hole the small M3 screws. - Page 13 Fitting the WaterBlock (Intel 2011) The installation process below is shown without the tubing connected. This has been done so the installation process can be seen clearly, without any obstructions. 2. Apply a thin layer of thermal paste to the CPUs heat 1.
- Page 14 Fitting the Waterblock (AMD) The installation process below is shown without the tubing connected. This has been done so the installation process can be seen clearly, without any obstructions. 1. Remove the plastic film from the base of the 2. Apply a thin layer of thermal paste to the CPUs heat waterblock.
-
Page 15: Finishing Touches
Finishing Touches 1. Connect the tachometer output from the pump to 2. Connect the fans to the motherboard fan headers, the motherboard fan header. This will allow you to or a fan controller. monitor the pumps speed. (D5 Pump only) 3. -
Page 16: Troubleshooting
Q. Can I use tap water? A. Do not use tap water as it contains many impurities. You should use a premixed coolant like XSPC EC6, which will provide protection against corrosion and biological growth. Q. I have heard you can use a silver coil and de-ionized water instead of premixed coolant. - Page 17 Notes Page 16/16...
- Page 18 www.xs-pc.com/support...
Need help?
Do you have a question about the RayStorm and is the answer not in the manual?
Questions and answers