Table of Contents
Advertisement
Quick Links
®
PORTFOLIO
and PORTFOLIO & Design
or registered trademarks of LF, LLC. All rights reserved.
ATTACH YOUR RECEIPT HERE
Purchase Date
Questions, problems, missing parts? Before returning to your retailer, call our customer
service department at
8 a.m. - 5 p.m., EST, Friday.
EB16102
TM
are trademarks
1-800-643-0067, 8 a.m. - 6 p.m., EST, Monday - Thursday,
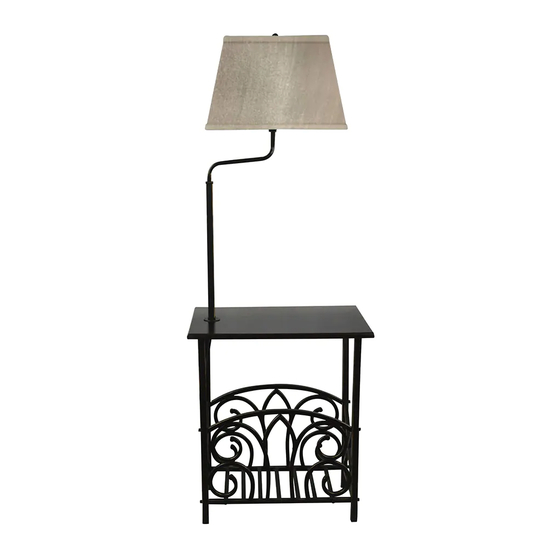
MAGAZINE RACK LAMP
1
ITEM
#0805599
MODEL
#TLC05BZ
Français p. 9
Español p. 17
E358409
Advertisement
Table of Contents

Subscribe to Our Youtube Channel
Related Manuals for LF Portfolio TLC05BZ


Summary of Contents for LF Portfolio TLC05BZ
- Page 1 MODEL #TLC05BZ ® PORTFOLIO and PORTFOLIO & Design are trademarks or registered trademarks of LF, LLC. All rights reserved. Français p. 9 Español p. 17 ATTACH YOUR RECEIPT HERE E358409 Purchase Date Questions, problems, missing parts? Before returning to your retailer, call our customer service department at 1-800-643-0067, 8 a.m.
- Page 2 PACKAGE CONTENTS PART DESCRIPTION QUANTITY Shade Finial (preassembled) Harp Socket Assembly Tube (preassembled) Decorative Cover (preassembled) (preassembled) Large Washer (preassembled) Plate (preassembled) Small Washer (preassembled) Wing Nut (preassembled) Side Rack Bottom Rack Bulb...
- Page 3 HARDWARE CONTENTS (shown actual size) Small Allen Wrench Screw Qty. 1 Qty. 4 Large Screw Qty. 12 SAFETY INFORMATION READ AND SAVE THESE INSTRUCTIONS. WARNING • This portable lamp has a polarized plug (one blade is wider than the other) as a safety feature to reduce the risk of electric shock.
- Page 4 ASSEMBLY INSTRUCTIONS TABLE AND MAGAZINE RACK ASSEMBLY: 1. Place top (L), with smooth side down on carpet or on foam to avoid damage to finish. Align holes at top of leg (M) with two of the holes on underside of top (L). Insert two small screws (BB) with fingers first and then tighten screws securely with the Allen wrench (AA).
- Page 5 ASSEMBLY INSTRUCTIONS 3. Align the two holes at bottom of both side racks (N) Large Holes with large holes on each end of bottom rack (O). Hold bottom rack (O) in place. Insert large screw (CC) with fingers first and then tighten screw with Allen wrench (AA).
- Page 6 ASSEMBLY INSTRUCTIONS Attach socket assembly (D) to the tube (E). Slide tube (E) through decorative cover (F). 3. Place the threaded portion of the tube (E) through the hole in the top (L) until large washer (H), bottom cap (G), decorative cover (F) and tube (E) are flush against the top (L).
- Page 7 ASSEMBLY INSTRUCTIONS 5. Lift one side of shade (A). Slide shade support away from the center while supporting shade (A) from the Shade Support opposite side. Repeat for other shade support. Shade Frame Remove preassembled finial (B) from harp (C). Place harp (C) into saddle preassembled on socket assembly (D).
- Page 8 CARE AND MAINTENANCE • Clean only with soft, damp cloth. Do not use an abrasive cleaner on table. • Bulb Replacement: Use one 23-watt max. standard-base CFL or halogen/LED equivalent. TROUBLESHOOTING WARNING: Before beginning work, shut off the power supply to avoid electrical shock. PROBLEM POSSIBLE CAUSE CORRECTIVE ACTION...
Need help?
Do you have a question about the Portfolio TLC05BZ and is the answer not in the manual?
Questions and answers