Advertisement
Technical Phone Support is from 8:00AM to 7:30PM E.S.T., Monday-Friday
Walk-in Service is from 8:00AM to 4:30PM E.S.T., Monday-Friday
Parts Department is from 8:00AM to 6:00PM E.S.T., :Monday-Friday
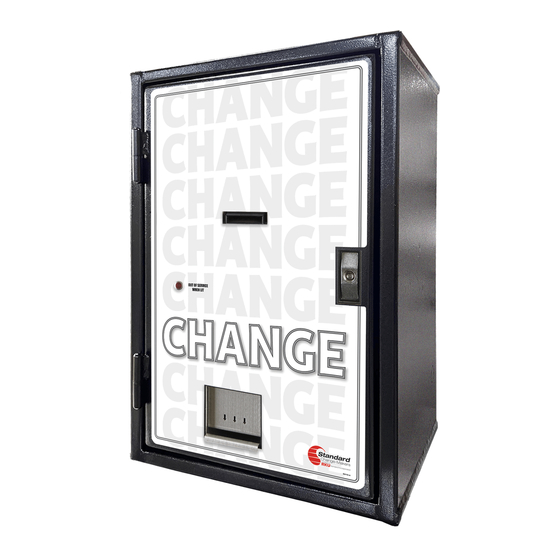
MC CHANGER CABINET INSTALLATION
Standard Change-Makers manufactures change machines in the following cabinet styles:
1) Free standing consoles, 2) Front loading wall mount, 3) Through-the-wall rear load
and 4) Slim-line vending changer. Because physical locations vary, we do not suggest an
exact method of installation. To assure proper operation of your Standard bill changer the
following general guidelines should be observed:
1. Full swing of the door when open.
2. Wall construction: For maximum security, it is recommended that the changer be
installed on a wall made of cement block, brick or other type of masonry.
Welding the cabinet to any kind of mounting could cause damage to electrical components
within the machine! Warping of the cabinet may also occur. Welding of any kind to the
cabinet during installation will void the manufacturer's warranty!
If welding is ultimately necessary, all components within the machine must be removed
prior to welding! Please contact our Service Department with any questions.
3. Rear loading changers (through the wall mountings) should always open into a secure
location that has a locked door and no windows.
4. Good overhead lighting is highly recommended in the area that your changer is
located not only for your customers but for additional security.
5. Accessibility of power supply. (120 Volt/ 60 Hertz on its own grounded circuit – 10
amp minimum required.)
6. Carwash locations will want to locate their changers out of reach of high-pressure
hoses.
7. The changer should be located so that any water runoff from the roof of the building
does not run down the face of the changer. A protective awning or shelter is highly
recommended for all outdoor installation sites.
www.standardchange.com
1-800-968-6955
INSTRUCTIONS
WARNING!!!
1
8M00356
REV. 14
February 10, .2020
Advertisement
Table of Contents

Related Manuals for Standard Change-Makers MC Series


Summary of Contents for Standard Change-Makers MC Series
- Page 1 MC CHANGER CABINET INSTALLATION INSTRUCTIONS Standard Change-Makers manufactures change machines in the following cabinet styles: 1) Free standing consoles, 2) Front loading wall mount, 3) Through-the-wall rear load and 4) Slim-line vending changer. Because physical locations vary, we do not suggest an exact method of installation.
- Page 2 Outdoor Installations All Cabinets This machine can be used in protected outdoor locations. Standard Change-Makers, Inc. recommends the use of an awning, canopy, marquee, or other protective screen to prevent machine damage from exposure to weather. Caution/ Important - Any open mounting holes in the top or sides of the cabinet must be plugged with an appropriately sized bolt or screw.
- Page 3 If the wall to which the changer will be mounted does not meet the construction standards above, we recommend the Standard Change-Makers stand. Mounting holes are provided on the bottom for mounting the stand to the floor. Cabinets are provided with mounting holes on the top surface for mounting the changer to the stand.
- Page 4 For rear load changers it may be necessary to temporally remove the power cord to make installation of the cabinet easier. Cover or remove the hoppers to prevent debris or metal shavings from falling into the hopper mechanisms. To remove the cord, locate the cord retaining plate on the inside of the changer cabinet.
- Page 5 Electrical Hook-up WARNING: Never Connect or disconnect electrical cables with power on. CAUTION: It is recommended that electrical connections be performed by a qualified electrician and that you should check local building codes for compliance. The MC Changer cabinet comes pre-wired*. The changer need only be connected to a properly grounded electrical outlet.
-
Page 6: Important Note
Instructions for Converting to a Permanently Wired Machine CAUTION: The following instructions are intended to be used by a qualified electrician. Local building codes should be checked for compliance. 1. Disconnect power to the changer. 2. Remove hoppers from change machines if needed to access outlet box. 3. -
Page 7: Power Considerations
Power Considerations GENERAL RANGE DETAILS OPERATING VOLTAGE 105 VAC - 135 VAC See “Power Considerations” POWER CONSUMPTION 80W (min) - 360W (max) See “Power Considerations” OPERATING TEMPERATURE 0 - 60 C (32 - 140 See “Environmental Considerations” ELECTRICAL SERVICE 15A – DEDICATED RUN See “Electrical Hook-up”... -
Page 8: Environmental Considerations
The Locations Electrical Supply If this machine has a service cord that ends in a 3-pin connector. The wall receptacle you plug the machine into must be properly polarized and grounded. Operating your machine from an improperly connected power source will VOID THE WARRANTY. The wall receptacle must be able to supply a constant 120 volts at 60Hertz. - Page 9 Moderate Environments – typically indoors: These environments have a minimum temperature of 0 C (32 F) and a maximum of no more than 41 C (106 F) as measured inside the machine. Keep in mind that all electro- mechanical equipment found inside an enclosure will be affected by two sources of heat: the outside temperature of the enclosure and the heat generated by the components inside the enclosure.
-
Page 10: Americans With Disabilities Act (Ada) Compliance
(1370 mm), or no less than 9” (200 mm) from the floor. AMERICANS WITH DISABILITIES ACT (ADA) COMPLIANCE Next page shows a chart listing each MC series cabinet model and the corresponding MAXIMUM INSTALLATION HEIGHT required to comply with the ADA height standards. - Page 11 ADA Requirements Maximum Installation Height Base Header Cabinet Floor to Cabinet bottom Height Height Model (inches) (inches) (inches) No Coin With Coin Acceptor Acceptor MC100 27.25 26.50 8.50 30.00 16.00 Bills Only: MC200 * 32.75 25.00 25.00 21.00 Bills & Coin: MC300RL 27.00 27.00...
- Page 12 1. Fill the hoppers until the black area at the bottom is covered. 2. Insert monetary bills in the bill acceptor. Count the coins dispensed. FOR ADDITIONAL QUESTIONS OR ASSISTANCE IN INSTALLING STANDARD CHANGE-MAKERS, INC. PRODUCTS, PLEASE CONTACT OUR SERVICE DEPT. Standard Change-Makers, Inc. 3130 N. Mitthoeffer Road...
Need help?
Do you have a question about the MC Series and is the answer not in the manual?
Questions and answers