Table of Contents
Advertisement
Quick Links
JET Micro HX 3.0
User Manual
Overview, Features, and how to use the JET Micro HX 3.0 MIDI controller
Overview
FAQ
Will my Old Micro Still Work with the New HX 3.0 Update?
Advertisement
Table of Contents

Summary of Contents for Jet Micro HX 3.0
- Page 1 JET Micro HX 3.0 User Manual Overview, Features, and how to use the JET Micro HX 3.0 MIDI controller Overview Description Getting Started Setting Up Your HX Stomp Operating the JET Micro Red Bank (Stomp Mode) Green Bank (Looper Mode)
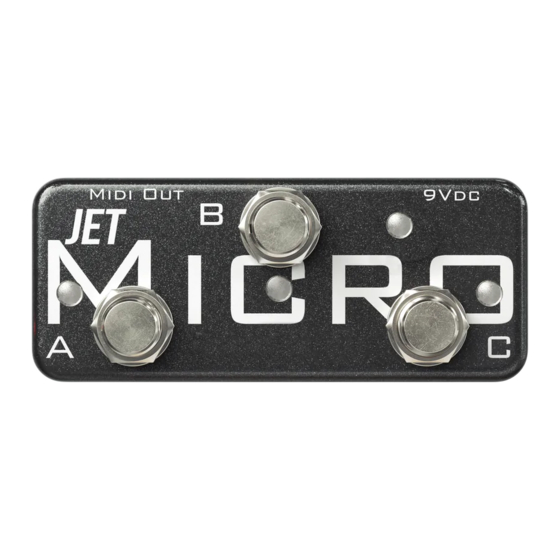
- Page 2 Overview Basic features and controls of the JET Micro...
- Page 3 (Tap/Tuner Mode) to access the tap tempo. Now with the JET Micro HX 3.0 you can assign any of the three buttons (A, B, or C) to tap tempo, which can be setup within the Global Settings.
- Page 4 Getting Started Instructions for setting up your HX Stomp to use with the JET Micro...
- Page 5 Getting Started Setting Up Your HX Stomp Let's take a moment and setup your HX Stomp to work with the Micro... 1. On the Stomp, press <Page and Page> simultaneously to open the menu 2. Press Page> and then press Knob 1 (Global Settings) 3.
- Page 6 3. Press Page> and assign FS5 function to Preset Up 4. Turn the Upper Knob to select the MIDI/Tempo menu 1. Turn Knob 1 and confirm MIDI Base Channel is set to 1 5. That's it! You are all setup to start using the Micro...
- Page 7 Operating the JET Micro How to use the JET Micro HX 3.0...
- Page 8 Operating the JET Micro Red Bank (Stomp Mode) The Red Bank is where you will likely spend most of your time with the JET Micro. In this bank you can toggle blocks on/off, toggle effect parameters up/down, recall Snapshots, and scroll up and down presets.
- Page 9 To bypass blocks within the HX Stomp, make sure the block you want to control is highlighted and then follow the steps below using the MIDI "Learn" feature. When you press (or double press) a button, the Micro will automatically send its respective MIDI CC message to the Stomp and the Stomp will sync to the Micro.
- Page 10 Operating the JET Micro Green Bank (Looper Mode) The green bank is dedicated to using the looper within the HX Stomp. Remember, in order to use the looper features you must have one of the blocks assigned to the "Looper" within the Stomp. All of the buttons listed below are pre-programmed and cannot be user assignable.
- Page 11 Operating the JET Micro Blue Bank (Tap/Tuner Mode) The blue bank is used to access tap tempo and the tuner. When in the blue bank, the follow buttons have been pre-programmed and cannot be user assignable. Short Press Button A - toggles the tuner on/off...
- Page 12 Operating the JET Micro Navigating the Banks The JET Micro has three different banks (Red, Green, & Blue), each bank is identified by the single color changing LED and offers unique features to control your HX Stomp. When the pedal first powers up it will automatically pull up the red bank (Stomp Mode). To toggle back and forth between the red (Stomp Mode) and green (Looper Mode) banks, quickly press and release all 3 buttons simultaneously.
- Page 13 Global Settings Access various features of the Micro...
- Page 14 Global Settings Controlling External MIDI Pedals For detailed information about this feature and how it works, please visit the Description page. To enable or disable this feature, turn power off and back on to the Micro. While the Micro is in the startup phase (blinking LED's) press down button A and continue to hold it down.
- Page 15 Global Settings Turning Off Double Press In order for the Micro to tell the different between a single press and a double press, there is a little bit of timing magic that has to happen behind the scenes. Unfortunately this will cause a slight delay between the time you perform a single press and the time a block (or effect parameter) is changed.
- Page 16 Global Settings Always Active Tap Tempo For detailed information about this feature and how it works, please visit the Description page. To enable or disable this feature, turn power off and back on to the Micro. While the Micro is in the startup phase (blinking LED's) press down button C and continue to hold it down.
- Page 17 Frequently Askes Questions...
- Page 18 Can I Update the Software on my Old Micro? Yes, currently we only have a solution for Windows users, however please check back as we are working on a solution for Mac users. In order to update your Micro please follow these steps below: 1.
- Page 19 3. Remove the stand-off located next to the USB port.
- Page 20 4. Plug a micro USB into the usb port. Once plugged into your computer, your computer should recognize the device.
- Page 21 Some Windows 10 users may experience issues with bad drivers for the Micro, to make sure your computer can talk to the Micro open the Device Manager and see if there is a Yellow warning sign next the device (see pictures below). If you have the Yellow warning sign, just double click the device and click the Uninstall Device button in the next dialog window.
- Page 22 From here make sure you check the box that says to delete the driver software for this device and then click the Uninstall button. Once this is finished, unplug the Micro from your computer and then plug it back it. Have a look at the Device manager to confirm your Micro is showing up with now warning signs, if there are no warning signs you are good to continue to the next step.
- Page 23 5. Using your web browser go to: github.com/binaryupdates/xLoader to download the free software XLoader. Hit the green "Code" button and select Download ZIP. 6. Once you've downloaded XLoader, run the installer file and install the application to your computer.
- Page 24 7. Download the .hex and save it to your Desktop, download link is found here: JET Micro HX3.0.hex 8. Open the XLoader application and upload the .hex file downloaded from the previous step. Choose Duemilanove/Nano(ATmega328) as the Device and select the COM port your Micro is plugged into.
- Page 25 Will my Old Micro Still Work with the New HX 3.0 Update? Most definitely! Just remember when you upgrade your HX Stomp, it resets its global settings so you will have to do the quick setup again after the update.
Need help?
Do you have a question about the Micro HX 3.0 and is the answer not in the manual?
Questions and answers