Philips WelcomeEye Comfort DES9500VDP User Manual
Hide thumbs
Also See for WelcomeEye Comfort DES9500VDP:
- Quick installation manual (100 pages) ,
- User manual (20 pages)
Table of Contents
Advertisement
Available languages
Available languages
Quick Links
WelcomeEye Comfort
DES9500VDP - 531019
WelcomeEye Compact
DES9300VDP - 531004
DES9300VDP - 531004
FR - Notice téléchargeable sur philips.com
GB - Downloadable instructions at phillips.com
D - Anleitung kann auf philips.com heruntergeladen werden
NL - De handleiding kan gedownload worden op philips.com
PL - Instrukcja do pobrania na philips.com
IT- Il manuale è disponibile anche su www.philips.com.
ES - Manual que puede descargar en philips.com
PT - Manual de instruções disponível no site philips.com
09/2017
Scan me
to fi nd out about our products
Flashez-moi
pour découvrir nos produits
Advertisement
Chapters
Table of Contents

Related Manuals for Philips WelcomeEye Comfort DES9500VDP


Summary of Contents for Philips WelcomeEye Comfort DES9500VDP
- Page 1 FR - Notice téléchargeable sur philips.com GB - Downloadable instructions at phillips.com D - Anleitung kann auf philips.com heruntergeladen werden NL - De handleiding kan gedownload worden op philips.com PL - Instrukcja do pobrania na philips.com IT- Il manuale è disponibile anche su www.philips.com.
- Page 2 Fig. 1 (Master) DES 9900 VDP CFI Extel ZI de Fétan, 01600 Trévoux FRANCE 120 m max 1 2 3 4 CFI Extel ZI de Fétan, 01600 Trévoux FRANCE IP44 WelcomeEye Comfort / Compact / 09/17...
- Page 3 Fig. 2 Made in P.R.C Made in P.R.C Made in P.R.C Made in P.R.C Made in P.R.C WelcomeEye Comfort / Compact / 09/17...
- Page 4 Fig. 3 Made in P.R.C Made in P.R.C Made in P.R.C Made in P.R.C Made in P.R.C Made in P.R.C Made in P.R.C Made in P.R.C WelcomeEye Comfort / Compact / 09/17...
-
Page 5: Table Of Contents
SOMMAIRE CONSIGNES DE SÉCURITÉ .............p.2 CONTENU DU KIT ................p.2 GÉNÉRALITÉ ..................p.3 NOMENCLATURE ................p.3 INSTALLATION DU PRODUIT ............p.5 1. Câblage 2. Paramétrage de la platine 3. Installation du moniteur principal ou supplémentaire 4. Installation de la platine de rue principal ou supplémentaire 5. -
Page 6: Contenu Du Kit
1. CONSIGNE DE SÉCURITÉ Important ! • Veuillez lire le manuel d’utilisation soigneusement avant d’installer ou d’utiliser ce produit. • Si vous installez ce produit pour d’autres, pensez à laisser le manuel ou une copie à l’utilisateur final. Avertissement : •... -
Page 7: Nomenclature
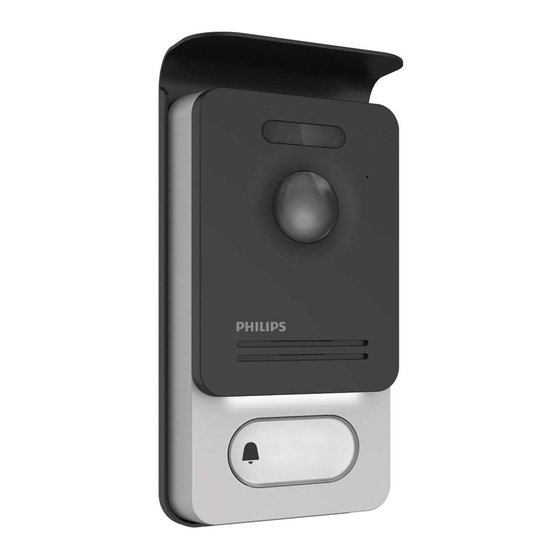
3. GÉNÉRALITÉ Ce visiophone est composé d’un poste de réponse intérieur avec écran tactile et d’une platine extérieure avec interphone et caméra permettant de voir et communiquer avec le visiteur qui a sonné. Il est facile d’installation puisque 2 fi ls sont nécessaires pour toutes les fonctions (sonnerie, vidéo, interphone, commandes gâche et automatisme). - Page 8 Platine de rue : LED blanche (vision de nuit) Capteur crépusculaire Microphone Objectif de la caméra Haut-parleur Éclairage porte-nom Bouton d’appel, porte-nom Vis antivol de fi xation 1 2 3 4 Switch de programmation Réglage volume haut- parleur 1 2 3 4 1 2 3 4 Bornier de CFI Extel...
-
Page 9: Installation Du Produit
5. INSTALLATION DU PRODUIT Conseils et notes importantes : - Afi n de profi ter pleinement de votre platine de rue, nous vous conseillons de la paramétrer (mode 1 ou 2 familles, 1 ou 2 platines, volume du haut-parleur), avant installation défi nitive. Pour cela, un branchement sur table peut être nécessaire afi n de vérifi er que les réglages ont été... -
Page 10: Paramétrage De La Platine
2. Paramétrage de la platine (voir fi g. 1, fi g. 2 ou fi g. 3) a. Paramétrage du numero de la platine : Placer le switch 2 à gauche sur la platine n°1 et à droite sur la platine n°2. b. -
Page 11: Installation De La Platine De Rue Principal Ou Supplémentaire
4 – Mettre des chevilles adaptées au support (celles fournies conviennent pour des murs en matériaux pleins). 5 – Fixer le support mural. 6 – Raccorder les 2 fi ls de la platine de rue et les 2 fi ls d’alimentation en respectant bien le schéma de câblage. -
Page 12: Installation D'une Caméra (En Option)
1 - Dévisser la vis antivol sous la platine de rue. 2 - Basculer la façade de la platine de rue vers l’avant. 3 – L’objectif de la platine doit être placé à une hauteur d’environ 1m60 du sol. 4 – Faire des repères. 5 - Percer. -
Page 13: Fonction Monitoring Et Réponse A Un Appel
B. Fonction intercommunication C. Réglages : indique que la sonnerie du moniteur est désactivée A. Fonction monitoring et réponse a un appel 1 : Permet de passer à la vue de la seconde platine de rue, de la caméra ou de revenir au menu principal. - Page 14 1 : Réglages audio a : Choix de la sonnerie lors d’un appel de la platine de rue 1 b : Choix de la sonnerie lors d’un appel de la platine de rue 2 (uniquement si une platine de rue supplémentaire a été paramétrée) c : Choix de la sonnerie lors d’un appel en intercommunication (uniquement si un moniteur supplémentaire a été...
-
Page 15: Mode D'emploi
a : activer (On) / désactiver (Off ) la sonnerie du moniteur. b : Heure à laquelle la sonnerie sera désactivée. c : Heure à laquelle la sonnerie sera réactivée. 5 : Réglage de l’heure et la date : réglage : valide, permet de passer au réglage suivant et au menu suivant a : menu 1 : réglage de l’heure et de la date b : menu 2 : réglage du format de la date (s’applique au menu principal uniquement) et de... -
Page 16: Caractéristiques Techniques
- Pour relancer l’image appuyer sur sur l’écran d’accueil. Pour relancer 120s. de conversation, appuyer sur la touche - Commander une serrure électrique ou une gâche en appuyant sur la touche (uniquement si la vidéo est affi chée) - Commander un automatisme de portail en appuyant sur la touche (uniquement si la vidéo est affi chée) Mise en veille... -
Page 17: Accessoires
* Réferez vous à la notice complète WelcomeEye Comfort/Compact disponible sur le site www.philips.com pour plus d’informations. ** Réferez vous à la notice complète WelcomeEye Connect/Touch disponible sur le site www.philips.com pour plus d’informations. WelcomeEye Comfort / Compact / 09/17... -
Page 18: Faq
10. FAQ Panne Cause Solution • Le moniteur ne • Le moniteur n’est • Vérifier que l’alimentation est s’allume pas pas alimenté correctement branchée et sous tension • Vérifier la polarité au niveau du moniteur ou à la sortie de l’alimentation •... - Page 19 • Image trop lumineuse • Position de la • Ne pas exposer l’objectif de la caméra caméra directement au soleil ou sur une surface réfléchissante. • Vérifier les réglages du moniteur • Volume de la platine • Réglage • Reprendre le réglage au dos de la de rue est trop faible platine de rue •...
-
Page 20: Assistance Technique - Garantie
Le ticket de caisse ou la facture fait preuve de la date d’achat. En cas de besoin, les contacts et les horaires d’ouverture de nos centres d’assistance technique sont disponible sur le site www.philips.com. WelcomeEye Comfort / Compact / 09/17... -
Page 21: Mesures De Sécurité
Important : veuillez conserver précieusement cette carte de garantie, ainsi que votre preuve d’achat. Philips et l’emblème bouclier Philips sont des marques déposées de Koninklijke Philips N.V. et sont utilisées sous licence. Ce produit a été fabriqué par et est vendu sous la responsabilité... -
Page 22: Avertissement Fcc/Ce
- Veuillez contacter une personne expérimentée au cas où vous auriez des doutes au sujet du mode de fonctionnement ou de la sûreté des appareils. - Ne jamais brancher ou débrancher les appareils électriques avec les mains mouillées. - Lors de l’installation de ce produit, vérifi ez bien que les câbles d’alimentation ne risquent pas d’être endommagés. - Page 23 TABLE OF CONTENTS SAFETY INSTRUCTIONS ..............p.2 CONTENT OF THE KIT ..............p.2 GENERAL INFORMATION ...............p.3 NOMENCLATURE ................p.3 PRODUCT INSTALLATION ..............p.5 1. Wiring 2. Confi guring the intercom 3. Installing the main or additional monitor 4. Installing the main or additional intercom panel 5.
-
Page 24: Safety Instructions
1. SAFETY INSTRUCTIONS Important! • Please read the user manual carefully before installing or using this product. • If you are installing this product for a third party, please remember to leave the manual or a copy of it with the end user. Warning: •... -
Page 25: Nomenclature
3. GENERAL This Video doorphone consists of an indoor answering unit with a touch screen and an outdoor panel with an intercom and camera, allowing you to see and communicate with the visitor who has pressed the bell. It is easy to install as only two wires are needed for all functions: bell, video image, intercom and strike plate and automatic opener controls. - Page 26 Intercom panel: White LED (night vision) Twilight sensor Microphone Camera lens Loudspeaker Name holder lighting Tamper-resistant retaining screw 1 2 3 4 Programming switch Loudspeaker volume settings 1 2 3 4 1 2 3 4 CFI Extel ZI de Fétan, 01600 Trévoux Terminal block FRANCE connecting the wires...
-
Page 27: Product Installation
5. PRODUCT INSTALLATION Important notes and advice: - To make the most of your intercom panel, we recommend confi guring it (for 1 or 2 families, 1 or 2 intercoms, loudspeaker volume) before fi nal installation. To do this, it might be necessary to connect up the system on a table to check that the settings are correct. -
Page 28: Confi Guring The Intercom
2. Confi guring the intercom (see fi g. 1, fi g. 2 or fi g. 3) a. Confi guring the intercom number: Place switch 2 on the left on intercom no. 1 and on the right on intercom no. 2. b. -
Page 29: Installing The Main Or Additional Intercom Panel
6 - Connect the 2 intercom panel wires and the 2 power supply wires in accordance with the wiring diagram. 7 - Position the monitor on the wall bracket. 8 - Depending on the confi guration selected, and when wiring is completed, the interface may have to be confi gured. -
Page 30: Installing A Camera (Optional)
5 - Drill. 6 - Use the correct fixings for the mounting surface (the screws provided are suitable for solid walls). 7 – Connect the two wires from the monitor and, if necessary, connect the electric strike plate and the gate (see section 1. Wiring). Configure the switches at the back of the intercom panel (see section 2. -
Page 31: Monitoring Function And Response To A Call
: indicates that the monitor ringtone is deactivated A. Monitoring function and response to a call 1: To switch to the view of the second intercom panel or camera, or return to the main menu. 2: To establish voice communication with the intercom panel and hang up. 3: To open the electric strike plate. - Page 32 1: Audio settings a: Choice of ringtone during a call from intercom panel 1 b: Choice of ringtone during a call from intercom panel 2 (only if an additional intercom panel has been confi gured) c: Choice of ringtone during an intercom call (only if an additional monitor has been confi gured) d: Volume settings for the monitor ringtone e: Volume settings for the monitor loudspeaker during communication.
- Page 33 5: Time and date settings : adjust : valid, enables access to the next setting and next menu a: menu 1: time and date settings b: menu 2: date (applies to the main menu only) and time format settings. 6: Reset menu Return product to factory settings and restore default values, disable ringer, confi gure options and adjust audio and image settings and date and time.
-
Page 34: Technical Characteristics
- If the monitor is on any other menu than the main menu, it will automatically revert to the main screen after 15s of inactivity. - If the monitor is on the main menu, it will automatically go into standby after 15s of inactivity. -
Page 35: Accessories
Refer complete WelcomeEye Comfort/Compact instructions available www.philips.com website for more information. ** Refer to the complete WelcomeEye Connect/Touch instructions available on the www.philips.com website for more information. 10. FAQ Failure Cause Solution • The monitor does not • The monitor is not •... - Page 36 • Does not work when • Connection error • The device is equipped with installed for the first major protections. Disconnect time the power supply for at least • Reversed polarity 1mn, correct the installation error of the supply and reconnect. Please note that voltage none of the protective measures will be effective if the product is...
- Page 37 • The Dual-family • Configuration • Verify that the intercom panel is not mode is not working programmed in dual-family mode. Reminder: single-family =switch 2 set to ON, dual-family =switch 2 set to OFF. Don’t forget to turn the power off for five seconds to activate the new settings •...
-
Page 38: Technical Assistance - Warranty
Important : Please keep this warranty card with your proof of purchase. Philips and Philips’ shield emblem are registered trademarks of Koninklijke Philips N.V. and are used under licence. This product has been manufactured by and is sold under the responsibility of CFI Extel SAS, and CFI Extel SAS is the sole guarantor of this product. -
Page 39: Safety Precautions
12. SAFETY PRECAUTIONS Any damage caused by a failure to adhere to the manual shall void the warranty. We assume no liability for damages resulting therefrom! We cannot be held responsible for any damage to property or persons caused by incorrect use or a failure to adhere to the safety instructions. -
Page 40: Fcc/Ce Warning
13. FCC/CE WARNING Note: This equipment has been tested and found to comply with the limits for the Class B, in compliance with current European safety standards. These limits are designed to provide reasonable protection against interference in a residential installation. This equipment uses and emits a radio frequency energy and may cause interference with radio communications if not installed and used according to the instructions. - Page 41 INHALT SICHERHEITSANWEISUNGEN ............S. 2 INHALT DES SETS ................S. 2 ALLGEMEINES ...................S. 3 NOMENKLATUR ................S. 3 INSTALLATION DES PRODUKTS ..........S. 5 1. Verkabelung 2. Parametrierung der Sprechanlage 3. Installation des Haupt- oder Zusatzmonitors 4. Installation der Haupt- oder Nebentürsprechanlage 5. Installation einer Kamera (optional) BENUTZEROBERFLÄCHE DES MONITORS ......S.
-
Page 42: Sicherheitsanweisungen
1. SICHERHEITSANWEISUNGEN Wichtig! • Bitte lesen Sie diese Bedienungsanleitung vor Installation oder Verwendung des Geräts aufmerksam durch. • Wenn dieses Gerät für Dritte installieren, muss Endnutzer diese Bedienungsanleitung oder eine Kopie davon überlassen werden. Warnhinweis: • Die unterschiedlichen Elemente dürfen ausschließlich durch einen Techniker mit entsprechender Zulassung demontiert werden. -
Page 43: Allgemeines
3. ALLGEMEINES Diese Video-Türsprechanlage besteht aus einer Antwortstation für den Innenraum mit taktilem Bildschirm und einer Außenanlage mit Gegensprechanlage und Kamera. Sie ermöglicht es Ihnen, den Besucher an der Tür nach dem Läuten zu sehen und mit ihm zu sprechen. Sie lässt sich leicht installieren, da zwei Kabel für das Ausführen sämtlicher Funktionen nötig sind: Klingel, Video, Gegensprechanlage, Steuerung von Türöff ner und Automatik. - Page 44 Türsprechanlage: Weiße LED (Nachtsicht) Dämmerungssensor Mikrofon Kameraobjektiv Lautsprecher Beleuchtung des Namensfelds Schraube zum Diebstahlschutz 1 2 3 4 Programmierschalter Lautstärkeregler für den Lautsprecher 1 2 3 4 1 2 3 4 CFI Extel ZI de Fétan, 01600 Trévoux Klemmleiste für den FRANCE Anschluss der Kabel CFI Extel...
-
Page 45: Installation Des Produkts
5. INSTALLATION DES PRODUKTS Wichtige Empfehlungen und Hinweise: - Damit Sie Ihre Türsprechanlage optimal nutzen können, empfehlen wir Ihnen, sie vor der endgültigen Installation einzustellen (Familienmodus 1 oder 2, 1 oder 2 Außenanlagen, Lautsprecherlautstärke). Hierbei kann eine provisorische Testinstallation erforderlich sein, um zu prüfen, ob die Einstellungen korrekt vorgenommen wurden. -
Page 46: Parametrierung Der Sprechanlage
2. Parametrierung der Sprechanlage (siehe Abb. 1, Abb. 2 oder Abb. 3) a. Einstellung der Nummer der Sprechanlage: Schalter 2 auf Sprechanlage Nr. 1 nach links stellen und auf Sprechanlage Nr. 2 nach rechts stellen. b. Einstellung der Anzahl von Familien: Schalter 1 für den Modus 1 Familie nach links stellen und für den Modus 2 Familien nach rechts. -
Page 47: Installation Der Haupt- Oder Nebentürsprechanlage
3 – Löcher bohren. 4 – Verwenden Sie geeignete Dübel (die mitgelieferten Dübel sind für Mauern aus Vollmaterial geeignet). 5 – Bringen Sie die Wandhalterung an. 6 – Schließen Sie die 2 Kabel der Außenanlage und die 2 Stromversorgungskabel an und halten Sie sich dabei genau an das Kabelschema. -
Page 48: Installation Einer Kamera (Optional)
1 - Schraube der Diebstahlsicherung unter der Türsprechanlage entfernen. 2 - Kippen Sie die Frontseite Türsprechanlage nach vorne. 3 - Das Objektiv der Türsprechanlage ist etwa 1,60 m über dem Boden zu platzieren. 4 - Markierungen anzeichnen. 5 – Löcher bohren. 6 –... -
Page 49: Monitoring-Funktion Und Anrufannahme
00:00 01.01.2000 A. Monitoring-Funktion und Anrufannahme B. Gegensprechfunktion C. Einstellungen : zeigt an, dass die Klingel des Monitors deaktiviert ist. A. Monitoring-Funktion und Anrufannahme 1: Ermöglicht den Wechsel auf die Ansicht der zweiten Türsprechanlage oder der Kamera oder die Rückkehr zum Hauptmenü. 2: Ermöglicht den Aufbau einer Sprachkommunikation mit der Türsprechanlage und das Aufl egen. -
Page 50: Einstellungen
C. Einstellungen Das Menü der Einstellungen besteht aus 2 Seiten. klicken, um zum vorherigen Menü zu gelangen. 1: Audio-Einstellungen a: Auswahl des Klingeltons bei einem Anruf von der Türsprechanlage 1 b: Auswahl des Klingeltons bei einem Anruf der Türsprechanlage 2 (nur wenn eine zusätzliche Türsprechanlage eingestellt wurde) c: Auswahl des Klingeltons bei einem Interkommunikationsanruf (nur wenn ein zusätzlicher Monitor eingestellt wurde) - Page 51 d: Aktivierung des Energiesparmodus der Video-Türsprechanlage. Bei aktiviertem Energiesparmodus (On) ist der Verbrauch des Geräts niedriger. Die Türsprechanlage wird auf Standby geschaltet, der Monitor erhält also keine Anrufe mehr. 4. Deaktivierung des Klingeltons des Monitors Diese Funktion ermöglicht es, den Klingelton des Monitors für einen bestimmten Zeitraum (Mittagsschlaf,...) auszuschalten.
-
Page 52: Bedienungsanleitung
7. BEDIENUNGSANLEITUNG Anrufannahme: - Durch Drücken des Knopfes an der Türsprechanlage wird ein Ton und das Aufl euchten des Monitors ausgelöst. Sie haben 20 Sek. Zeit, um den Anruf entgegenzunehmen. Sobald Sie den Besucher erkannt haben, drücken Sie die Taste , um mit ihm zu kommunizieren. -
Page 53: Zubehör
- Steuerung Tor: Schaltvermögen 12V/2A - IP44 - Betriebstemperatur: -20 °C / +50°C WelcomeEye Outdoor: (zusätzliche Türsprechanlage) Ref.: 531006 - 900TVL C-MOS-Farbsensor - Blickwinkel H130° / V90° - Nachtsicht (weiße LEDs) - Steuerung des Türöffners 12V / 1.1A / 1,5 s. - Steuerung Tor: Schaltvermögen 12V / 2A - RFID (125 kHz) - IP44... -
Page 54: Faq
WelcomeEye TAG - DES 1000 ACI (Ref.: 531011)** * Für weitere Informationen siehe vollständige Anleitung von WelcomeEye Connect/Touch auf der Website www.philips.com. ** Für weitere Informationen siehe vollständige Anleitung von WelcomeEye Connect/Touch auf der Website www.philips.com. 10. FAQ Panne Ursache Lösung... - Page 55 • Schlechtes Bild und / • Umgebung • Prüfen, ob die verwendeten Kabel oder schlechter Ton die richtigen Maße aufweisen und ob sich die Verbindungskabel der Video-Türsprechanlage nicht im gleichen Leitungskanal wie das Stromkabel (230VAC) befinden. • Violettes Bild • Anschluss •...
-
Page 56: Technischer Kundendienst - Garantie
Verwenden Sie für die Reinigung keine Vorrichtung, die den Strom leiten kann (Metallbürste, spitze Werkzeuge usw.). Der Kassenzettel oder die Rechnung gelten als Nachweis des Kaufdatums. Die Kontaktinformationen und Servicezeiten unserer Kundendienstzentren sind erhältlich auf der Website www.philips.com. WelcomeEye Comfort / Compact / 09/17... -
Page 57: Sicherheitsmassnahmen
PHI/1031/ Wichtig : Bitte bewahren Sie diese Garantiekarte und Kaufbeleg. Philips und das Logo mit dem Schild sind eingetragene Warenzeichen von Koninklijke Philips N.V. und werden im Rahmen einer Lizenzvereinbarung benutzt. Dieses Produkt wurde von CFI Extel SAS gefertigt und wird unter der Verantwortlichkeit von CFI Extel SAS vertrieben und CFI Extel SAS ist der einzige Garantiepartner für dieses Produkt. -
Page 58: Warnung Fcc/Ce
- In Schulen, Bildungseinrichtungen oder Werkstätten muss die Betriebsfähigkeit von elektronischen Geräten durch qualifi ziertes Personal kontrolliert werden. - Halten Sie die Nutzungsbedingungen anderer, mit dem System verbundenen Gerät ein. - Kontaktieren Sie bei Zweifeln hinsichtlich der Funktionsweise oder der Sicherheit der Geräte eine Person mit entsprechender Erfahrung. - Page 59 INHOUDSOPGAVE VEILIGHEIDSVOORSCHRIFTEN ............p.2 INHOUD VAN DE KIT.................p.2 ALGEMEEN ...................p.3 NOMENCLATUUR ................p.3 INSTALLATIE VAN HET PRODUCT ..........p.5 1. Bedrading 2. Instelling van de straatunit 3. Installatie van het hoofdscherm of extra scherm 4. Installatie van de hoofd- of extra straatunit 5.
-
Page 60: Veiligheidsvoorschriften
1. VEILIGHEIDSVOORSCHRIFTEN Belangrijk! • Lees de gebruiksaanwijzing zorgvuldig door voordat u dit product installeert of gebruikt. • Indien u dit product installeert voor derden, vergeet dan niet om de handleiding of een kopie hiervan achter te laten voor de eindgebruiker. Waarschuwing: •... -
Page 61: Algemeen
3. ALGEMEEN Deze videofoon is samengesteld uit een antwoordset binnen met aanraakscherm en een buitenunit met intercom en camera waarmee u de bezoeker die heeft gebeld kunt zien en ermee kunt praten. Het systeem kan eenvoudig geïnstalleerd worden omdat er slechts 2 draden nodig zijn voor alle functies (bel, video, intercom, bediening slot en automatische poort). - Page 62 Straatunit: Witte LED (nachtzicht) Schemersensor Microfoon Lens van de camera Luidspreker Verlichting naamplaatje Antidiefstal- bevestigingsschroef 1 2 3 4 Programmaswitch Volumeregeling luidspreker 1 2 3 4 1 2 3 4 CFI Extel ZI de Fétan, 01600 Trévoux Connector voor de FRANCE aansluiting van de CFI Extel...
-
Page 63: Installatie Van Het Product
5. INSTALLATIE VAN HET PRODUCT Advies en belangrijke opmerkingen: - Om optimaal gebruik te maken van uw straatunit raden wij u aan deze in te stellen (mode 1 of 2 families, 1 of 2 straatunits, volumeregeling van de luidspreker), alvorens het systeem defi nitief te installeren. -
Page 64: Instelling Van De Straatunit
2. Instelling van de straatunit (zie fi g. 1, fi g. 2 of fi g. 3) a. Instelling van het nummer van de straatunit: Schuif switch 2 naar links op straatunit nr. 1 en naar rechts op straatunit nr. 2. b. -
Page 65: Installatie Van De Hoofd-Of Extra Straatunit
4 – Gebruik aan de ondergrond aangepaste deuvels (de meegeleverde deuvels zijn geschikt voor massieve muren). 5 - Bevestig de wandhouder. 6 - Sluit de 2 draden van de straatunit en de 2 voedingskabels aan volgens het bekabelingsschema. 7 - Breng het scherm op de wandhouder aan. 8 - Naargelang de gekozen confi guratie en nadat de bekabeling voltooid is, kan een instelling van de interface nodig zijn. -
Page 66: Installatie Van Een Camera (Optie)
1 - Draai de antidiefstalschroef onder de straatunit los. 2 - Kantel het frontpaneel van de straatunit naar voren. 3 - De lens van de straatunit moet op een hoogte van ongeveer 1,60 m van de grond worden geplaatst. 4 - Teken de gaten af. 5 –... -
Page 67: Functie Bewaking En Oproep Beantwoorden
00:00 01/01/2000 A. Functie bewaking en oproep beantwoorden B. Functie intercom C. Regelingen : geeft aan dat de beltoon van het scherm uitgeschakeld is A. Functie bewaking en oproep beantwoorden 1 : Om over te gaan naar het beeld van de tweede straatunit, de camera of terug te keren naar het hoofdmenu. -
Page 68: Regelingen
C. Regelingen Het instellingsmenu bestaat uit 2 pagina’s. Klik op om terug te keren naar het vorige menu. 1 : Audio-instellingen a : Keuze van de beltoon wanneer gebeld wordt vanaf straatunit 1. b : Keuze van de beltoon wanneer gebeld wordt vanaf straatunit 2 (uitsluitend als een extra straatunit ingesteld is). -
Page 69: Gebruiksaanwijzing
4. Uitschakeling van de bel van het scherm Door middel van deze functie kan de bel van het scherm voor een bepaalde duur uitgeschakeld worden (siësta, ...). De LED’s van het scherm blijven knipperen om aan te geven dat iemand aanbelt. a : de bel van het scherm inschakelen (On) / uitschakelen (Off... -
Page 70: Technische Eigenschappen
- Na een gesprek van 2 minuten wordt de verbinding verbroken en keert het scherm terug naar de startpagina. Druk als het gesprek beëindigd is voordat de 120 s. verstreken zijn op de toets om de verbinding te verbreken. Het scherm keert vervolgens terug naar de startpagina. - Page 71 WelcomeEye TAG - DES 1000 ACI (ref.: 531011)** ** Raadpleeg voor meer informatie de complete handleiding van WelcomeEye Comfort/Compact, beschikbaar op de site www.philips.com. * Raadpleeg voor meer informatie de complete handleiding van WelcomeEye Connect/Touch, beschikbaar op de site www.philips.com.
-
Page 72: Faq
10. FAQ Storing Oorzaak Oplossing • Het scherm wordt • Het scherm krijgt • Controleer of de voeding goed niet ingeschakeld geen voeding is aangesloten en de spanning ingeschakeld is • Controleer de polariteit van de schermaansluiting of bij de uitgang van de voeding •... - Page 73 • Beeld is te licht. • Positie van de • Richt de camera niet direct naar camera de zon of een weerspiegelend oppervlak. • Controleer de instellingen van het scherm • Het geluidsvolume • Instellingen • Controleer de instellingen op de van de straatunit is achterzijde van de straatunit te zwak...
-
Page 74: Technische Bijstand - Garantie
De kassabon of de factuur is het bewijs van de datum van aankoop. De contactadressen en openingstijden van onze technische centra kunnen zo nodig geraadpleegd worden op de website www.philips.com. NL16 WelcomeEye Comfort / Compact / 09/17... -
Page 75: Veiligheidsmaatregelen
PHI/1031/ Belangrijk : Bewaar deze garantiekaart en het aankoopbewijs. Philips en het schildembleem van Philips zijn gedeponeerde merken van Koninklijke Philips N.V. en worden onder licentie gebruikt. Dit product werd gefabriceerd door en verkocht onder de aansprakelijkheid van CFI Extel SAS, die als enige garant staat voor dit product. -
Page 76: Fcc/Eg-Waarschuwing
- Leef de gebruiksvoorschriften van andere apparaten die aan het systeem zijn gekoppeld - Neem contact op met een deskundig persoon als u twijfelt over de werking of de veiligheid van de apparaten. - Elektrische apparaten nooit met natte handen aan- en uitschakelen of loskoppelen. - Bij het installeren van dit product moet u controleren of de voedingskabels van het apparaat niet beschadigd zijn. - Page 77 SPIS TREŚCI ZALECENIA BEZPIECZEŃSTWA ..........str. 2 ZAWARTOŚĆ ZESTAWU............... str. 2 INFORMACJE OGÓLNE ..............str. 3 TERMINOLOGIA ................str. 3 MONTAŻ URZĄDZENIA ..............str. 5 1. Okablowanie 2. Ustawienia panelu 3. Montaż monitora głównego lub dodatkowego 4. Montaż głównego lub dodatkowego panelu zewnętrznego 5.
-
Page 78: Zalecenia Bezpieczeństwa
1. ZALECENIA BEZPIECZEŃSTWA Ważna uwaga! • Przed montażem lub użyciem produktu należy dokładnie przeczytać niniejszą instrukcję obsługi. • Jeśli produkt instalowany jest na rzecz osób trzecich, należy pamiętać o pozostawieniu użytkownikowi końcowemu niniejszej instrukcji obsługi lub jej kopii. Uwaga: • Demontaż poszczególnych elementów powinien być wykonany wyłącznie przez wykwalifikowanego technika. -
Page 79: Informacje Ogólne
3. INFORMACJE OGÓLNE Wideodomofon składa się z wewnętrznego odbiornika z ekranem dotykowym oraz panelu zewnętrznego z interkomem i kamerą, umożliwiającego komunikację audiowizualną z osobą odwiedzającą. Jest urządzeniem łatwym w montażu, ponieważ do korzystania ze wszystkich jego funkcji (dzwonka, rejestracji wideo, interkomu, sterowania zaczepem i sterowania automatyką) niezbędna jest jedynie instalacja 2-przewodowa. - Page 80 Panel zewnętrzny: Białe światło ledowe Czujnik (widzenie w nocy) zmierzchu Mikrofon Obiektyw kamery Głośnik Podświetlenie wizytówki Antywłamaniowa śruba mocująca 1 2 3 4 Przełącznik programowania Regulacja siły dźwięku głośnika 1 2 3 4 1 2 3 4 CFI Extel ZI de Fétan, 01600 Trévoux Zaciskowa listwa FRANCE podłączeniowa do...
-
Page 81: Montaż Urządzenia
5. MONTAŻ URZĄDZENIA Ważne rady i uwagi: - Aby korzystać w pełni z funkcjonalności panela zewnętrznego, zaleca się jego ustawienie przed ostatecznym montażem (tryb 1 lub 2 rodziny, 1 lub 2 panele, ustawienie siły dźwięku głośnika). W celu sprawdzenia poprawności ustawień, należy podłączyć i uruchomić urządzenie na stole. -
Page 82: Montaż Monitora Głównego Lub Dodatkowego
2. Ustawienia parametrów panelu (zob. rys. 1, rys. 2 lub rys. 3) a. Ustawienia numeru panelu głównego: Umieścić przełącznik 2 po lewej stronie na panelu nr 1 i po prawej stronie na panelu nr 2. b. Ustawienie liczby rodzin: Dla trybu jednorodzinnego umieścić przełącznik 1 po lewej stronie, dla trybu dwurodzinnego —... -
Page 83: Montaż Głównego Lub Dodatkowego Panelu Zewnętrznego
4 – Umieścić w otworach odpowiednie do uchwytów kołki (te znajdujące się w zestawie przeznaczone są do ścian pełnych). 5 – Zamocować uchwyt ścienny. 6 – Podłączyć 2 przewody panelu zewnętrznego i 2 przewody zasilające zgodnie ze schematem instalacji okablowania. 7 –... -
Page 84: Montaż Kamery (Opcjonalnie)
1 - Odkręcić śrubę mocującą antywłamaniową na płycie zewnętrznej. 2 - Podważyć front kasety wideodomofonowej do góry. 3 – Obiektyw płyty powinien znajdować się na wysokości ok 1,60 m od podłoża. 4 – Oznaczyć miejsca otworów. 5 – Wywiercić otwory. 6 –... -
Page 85: Funkcja Monitoringu I Odbieranie Domofonu
00:00 01/01/2000 A. Funkcja monitoringu i odbieranie domofonu B. Funkcja łączności C. Ustawienia : informuje o tym, że wyłączono dzwonek monitora A. Funkcja monitoringu i odbieranie domofonu 1: Umożliwia wyświetlenie widoku drugiego panelu zewnętrznego, kamery lub powrót do menu głównego. 2: Umożliwia nawiązanie połączenia głosowego z panelem zewnętrznym i zakończenie połączenia. -
Page 86: Ustawienia
C. Ustawienia Menu ustawień składa się z 2 stron. Kliknąć , aby powrócić do poprzedniego menu. 1: Regulacja dźwięku a: Wybór dzwonka podczas połączenia przychodzącego z panelu zewnętrznego 1. b: Wybór dzwonka podczas połączenia przychodzącego z panelu zewnętrznego 2 (wyłącznie, jeśli skonfi gurowano dodatkowy panel zewnętrzny). c: Wybór dzwonka podczas połączenia przychodzącego z innego monitora (wyłącznie, jeśli skonfi gurowano dodatkowy monitor). - Page 87 d: Włączanie trybu oszczędzania energii w wideodomofonie. Gdy włączono (On) tryb oszczędzania energii, możliwości użytkowania produktu są ograniczone. Panel zewnętrzny przechodzi w tryb czuwania, więc monitor nie odbiera połączeń przychodzących. 4. Wyłączanie dzwonka monitora Funkcja ta umożliwia wyłączenie dzwonka monitora na pewien czas (np. podczas odpoczynku).
-
Page 88: Obsługa
7. OBSŁUGA Odbieranie połączenia przychodzącego: - Naciśnięcie przycisku panelu zewnętrznego wyzwala sygnał dźwiękowy i włączenie się monitora. Czas na odebranie połączenia: 20 sekund. Po rozpoznaniu gościa należy nacisnąć przycisk , aby uzyskać łączność. - Po 2 minutach rozmowy łączność zostaje przerwana, a na ekranie wyświetla się strona główna. - Page 89 - Widzenie w nocy (białe światło ledowe) - Sterowanie zaczepami 12 V / 1,1 A / 1,5 s - Sterowanie bramą: zdolność wyłączania 12 V / 2 A - IP44 - Temperatura pracy: -20°C / +50°C WelcomeEye Outdoor: (Dodatkowy panel zewnętrzny) nr kat.: 531006 - Czujnik C-MOS kolorowy 900TVL - Kąt widzenia: w poziomie 130°...
-
Page 90: Dodatki
WelcomeEye Power - DES 1000 DPS (nr kat.: 531010)** WelcomeEye TAG - DES 1000 ACI (nr kat.: 531011)** * Więcej informacji można znaleźć w kompletnej instrukcji WelcomeEye Comfort/Compact dostępnej na stronie www.philips.com. ** Więcej informacji można znaleźć w kompletnej instrukcji WelcomeEye Connect/Touch dostępnej na stronie www.philips.com. - Page 91 • Panel zewnętrzny jest • Konfiguracja • Sprawdzić, czy panelu włączony, ale monitor przełącznika zewnętrznego nie zaprogramowano nie dzwoni panelu jako urządzenia używanego przez zewnętrznego dwie rodziny. Przypomnienie: tryb jednorodzinny = przełącznik 2 w położeniu ON, tryb dwurodzinny = przełącznik 2 w położeniu OFF.
- Page 92 • Tryb dwurodzinny nie • Konfiguracja • Sprawdzić, czy panelu działa zewnętrznego nie zaprogramowano jako urządzenia używanego przez dwie rodziny. Przypomnienie: tryb jednorodzinny = przełącznik 2 w położeniu ON, tryb dwurodzinny = przełącznik 2 w położeniu OFF. Należy odłączyć zasilanie na 5 sekund, aby zapisać nowe ustawienia.
-
Page 93: Pomoc Techniczna - Gwarancja
Nie stosować podczas prac konserwacyjnych narzędzi przewodzących prąd elektryczny (metalowa szczotka, narzędzia ostro zakończone...lub inne). Paragon fiskalny lub faktura stanowią dowód zakupu. Numery kontaktowe oraz godziny otwarcia naszych centrów obsługi znajdują się na stronie www.philips.com. KARTA GWARANCYJNA Pan / Pani : Numer telefonu :... -
Page 94: Środki Bezpieczeństwa
Nazwa Philips oraz emblemat tarczy Philips są znakami towarowymi objętymi licencją firmy Koninklijke Philips N.V. Ten produkt został wytworzony i jest sprzedawany na odpowiedzialność firmy CFI Extel SAS, która jest jedynym gwarantem w odniesieniu do tego produktu. 12. ŚRODKI BEZPIECZEŃSTWA Wszelkie uszkodzenia wynikające z niestosowania się... -
Page 95: Ostrzeżenia Fcc/Ce
13. OSTRZEŻENIA FCC/CE Uwaga: To urządzenie zostało poddane badaniom, podczas których stwierdzono, że spełnia wymogi ustalone dla urządzeń klasy B, zgodnie z obowiązującymi normami europejskimi. Wymogi te mają zagwarantować odpowiedni poziom ochrony przed szkodliwymi zakłóceniami w instalacjach w budynkach mieszkalnych. Urządzenie to może wypromieniowywać... - Page 96 INDICE ISTRUZIONI DI SICUREZZA ............p.2 CONTENUTO DEL KIT ...............p.2 INFORMAZIONI GENERALI.............p.3 NOMENCLATURA................p.3 INSTALLAZIONE DEL PRODOTTO ..........p.5 1. Cablaggio 2. Impostazione della pulsantiera 3. Installazione del monitor principale o supplementare 4. Installazione della pulsantiera esterna principale o supplementare 5. Installazione di una telecamera (opzionale) INTERFACCIA DEL MONITOR ............p.8 A.
-
Page 97: Istruzioni Di Sicurezza
1. ISTRUZIONI DI SICUREZZA Importante! • Prima di installare o utilizzare il prodotto, leggere attentamente il manuale d’istruzioni. • Se si installa il prodotto per conto di terzi, ricordarsi di lasciare il manuale o una copia dello stesso all’utente fi nale. Avvertenza: •... -
Page 98: Informazioni Generali
3. INFORMAZIONI GENERALI Il presente videocitofono è composto da un touch screen e da una pulsantiera esterna con citofono e telecamera che consentono di vedere chi ha suonato e comunicare con l’esterno. L’installazione è particolarmente semplice, poiché bastano 2 fi li per assicurare tutte le funzioni (audio, video, citofono e comando di bocchetta e automatismo). - Page 99 Pulsantiera esterna: Sensore LED bianco (visione notturna) crepuscolare Microfono Obiettivo della telecamera Altoparlante Illuminazione portaetichette Vite di fi ssaggio antifurto 1 2 3 4 Switch di programmazione Regolazione volume altoparlante 1 2 3 4 1 2 3 4 CFI Extel ZI de Fétan, 01600 Trévoux Morsettiera per il FRANCE...
-
Page 100: Installazione Del Prodotto
5. INSTALLAZIONE DEL PRODOTTO Consigli e note importanti: - Per sfruttare a pieno tutte le potenzialità della pulsantiera esterna, prima di installarla nella sua posizione definitiva, si consiglia di impostarne tutti i vari parametri (modalità 1 o 2 famiglie, 1 o 2 pulsantiere, volume altoparlante). Per controllare che tutte le regolazioni siano state eseguite correttamente, è... -
Page 101: Installazione Del Monitor Principale O Supplementare
2. Impostazione della pulsantiera (v. fi g. 1, fi g. 2 o fi g. 3). a. Impostazione del numero della pulsantiera: Posizionare lo switch 2 a sinistra sulla pulsantiera esterna n°1 e a destra sulla pulsantiera esterna n°2 b. Impostazione del numero di famiglie: Posizionare lo switch 1 a sinistra per la modalità... -
Page 102: Installazione Della Pulsantiera Esterna Principale O Supplementare
3 – Forare. 4 – Inserire dei tasselli adatti al tipo di supporto (quelli in dotazione sono adatti a muri pieni). 5 – Fissare il supporto murale. 6 – Collegare i 2 fi li della pulsantiera esterna e i 2 fi li dell’alimentazione seguendo attentamente lo schema di cablaggio. -
Page 103: Installazione Di Una Telecamera (Opzionale)
1 – Svitare la vite antifurto sotto la pulsantiera esterna. 2 – Spostare la parte anteriore della pulsantiera esterna in avanti. 3 – L’obiettivo della pulsantiera esterna deve trovarsi a un’altezza di circa 1,60 m da terra. 4 – Prendere i punti di riferimento necessari per i fori. 5 –... -
Page 104: Funzione Monitoring E Risposta Alle Chiamate
00:00 01/01/2000 A. Funzione monitoring e risposta alle chiamate B. Funzione interfono C. Impostazioni : indica che la suoneria del monitor è disattivata A. Funzione monitoring e risposta alle chiamate 1: Permette di passare alla visualizzazione delle immagini della seconda pulsantiera esterna o della telecamera o di tornare al menu principale. -
Page 105: Impostazioni
C. Impostazioni Il menu delle impostazioni è composto da 2 pagine. Toccare per tornare al menu precedente. 1: Impostazioni audio a: Selezione della suoneria in caso di chiamata proveniente dalla pulsantiera esterna 1 b: Selezione della suoneria in caso di chiamata proveniente dalla pulsantiera esterna 2 (solo se è... -
Page 106: Istruzioni Per L'uso
4. Disattivazione della suoneria del monitor Questa funzione permette di impostare la suoneria del monitor su silenzioso per un determinato intervallo di tempo (ad esempio se si fa un riposino). In caso di chiamata i led del monitor continueranno comunque a lampeggiare. a: attiva (On) / disattiva (Off... -
Page 107: Caratteristiche Tecniche
- Dopo 2 minuti la comunicazione s’interrompe e lo schermo torna alla pagina iniziale. Se la conversazione termina prima dei 120 sec. impostati per la temporizzazione, per interrompere la comunicazione toccare il tasto . Lo schermo torna alla pagina iniziale. - Per tornare a riprodurre l’immagine, toccare sulla schermata iniziale. - Page 108 WelcomeEye Power - DES 1000 DPS (rif: 531010)** WelcomeEye TAG - DES 1000 ACI (rif.: 531011)** * Per maggiori informazioni consultare il manuale completo WelcomeEye Comfort/Compact disponibile sul sito www.philips.com. ** Per maggiori informazioni consultare il manuale completo WelcomeEye Connect/Touch disponibile sul sito www.philips.com.
-
Page 109: Domande Frequenti
10. DOMANDE FREQUENTI Problema Causa Soluzione • Il monitor non si • Il monitor non è • Controllare che l’alimentazione sia accende alimentato collegata alla rete e in tensione • Controllare la polarità a livello del monitor o dell’uscita dell’alimentazione •... - Page 110 • L'immagine è troppo • Posizione della • Non puntare l'obiettivo della luminosa telecamera telecamera direttamente contro la luce del sole o di fronte a una superficie riflettente. • Controllare le impostazioni del monitor • Volume della • Regolazione • Modificare la regolazione sul retro pulsantiera esterna della pulsantiera esterna troppo basso...
-
Page 111: Assistenza Tecnica - Garanzia
Per la data d’acquisto, fa fede lo scontrino o la fattura. In caso di necessità, i contatti e gli orari di apertura dei nostri centri di assistenza sono disponibili sul sito www.philips.com. IT16 WelcomeEye Comfort / Compact / 09/17... -
Page 112: Misure Di Sicurezza
Importante : Si prega di conservare questa scheda di garanzia e la prova di acquisto. Philips e il simbolo dello scudo Philips sono marchi depositati da Koninklijke Philips N.V. usati con licenza. Il presente prodotto è stato costruito da CFI Extel SAS ed è venduto sotto la responsabilità... -
Page 113: Avviso Fcc/Ce
- Per l’uso in scuole, istituti di formazione, laboratori, ecc. la presenza di personale qualificato è necessaria per controllare che tutte le apparecchiature elettroniche funzionino correttamente. - Attenersi alle istruzioni per l’uso delle altre apparecchiature collegate all’impianto. - In caso di dubbi riguardanti le modalità di funzionamento o la sicurezza delle apparecchiature, contattare una persona qualificata. - Page 114 ÍNDICE NORMAS DE SEGURIDAD ..............p. 2 CONTENIDO DEL KIT...............p. 2 GENERALIDADES ................p. 3 NOMENCLATURA................p. 3 INSTALACIÓN DEL PRODUCTO ...........p. 5 1. Cableado 2. Confi guración de la placa 3. Instalación del monitor principal o adicional 4. Instalación de la placa externa principal o adicional 5.
-
Page 115: Normas De Seguridad
1. NORMAS DE SEGURIDAD ¡Importante! • Lea atentamente el manual de uso antes de la instalación o utilización de este producto. • Si instala este producto para terceros, recuerde dejar el manual o una copia del mismo al usuario fi nal. Advertencia: •... -
Page 116: Generalidades
3. GENERALIDADES Este videoportero se compone de un módulo para contestar desde el interior con pantalla táctil y una placa externa con interfono y cámara que permite ver y comunicarse con el visitante que ha llamado. Es sencillo de instalar ya que son necesarios 2 cables para todas las funciones (timbre, vídeo, interfono y controles del cerradero y del automatismo). - Page 117 Placa externa: Sensor Led blanco (visión nocturna) crepuscular Micrófono Objetivo de la cámara Altavoz Iluminación portanombre Tornillo antirrobo de fi jación 1 2 3 4 Conmutador de programación Ajuste volumen de altavoz 1 2 3 4 1 2 3 4 CFI Extel ZI de Fétan, 01600 Trévoux Bornera para conexión...
-
Page 118: Instalación Del Producto
5. INSTALACIÓN DEL PRODUCTO Consejos y notas importantes: - Para disfrutar plenamente de su placa externa, le recomendamos configurarla (modo 1 o 2 familias, 1 o 2 placas, volumen del altavoz) antes de su instalación definitiva. Para ello, puede ser necesaria una conexión previa para comprobar que los ajustes se han realizado correctamente. -
Page 119: Confi Guración De La Placa
2. Confi guración de la placa (ver fi g. 1, fi g. 2 o fi g. 3) a. Confi guración del número de la placa: Colocar el conmutador 2 a la izquierda en la placa n.° 1 y a la derecha en la placa n.° 2. b. -
Page 120: Instalación De La Placa Externa Principal O Adicional
4 - Colocar tacos adaptados al soporte (los suministrados son adecuados para paredes macizas). 5 - Fijar el soporte de pared. 6 - Conectar los 2 cables de la placa externa y los 2 cables de alimentación respetando correctamente el esquema del cableado. 7 - Colocar el monitor sobre su soporte de pared. -
Page 121: Instalación De Una Cámara (Opcional)
1 - Retirar el tornillo antirrobo debajo de la placa externa. 2 - Bascular la parte delantera de la placa externa hacia delante. 3 - El objetivo de la placa debe colocarse a una altura de aproximadamente 1,60 m del suelo. -
Page 122: Función De Monitoreo Y Respuesta A Una Llamada
0:00 01/01/2000 A. Función de monitoreo y respuesta a una llamada B. Función de intercomunicación C. Ajustes : indica que el timbre del monitor está desactivado A. Función de monitoreo y respuesta a una llamada 1: Permite pasar a la vista de la segunda placa externa, de la cámara o volver al menú principal. -
Page 123: Ajustes
C. Ajustes El menú de los ajustes se compone de 2 páginas. Hacer clic en para volver al menú anterior 1: Ajustes de audio a: Selección del timbre al recibir una llamada de la placa externa 1 b: Selección del timbre al recibir una llamada de la placa externa 2 (únicamente si se ha confi gurado una placa externa adicional) c: Selección del timbre al recibir una llamada en intercomunicación (únicamente si se ha confi gurado un monitor adicional) - Page 124 4. Desactivación del timbre del monitor Esta función permite cortar el timbre del monitor durante cierto periodo (siesta…). Los ledes del monitor seguirán parpadeando para indicar una llamada. a: Activar(On) / desactivar (Off ) el timbre del monitor. b: Hora en la cual el timbre estará desactivado. c: Hora en la cual el timbre volverá...
-
Page 125: Características Técnicas
- Al cabo de 2 minutos de conversación, la comunicación se detendrá y la pantalla volverá a la página de inicio. Si la conversación fi naliza antes de los 120 s de temporización, pulsar la tecla para parar la comunicación. La pantalla volverá entonces a la página de inicio. -
Page 126: Accesorios
WelcomeEye Lock - DES 1100 EDL (ref.: 531009) WelcomeEye Power - DES 1000 DPS (ref.: 531010)** WelcomeEye TAG - DES 1000 ACI (ref.: 531011)** * Consulte el manual completo WelcomeEye Comfort/Compact disponible en el sitio www.philips.com para más información. ES13... -
Page 127: Preguntas Frecuentes
** Consulte el manual completo WelcomeEye Connect/Touch disponible en el sitio www.philips.com para más información. 10. PREGUNTAS FRECUENTES Avería Causa Solución • El monitor no se • El monitor no tiene • Compruebe que la alimentación enciende corriente esté correctamente conectada y con tensión... - Page 128 • Imagen y/o sonido • Entorno • Compruebe que los cables usados incorrectos tienen la sección adecuada y que los cables de conexión del videoportero no estén en la misma vaina que el de 230 V CA. • Imagen violeta •...
-
Page 129: Asistencia Técnica - Garantía
El ticket de compra o la factura sirven para demostrar la fecha de compra. En caso de necesidad, encontrará los contactos y los horarios de apertura de nuestros centros de asistencia técnica en el sitio www.philips.com. ES16 WelcomeEye Comfort / Compact / 09/17... -
Page 130: Medidas De Seguridad
Importante : Conserve esta tarjeta de garantía y el comprobante de compra. Philips y el emblema escudo Philips son marcas registradas de Koninklijke Philips N.V. y se usan bajo licencia. Este producto ha sido fabricado por y es vendido bajo la responsabilidad de CFI Extel SAS y CFI Extel SAS es el único garante de dicho producto. -
Page 131: Advertencia Fcc/Ce
- Respete los consejos de uso del resto de aparatos asociados al sistema. - Póngase en contacto con una persona experimentada en caso de que tenga dudas sobre el modo de funcionamiento o la seguridad de los aparatos. - No conecte ni desconecte nunca los aparatos eléctricos con las manos húmedas. - Durante la instalación de este producto, compruebe que los cables de alimentación no corren peligro de sufrir daños. - Page 132 ÍNDICE INSTRUÇÕES DE SEGURANÇA ............p.2 CONTEÚDO DO KIT ................p.2 GENERALIDADE .................p.3 NOMENCLATURA................p.3 INSTALAÇÃO DO PRODUTO ............p.5 1. Cablagem 2. Parametrização da placa de rua 3. Instalação do monitor principal ou suplementar 4. Instalação da placa de rua principal ou suplementar 5.
-
Page 133: Instruções De Segurança
1. INSTRUÇÃO DE SEGURANÇA Importante ! • Leia atentamente o manual de utilização antes de instalar ou utilizar este produto. • Se instalar este produto para outras pessoas, não se esqueça de transmitir o manual ou uma cópia para o utilizador fi nal. Advertência: •... -
Page 134: Generalidade
3. GENERALIDADE Este videoporteiro é composto por um posto de resposta interno com ecrã táctil e uma placa externa com intercomunicador e câmara que permite ver e comunicar com o visitante que tocou a campainha. A instalação do videoporteiro é fácil com apenas 2 fi os para todas as funções (campainha, vídeo, intercomunicador e comandos do trinco e do automatismo). - Page 135 Placa de rua: LED branco (visão noturna) Sensor crepuscular Microfone Objetiva da câmara Altifalante Iluminação da etiqueta de identifi cação Parafuso de fi xação antirroubo 1 2 3 4 Switch de programação Ajuste do volume do altifalante 1 2 3 4 1 2 3 4 CFI Extel ZI de Fétan, 01600 Trévoux...
-
Page 136: Instalação Do Produto
5. INSTALAÇÃO DO PRODUTO Conselhos e notas importantes: - Para desfrutar plenamente da sua placa de rua, não se esqueça de configurar o dispositivo (modo 1 ou 2 domicílios, 1 ou 2 placas de rua, volume do altifalante), antes da instalação definitiva. -
Page 137: Parametrização Da Placa De Rua
2. Parametrização da placa de rua (ver fi g. 1, fi g. 2 ou fi g. 3) a. Parametrização do número da placa: Colocar o switch 2 à esquerda na placa de rua n°1 e à direita na placa de rua n°2. b. -
Page 138: Instalação Da Placa De Rua Principal Ou Suplementar
4 – Colocar buchas adaptadas ao suporte (as buchas fornecidas são adequadas para paredes de materiais sólidos). 5 – Fixar o suporte de parede. 6 – Ligar os 2 fi os da placa de rua e os 2 fi os da alimentação respeitando bem o esquema de cablagem. -
Page 139: Instalação De Uma Câmara (Opcional)
3 - A objetiva da placa de rua deve ser colocada à uma altura de cerca de 1,60m do solo. 4 - Marcar as posições de furo. 5 - Furar. 6 - Colocar buchas adaptadas ao suporte (os parafusos fornecidos foram concebidos para paredes de materiais sólidos). -
Page 140: Função De Monitoring E Atendimento De Chamada
C. Ajustes : indica que a campainha elétrica do monitor está desativada A. Função de monitoring e atendimento de chamada 1 : Permite visualizar a segunda placa de rua, a câmara ou voltar ao menu principal. 2 : Permite entrar em comunicação vocal com a placa de rua e desligar. 3 : Permite abrir o trinco elétrico 4 : Para abrir o portão. - Page 141 1 : Ajustes áudio a : Escolha da tonalidade da campainha durante uma chamada proveniente da placa de rua 1 b : Escolha da tonalidade da campainha durante uma chamada proveniente da placa de rua 2 (unicamente se uma placa de rua suplementar tiver sido confi gurada) c : Escolha da tonalidade da campainha durante uma utilização da função de intercomunicação (unicamente se um monitor suplementar tiver sido confi gurado)
- Page 142 5 : Ajuste da hora e da data : ajuste : confi rma, permite aceder ao ajuste seguinte e ao menu seguinte a : menu 1 : ajuste da hora e da data b : menu 2 : ajuste do formato da data (no menu principal unicamente) e da hora. 6 : Menu de reinicialização Reinicialização do produto com os parâmetros padrão da fábrica, desativação da campainha, confi guração das opções, ajustes de áudio, ajustes da imagem, data e hora).
-
Page 143: Características Técnicas
para o ecrã principal após 15 segundos sem ação. - Se o monitor estiver no menu principal, o monitor comuta automaticamente para o modo de espera após 15 segundos sem ações. - Basta tocar num botão para sair do modo de espera. 8. -
Page 144: Acessórios
WelcomeEye TAG - DES 1000 ACI (ref: 531011)** * Consulte o manual de instruções completo do WelcomeEye Comfort/Compact disponível no site www. philips.com para obter mais informações. ** Consulte o manual de instruções completo do WelcomeEye Connect/Touch disponível no site www. - Page 145 • Nenhum • Erro de ligação • O dispositivo está equipado funcionamento na com sistemas de proteção muito primeira instalação eficazes. Desligue a fonte de • Inversão de alimentação durante pelo menos 1 polaridade na minuto, corrija o erro de instalação alimentação e ligue novamente.
- Page 146 • O modo bi-domicílio • Configuração • Verifique se a placa de rua não está não funciona programada em modo bi-domicílio. Lembrete : monodomicílio = switch 2 no ON, bi-domicílio = switch 2 no OFF. Corte a alimentação elétrica durante 5 segundos para que as novas configurações sejam tomadas em conta •...
-
Page 147: Assistência Técnica - Garantia
Importante : Por favor, guarde este cartão de garantia e prova de compra. Philips e o logotipo Philips são marcas registadas da Koninklijke Philips N.V. e são utilizadas sob licença. Este produto foi fabricado e é vendido sob a responsabilidade da CFI Extel SAS, e a CFI Extel SAS é... -
Page 148: Medidas De Segurança
12. MEDIDAS DE SEGURANÇA Os danos provocados pela falta de conformidade ao manual conduzem à expiração da garantia. Não assumiremos qualquer responsabilidade pelos danos daí resultantes! Não assumiremos qualquer responsabilidade relativamente a todo o dano, em bens e pessoas, causado por uma má manipulação ou pela falta da conformidade relativamente às instruções de segurança. -
Page 149: Advertência Fcc/Ce
13. ADVERTÊNCIA FCC/CE Nota : Este equipamento foi testado e está em conformidade com os limites de um dispositivo de classe B, de acordo com as normas europeias em vigor. Estes limites foram concebidos para fornecer uma proteção razoável contra as interferências numa instalação residencial. - Page 152 GB - Alternating Current Wechselstrom Koninklijke Philips N.V. NL - Gelijkstroom I marchi Philips sono marchi registrati di proprietà di Koninklijke Philips PL - Prąd zmienny N.V. IT - Corrente alternata Las marcas registradas de Philips son marcas registradas de Koninklijke...
Need help?
Do you have a question about the WelcomeEye Comfort DES9500VDP and is the answer not in the manual?
Questions and answers