Table of Contents
Advertisement
Advertisement
Table of Contents

Related Manuals for Bosch WTW87NH1UC


Summary of Contents for Bosch WTW87NH1UC
- Page 1 Use and Care Manual, Installation Instructions Dryer WTW87NH1UC...
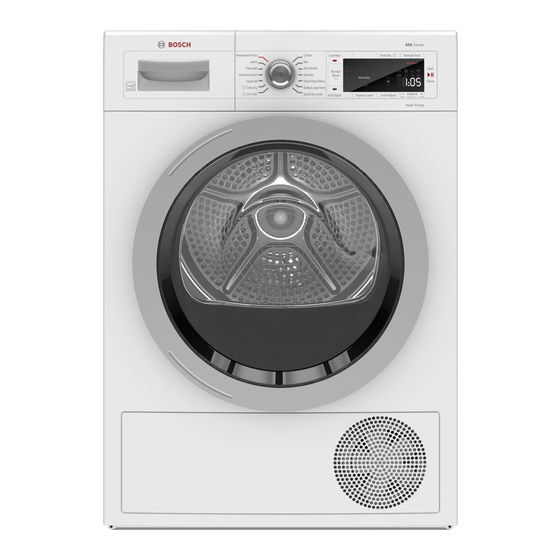
- Page 2 Welcome to Your New Dryer! Congratulations on your selection of a new Bosch dryer for your laundry needs. We are confident you will enjoy the superior performance and reliability. Please do not hesitate to contact our Customer Service department if you have any questions or comments about your new dryer.
-
Page 3: Table Of Contents
Starting the program ............29 www.bosch-home.com/us (USA) or www.bosch- Indicator of program sequence ........30 home.ca (Canada) and in the online shop www.bosch- Selecting a different program ......... 30 home.com/us/store Cancel program ..............30 Program end .............. -
Page 4: Important Information
Please take a moment to record the following basic Your dryer does not require any special care other than information about the purchase of your new Bosch dryer. the maintenance and care mentioned in this manual. If This information will be helpful in the event you need to... -
Page 5: Your Dryer Is Intended For
Your dryer is intended for Only household use and in a non-commercial ▯ Installation by qualified installers. Y o u r d r y e r i s i n t e n d e d f o r ▯ environment. -
Page 6: Important Safety Instructions
THE FOLLOWING ▯ recommended by the clothing manufacturer. Bosch dryers are provided with a Use and Care Manual ▯ Do not operate the dryer if parts are missing or broken. with Installation Instructions. Read and understand all ▯... - Page 7 IMPORTANT SAFETY INSTRUCTIONS READ AND SAVE THESE INSTRUCTIONS Always contact your dealer, distributor, service provider ▯ or the manufacturer about any problems or conditions that you do not understand. Follow the Safety Information in the INSTALLATION ▯ INSTRUCTIONS and the OPERATING INSTRUCTIONS. WARNING WARNINGS FOR CHILDREN AND PETS Do not allow children and pets to play on or in the...
-
Page 8: Introduction To Your New Dryer
I n t r o d u c t i o n t o y o u r n e w d r y e r RISK OF FIRE, ELECTRIC SHOCK OR INJURY A distinctive feature of your Bosch dryer is its Self- ▯... -
Page 9: Environmentally Friendly Use Of Your Dryer
Environmentally friendly use of your dryer Your new Bosch dryer is designed to use energy in a highly efficient way to help reduce operating costs, conserve resources and protect the environment. To save energy, money and time, Bosch recommends the following: Spin the laundry thoroughly ▯... -
Page 10: Dimensions And Clearances Required
Dimensions and clearances required Installation for best performance Appliance dimensions D i m e n s i o n s a n d c l e a r a n c e s r e q u i r e d CAUTION DO NOT INSTALL THE DRYER: outdoors,... -
Page 11: Minimum Clearances
Under counter (Preferred) Closet: Stacked Only with one of the Bosch required Stacking Kits (sold separately), can this Bosch Dryer be stacked on top of a Bosch Washer of the same dimensions to save space. CAUTION Use only the dryer stacking kit noted in this User ▯... -
Page 12: Installation Instructions
Your dryer is supplied with a specific power ▯ Remove the appliance packaging carefully to adapter that is only to be used with the Bosch prevent damage to the surfaces. Washers and Dryers having NEMA 6-15P cords. After removing the packaging, immediately remove Any other use of this power adapter is prohibited. -
Page 13: Waste Disposal
Waste disposal Parts provided with your dryer Disposal of Packaging Materials Back side of the dryer After unpacking your new appliance dispose of the protective packaging materials in an environmentally friendly way. Ask your dealer or inquire with your local authority regarding currently acceptable means of disposal. -
Page 14: Accessories For Your Appliance
WTZPW20D Tank Kit Stacking kits Blue filter ▯ The dryer can be stacked on a Bosch washer of the Rubber plug ▯ same dimensions to save space. Only the below Drain Set Pack: Stacking kits must be used when stacking this dryer on a (2) plastic ties for securing drain hose Bosch washer. -
Page 15: Installation - Step By Step And Check List
Installation - step by step and check list Examples of connections: Plumbing box or Standpipe connection: Review the following list and check off each step as it is ▯ completed during installation, if necessary. For most plumbing box installations (with adjacent washer) the plastic elbow supplied with the dryer will Unpack the dryer. - Page 16 Secure hose and/or elbow as shown below. Sink “D” NOTICES or floor “E”. Examples shown are for reference only. Not all fittings, ▯ connectors, nuts, brackets, ties, etc. are supplied to NOTICE: Examples shown are for reference only. Not all accommodate every application.
- Page 17 Remove accessories from drum and locate the Tank Turn the Tank over and you will see a small hole for Kit containing the blue filter and rubber plug. the plug to be inserted into. Insert the plug into the hole. Ensure it is completely inserted and will not fall out.
-
Page 18: Electrical Connections
Plug the adapter into the 4-prong receptacle (Line Do not cut, remove or bypass the grounding ▯ side) and then plug the Bosch Dryer and Washer prong on the power cord end. power cords into the adapter (Load side). See Do not modify the plug provided with the ▯... -
Page 19: Leveling The Dryer
Press down on each corner of the dryer top to make GROUNDING INSTRUCTIONS sure the dryer does not “wobble“. There should be no "give" or movement. All four dryer feet should press WARNING equally against the floor. This is just as important as the dryer being level to prevent vibration. -
Page 20: Preparing To Transport The Dryer - Step By Step
Preparing to transport the dryer - step by Reversing the door - step by step step Tip: To reverse your dryer door side: Press the center of the Program Selector to switch off Use only T20 (Torx) type screw driver to remove and ▯... - Page 21 Remove screws from the hook insert and then remove Place the hook insert in position adjacent to the it from the door. handle slots/openings and the hinge insert in the opposite position as shown. Reinstall the original screws. Follow the instructions in the images below to unlock the door ring from the door body.
- Page 22 Install the door latch (1) and then door latch cover (2) on the opposite side of the door opening. Install the door and hinge assembly back on the dryer with the original screws. Confirm the door closes and latches in place. Plug in the dryer to operate it.
Need help?
Do you have a question about the WTW87NH1UC and is the answer not in the manual?
Questions and answers