Advertisement
Quick Links
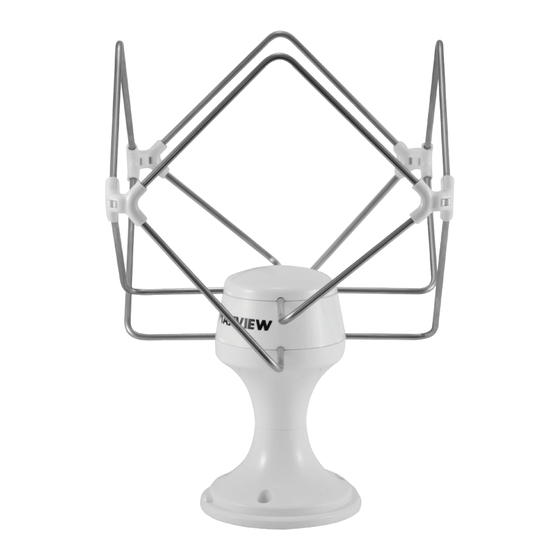
Omnimax Pro
B2344/B2345
Installation and user manual
Installation et mode d'emploi
Installations- und Bedienungsanleitung
Installatie- en gebruiksaanwijzing
UK contact:
Helpline:
+44 (0) 1553 811000
Email:
support@maxview.co.uk
Web:
www.maxview.co.uk
Maxview reserve the right to change specifications without prior notice
Maxview behält sich das Recht vor die Spezifikation ohne weitere Ankündigung zu ändern
9111341 Iss 2
DE Kontakt:
Tel:
+49 (0) 8145 9969980
Email:
info@maxview.de
Web:
www.maxview.de
French TEC contact:
Tel:
05.45.78.97.98
Email:
contact@tecdiffusion.com
Advertisement

Subscribe to Our Youtube Channel
Related Manuals for Maxview Omnimax Pro B2344


Summary of Contents for Maxview Omnimax Pro B2344
- Page 1 +49 (0) 8145 9969980 Tel: 05.45.78.97.98 Email: support@maxview.co.uk Email: info@maxview.de Email: contact@tecdiffusion.com Web: www.maxview.de Web: www.maxview.co.uk Maxview reserve the right to change specifications without prior notice Maxview behält sich das Recht vor die Spezifikation ohne weitere Ankündigung zu ändern 9111341 Iss 2...
- Page 2 Should you have any difficulty using your Omnimax Pro please contact our friendly Customer Helpline on 01553 811000 or email support@maxview.co.uk. Please retain these instructions for future reference. Nous vous remercions d’avoir acheté ce produit, nous espérons que vous en serez satisfaits pendant des années à...
- Page 3 Product contents/Contenu du produit A. Aerial Head Unit B. Aerial Base C. F Connector Tool D. Sealing Gasket E. Base Mounting Screws x 3 F. VSB Mounting Screws x 2 G. Head Unit Screw x 1 H. 1m ‘F’ TO Coaxial Flylead I: 5m Coaxial Cable J.
- Page 4 Installation/Installation Page 4...
- Page 5 Permanent installation of Omnimax Pro/Installation permanente de l’Omnimax Pro Choose a cable exit option which best suits your application. Choisir l’option de sortie de câble qui convient le mieux à votre application. Option 1 - Direct through the roof exit Option 1 - directement par la sortie de toit Omnimax Pro is placed above relevant internal space (cupboard, overhead storage etc) away from...
- Page 6 Without/Sans With Silicone Seleant Avec adhésif silicone Dry seal option Wet seal option Guide coaxial cable (I) through Base (B) and connect to Head Unit Offer the Sealing Gasket (D) onto Alternatively a Silicone adhesive using the F Connector Tool (C). the Aerial Base (B).
- Page 7 See page/ Voir page 8 Push head unit (A) onto base (B). Secure into place using Head Unit Route Coaxial Cable (H) inside Screw (G). vehicle to Variable Signal Booster Pousser l’unité principale (A) sur la which should be located near your base (B).
- Page 8 Using Variable Signal Booster/Utilisation de l’Amplificateur de signal 12/24V Connections & features Connexions et caractéristique A. 12/24V power input A. Tension d’entrée 12/24V B. On/off power switch B. Interrupteur de marche/arrêt C. Wall fixing hole C. rou de fixation au mur D.
- Page 9 Q & A’s Fault Finding/Détection de pannes - Questions et réponses 1. I have no picture on my TV or the picture is breaking up/freezing? ¢ Ensure all connections are correct ¢ Ensure the Variable Signal Booster power LED is on ¢...
- Page 10 > Recyclage des emballages où les équipements existent. 2 year guarantee/Garantie 2 ans The Maxview Omnimax Pro is guaranteed against defective parts or workmanship for 2 years from the time of purchase. This excludes any malfunction caused by improper use, accidental or malicious damage.
- Page 11 Optional semi permanent mounting accessories/Accessoires de montage semi-permanent en option Available online from www.maxview.co.uk or your local Maxview stockist Disponible en ligne sur le site www.maxview.co.uk ou chez votre marchand local de Maxview Zubehör für die Omnimax Pro/Optionele semipermanente bevestigingsaccessoires Erhältlich im guten Fachhandel.
- Page 12 Vielen Dank, dass Sie sich für die Maxview-Omnimax entschieden haben. Sie werden mit der Maxview Omnimax über viele Jahre zufrieden sein. Sollten sich bei der Inbetriebnahme Schwierigkeiten ergeben bitte kontaktieren Sie unseren Kundendienst unter: +49 (0)8145 9969980 oder per E-Mail: info@maxview.de. Bewahren Sie diese Anleitung auf.
- Page 13 Lieferumfang/Inhoud A. Antennenkopf B. Montagefuß C. Anschraubhilfe D. Dichtung E. Drei Schrauben für den Montagefuß F. Zwei Schrauben zur Verstärker Befestigung G. Eine Schraube für Antennenkopfbefestigung H: 1 m Koaxial-Kabel I: 5 m Koaxial-Kabel J. 12/24 Anschlusskabel K. Regelbarer Signalverstärker L.
- Page 14 Installation/Installatie Page 14...
- Page 15 Dauerhafte Befestigung der Omnimax-Antenne/Permanente installatie van Omnimax Pro Wählen Sie den Kabel-Ausgang entsprechend der beiden Optionen Kies een kabelverbinding die het beste past bij de toepassing van het product Option 1 – Direkt durch das Dach Optie 1 – direct door het dak Die Omnimax wird direkt über die Kabeldurchführungsbohrung montiert z.B.
- Page 16 ohne/Zonder mit Kleber Silicone Seleant Met siliconenlijm Montage mit Dichtung Montage ohne Dichtung Legen Sie die Dichtung (D) über die Alternative können Sie auch den Ziehen Sie das Koaxial-Kabel (I) 2,5 mm Bohrungen und fixieren Montagefuß ohne Dichtung etwas aus der Bohrung und Sie den Montagefuß...
- Page 17 siehe Seite 18/Zie pagina 18. Drücken Sie den Antennenkopf (A) Um den Antennenkopf am Verbinden Sie jetzt das auf den Montagefuß (B) Montagefuß zu befestigen Koaxial-Kabel (H) von der Antenne verwenden Sie die Schraube (G) mit dem Verstärker. Beachten Sie, Druk de top (A) op de basis (B).
- Page 18 Bedienung des regalbaren Signalverstärkers/Variabele signaalversterker gebruiken 12/24V Inbetriebnahme und Bedienung Aansluiten & eigenschappen A. 12/24V Anschlussbuchse A. 12/24 V voltage input B. An/Aus Schalter B. Aan/uit-knop (netschakelaar) C. Öffnungen für Wandbefestigung C. Opening om het aan de D. Antennen-Eingang D. Muur te bevestigen Antenne-invoer E.
- Page 19 Fehlersuche/Oplossingen bij problemen 1. Ich habe kein Fernsehbild oder Klötzchen im Bild ¢ Überprüfen Sie alle Kabelverbindungen ¢ Vergewissern Sie sich, dass der Verstärker eingeschaltet ist ¢ Versuchen Sie die Verstärkung am Verstärker nach zu regeln. Wir empfehlen mit 100% Verstärkung zu beginnen und in Empfangsgebieten mit hoher Signalstärke entsprechend die Verstärkung zu reduzieren.
- Page 20 > Recycle de verpakking waar mogelijk 2 Jahr Garantie/2 jaar garantie Maxview gewährt auf die Omnimax eine Garantie von 2 Jahren ab dem Kaufdatum. Im Garantiefall ist die Antenne mit Rechnung an die entsprechende Adresse zu senden. Gewaltschäden oder technische Abänderungen so wie das Öffnen des Antennenkopfs oder des Verstärkers führt zum Erlöschen der Garantieansprüche.
- Page 21 Omnimax Pro Spezifikationen Regelbarer Signal Verstärker Kompatibilität: SD, HD, 3D, 4K TV und FM/DAB Radio Kompatibilität: Digital TV und FM/DAB Radio Frequenzbereich: UHF TV & VHF Radio Frequenzbereich: UHF TV und VHF Radio Verstärkung: max. 19 dB mit Verstärker Stromversorgung: 12/24V optional 230V Montage: zur festen Montage auf dem Dach...
- Page 22 Page 22...
- Page 23 Page 23...
- Page 24 Omnimax Pro Fixing template/Template Fixant/ Schablone/Vaststelling van sjabloon Front of vehicle. Avant du véhicule. Fahrtrichtung. Voorzijde van het voertuig. X = 2.5mm holes/Trous/Bohrung/Gats = 13mm hole/Trou/Bohrung/Gat * ‘Y’ Only required if using cable exit option 1 * ‘Y’ Nécessaire seulement si vous utilisez un câble de sortie l’option 1 * ‘Y’...
Need help?
Do you have a question about the Omnimax Pro B2344 and is the answer not in the manual?
Questions and answers