
Related Manuals for boho office BASIC LINE SQ650


Summary of Contents for boho office BASIC LINE SQ650
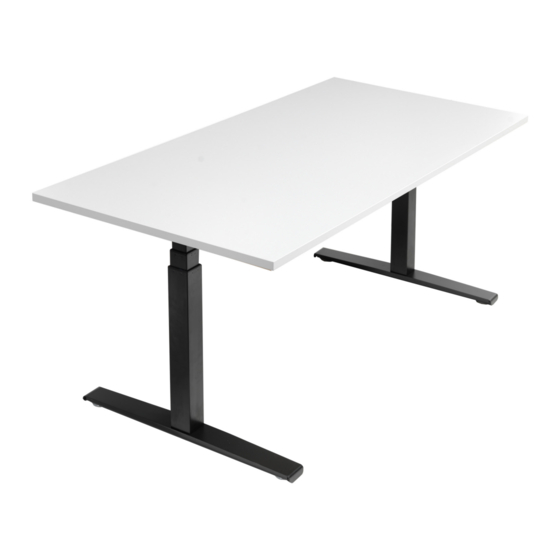
- Page 1 BASIC LINE SQ650 Assembly and operating instructions Please read carefully and keep them safe. 2-stage electrical height adjustment Version 20200617-boho-sq650-de • Subject to technical changes...
-
Page 3: Table Of Contents
GENERAL INFORMATION Importance of the operating and assembly instructions Correct use Improper use Laws, directives and standards to be complied with FCC Information on Digital Power Supplies SAFETY INSTRUCTIONS 7-10 Symbols and explanations Organizational measures Recommended safety precautions Requirements for assemblers Transport and assembly Safety and precautionary measures Electrical hazards... - Page 4 HEIGHT ADJUSTMENT Initial use / reset mode Other features 21-24 TYPE LABELS GUIDE TO ERGONOMIC WORKING TECHNICAL SPECIFICATIONS 27-28 OPERATING INSTRUCTIONS Troubleshooting CONTACT INFORMATION Customer Service Manufacturer DISPOSAL Taking the desk out of service Dismantling the desk Disposal EC Declaration of Conformity...
-
Page 5: General Information
GENERAL Importance of the operating and assembly instructions The basic prerequisite for safe handling and trouble-free operation of this table is the knowledge of the basic safety instructions and regulations. These operating and assembly instructions contain the most important infor- mation for safe assembly and operation of the desk frame. -
Page 6: Laws, Directives And Standards To Be Complied With
GENERAL Laws, directives, standards to be complied with • Machinery Directive 2016/42/EG • Low-Voltage Directive 2014/35/EU • Directive on electromagnetic compatibility 2004/30/EU FCC information for Class B digital devices (power supplies) This equipment has been tested and found to comply with the limits for a Class B digital device, pursuant to Part 15 of the FCC Rules. -
Page 7: Symbols And Explanations
Safety information Explanation of symbols and notes The following information and symbols for hazards are used in the operating and assembly instructions This symbol indicates an imminent danger to the life and health of persons. Failure to observe these instructions can have serious adverse health effects, for example, life-threatening injuries or even death. -
Page 8: Safety Instructions
Safety Instructions Organizational measures Please assemble the table frame with two people. Especially the turning of the frame with mounted desktop must be carried out by two people. Recommended safety precautions Always keep the operating and assembly instructions close to where the desk frame is used. -
Page 9: Electrical Hazards
Safety Instructions Electrical hazards Do not connect the desk frame to the power supply until it is com- pletely assembled. Check the electrical equipment of the desk frame regularly in accordance with the national regulations (in Germany these are the accident prevention regulations). Do not use cables with dama- ged insulation, otherwise the desk frame may be damaged and there is a risk of an electric shock. -
Page 10: Special Danger Spots
Safety Instructions Particular hazard areas When adjusting the desk frame, please make sure that no persons near the desk frame, risk of injury is high. When setting up the desk frame, make sure that it is completely free of potential collisions (e.g. pitched roof, structural conditions, roller containers, waste paper basket, etc.) in all possible adjustable positions. -
Page 11: Residual Risks
Safety Instructions Residual risks The desk frame is built according to recognised safety regulations. Nevertheless, its use may cause danger to the life and limb of the user or third parties or damage to the desk frame or other material assets. The table frame is only to be used: for its intended use and in perfect condition in respect to safety. -
Page 12: Included In Delivery
Overview of contents PLEASE CHECK THE CONTENTS CAREFULLY 1 2 3 Included 1 x Memory hand control 4 x Cross beams ( 2 x A / 2 x B ) 1 x Power supply plug 2 x Feet 2 x Connection cables 2 x Support arms 2 x Lifting columns 1 x Motor control unit... -
Page 13: Tools
Overview of contents PLEASE CHECK THE CONTENTS CAREFULLY Fittings bag 22 x plastic guides 12x M6x15 8x M6x40 (10 x pre installed) 8x M10x25 10x 5x20 2x 5x25 3x 3x20 10x 3,5x16 For the Memory hand control Tools only 2 screws are needed Allen key You will also need a Phillips screwdriver... -
Page 14: Assembly
ASSEMBLY - STEP 1 Feet assembly The assembly requires 2 people Adjustable ! -
Page 15: Assembly Of The Upper Frame
ASSEMBLY - STEPS 2 + 3 Assembly of the upper frame Note the alignment of the arrows on the components. All arrows must point in the direction of the desktop (to be installed later) Components C are be pre-installed. - Page 16 ASSEMBLY - STEPS 4 + 5 Assembly of the upper frame Please note that screws (D) are not yet to be tightened. The width must remain freely adjustable until the desktop is mounted.
-
Page 17: Assembly Of The Desktop
ASSEMBLY - STEP 6 Assembly of the desktop As shown, please ensure that the table frame is positioned centrally on the desktop. 0- 25mm 0- 25mm The width is arbitrary and continuously adjustable. Please place the frame in the middle of the desktop and make sure that all distances to the edges are equal. - Page 18 ASSEMBLY - STEP 6 Assembly of the desktop We recommend that the desktop be slightly predrilled (ca 1cm). The tubes ( C ) are pre-installed.
-
Page 19: Connection Of Electronic Components
ASSEMBLY - STEP 7 Assembly of the electrical components The hand switch (10) can be mounted on the left or right side. When aligning the control unit, make sure that the hand switch connector is aligned accordingly. To provide the greatest possible legroom, the control unit (9) should be mounted on the side facing away from the handset. - Page 20 ATTENTION!! Initialising the desk frame ! ! ! Make sure that there are no obstacles under the desk during the initializa- tion process. The height-adjustable desk must be initialised before first use. When the assembly is correctly completed, plug in the mains plug and then keep pressed the UP and DOWN keys at the same time until the table has moved to the lowest position.
- Page 21 Additional settings SAVE Display DOWN Memory Positions Please note that the keys must be pressed in sequence and not simultaneously!
- Page 22 Additional settings Installation of the memory control >> Saving favourite positions << Save and set preferred heights using the number keys. First the table must be moved to the desired position. Press key „S“ briefly - the display starts to flash. ...
- Page 23 Additional settings Installation of the memory control >> Set window stop << Function serves to limit the high point of desk - once set - cannot normally be moved above the set stop point. Adjust the height to the position where the stop point should be set. ...
- Page 24 Additional settings Installation of the collision sensor >> Setting the collision sensor << If the table encounters a solid obstacle during height adjustment, this is detected by the sensor and the adjustment stops immediately. Furthermore, the desk moves a little in the opposite direction. Depending on the installation situation on site, it may be necessary to adjust the sensitivity of collision sensor.
- Page 25 TECHNICAL SPECIFICATIONS Product label boho office® trade mark of the boho möbelwerkstatt GmbH Industriestr. 45 33397 Rietberg Year of manufacture: 2020 Type: Basic Line SQ650 220 - 240V ~ 50/60 Hz 20V DC max. 8a (Class II) 80 KG...
- Page 26 Information The right sitting posture Sitting incorrectly can cause damage to joints, tendons and muscles. To avoid this, the desk and office chair must be adjusted. Irrespective of the following instructions, an uncomfortable sitting posture must be avoided. If you find that one or the other of the following tips leads to an uncomfortable sitting position, simply adjust the positioning to suit your needs.
- Page 27 Information User Manual version 20200617-boho-sq650-de Year of manufacture 2020 Country of origin China System two-stage Materials Steel & plastic Total lift 65 cm Manufacturer max. load 100 kg incl. table top TÜV / GS test max. load. 80 kg incl. table top* *tested table top 160x80 cm light grey + Basic Line SQ650...
- Page 28 Information A / B A - Frame width Option 1 110 - 155 cm B - Frame width Option 2 156 - 190 cm C - Desktop, minimum depth 80 cm D - Depth 73,8 cm E - Min. frame height 64 cm F - total lift 65 cm...
- Page 29 Operating notes Please observe the regulations and safety instructions starting on page 7. In particular: Do not leave children unattended with the desk. Children cannot assess the dangers that may be caused by this desk. Children can be seriously injured or even killed. Do not exceed the maximum switch-on time of 2 minu- tes for the table.
- Page 30 Industriestraße 45 33397 - Rietberg GERMANY +49 5244 9789030 boho office is a trade mark of the boho möbelwerkstatt GmbH Disposal Unplug the power cord from the wall outlet to take the desk out of operation. Dismantle the table To dismantle the frame, follow the instructions in the reverse order.
- Page 31 Declaration of Conformity...
Need help?
Do you have a question about the BASIC LINE SQ650 and is the answer not in the manual?
Questions and answers