Advertisement
Available languages
Available languages
Quick Links
Instruction Manual
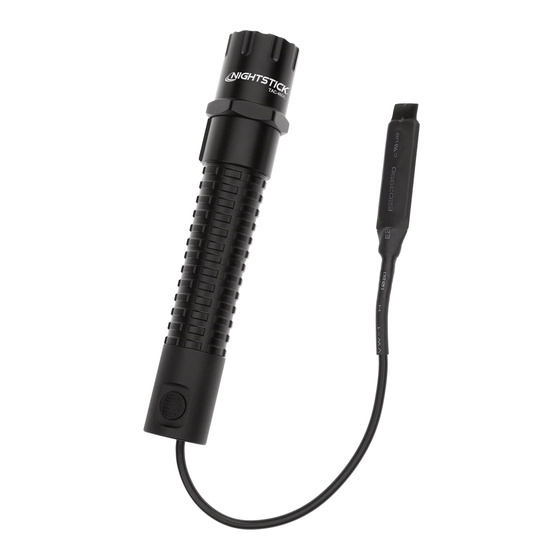
TAC-460XL-K01
WARNINGS
y NOT FOR USE IN HAZARDOUS LOCATIONS. Do not use this product in explosive
atmospheres, near fl ammable liquids, or where explosion proof or intrinsically safe lighting
is required.
y DO NOT use this product in the proximity of vehicles or equipment when there is a risk
of fl ammable liquids coming into contact with the fl ashlight.
y Light can become hot while on. To prevent damage DO NOT cover or place next to any
potentially fl ammable materials while in use.
y Keep out of the reach of children.
ASSEMBLY INSTRUCTIONS
The TAC-460XL includes the tail cap switch already attached. The light can be used
immediately as a hand-held tactical fl ashlight once the included batteries and CR123 battery
carrier are installed. The light may be converted back to this confi guration at any time.
1. Remove the tail cap switch (Figure 1-A) and the CR123 battery carrier (Figure 1-B).
NOTE: Keep the tail cap switch for future use so the light can be converted back to a
conventional hand-held tactical fl ashlight in the future.
2. Install the two included CR123 batteries (Figure 2-A) into the battery carrier (Figure 2-B).
The positive terminals on each battery should be oriented in the direction of the arrow on
the battery carrier and then inserted into the fl ashlight with the + end terminals pointing
in the direction of the fl ashlight's bezel (Figure 3-A).
3. Install the Remote Pressure Switch (Figure 3-B) and tighten into place.
4. Test the operation of the Remote Pressure Switch (Figure 3-C) and the side switch
(Figure 3-D). The Remote Pressure Switch provides momentary On/Off operation of the
light only. The side switch provides momentary On/Off operation by pressing slightly on
the button, or constant-on by pressing until the button clicks.
5. Determine where the Quad Lock Mount (Figure 4-A) is to be located on the light. The
mount must remain clear of the Remote Pressure Switch, otherwise accessing the
batteries and battery carrier will require complete disassembly of the Quad Lock Mount.
6. Once the appropriate location of the Quad Lock Mount along the handle of the light has
been determined, remove all 4 of the cap head screws (Figure 5-A) using the supplied
Allen wrench (Figure 5-B).
7. While holding the lower half of the Quad Lock Mount (Figure 5-C) in place on the light,
press each of the top rails (Figure 5-D) in to alignment with the lower half and start all 4
of the cap head screws (Figure 5-A). IMPORTANT: Partially start all 4 cap head screws
before fully tightening.
8. Tighten all 4 cap head screws (Figure 6-A) by alternating between each and tightening a
small amount at a time. When all 4 are tightened into place (DO NOT over-tighten), the
gap between the lower half of the mount and the two top rails should be approximately
1/16" and should be equal on both sides.
9. Test fi t the Quad Lock Mount on to the mil spec Picatinny or Weaver rail of the long
gun (Figure 9-A). At the same time, determine the desired location of the Remote
Bayco Products, Inc. • 640 South Sanden Blvd. • Wylie, TX 75098 • 1-800-233-2155 • 1-469-326-9400 • www.nightstick.com
Pressure Switch (Figure 9-B). NOTE: The Remote Pressure Switch may be attached
to any clean, dry, fl at surface on the long gun. The location indicated in Figure 9 is one
example. The location you choose will be determined by your weapon's confi guration
and personal preferences.
10. Once the location of the Quad Lock Mount (Figure 9-A) and the Remote Pressure
Switch (Figure 9-B) have been determined, clean the location on your weapon where
the Remote Pressure Switch will be located as well as the inside surface of the Remote
Pressure Switch (Figure 7-A) using the supplied Alcohol Swab (Figure 7-B).
11. Peel back one of the paper backings on the included Velcro Pressure Sensitive Adhesive
Strip (Figure 8-A) and press it into place on the back side of the Remote Pressure Switch
(Figure 8-B).
12. Attach the Quad Lock Mount with the light installed onto the mil spec Picatinny or Weave
rail of your weapon (Figure 9-A)
13. Peel back the paper backing on the Velcro Pressure Sensitive Adhesive Strip and press
it into place on the previously cleaned area on your long gun (Figure 9-B).
NOTE: Do not move or remove the adhesive strips once they have been placed. The
Velcro
adhesive requires about 24 hours to make a semi-permanent bond. Do not attempt
®
to separate the two Velcro
OPERATION
The Nightstick Tactical Long Gun Kit is now fully installed and ready for use.
The Remote Pressure Switch provides Momentary On/Off operation of the light only.
Using this switch, gives the operator full and instant control over when the light is on, and
when it is off
The Side Switch provides Momentary On/Off operation by pressing slightly on the
button, or Constant-on by pressing until the button clicks.
If the Quad Lock Mount has been positioned correctly (see Step 5 above), changing the
batteries may be accomplished without removing the light from the Quad Lock Mount, and
depending on your installation location, it may be possible to change the batteries without
removing the mount from your weapon.
To change the batteries, fi rst separate the two halves of the Velcro Strip from each other
so that one half stays adhered to your weapon and the other remains attached to the back
side of the Remote Pressure Switch. Next unscrew the Remote Pressure Switch, remove
the CR123 Battery Carrier and replace the batteries (see Step 2 above).
WARRANTY
LIMITED LIFETIME WARRANTY
Bayco Products, Inc. warrants this product to be free from defects in workmanship and
materials for the original purchaser's lifetime. The Limited Lifetime Warranty includes the
LEDs, housing and lenses. Rechargeable batteries, chargers, switches, electronics and
included accessories are warranted for a period of two years with proof of purchase. Normal
wear and failures which are caused by accidents, misuse, abuse, faulty installation and
lightning damage are excluded.
We will repair or replace this product should we determine it to be defective. This is the
only warranty, expressed or implied, including any warranty of merchantability or fi tness for
a particular purpose.
For a complete copy of the warranty, go to www.baycoproducts.com/bayco-product-
support/warranties. Retain your receipt for proof of purchase.
INS-T460XL-K01-20
sections until it is set.
®
Advertisement

Related Manuals for NightStick TAC-460XL-K01


Summary of Contents for NightStick TAC-460XL-K01
- Page 1 Retain your receipt for proof of purchase. gun (Figure 9-A). At the same time, determine the desired location of the Remote Bayco Products, Inc. • 640 South Sanden Blvd. • Wylie, TX 75098 • 1-800-233-2155 • 1-469-326-9400 • www.nightstick.com INS-T460XL-K01-20...
- Page 2 10. Una vez que se ha determinado la ubicación Quad Lock Mount (Figura 9-A) y el sur le bouton jusqu’à ce que vous entendiez un déclic. Bayco Products, Inc. • 640 South Sanden Blvd. • Wylie, TX 75098 • 1-800-233-2155 • 1-469-326-9400 • www.nightstick.com INS-T460XL-K01-20...
- Page 3 Para obtener una copia completa de la garantía, visite www.baycoproducts.com/bayco- product-support/warranties. Conserve su recibo para comprobar la compra. Bayco Products, Inc. • 640 South Sanden Blvd. • Wylie, TX 75098 • 1-800-233-2155 • 1-469-326-9400 • www.nightstick.com INS-T460XL-K01-20...
Need help?
Do you have a question about the TAC-460XL-K01 and is the answer not in the manual?
Questions and answers