Table of Contents
Advertisement
Quick Links
First Step Guide
Machine Highlights � � � � � � � � � � � � � � � � � � � � 4
To Ensure Safe Use � � � � � � � � � � � � � � � � � � � � � 6
Part Names and Functions � � � � � � � � � � � � � 18
Before Using This Printer � � � � � � � � � � � � � � 22
First Time Printing � � � � � � � � � � � � � � � � � � � � 44
Advertisement
Table of Contents

Related Manuals for Roland VersaUV LEF-300


Summary of Contents for Roland VersaUV LEF-300
-
Page 1: Table Of Contents
First Step Guide Machine Highlights � � � � � � � � � � � � � � � � � � � � 4 To Ensure Safe Use � � � � � � � � � � � � � � � � � � � � � 6 Important Notes on Handling and Use �... - Page 3 • Roland DG Corp. assumes no responsibility for any direct or indirect loss or damage that may occur with respect to any article made using this product.
- Page 4 California to cause cancer and birth defects or other reproductive harm. For more information go to www.P65Warnings.ca.gov. For EU Countries Manufacturer: ROLAND DG CORPORATION 1-6-4 Shinmiyakoda, Kita-ku, Hamamatsu-shi, Shizuoka-ken, 431-2103 JAPAN The importer in the EU: Roland DG Europe Holdings B.V. Prof. J.H. Bavincklaan 2, 1183 AT, Amstelveen, The Netherlands...
-
Page 5: Contents
Make the Network Settings for the About Roland OnSupport ..... Computer ....... -
Page 6: Machine Highlights
Roland VersaWorks Dual Installation Guide This describes how to install and set up the included RIP & PRINT MANAGEMENT SOFTWARE Roland VersaWorks Dual as well as the basic usage of the software and other such matters. Special Color Ink Guide Read this after reading the Roland VersaWorks Dual Installation Guide. -
Page 7: Features Of This Machine
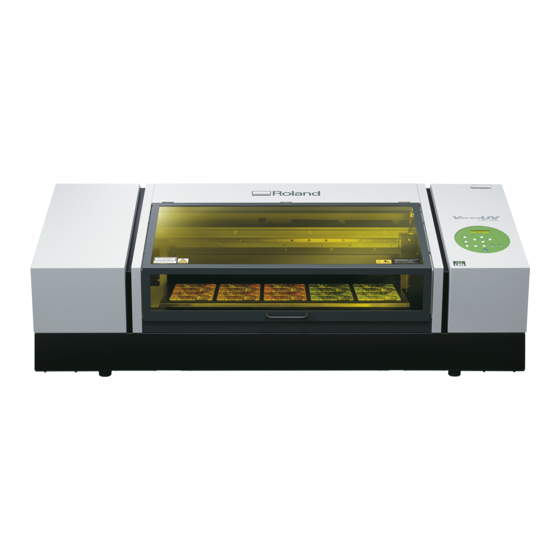
Machine Highlights Features of This Machine This machine is provided with the following features. Also supports printing on thick materials This printer can print on a variety of materials from thin paper to thick materials. Using UV ink, this printer can print high-quality images on various types of media (the general name for the material to be printed on). -
Page 8: To Ensure Safe Use
To Ensure Safe Use Improper handling or operation of this machine may result in injury or damage to property. Points which must be observed to prevent such injury or damage are described as follows. About of WARNING and CAUTION Notices Used for instructions intended to alert the user to the risk of death or severe injury should WARNING the unit be used improperly. - Page 9 Combustion or explosion could occur. electrical shock, or injury.Contact your authorized Never use outside or in any location where Roland DG Corp. dealer. exposure to water or high humidity may Connect to ground. occur. Do not touch the power cord, plug, or electrical outlet with wet hands.
- Page 10 Position so that the power plug is within disconnect the power cord and contact your immediate reach at all times. authorized Roland DG Corporation dealer. This is to enable quick disconnection of the Handle the power cord, plug, and electrical power plug in the event of an emergency.
- Page 11 To Ensure Safe Use Ink, cleaning fluid, and discharged fluid are flammable and toxic. WARNING WARNING Keep open flame away from the work area. Never drink or sniff ink, cleaning liquid, or discharged fluid, or allow them to come in Ink and discharged fluid are flammable.
- Page 12 To Ensure Safe Use This machine uses ultraviolet light CAUTION Never look at the blue-white (ultraviolet) light emitted from the print-head area for an extended time. Looking directly at the ultraviolet light from up close for an extended period may result in eye injury.
-
Page 13: Pour Utiliser En Toute Sécurité
Pour utiliser en toute sécurité La manipulation ou l'utilisation inadéquates de cet appareil peuvent causer des blessures ou des dommages matériels. Les précautions à prendre pour prévenir les blessures ou les dommages sont décrites ci-dessous. Avis sur les CONSIGNES de SÉCURITÉ... - Page 14 Ne jamais utiliser à l’extérieur ni à un endroit où un choc électrique ou des blessures.Communiquer avec l’appareil risque d’être exposé à de l’eau ou à une le représentant Roland DG Corp. Autorisé. humidité élevée. Ne pas toucher le câble d’alimentation, Mise à la terre.
- Page 15 Placer l’appareil de façon à ce que la fiche soit Roland DG autorisé. facile d’accès en tout temps. Manipuler le câble d’alimentation, la fiche et la Ainsi, l’appareil pourra être débranché rapidement prise électrique correctement et avec soin.
- Page 16 Pour utiliser en toute sécurité L’encre, les liquides nettoyants et les liquides usées sont inflammables et toxiques. ATTENTION ATTENTION Ne pas approcher une flamme nue de l’espace Ne jamais boire l’encre, le liquide de nettoyage de travail. ni les liquides usés, ne pas en respirer les vapeurs et ne pas laisser les produits entrer en L’encre et les liquides usés sont inflammables.
- Page 17 Pour utiliser en toute sécurité Cet appareil utilise des rayons ultraviolets. PRUDENCE Ne jamais regarder pendant de longues périodes le rayonnement blanc bleuté (ultraviolet) émis par la tête d’impression. Le fait de regarder directement et de près le rayonnement ultraviolet pendant une période prolongée peut causer des lésions oculaires.
-
Page 18: Important Notes On Handling And Use
Important Notes on Handling and Use This machine is a precision device. To ensure the full performance of this machine, be sure to observe the following important points. Failure to observe them may not only result in loss of performance, but may also cause malfunction or breakdown. -
Page 19: Ink Cartridges
Ink Cartridges Ink cartridges come in various types. • Use a type that is compatible with the printer. Also, be sure to use only genuine items from Roland DG Corp. Never subject ink cartridges to impacts or attempt to disassemble them. -
Page 20: Part Names And Functions
Part Names and Functions Printer Unit Front Head gap sensor Front cover Handle Status light Used to detect the Keep this closed except Hold this handle to open and When lit, this indicates the status of the height of media. when necessary such as close the font cover gently. -
Page 21: Rear
Part Names and Functions Rear Status LED This lights up green when the connection to the network is correct. Activity LED This flashes yellow while data is being received from the network. Ext.port B This is used to connect the machine to an external output device used by the user. Ethernet connector This is used to connect the machine to a network. -
Page 22: Operation Panel
Part Names and Functions Operation Panel BUSY indicator This indicator lights during printing and other such Display screen operations. TABLE [UP]/[DOWN] key Cursor keys [FUNCTION] key [SETUP] key [MENU] key [PAUSE/VACUUM] key [ENTER] key Sub power switch Names and Functions of Operation Panel Keys In this document, the keys on the operation panel are indicated as shown below. -
Page 23: Display Screen
Part Names and Functions Display Screen Cursor Setting value Direction mark Displays the setting to be changed. You Select the setting you You can select settings and switch can move it with the cursor keys. want to set (after change). screens by pressing the cursor keys indicating directions. -
Page 24: Before Using This Printer
Before Using This Printer STEP 1: Checking the Included Items The following items are included with the machine. Make sure they are all present and accounted for. Power cord, power plug SOL INK Dummy cartridges (2) Mist filters (2) adapter (1 each) cleaning cartridges (2) Cleaning sticks Cleaning liquid (2) -
Page 25: Step 2: Deciding On An Installation Site
Before Using This Printer STEP 2: Deciding on an Installation Site Information is provided in "To Ensure Safe Use" (P. 6). Be sure to read this guide prior to installing or connecting the printer. Install the machine in a quiet, stable location offering good operating conditions. An unsuitable location can cause accidents, fire, faulty operation, or breakdown. -
Page 26: Installation Space And Height
This machine emits a small amount of volatile compounds during printing and for some time after printing, which may cause irritation of your eyes, nose, and throat. To use this machine, make sure to install ventilating equipment to ensure adequate ventilation. For installation of a ventilation machine, contact your authorized Roland DG Corp. dealer. -
Page 27: Step 3: Removing The Retainers
• Store the retainers carefully because they are needed again when transporting the machine. • For transportation of this machine, contact your authorized Roland DG Corp. dealer. Retainer A... -
Page 28: Step 4: Attaching The Pad Tray
Before Using This Printer STEP 4: Attaching the Pad Tray The pad tray prevents discharged fluid from entering the machine when discharged fluid spills from the drain bottle. MEMO When the pad tray gets dirty, replace it with a spare pad tray (included) as needed. Open the panel cover. - Page 29 Before Using This Printer Place the pad tray on the place where the drain bottle was stored. MEMO Place the pad tray so that it is not creased or loose. If the pad tray is creased or loose, it will be difficult to install the drain bottle.
-
Page 30: Step 5: Connecting The Cables
Before Using This Printer STEP 5: Connecting the Cables WARNING Perform this task with all power switches left switched off. Otherwise sudden movement of the machine may cause injury. Electrical outlet Power cord Ethernet (100Base-TX recommended) Ethernet cable (Category 5 or higher) Never insert a telephone cable. -
Page 31: Step 6: Initial Settings
Before Using This Printer STEP 6: Initial Settings NOTE Be sure to hold the handle of the front cover and open and close it gently. Handle Close the front cover. Switch on the main power. Hold down [MENU] and press the sub power switch. The screen shown below appears. - Page 32 Before Using This Printer Press [ENTER] to display the screen shown below. LENGTH UNIT INCH Press [ ] or [ ] to select the measurement unit for length. Press [ENTER] to display the screen shown below. TEMP. UNIT ゚C ゚F Press [ ] or [ ] to select the measurement unit for temperature.
- Page 33 Before Using This Printer Make sure that the drain bottle is installed properly. Press [ENTER].
-
Page 34: Step 7: Filling With Ink For The First Time
Therefore, exercise caution when inserting cartridges. If you insert an incorrect cartridge by mistake, contact your authorized Roland DG Corp. dealer. • Be sure to insert cartridges horizontally. If cartridges are not inserted horizontally, cleaning and filling may not be performed properly. -
Page 35: Clean The Print Heads Using Sol Ink Cleaning Cartridges
Before Using This Printer 1. Clean the Print Heads Using SOL INK Cleaning Cartridges Check that the following screen is displayed. SET CL-LIQUID Insert SOL INK cleaning cartridges into the slots whose numbers are displayed. SET DUMMY CRT. SLOT:3 4 MEMO The SOL INK cleaning cartridges are not differentiated by color. - Page 36 Before Using This Printer Remove the dummy cartridges, and then press [ENTER]. The screen shown below appears. SET CL-LIQUID Use the removed SOL INK cleaning cartridges to repeat steps 2 to 5 until the screen shown below appears. EMPTY DRAIN BOTTLE Discard the discharged fluid, and then reattach the drain bottle.
-
Page 37: Attach The Ink-Cartridge Tray (Only When Installing 500 Cc Cartridges)
Before Using This Printer 2. Attach the Ink-cartridge Tray (Only When Installing 500 cc Cartridges) NOTE When using 500 cc cartridges, be sure to attach the ink-cartridge tray. 500 cc cartridges protrude approximately 30 cm from the side of the machine. Running into the ink cartridges may lead to injury or to machine malfunctions. -
Page 38: Respective Colors
Before Using This Printer Temporarily tighten the screws in the two bottom locations. Fully tighten all the top and bottom screws (four locations). 3. Insert the Ink Cartridges for the Respective Colors NOTE Be sure to hold the handle of the front cover and open and close it gently. Before inserting ink cartridges, shake each of them 50 times (about 15 seconds). - Page 39 Before Using This Printer Insert the ink cartridge for each color. Insert cartridge into the slot of the matching color. The screen shown below appears. FILLING INK... > EMPTY DRAIN BOTTLE Discard the discharged fluid, and then reattach the drain bottle. Make sure the drain bottle is installed, and then press [ENTER].
-
Page 40: Step 8: Network Settings
Before Using This Printer STEP 8: Network Settings Introduction Make sure the machine is connected to the network by an Ethernet cable. The network settings on the machine must be made manually, using the operation panel. For information about how to make the settings, refer to “Make the Network Settings on the Printer” (P. 41) later in this step. - Page 41 Before Using This Printer Windows 7 2-1. From the [Start] menu, click [Control Panel]. 2-2. Click [Network and Internet], and then click [Network and Sharing Center]. 2-3. Click [Local Area Connection] or [Wireless Network Connection]. Click [Properties]. The [Ethernet Properties] dialog box appears. (On Windows 7, the [Local Area Connect Properties] dialog box appears.) If the [User Account Control] dialog box appears, click [Continue].
- Page 42 Before Using This Printer Select [Internet Protocol Version 4 (TCP/IPv4)], and then click [Properties]. MEMO If the [Internet Protocol] check box is clear, select it. The [Internet Protocol Version 4 (TCP/IPv4) Properties] dialog box appears. Select [Use the following IP address]. Enter the information as shown below, and then click [OK]. Item Address to enter IP address...
-
Page 43: Make The Network Settings On The Printer
Before Using This Printer Click [OK] in the [Internet Protocol Version 4 (TCP/IPv4) Properties] dialog box, click [OK] in the [Ethernet Properties] dialog box (the [Local Area Connection Properties] dialog box on Windows 7), and then click [Close] in the [Ethernet Status] dialog box (the [Local Area Connection Status] dialog box on Windows 7). Make the Network Settings on the Printer NOTE The addresses used in this section are merely example settings. - Page 44 Before Using This Printer When you have finished making the setting, press [ENTER]. Press [ The screen shown below appears again. 2. Set the subnet mask. On the screen for step 1.-8., press [ ] to display the screen shown below. Press [ ] twice to display the screen shown below.
-
Page 45: Make The Port Settings For The Software Rip
Before Using This Printer 3. Set the gateway address. On the screen for step 1.-8., press [ ] twice to display the screen shown below. Press [ ] twice to display the screen shown below. Press [ ] or [ ] to select the address number. [GATEWAY ADDR.]: 255.255.255.255 For the value to enter for the gateway address, consult your network administrator. -
Page 46: First Time Printing
First Time Printing Basic Operation Flow When Starting Daily Operations 1. “STEP 1: Turning the Power On” (P. 46) 2. “STEP 2: Loading Media and Setting the Height” (P. 47) 3. “STEP 3: Printing Tests and Normal Cleaning” (P. 50) Actual Printing 4. -
Page 47: Conditions For Usable Media
First Time Printing Conditions for Usable Media In this manual, the printing material used for output is called "media." Media Condition Width 800 mm (31.5 in.) Length 360 mm (14.2 in.) Maximum size Thickness 100 mm (3.94 in.) Maximum weight 8 kg (18 lb.) NOTE •... -
Page 48: Printable Area
First Time Printing Printable Area The maximum printable area is width 770 × length 330 × thickness 100 mm (width 30.32 × length 13 × thickness 3.94 in.) * The maximum printable area is inside the square holes on the four corners of the flat table. (The holes are included in the printable area.) * The maximum size of the media and the printable area are different. -
Page 49: Step 2: Loading Media And Setting The Height
First Time Printing STEP 2: Loading Media and Setting the Height CAUTION Never load media that weighs over 8 kg (18 lb.). To avoid injury, handle the media with care. 1. Loading Media (Media Setup) NOTE Be sure to hold the handle of the front cover and open and close it gently. MEMO •... -
Page 50: Setting The Height Of The Media Automatically
First Time Printing Securing the media in place with tape If you do not want to use the suction function and for media that cannot be secured in place with the suction function, secure the media in place using a substance such as commercially available tape affixed directly to the flat table. - Page 51 First Time Printing Head gap sensor Make the media come into contact with the head gap sensor. Media MEMO This step can be performed with the front cover open. Press [ The screen shown below appears. AUTO DETECTION If the front cover is open, close it. The following step moves the flat table rearward.
-
Page 52: Step 3: Printing Tests And Normal Cleaning
First Time Printing STEP 3: Printing Tests and Normal Cleaning Check for dot drop-out by performing printing tests before and after daily operations. If dot drop-out occurs, perform cleaning of the print heads (normal cleaning). Leaving the dot drop-out untreated may damage the print heads, so be sure to check for this condition each day after operation. -
Page 53: Perform Normal Cleaning
First Time Printing A test pattern is printed. Dot drop-out Group A Group B If dot drop-out is present, proceed to “2. Perform Normal Cleaning” (P. 51). If there is no dot drop-out, proceed to “STEP 4: Production Printing” (P. 53). If the printing-test results are difficult to interpret Examine the results from different angles in a well-lit location. - Page 54 First Time Printing Press [ ] or [ ] to clear the group of print heads that is not to be cleaned from the display. NORMAL CL. A Press [ENTER]. Normal cleaning starts. It takes about two to three minutes. CLEANING...
-
Page 55: Step 4: Production Printing
• Installation of VersaWorks Dual • Connecting VersaWorks Dual and this machine • Learning the basic operation of VersaWorks Dual " "Roland VersaWorks Dual Installation Guide" (included) • Preparing print data In this section, a file saved in the PS (PostScript) format is used. - Page 56 First Time Printing Click [Get Media Width]. Load the print area set on this machine into VersaWorks Dual. Displays the width and length of the retrieved print area. * To configure other settings, see the "VersaWorks Dual Installation Guide" (included), the Help, or the "White & Gloss Ink Guide"...
-
Page 57: Output Print Data Using Versaworks Dual
First Time Printing 3. Output Print Data Using VersaWorks Dual Click the [Queue A] tab in the [Job List], and then drag the print data to the Queue A job list (to the Queue B job list when the print setting is done on Queue B). The contents of the data are displayed in the preview window, and the layout on the media is displayed in the layout window. - Page 58 First Time Printing Use this screen to fit the print data in the print area and adjust the position of the print data. The white part in the layout area is the print area that was loaded in step 1. Print data that is not in the print area will not be printed.
- Page 59 First Time Printing After you have adjusted the printing position, click [OK]. Click Printing starts. When the printing ends, the screen shown below appears on the display screen of the printer. FINISHED PRINT Data from the computer is not accepted while this screen is displayed. MEMO If [PRT CONTINUE] is set to [ENABLE], the screen shown in the figure does not appear.
-
Page 60: Step 5: Printing Tests And Normal Cleaning
First Time Printing Pausing or Canceling Printing You can pause and cancel printing before it finishes. However, we do not recommend resuming printing because colors may be uneven in the place where output stopped. Procedure Press [PAUSE/VACUUM] before printing finishes. The printing operation is paused. -
Page 61: Step 6: Turning The Power Off
First Time Printing STEP 6: Turning the Power Off Hold down the sub power button for one second or longer. The sub power turns off. Turn off the sub power after printing is complete. NOTE • Never switch off the main power. Leaving the main power on enables the automatic maintenance to be carried out periodically. - Page 63 For China 产品中有毒有害物质或元素的名称及含量 有毒有害物质或元素 部件名称 六价铬 多溴联苯 多溴二苯醚 铅(Pb) 汞(Hg) 镉(Cd) (Cr(Ⅵ)) (PBB) (PBDE) 印刷电路板 × ○ × ○ ○ ○ 头部 × ○ ○ ○ ○ ○ 壳体、底架 × ○ ○ ○ ○ ○ 电源 × ○ × ○ ○...
- Page 64 R3-170809...
Need help?
Do you have a question about the VersaUV LEF-300 and is the answer not in the manual?
Questions and answers