Advertisement
Quick Links
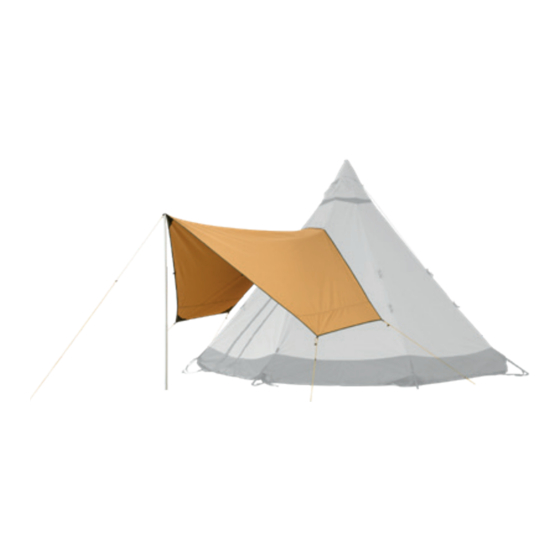
Mounting the canopy onto the Nordic tipi
The canopy's fastening is connected to the Nordic tipi's
accessory sleeve. The eyelet and cord are used when
the canopy is put up as a freestanding shelter, see the
pictures on the opposite page.
1. Attach the canopy to the accessory sleeve. Press firmly all
along the Velcro strips. The canopy is mounted on the right so
that rain water is led away from the tent opening.
Canopy 5/7 is mounted using a telescopic pole and a
cord and is tightened using another four cords.
The canopy is not intended to resist strong winds and snow. The exceptional storm resistance of a Tentipi® Adventure Nordic tipi
is maintained by the canopy being designed so that it can easily be removed in bad weather.
Before using the product, please read "Care instructions, hints and advice" at tentipi.com/support
2. Pull the eyelet at the front end of the
canopy over the end of a telescopic pole
and peg the cord to the ground. Canopy
7/9 has three poles.
Canopy 7/9 is mounted using three telescopic poles plus cords and is tightened
using two or four more cords.
3. Peg the other cords to the
ground. Adjust and tighten so the
canopy fits snugly against the tent.
www.tentipi.com
Advertisement

Related Manuals for Tentipi Nordic tipi


Summary of Contents for Tentipi Nordic tipi
- Page 1 The canopy is not intended to resist strong winds and snow. The exceptional storm resistance of a Tentipi® Adventure Nordic tipi is maintained by the canopy being designed so that it can easily be removed in bad weather.
- Page 2 For size 7/9, two poles are needed on this side and it is also possible to put a third telescopic pole here, in the same way as when the canopy is mounted onto the Nordic tipi. The cords on the long sides are pegged down and all cords are then adjusted using their tensioners.
Need help?
Do you have a question about the Nordic tipi and is the answer not in the manual?
Questions and answers