
Related Manuals for Electra Townie GO!


Summary of Contents for Electra Townie GO!
- Page 1 OWNERS MANUAL Even if you have ridden a bicycle for years, it is important for EVERY person to read Chapter 1 before you ride your new bicycle.
-
Page 2: Table Of Contents
Chapter 2: Maintenance Maintenance schedule .........15 It is easy to register on the Electra web site. Choose the web site for your country. If you Chapter 3: Inspection and adjustment cannot find one for your country, use the web A word about torque specifications .... -
Page 3: Important: Keep For Future Reference
Important: Keep for future reference Even if you have ridden a bicycle for years, it is important for EVERY person to read Chapter 1 before riding this bicycle! Foreword: Bicycles, This manual shows how to ride your new bicycle safely. Parents should explain Chapter 1 to a accidents, and safety child or person who might not understand this A bicycle can be fun when used for... -
Page 4: Chapter 1: Guide To Safe On- And Off-Road Operation
Chapter 1: Guide to safe on- and off-road operation Chapter 1: Guide to safe on- and off-road operation This chapter explains important things you should know before a first ride, including safety information that is important to follow on every ride. Bicycle fit If your bicycle does not operate as you need, Your retailer will help you find a bicycle that has... -
Page 5: Life Span Of A Bicycle And Its Parts
Life span of a bicycle Sharp points, moving parts, hot spots, and pinch points and its parts Some parts of your bicycle can injure you if Bicycles are not indestructible, and their parts mishandled. Sharp points include the teeth of will not last forever. -
Page 6: Pre Ride Checklist
Chapter 1: Guide to safe on- and off-road operation Pre ride checklist The checklist that follows shows critical areas for you to check before every ride. Make sure grips are secure and that the ends If a part of your bicycle does not function of the handlebar are covered correctly, use the instructions in this manual to or that plugs are... - Page 7 If you are not familiar with the attachment Make sure the cables and housing are properly devices on your wheels, we also recommend you secured to the frame or fork so that they cannot ask your retailer to demonstrate them for you. interfere with or get caught on moving parts.
- Page 8 Chapter 1: Guide to safe on- and off-road operation Internal hub brake : Pull the lever to make sure ✔ Check your tandem the brake moves freely and stops your bicycle. Check both saddles and handlebars as If more than 15 mm (5/8”) of lever movement explained earlier for ‘single’...
-
Page 9: Rules To Ride Safely
Rules to ride safely You can prevent many bicycle accidents if you use common sense and think about safety. Obey local bicycle laws are not sure of the surface conditions, walk with Most national, state, or local areas have special your bicycle. - Page 10 Chapter 1: Guide to safe on- and off-road operation WARNING: Wet or inclement weather can • Let someone know where you are going and when you plan to return. make a bicycle difficult to control. Decrease • Avoid riding in large groups. Riding close to your speed and use extra caution, or use other riders can make it difficult for you to other types of transportation.
-
Page 11: Riding Instructions
Riding instructions This section explains the basics of riding technique, including how to ride a tandem. Braking WARNING: Brake force applied to the Always ride with a safe distance between you front-wheel suddenly or too fully could lift and other vehicles or objects; use your brakes. the rear wheel off the ground or cause the Adjust distances and brake forces for the front wheel to slide out from below you. - Page 12 Chapter 1: Guide to safe on- and off-road operation Children and safety To shift gears with internal gears It is particularly important that you inspect your When you shift gears, coast (do not pedal). child’s bicycle frequently for damage. Pay extra Tension on the chain prevents the correct attention to the grips or handlebar covers.
-
Page 13: Safeguard Your Bicycle
Safeguard your bicycle Clean, store, and care for your bike to give it a long life. Prevent theft Avoid heat Purchase and use a lock that resists bolt cutters Excessive heat may damage the joints of frame and saws. Do not park your bicycle unless it is parts. -
Page 14: Warning About Mechanical Work
Something as simple as has the approval of Electra. As an example, a an under-tightened bolt can, over time, cause a child carrier puts weight high on the bicycle,... -
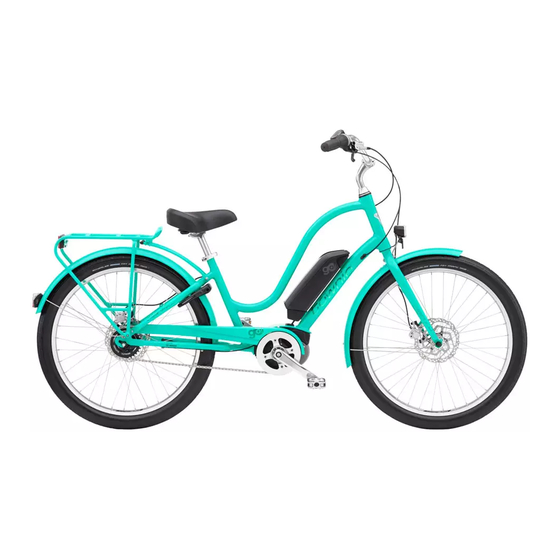
Page 15: Townie Go
Townie GO! This section explains some of the basic information about e-bikes or EPACs (Electric Pedal Assist Cycle). Please also read the information in the Shimano WARNING: Mishandling of the battery- Steps manual included with your bicycle. If you pack may cause it to overheat, catch fire, or did not get a manual, ask your retailer or visit explode. -
Page 16: Use Conditions
Chapter 1: Guide to safe on- and off-road operation Use conditions There are many types of bicycles, and each is designed for a specific Use Condition. This section explains those conditions and the weight limit: the sum of rider, gear, and bicycle. Your bicycle has a frame sticker that indicates its Use Condition. -
Page 17: Chapter 2: Maintenance
Chapter 2: Maintenance This maintenance schedule is based on normal use. Maintenance schedule If you ride your bicycle more than average; or in rain, snow, or off-road conditions; do Check each ride maintenance on your bicycle more frequently Pre ride checklist Complete the than the schedule recommends. -
Page 18: Chapter 3: Inspection And Adjustment
Chapter 3: Inspection and adjustment Chapter 3: Inspection and adjustment This chapter gives instructions for inspection and adjustment of the parts of a bicycle. The inspections in this chapter are in addition to those listed in Chapter 1. A word about torque Before you perform any work on your bicycle, Warning about mechanical read the section... -
Page 19: Handlebar And Stem
Make Stem sure the minimum insertion mark (Figure There are two types of stems on Electra bikes: 3.3) is in the frame. • “Quill” type stem • Stoker (rear of tandem) stem with adjustable... -
Page 20: Saddle (Seat) And Seatpost
Chapter 3: Inspection and adjustment Saddle rail design and springs Make sure the ends of the handlebar are If you attach a child carrier to the rear of the covered properly by either grips or plugs. The bicycle, exposed saddle springs could injure a end covers may prevent the handlebar from child’s fingers. - Page 21 To adjust the height of the saddle To adjust the angle of the saddle or fore-aft position Do not close the seatpost binder with the The saddle can be moved forward or rearward seatpost out of the frame. along the seatpost to add comfort and to adjust 1.
-
Page 22: Derailleurs
Chapter 3: Inspection and adjustment Derailleurs To adjust the large chainring position 1. Move the rear derailleur to the smallest rear A derailleur shifts gears by pushing the chain cog. from one cog or chainring to the next. These 2. Turn the high-gear limit-screw (identified with instructions are written for standard, cable an “H”) counterclockwise until it can not stop operated derailleurs. -
Page 23: Internal Gear Systems
Internal gear systems 3. Move behind the bicycle to see that the smallest rear cog, the chain, and both These systems change gears with a mechanism derailleur pulleys are in alignment. that is in the rear hub. Each month, check the 4. -
Page 24: Shift Levers
Chapter 3: Inspection and adjustment Shift levers lightly tap it with a mallet to loosen the wedge. 3. Move the lever. A shift lever controls a derailleur or internal hub 4. Tighten the lever-clamp bolt to 53-71 lb•in shift mechanism. (6-8 Nm). -
Page 25: Brakes
Brakes • Hub brake: the brake mechanism is inside the hub (Figure 3.22). A hub brake can be The brake system allows you to slow or stop controlled by a hand lever (drum brake), or by your bicycle. This operation is critical to your the pedals (coaster brake). - Page 26 Chapter 3: Inspection and adjustment Inspection FIGURE 3.23 Brake pad alignment Before every ride, inspect the brakes as shown 1. Brake-pad in alignment in Chapter 1. Each month check all the brake with rim surface bolts, including any attaching a cable housing 2.
- Page 27 Hub brakes Disc brakes A hub brake such as a coaster brake, drum When the wheel is out of the frame, do not brake, or internal brake usually requires multiple operate the brake lever. With some brakes, the frame attachments and multiple adjustments. pads automatically adjust their clearance such Due to this complexity and the importance that you will not be able to insert the disc.
-
Page 28: Wheels
Chapter 3: Inspection and adjustment Wheels Whenever you change a tire or tube, inspect the rim, tire, and rim strip. This inspection is The wheels hold you up when riding and allow intended to remove the cause of a puncture or you to roll along smoothly. - Page 29 Test the wheel attachment FIGURE 3.27 Quick-release parts For the device(s) on your bike, follow the 1- Hub instructions to make sure your wheels are 2- Adjustment nut correctly attached. If the attachment does not 3- Skewer (inside hub) pass a test, attach the wheel again or take your 4- Centering springs (narrow bicycle to your retailer for service.
- Page 30 Chapter 3: Inspection and adjustment Wheel installation 4. If you can close the lever with little or no resistance, the clamp-force is not The method for installing a wheel varies sufficient. Go back to Step 2 and tighten the according to the attachment type. adjustment-nut.
- Page 31 Tire installation FIGURE 3.33 With a standard (“clincher”) tire, the air inside Tire beads in bottom of rim well the tire is contained in an inner tube, and the Tube tire is on a standard rim Use the correct size When you purchase spare tires, tubes, rim strips, or other replacements, use the size written on the side of the tire or consult your...
-
Page 32: Reflectors
Chapter 3: Inspection and adjustment To install a tire on the wheel FIGURE 3.36 One tire bead in rim 1. Follow the Inspection procedures in the Wheels section to check the rim, rim strip, and tire. Also check the inside of the tire. 2. -
Page 33: Cables
Cables To check the headset adjustment 1. Apply the front brake while you rock the On a bicycle with a shifter or hand brake, a bicycle forward and rearward. cable connects the control lever to the item 2. Lift the front wheel off the ground. Slowly turn it controls. -
Page 34: Chain
Luggage can only be carried safely on a bike 1- locator plate when in or on a luggage carrier. However, not all 2- serrated washer Electra bicycles are compatible with a luggage 3- primary nut carrier. If you are not sure, ask your retailer. 4- strut... -
Page 35: Accessories
Frameset (frame and fork) FIGURE 3.43 Training wheels: clearance The frame is the backbone of the bicycle, the from ground part to which other parts, including the fork, attach. The fork holds the front wheel and is controlled or steered by the handlebar. The maintenance of the frameset is critical to your safety. - Page 36 Chapter 3: Inspection and adjustment Frame sticker Removing paint from a frame requires Your frame has a sticker (Figure 3.44). Do special techniques, so should only be done not remove the sticker; it contains important at the factory. Consult your retailer for more safety information that you or anyone riding the information.
-
Page 37: Chapter 4: Lubrication
Chapter 4: Lubrication This section shows the parts that you should lubricate, the frequency of service, and brief instructions. Pedals See your retailer for recommended grease or oil. If more instructions are necessary, see other Each year, replace the grease in the pedal sections of this manual or consult your retailer. -
Page 38: For More Instructions
Chapter 4: Lubrication For more instructions Cables Apply lubricant to a cable when you install it. If you need more instructions about your bicycle To install a cable in a cantilever brake, special or the servicing of bicycles, there are many tools and training are necessary, so only your resources in your community. - Page 39 Electra Bicycle Company 1010 S. Coast Hwy. 101, Ste. 101 Encinitas, CA 92024 Customer Service 800-261-1644 www.electrabike.com EUROPE Electra Bicycle Company, GmbH 29 Falkenried 20251 Hamburg +49 40 55 00 60 60 www.electrabike.com ©2016 Electra Bicycle Company All rights reserved. PN543232 APR2016 ®...
Need help?
Do you have a question about the Townie GO! and is the answer not in the manual?
Questions and answers
Where can I purchase replacement battery for my Electra ?
What type of replacement key for the battery
What is the weight of this bike?