
Related Manuals for Kaseya Unitrends Recovery Series


Summary of Contents for Kaseya Unitrends Recovery Series
- Page 1 Quick Start Guide for Recovery Series Appliances Release 10.4.8 | Document version 1.10012020...
- Page 2 Quick Start Guide for Recovery Series Appliances Release 10.4.8 | October 2020 Copyright Copyright © 2020 Unitrends Incorporated. All rights reserved. Content in this publication is copyright material and may not be copied or duplicated in any form without prior written permission from Unitrends, Inc (“Unitrends”).
-
Page 3: Table Of Contents
Quick Start Guide for Recovery Series Appliances Release 10.4.8 | October 2020 Contents Quick Start Guide for Recovery Series Appliances Preparing to configure your Recovery Series appliance Inspect the appliance Network requirements Ethernet ports Setting up your Recovery Series appliance Step 1: Set up the appliance on the network Step 2: (Recommended) Configure a network port for iDRAC Step 3: Configure the appliance console password... -
Page 4: Quick Start Guide For Recovery Series Appliances
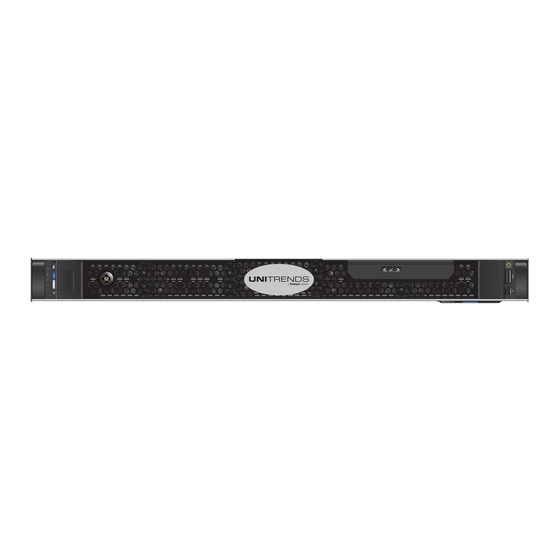
Quick Start Guide for Recovery Series Appliances Release 10.4.8 | October 2020 Quick Start Guide for Recovery Series Appliances The following instructions detail how to configure your Recovery Series appliance, as well as how to prepare it to protect your data. Preparing to configure your Recovery Series appliance First, decide on a location for your appliance. -
Page 5: Ethernet Ports
Quick Start Guide for Recovery Series Appliances Release 10.4.8 | October 2020 • A network domain name. Note: You can obtain the above information from your network administrator. Ethernet ports Ethernet ports are located on the back of the appliance. Connect Ethernet cables to these ports prior to powering on the appliance: •... -
Page 6: Step 1: Set Up The Appliance On The Network
Quick Start Guide for Recovery Series Appliances Release 10.4.8 | October 2020 • "Step 3: Configure the appliance console password" • "Step 4: Set up the appliance using the Quick Setup Wizard" Step 1: Set up the appliance on the network Your appliance ships with the required software already installed. - Page 7 Quick Start Guide for Recovery Series Appliances Release 10.4.8 | October 2020 On the Initial System Setup Menu screen, enter 1 in the Please enter choice field. Enter a number in the Select a network adapter field. For example, enter 0 to select em1. Enter Y to configure the IP address, netmask, and gateway.
- Page 8 Quick Start Guide for Recovery Series Appliances Release 10.4.8 | October 2020 To configure DNS settings, enter 2, then enter Y to edit. Enter the Primary DNS IP address, a Secondary DNS IP (optional), and a DNS Domain. Review the settings and enter Y to save. Quick Start Guide for Recovery Series Appliances...
- Page 9 Quick Start Guide for Recovery Series Appliances Release 10.4.8 | October 2020 To exit network setup, enter 6. Proceed to one of the following: • "Step 2: (Recommended) Configure a network port for iDRAC " • "Step 3: Configure the appliance console password" Quick Start Guide for Recovery Series Appliances...
-
Page 10: Step 2: (Recommended) Configure A Network Port For Idrac
Quick Start Guide for Recovery Series Appliances Release 10.4.8 | October 2020 Step 2: (Recommended) Configure a network port for iDRAC Configuring a network port for iDRAC ensures timely warranty support and enables Unitrends Support to perform additional troubleshooting procedures. Unitrends recommends that you set up iDRAC on a port that is inaccessible to the WAN. - Page 11 Quick Start Guide for Recovery Series Appliances Release 10.4.8 | October 2020 Enter the iDRAC IP address, iDRAC Netmask, iDRAC Gateway, and an iDRAC Admin Password. Review the settings and enter Y to save. To exit network setup, enter 6. Proceed to "Step 3: Configure the appliance console password".
-
Page 12: Step 3: Configure The Appliance Console Password
Quick Start Guide for Recovery Series Appliances Release 10.4.8 | October 2020 Step 3: Configure the appliance console password IMPORTANT! All appliances are deployed with these default operating systems credentials: user root, password unitrends1. For appliance security, you must use this procedure to change this password. On the Console Interface screen, enter 1 in the Please Configure Console Access Password... -
Page 13: Step 4: Set Up The Appliance Using The Quick Setup Wizard
Quick Start Guide for Recovery Series Appliances Release 10.4.8 | October 2020 Step 4: Set up the appliance using the Quick Setup Wizard To start the setup process, you will log in to the appliance UI from any machine on the same network by opening a browser and entering the appliance’s IP address followed by /ui/. - Page 14 Quick Start Guide for Recovery Series Appliances Release 10.4.8 | October 2020 Enter a Host Name, a Domain, and a new UI Password for the appliance. Confirm the UI password by entering it again in the field to the right. Click Next. Notes: •...
- Page 15 Quick Start Guide for Recovery Series Appliances Release 10.4.8 | October 2020 (Optional) To enable email from the appliance, check Enable email reporting and enter the following: • The fully qualified domain name of the SMTP server. • (If needed) If the SMTP server requires authentication, select Authentication required and enter a Username and Password.
-
Page 16: Additional Details
Quick Start Guide for Recovery Series Appliances Release 10.4.8 | October 2020 When the dialog completes, a short tour begins to help you get started. Additional details Reference the Administrator Guide for Recovery Series, Recovery MAX, and Unitrends Backup on the Unitrends website. IMPORTANT! Record the appliance asset tag, which is a 10-11 digit string on the appliance.
Need help?
Do you have a question about the Unitrends Recovery Series and is the answer not in the manual?
Questions and answers