Advertisement
Quick Links
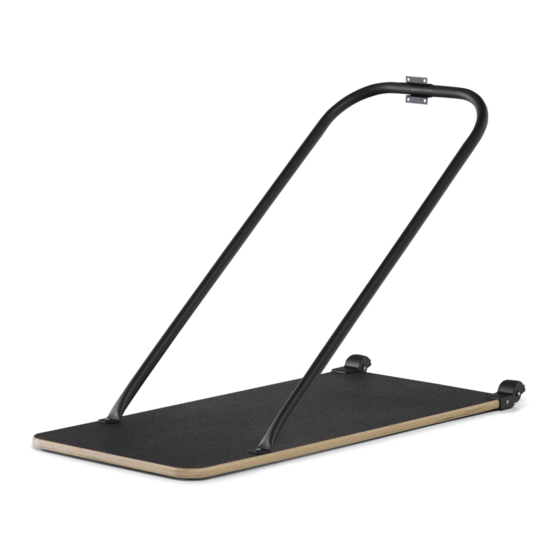
Floor Stand Assembly and SkiErg Installation
Wooden
Base
1
With the wooden base
on its side, position
the universal bracket
on the base as shown.
3
Install a T-nut over the
protruding fastener and
finger tighten. Use a
hammer to fully seat the
T-nut on the fastener.
Repeat steps 2 and 3
on the opposite outside
hole and tighten both
fasteners.
(2) T-nuts
PN 2251
U-bar
U-bar bracket
Located in SkiErg box
(1) universal bracket
Page 1
Parts Bag Contents
(8) 1 1/4" fasteners
PN 2206
(4) T-nuts
PN 2251
(8) black washers
PN 1259
(6) 1/2" fasteners
PN 1231
2
Assemble a fastener
and washer and insert
through the top of the
wooden base and into
the universal bracket
in one of the outside
holes. The fastener
will protrude from
the underside of the
wooden base.
(1) 1 1/4" fastener
PN 2206
(1) black washer
PN 1259
4
From the underside of
the wooden base, insert
the two remaining
T-nuts in each of the
two inside holes of
the universal bracket.
Use a hammer to fully
seat the T-nuts. Lay the
wooden base on its
bottom in preparation
for mounting the
SkiErg.
(2) T-nuts
PN 2251
0815
(1) T27 6-lobe driver
CONCEPT2.COM
Advertisement

Related Manuals for concept 2 SkiErg


Summary of Contents for concept 2 SkiErg
- Page 1 Floor Stand Assembly and SkiErg Installation Parts Bag Contents (8) 1 1/4” fasteners U-bar PN 2206 U-bar bracket (4) T-nuts PN 2251 (8) black washers PN 1259 (6) 1/2” fasteners PN 1231 Wooden Located in SkiErg box Base (1) universal bracket...
- Page 2 Using a fastener and washer, attach the U-bar Assemble four fasteners and washers and insert to the wooden base on each side. Tighten until through each of the four holes in the SkiErg fully seated. bottom bracket and into the wooden base (two holes on each side).
Need help?
Do you have a question about the SkiErg and is the answer not in the manual?
Questions and answers