Delta MultiChoice 17T Series Installation Instructions Manual
Valve trim
Hide thumbs
Also See for MultiChoice 17T Series:
- Owner's manual (38 pages) ,
- Installation instructions and owner's manual (94 pages) ,
- Installation instructions manual (94 pages)
Advertisement
Available languages
Available languages
Quick Links
Write purchased model number here.
Table of Contents:
Warranties ................................................................................. Page 2
Installation Instructions ............................................................. P ages 3 - 7
Clean and care........................................................................... Page 8
Maintenance .............................................................................. P age 8
Cartridge Summary Reference Sheet ....................................... P age 8
To order replacement parts, visit www.deltafaucet.com
CAUTION: This system/device must be set by the
installer to ensure safe, maximum temperature.
Any change in the setting may raise the discharge
temperature above the limit considered safe and
may lead to hot water burns.
NOTICE TO INSTALLER: CAUTION!–As the
installer of this valve, it is your responsibility
to properly INSTALL and ADJUST this valve
per the instructions given. This valve does
not automatically adjust for inlet temperature
changes, therefore, someone must make the
necessary temperature knob adjustments at
the time of installation and further adjustments
may be necessary due to seasonal water
temperature change. YOU MUST inform the
owner/user of this requirement by following the
instructions. If you or the owner/user are unsure
how to properly make these adjustments please
refer to page 7 and if still uncertain, call us at
1-800-345-DELTA.
After installation and adjustment, you must affix
your name, company name and the date you
adjusted the temperature knob to the caution
07/08/2020
107530
You May Need
label provided and apply or attach the label to
the back side of the closest cabinet door and
the warning label to the water heater. Leave
this Instruction Sheet for the owner's/user's
reference. WARNING: This pressure balanced
or thermostatic bath valve is designed
to minimize the effects of outlet water
temperature changes due to inlet pressure
changes, commonly caused by dishwashers,
washing machines, toilets and the like. It may
not provide protection from hot water burns
when there is a failure of other temperature
controlling devices elsewhere in the plumbing
system, if the temperature knob is not properly
set or if the hot water temperature is changed
after the settings are made or if the water inlet
changes due to seasonal changes. WARNING:
Do not install a shut-off device on either outlet
of this valve. When this type of device shuts
off the water flow, it can defeat the ability of
the valve to balance the hot and cold water
pressures.
1
MultiChoice
Installation Instructions
Owners Manual
17T Series
®
Valve Trim
107530 Rev. B
Advertisement

Related Manuals for Delta MultiChoice 17T Series


Summary of Contents for Delta MultiChoice 17T Series
- Page 1 When this type of device shuts refer to page 7 and if still uncertain, call us at off the water flow, it can defeat the ability of 1-800-345-DELTA. the valve to balance the hot and cold water After installation and adjustment, you must affix pressures.
- Page 2 For purposes of this warranty, the term “multi-family residential application” refers to the purchase of the faucet from an authorized Delta seller by a purchaser who owns but does not live in the residential dwelling in which the faucet is initially installed, such as in a rented or leased single unit or multi-unit detached home (duplex or townhome), or a condominium, apartment building or community living center.
-
Page 3: Back To Back Installation
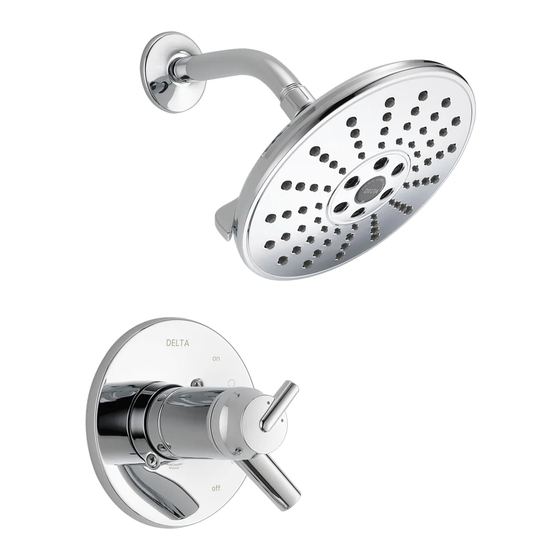
Cartridge Installation Turn off water supplies. Remove bonnet nut Rotate the cartridge (1) so the word “UP” (2) (1) and test cap (2) from the body. Place a appears on the top. The “H” must be on the bucket or small container over the front of the hot side and the “C”... - Page 4 Shower Head and Tub Spout Installation FOR SHOWER HEAD INSTALLATION: Apply plumber tape to pipe threads on both ends of the shower arm (1). To prevent damage to finish on shower arm, insert wall end of shower arm into shower flange (2) before screwing arm into riser connection.
- Page 5 Ensure sleeve is properly positioned over the front of cartridge. Note: Adjust for up to 1" thick wall. For thick wall installation, visit delta faucet website, check "view technical specification" of the models you bought, order the appropriate thick wall installation kit RP to get additional 1 3/4"...
- Page 6 Installation and Adjustment of the Temperature Knob Failure to do so may cause injury. A. Adjust temperature limit stop! If max temperature is not achieved before limit stop Turn on water supplies; LET THE WATER RUN AT (3) on temperature knob (1) meets the limit stop (4) on BOTH FULL HOT AND FULL COLD TO ENSURE the volume control handle.
- Page 7 Temperature handle Installation Turn on water supplies; LET THE WATER RUN AT BOTH FULL HOT AND FULL COLD TO ENSURE THE WATER IS RUNNING AS HOT/COLD AS POSSIBLE.Place the temperature handle (1) onto the spline, then rotate the temperature handle until you achieve your maximum desired temperature from the outlet (not more than 120° or the lower temperature mandated by your local plumbing code).
-
Page 8: Cleaning And Care
Cleaning and Care ® Care should be given to the cleaning of Warning: Scrubbing Bubbles Bathroom this product. Although its finish is extremely ® Cleaner and Lysol Basin Tub and Tile durable, it can be damaged by harsh Cleaner must not be used on the clear knob abrasives or polish. - Page 9 ADVERTENCIA: No instale un aparato de corte Página 7 y si todavía no está seguro, llámenos al o cierre en cualquiera de las tomas de esta 1-800-345-DELTA. válvula. Cuando este tipo de aparato cierra el flujo de agua, puede hacer fallar la habilidad de Después de hacer la instalación y el ajuste, usted...
- Page 10 Piezas electrónicas. Las piezas electrónicas (excepto las pilas), si las hay, de las llaves de agua Delta® compradas de deltafaucet.com o vendedores autorizados por Delta están garantizadas al consumidor comprador original de estar libres de defectos en material y fabricación durante cinco (5) años a partir de la fecha de compra o para los consumidores comerciales, por un (1) año a partir de la fecha de compra.
- Page 11 Instalación del Cartucho Cierre los suministros de agua. Retire la tuerca tapa Gire el cartucho (1) de manera que la palabra “UP” (1) y la tapa de prueba (2) del cuerpo. Coloque un (2) aparezca en la parte superior. La “H” debe balde o recipiente pequeño en la parte del frente del estar en el lado caliente y la “C”...
- Page 12 Instalación de la Cabeza de la Regadera y el Surtidor de la Bañera INSTALACIÓN DE LA REGADERA / DUCHA: Aplique cinta para plomero a las roscas en ambos extremos del brazo de la regadera (1). Para prevenir daño al acabado del brazo de la regadera, inserte el extremo de la pared del brazo de la regadera en la brida de ésta (2) antes de enroscar el brazo en la conexión a la tubería interior.
- Page 13 O. Nota: Ajuste para paredes de hasta 1" de espesor. Para la instalación en pared gruesa, visite el sitio web de delta faucet, verifique "ver especificaciones técnicas" de los modelos que ha comprado, pida el juego de instalación en pared de espesor adecuado...
- Page 14 Instalación y Ajuste del Pomo de Temperatura El no hacerlo puede causar lesión. A: ¡Ajuste el tope del límite de temperatura! control de la temperatura (1) donde tropieza con Abra los suministros de agua; DEJE QUE CORRA EL el tope del límite rotacional (4) en la manija del AGUA CALIENTE Y FRÍA TOTALMENTE ABIERTA control de volumen.
- Page 15 Instalación del mango de temperatura Abra los suministros de agua; DEJE CORRER EL AGUA TANTO EN CALIENTE COMPLETO COMO EN FRÍO COMPLETO PARA ASEGURARSE DE QUE EL AGUA CORRA DE MANERA TAN CALIENTE / FRÍA COMO POSIBLE. Coloque el mango de temperatura (1) en la lengüeta, luego gírelo hasta que alcance la temperatura máxima deseada desde la salida (de no más de 120º...
-
Page 16: Mantenimiento
Limpieza y Cuidado de su Llave Tenga cuidado al ir a limpiar este producto. ADVERTENCIA! No se puede usar ¡ Aunque su acabado es sumamente durable, SCRUBBING BUBBLES® BATHROOM puede ser afectado por agentes de limpieza CLEANER o LYSOL® BASIN TUB AND TILE o para pulir abrasivos. - Page 17 1-800-345-DELTA. pressions d’eau chaude et d’eau froide. Après avoir terminé l’installation et le réglage, vous devez inscrire, sur l’étiquette de mise en garde fournie, votre nom, le nom de votre entreprise et la date à...
- Page 18 ® Pièces et finis. Tous les pièces (autres que les composants électroniques et les piles) et les finis de ce robinet Delta® achetés chez des vendeurs Delta autorisés sont protégés contre les défectuosités du matériau et les vices de fabrication par une garantie qui est consentie au premier acheteur au détail et qui demeure valide tant que celui-ci demeure propriétaire de la maison dans laquelle le robinet a été...
- Page 19 Installation de la cartouche. Fermez les robinets d’arrêt. Enlevez l’écrou- Tournez la cartouche (1) de sorte que le mot « UP chapeau (1) et le capuchon d’essai (2) » (2) se trouve sur le dessus. La lettre « H » doit se du corps.
- Page 20 Installation de la pomme de douche et du bec de baignoire INSTALLATION DE LA POMME DE DOUCHE: appliquez du ruban de plomero sur les filetages aux deux extrémités du bras de douche (1). Pour éviter d’endommager le fini du bras de douche, introduisez le côté...
- Page 21 Remarque: Veuillez ajuster pour un mur jusqu'à l'épaisseur de 1 ". Pour une installation sur un mur épais, veuillez visiter le site Web delta faucet, et consulter «Voir les spécifications techniques» des modèles achetés, et commander le kit d'installation RP approprié pour obtenir un mur supplémentaire de l’épaisseur de 1 3/4".
- Page 22 Installation et réglage du bouton de température Il y a risque de blessure si le bouton de température n’est pas réglé. Réglez la butée limitatrice de température! bouton de température (1) n'atteigne la butée de Rétablissez l’alimentation en eau. LAISSEZ COULER température maximale (4) sur la manette de débit, CHAUDE JUSQU’À...
- Page 23 Installation de la poignée de température Veuillez ouvrir l'alimentation en eau; VEUILLEZ LAISSER L'EAU FONCTIONNER À LA FOIS À CHAUD ET À FROID POUR ASSURER QUE L'EAU FONCTIONNE COMME CHAUDE / FROIDE LE PLUS POSSIBLE. Placez la poignée de température (1) sur la cannelure, puis tournez la poignée de température jusqu'à ce que vous obteniez la température maximale souhaitée à...
-
Page 24: Instructions De Nettoyage
Instructions de nettoyage ® Il faut le nettoyer avec soin. Même si son de Baignoires et de Carreaux Lysol fini est extrêmement durable, il peut être sur les manettes et les poignées sphériques abîmé par des produits fortement abrasifs transparentes. Ces produits peuvent faire ou des produits de polissage.
Need help?
Do you have a question about the MultiChoice 17T Series and is the answer not in the manual?
Questions and answers