Advertisement
INSTALLTION MANUAL
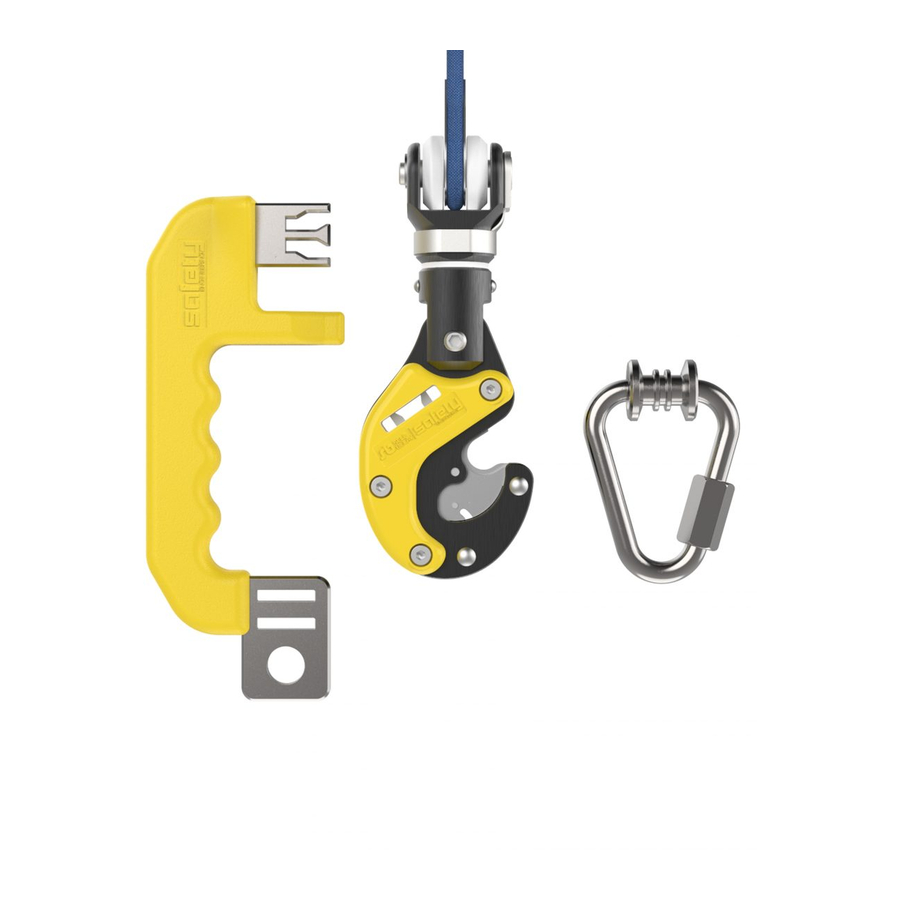
INSTALLING AND USING SELF BELAY
CONNECTOR WITH KANOPEO
SAFEROLLER AND HIROPE 2
OFFICE ADDRESS:
111 Tsarigradsko shose,
1784 Sofia, Bulgaria
www.safetyeng.eu
ACCOUNTING DETAILS:
EUR: BG75UNCR70001520885679
USD: BG56UNCR70001523186764
Bank: UniCredit Bulbank AD
BIC code: UNCRBGSF
VAT number: BG 175376730
WARNING: Do not install or operate the device until you have fully read
and fully understood this manual!
SERIOUS INJURIES OR FATALITIES!
FAILING TO DO SO MAY LEAD TO
|page 1 of 5 |
www.safetyeng.eu
Advertisement
Table of Contents

Related Manuals for Safety Engineering SELF BELAY


Summary of Contents for Safety Engineering SELF BELAY
- Page 1 INSTALLTION MANUAL INSTALLING AND USING SELF BELAY CONNECTOR WITH KANOPEO SAFEROLLER AND HIROPE 2 OFFICE ADDRESS: 111 Tsarigradsko shose, 1784 Sofia, Bulgaria www.safetyeng.eu ACCOUNTING DETAILS: EUR: BG75UNCR70001520885679 USD: BG56UNCR70001523186764 Bank: UniCredit Bulbank AD BIC code: UNCRBGSF VAT number: BG 175376730...
- Page 2 Installing the Self Belay to the Hirope 2 User’s Side Loop Using a flat screwdriver remove the retaining With the screwdriver lift to unlock and remove the E-clip: folding spring bolt: Arrange the plastic spacers so that the chamfer is on the inside: |page 2 of 5 | Ver.
- Page 3 Align the Hirope 2 user’s side loop between the spacers: Insert back the folding spring bolt and lock it. Make sure you match the cone/tapered side of the swivel with the cone/tapered side of the bolt: cone click Using pliers lock back the retaining E-clip: click |page 3 of 5 | Ver.
- Page 4 Installing Hirope 2 to the Saferoller Insert the carabiner in the Saferoller eye. Use a rubber band or similar tool to avoid having the carabiner turn upside down: Insert the lanyard loop first and then the Hirope 2 lock device: |page 4 of 5 | Ver.
- Page 5 Using Safety Engineering Self Belay connector with KANOPEO Saferoller and Hirope 2 WARNING: Always refer to the KANOPEO and Safety Engineering corresponding user manuals to fully understand how to properly operate each device. Failing to do so may lead to...
Need help?
Do you have a question about the SELF BELAY and is the answer not in the manual?
Questions and answers