
Subscribe to Our Youtube Channel
Related Manuals for Samsung WB30H7 Series


Summary of Contents for Samsung WB30H7 Series
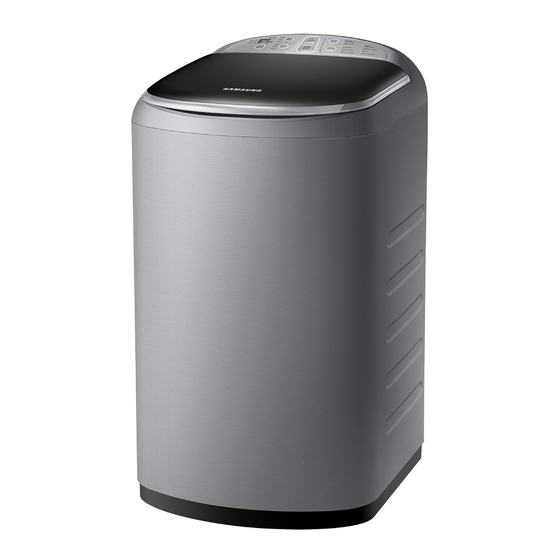
- Page 1 WB30H7***** Washing machine User manual This manual is made with 100 % recycled paper. Imagine the possibilities Thank you for purchasing this Samsung product.
-
Page 2: Table Of Contents
Content Safety information Icons and symbols used in this manual ......... . 3 Important safety instructions . -
Page 3: Safety Information
The product you have purchased is designed for domestic use only. Using the product for business purposes qualifies as a product misuse. In this case, the product will not be covered by the standard warranty provided by Samsung and no responsibility will be attributed to Samsung for malfunctions or damages resulting from such misuse. - Page 4 Do not let children (or pets) play in or on your washing machine. The washing machine door does not open easily from the inside and children may be seriously injured if trapped inside. This appliance is not to be used by persons (including children) with reduced physical, sensory or mental capabilities, or lack of experience and knowledge, unless they have been given supervision or instruction concerning use of the appliance by a person responsible for their...
-
Page 5: Important Safety Instructions
Do not put your hands or any objects in or under the washing machine while the washing machine is operating. Do not replace a damaged power cord or power plug yourself. Have Samsung or a qualified service technician replace a damaged power cord or power plug. -
Page 6: Location Requirements
Location requirements To ensure safe and proper installation and use of your washing machine, follow these guidelines for selecting a location. WARNING: • Use caution when lifting or moving the washing machine. • Do not install the washing machine in areas exposed to the weather. •... -
Page 7: Installation
This product can only be used with 230 V, and is not compatible with a power source of 110 V. Accessories The water supply hose and the drain hose (extension hose) can be purchased at a local Samsung service center. Water supply hose... -
Page 8: Installation Requirements
Installation requirements Water Supply • The washing machine fills up with a water pressure of 0.05 Mpa ~ 0.78 Mpa (0.5~8.0 kg•f/ • A water pressure level of less than 0.05 MPa (0.5 kg•f/cm ) may inhibit the water valve to close completely. -
Page 9: Step-By-Step Installation
Grounding For safety, the washing machine must be grounded. • Ensure that the washing machine is properly grounded to prevent electric shock. If the wall socket has a ground terminal No additional grounding is required. (*): Ground terminal Step-by-step installation Step 1 - Select a location Location requirements: •... - Page 10 Step 2 - Connect the water supply hose 1. Connect the L-shaped arm fitting for the cold water supply hose to the cold water supply intake at the upper rear side of the washing machine. Then tighten it by turning part (A) clockwise by hand.
- Page 11 6. Open the water tap and ensure that no water leaks from the water supply intake, water tap or adaptor. If you encounter a water leak, repeat the steps above. WARNING: In case of a water leak, stop using the washing machine.
- Page 12 Combine with an existing washing machine by sharing one water tap 1. Disconnect the water supply hose (A) from the existing washing machine. 2. Connect the inlet T adaptor (B) to the inlet hole (C) of the existing washing machine. 3.
- Page 13 Step 3 - Connect the drain hose 1. Insert the joint ring (A) around the drain hose. 2. Connect one end of the drain hose into a drain hole, and join the other end of the drain hose into the drain outlet of the washing machine.
- Page 14 3. Insert the clamper (C) at the end of the sponge. Make sure the clamper covers one end of the sponge. Make sure the sponge is tightened. A loose sponge may cause noise while the washing machine is operating. 4. Insert the included screw through the screw hole in the clamper, then fix the screw to the hole on the rear right side of the frame.
- Page 15 To reverse the direction of the drain hose (applicable No Pump models only) While pressing down the joint ring, disconnect the drain hose. Reverse the direction of the drain hose and repeat the steps above to connect again. Considerations on the drain hose •...
- Page 16 To share the drain hole with an existing washing machine (applicable No Pump models only) To share one drain hole with an existing washing machine, use the drain T adaptor. 1. Connect the drain hose (A) of the sanitizing washing machine to one end of the drain T adaptor (B).
- Page 17 To share the drain hole with an existing washing machine (applicable Pump models only) To share one drain hole with an existing washing machine, use the drain T adaptor. 1. Connect the drain hose (A) of the sanitizing washing machine to the drain adaptor (B) as shown.
- Page 18 Step 4 - Level the washing machine 1. Choose a location with a minimum clearance of 4 in (10 cm) from the rear and side walls. 2. Attach the provided two levelling devices to the front and side, respectively. Then, check if the washing machine is level within tolerance.
- Page 19 Step 5 – Insert the baffle board 1. Lay the washing machine down on its side. • Do not lay the washing machine down on its front or back. • While laying the washing machine down, be careful not to scratch the surface of the washing machine.
-
Page 20: Basic Operations
Basic operations Laundry guidelines Carefully read the following instructions to avoid machine problems or damage to clothing. Check the Care label on clothing before washing. • Do not overload the tub with laundry. Excessive laundry reduces the washing efficiency, and severely wears the laundry. - Page 21 Do not wash • Clothing that is easily disfigured even when simply soaking in water. • Neckties, brassieres, jackets, suits and coats that are made mostly of rayon and other kind of blended fabrics that can be easily disfigured (e.g. shrinkage and discoloration). •...
- Page 22 Checklist Sorting & pretreatment 1. Sort the laundry according to the types, colors and degree of soiling (heavily soiled, won't discolor, delicate clothing, etc.). 2. Keep the accessories of clothing in place and empty the pockets. 3. If any damage to the clothing, please fix it before washing. 4.
-
Page 23: Detergent Types And Usage
Detergent types and usage • Adding more detergent doesn't increase performance. Rather, too much detergent generates too many bubbles, reducing the rinse effect and causing environmental pollution. • Powder detergent residue may be left over in the cleaned laundry, causing bad odors. If using powder detergent, fully rinse the laundry. -
Page 24: About A Sanitizing Wash
About a sanitizing wash The laundry for sanitizing wash at home normally needs to be washed roughly in advance. This will help remove stains. How can a sanitizing wash remove stains more effectively? While the laundry is being sanitized, the laundry’s fibres fold and naturally rub each other to facilitate the removal of stubborn stains. -
Page 25: Getting Started
Getting started Control panel 1. Display Displays the remaining washing time. Displays an error message if a problem occurs. 2. Rinse Press this button to perform a rinse-only cycle, or to change the number of rinse cycles. You can set up to 6 rinse cycles. 3. - Page 26 7. Baby Care Use this course for items such as baby clothes and underwear that require additional rinse cycles for sanitary purposes without damaging the fabric. For sterilizing and bleaching innerwear. The laundry is heated up to a sanitizing point and maintained for Super Sanitize a pre-determined period of time, and then goes through 3 rinse cycles.
- Page 27 Before you start 1. Open the water tap. Check if the water supply hoses are correctly connected to the corresponding tap (cold/hot water). 2. Plug the power cable into a 230 V wall socket. 3. Ensure that the drain hose is placed as instructed. Washing for the first time 1.
- Page 28 Water level and temperature For economic and effective washing, specify a proper water level and a water supply type. The default water level is High, and the default supply type is cold water. • Press the Water Level button to select a water level and a water supply type: High/Cold >...
-
Page 29: Maintainence
Maintainence Keeping your washing machine clean improves its performance, wards off unnecessary repairs, and lengthens its life. Cleaning the exterior Wipe the washing machine surfaces, including the control panel, with a soft cloth using a nonabrasive household detergent. Use a soft cloth to dry the surfaces. CAUTION: Do not pour water onto the washing machine. -
Page 30: Cleaning The Water Valve Mesh Filter
Cleaning the water valve mesh filter 1. Remove the filter and wash it thoroughly. 2. Return the filter to its place and securely connect the hose to the inlet water valve. 3. Check if there is any water leakage. Ensure that the water supply hose is connected tightly. English - 30... -
Page 31: Filter
Filter Filters can filter and collect debris and other materials while washing. If no filters are installed, laundry could be contaminated by other materials. Please clean the filters periodically. 1. Lift the filter up to remove it as shown in the figure. 2. -
Page 32: Troubleshooting
Troubleshooting Check the table below for basic troubleshooting solutions If you request service and the problem is not a malfunction, you will be charged for the service call, even if the washer is still under warranty. Problem Checkpoints Action Check if the electric voltage is This product can only be used normal. - Page 33 Problem Checkpoints Action If the water supply hose Repeat the assembling steps connector at the tap is loose, again. water can leak. (Refer to “Step 2 - Connect the water supply hose” on page 10) Check if the rubber ring in the Move it into the correct position.
-
Page 34: Information Codes
• Ensure that the cold water tap and the hot water tap are connected correctly. The washing machine is not working properly. Contact the nearest IE/tE1/HE/HE1/dE1/ Samsung service center. dE2/LE/8E/OE English - 34... -
Page 35: Specifications
Specifications Specifications Model WB30H7***** Type Fully-Automatic Washer Washing type Single Coil Type Spinning type Centrifugal Spinning Cotton 3.0 kg Load of laundry Sanitizing wash 1.5 kg 0.05 - 0.78 Mpa Water pressure (0.5 kg•f/cm - 8 kg•f/cm Dimensions (mm) W 450 x D 540 x H 809 Weight 28 kg Power... - Page 36 QUESTIONS OR COMMENTS? COUNTRY CALL OR VISIT US ONLINE AT NIGERIA 0800-726-7864 www.samsung.com/africa_en/support DC68-03449A-00...
Need help?
Do you have a question about the WB30H7 Series and is the answer not in the manual?
Questions and answers