Table of Contents
Advertisement
Quick Links
Advertisement
Table of Contents

Subscribe to Our Youtube Channel
Related Manuals for Ziatech Corporation ZT 8907


Summary of Contents for Ziatech Corporation ZT 8907
- Page 1 Artisan Technology Group is your source for quality new and certified-used/pre-owned equipment SERVICE CENTER REPAIRS WE BUY USED EQUIPMENT • FAST SHIPPING AND DELIVERY Experienced engineers and technicians on staff Sell your excess, underutilized, and idle used equipment at our full-service, in-house repair center We also offer credit for buy-backs and trade-ins •...
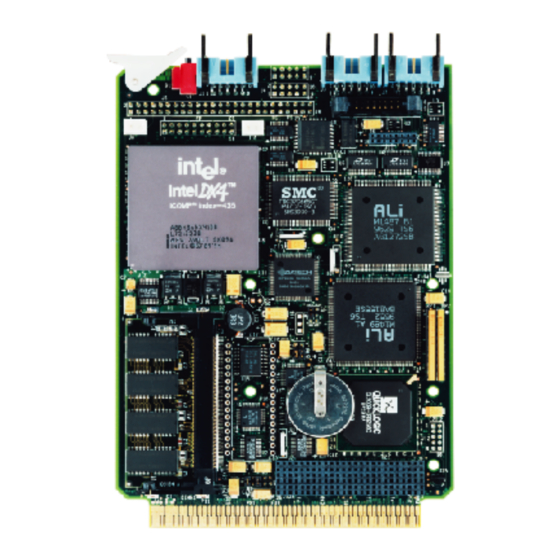
- Page 2 ZT 8907 Single Board Computer with IntelDX4™ Microprocessor Hardware User Manual...
-
Page 3: Table Of Contents
CONTENTS MANUAL ORGANIZATION.......................... 6 1. INTRODUCTION ............................8 PRODUCT DEFINITION........................8 STAND-ALONE OPERATION .................... 8 STD-80 OR STD 32 SINGLE MASTER ARCHITECTURE ..........9 STD 32 MULTIPLE MASTER ARCHITECTURE..............9 FEATURES ............................9 DEVELOPMENT CONSIDERATIONS ..................10 FUNCTIONAL BLOCKS ........................ 11 STD BUS INTERFACE ..................... - Page 4 Contents RESET ............................31 MULTIPLE MASTER AND INTELLIGENT I/O................32 MULTIPLE MASTER ......................32 INTELLIGENT I/O ......................33 MULTIPLE MASTER VS. INTELLIGENT I/O ..............34 MULTIPLE MASTER SYSTEM REQUIREMENTS ............34 MULTIPLE MASTER SYSTEM RESET ................35 4. INTERRUPT CONTROLLER ......................... 36 INTERRUPT SOURCES........................
- Page 5 SINGLE BOARD APPLICATIONS....................82 18. OPTIONAL LOCAL FLOPPY DISK INTERFACE ................83 A. BOARD CONFIGURATION........................84 BIOS SETUP OVERVIEW ......................84 ZT 8907-SPECIFIC SETUP OPTIONS ................86 JUMPER OPTIONS AND LOCATIONS ..................86 JUMPER DESCRIPTIONS ......................88 W1 (MULTIPLE MASTER INTERRUPT)................88 W2 (PROM/SRAM SELECTION) ..................
- Page 6 INDUCTIVE COUPLING....................132 ADDITIONAL INFORMATION ..................... 133 D. PCI CONFIGURATION SPACE MAP ....................134 E. ZT 8907 VS. ZT 8902: TECHNICAL DIFFERENCES ................. 136 ZT 8907 NEW FEATURES ......................136 ZT 8907 MECHANICAL ISSUES....................136 ZT 8907 PROGRAMMING ISSUES .................... 138 ZT 260 AND ZT 310 ENCLOSURES...................
-
Page 7: Manual Organization
MANUAL ORGANIZATION This manual describes the operation and use of the ZT 8907 Single Board Computer with IntelDX4™ Microprocessor. The following summarizes the focus of each major section in this manual. Chapter 1, "Introduction," introduces the key features of the ZT 8907. It includes a product definition, a list of product features, a functional block diagram, and a description of each block. - Page 8 Appendix A, "Board Configuration," describes the jumpers and cuttable traces on the ZT 8907. This appendix details factory default settings as well as information to tailor your board to a specific application. Appendix B, "Specifications," contains the electrical, environmental, and mechanical specifications for the ZT 8907.
-
Page 9: Introduction
0º to +70º C is extended in the ZT 89LT07 to -40º +70º C. Contact Ziatech for details. Stand-Alone Operation The ZT 8907 does not require an STD bus backplane to operate. The ZT 8907 is able to operate stand alone in many applications because of the large selection of the most commonly needed peripheral devices. -
Page 10: Or Std 32 Single Master Architecture
COM1/COM2 (16550 compatible) STD-80 or STD 32 Single Master Architecture The ZT 8907 supports additional memory and I/O through the STD bus. In an STD-80 architecture, all 16-bit data transfers are automatically reduced to 8-bit transfers for complete backwards compatibility with STD-80 boards. In an STD 32 architecture, the data transfers are dynamically adjusted to support 8-bit and 16-bit boards. -
Page 11: Development Considerations
DEVELOPMENT CONSIDERATIONS Ziatech offers DOS and STD 32 STAR SYSTEM™ software development systems for ZT 8907 applications. DOS is Microsoft's MS-DOS residing on the ZT 8907. The DOS system provides a development platform similar to a PC, enabling applications to be developed quickly. -
Page 12: Functional Blocks
FUNCTIONAL BLOCKS Functional Block Diagram figure of the ZT 8907 is on the following page. The blocks correspond to topics remaining in this chapter. The following topics, not represented on the diagram, are also in this chapter: •... -
Page 13: Std Bus Interface
In addition to 16-bit data transfers, the STD 32 system provides the platform needed for multiple master operation. In a multiple master system, up to seven ZT 8907 boards share STD bus resources with a fixed or rotating priority granted by an external bus arbiter, such as the ZT 89CT39. -
Page 14: 486Sx/Dx4 Processors
16-bit data path. PCI Bus Video The ZT 8907 supports both STD bus and local PCI bus video adapters. For STD bus video, Ziatech offers video boards that support VGA and flat panel displays. For local bus video, Ziatech offers zPM adapters that plug directly onto the ZT 8907's PCI mezzanine local bus interface connector (J13). -
Page 15: Serial I/O
Controller." Parallel I/O The ZT 8907 includes three 8-bit parallel I/O ports for a total of 24 parallel I/O lines. Each line is programmable as an input or an output with readback. All three ports include event sense capability where a positive or negative transition on the input will generate an onboard interrupt. -
Page 16: Dma
1. Introduction The ZT 8907's two DMA controllers provide a total of four DMA channels for data transfers between STD bus I/O and local memory. The DMA channels support STD bus DMA slaves by managing the data transfers between the slaves and local memory. -
Page 17: Speaker Interface
The ZT 8907 supports an external speaker through a 2-pin frontplane connector (J8). AC Power-Fail Protection With the addition of an AC transformer, the ZT 8907 monitors AC power to permit an orderly shutdown during a power failure. When AC power falls below an acceptable operating range, a non-maskable interrupt is generated to notify the CPU of an impending power failure. -
Page 18: Getting Started
ZT 8907 to handle the boards. SYSTEM REQUIREMENTS The ZT 8907 is designed for use with or without an STD bus backplane. The ZT 8907 is electrically, mechanically, and functionally compatible with both the STD 32 Bus Specification (ZT MSTD32) for STD bus applications. -
Page 19: Memory Configuration
ZT8907F02-01 MEMORY CONFIGURATION The ZT 8907 can address up to 128 Mbytes of memory. The address space is divided between memory local to the board and memory on the STD bus. Any memory not reserved or occupied by a local memory device is available for STD bus expansion. -
Page 20: I/O Configuration
ZT8907 I/O CONFIGURATION The ZT 8907 addresses up to 64 Kbytes of I/O using a 16-bit I/O address. The address space is divided between I/O local to the board and I/O on the STD bus. Any I/O space not reserved or occupied by a local I/O device is available for STD bus expansion. - Page 21 64 Kbyte I/O address space. The ZT 8907 is populated with many of the most commonly used I/O peripheral devices for industrial control and computing applications. The I/O address location for each of the peripherals is shown in the "I/O Address Range...
- Page 22 Onboard master Interrupt 0000h - 001Fh PCI I/O Address Space Onboard Master DMAC Notes: "STD 32 Address Space" refers to STD 32 backplane devices. "PCI I/O Address Space" refers to mezzanine devices or devices on board the ZT 8907. ÛZIATECH...
-
Page 23: Connectors
SETUP The ZT 8907 has many features that can be configured with the BIOS SETUP utility. The SETUP utility is executed during the boot sequence when the "s" key is typed. In DOS systems, SETUP may be executed by running the SETUP.COM program from the... -
Page 24: Bios Setup Screens
The following topics present an introduction to the setup and configuration of the ZT 8907. BIOS SETUP Screens The BIOS SETUP utility for the ZT 8907 is organized as two screens, shown on the last † page of this chapter and described below. -
Page 25: Operating System Installation
2. Getting Started The SETUP parameters are saved in the battery-backed RAM portion of the ZT 8907's real-time clock device. The SETUP parameters can also be saved in a file format, or as the programmed BIOS defaults. Operating System Installation It may be necessary to install an operating system such as Windows NT or QNX on the ZT 8907 system. - Page 26 2. Getting Started BIOS SETUP Utility: Screen 1 Generic SETUP Options Ziatech Industrial BIOS Setup Utility Copyright (C) 1997, Ziatech Corporation Floppy Disk A: ......1.44M Floppy Interface ....... STD32 Floppy Disk B: ......IDE Interface ......STD32 ONBOARD COM1 Port .......
-
Page 27: Std Bus Interface
The following topic discusses STD 32 operation in greater detail. STD 32 Operation Data transfers between the ZT 8907 and any STD bus memory or I/O board occur eight bits at a time for boards supporting an 8-bit data bus and 16 bits at a time for boards supporting a 16-bit data bus in an STD 32 system. -
Page 28: Bus Compatibility
External Masters and DMA Slaves The ZT 8907 does not support external masters in an STD-80 architecture; an STD 32 architecture is required for external master support. The ZT 8907 supports DMA slaves in both STD-80 and STD 32 architectures. -
Page 29: Std 32 Bus Compatibility
3. STD Bus Interface The ZT 8907 includes a frontplane connector (J6) to support DMA slaves in an STD-80 architecture. J6 provides signals (not defined on the STD-80 bus) that are required by DMA slaves. See Chapter 6, "DMA Controller," for an overview of ZT 8907 DMA architecture and DMA controller operation. -
Page 30: Std Bus Interrupts
3. STD Bus Interface STD BUS INTERRUPTS The ZT 8907 supports both maskable and non-maskable interrupts from the STD bus. This section discusses system level issues related to these interrupts. Refer to Chapter 4, "Interrupt Controller," for more information on the ZT 8907's maskable interrupts. - Page 31 3. STD Bus Interface STD Bus Polled Interrupt Structure STD BUS INTRQ* INTRQ* INTERRUPT ZT 8907 SOURCE 1 INTRQ* INTERRUPT SOURCE 2 INTRQ* INTERRUPT SOURCE N INTERRUPT STATUS ZT8907 PORT STD Bus Vectored Interrupt Structure STD BUS INTRQ* INTRQ* INTRQ1*...
-
Page 32: Non-Maskable Interrupts
STD bus pushbutton reset signal, PBRESET* (P48). The ZT 8907 responds to any of these reset sources by initializing local peripherals and driving the STD bus system reset, SYSRESET* (P47). STAR SYSTEM temporary... -
Page 33: Multiple Master And Intelligent I/O
STD bus request, DREQx* (E16), to an external bus arbiter, such as the ZT 89CT39. The ZT 8907 then suspends all local operation until the bus arbiter returns an STD bus acknowledge, DAKx* (E15). The ZT 89CT39, if used, must be Revision D or higher. -
Page 34: Intelligent I/O
I/O, and dual-port RAM. The ZT 8907 also operates at full STD bus speeds when accessing the dual-port RAM. It is not until the ZT 8907 and the intelligent I/O board access the dual-port RAM at the same time that arbitration occurs. -
Page 35: Multiple Master Vs. Intelligent I/O
I/O boards are through the dual-port RAM local to each intelligent I/O board. Multiple Master System Requirements The following is a list of considerations for the ZT 8907 operating in a multiple master architecture. •... -
Page 36: Multiple Master System Reset
(DREQx* and DAKx*). • A ZT 89CT39, or equivalent bus arbiter, is needed to manage ZT 8907 access to the STD bus resources. The bus arbiter must be installed in Slot 'X' of the STD 32 backplane. The ZT 89CT39 must be Revision D or higher. -
Page 37: Interrupt Controller
CPU with a pointer to a service routine for the highest priority device. Note: The ZT 8907 does not support cascaded interrupt controllers on the STD bus. It may be helpful before reading this chapter to review Chapter 3, "STD Bus Interface,"... - Page 38 4. Interrupt Controller Interrupt Architecture (see notes following table) Notes Programmable Interrupt Sources Interrupt (default in bold) IRQ0 System Timer 0 2, 3 IRQ1 Local keyboard or INTRQ1* CTC2, Ch.0 IRQ2 Cascade IRQ3 COM2 CTC 2, Ch.1 IRQ4 COM1 CTC 2, Ch.0 IRQ5 INTRQ4* CTC 2, Ch.1...
-
Page 39: Interrupt Sources
4. Second interrupt controller (8259). 5. Real Time Clock interrupt. 6. Math coprocessor exception interrupt. 7. Enable the ZT 8907 for either local IDE or STD 32 IDE operation through the BIOS SETUP utility. See "Selecting IDE Operation Type" in Chapter 17 for details. -
Page 40: Programmable Registers
4. Interrupt Controller screen 2 of the SETUP utility. The PCI configuration utility then assigns interrupts to PCI devices as needed. Local: Local interrupt sources include counter/timers (CTC1 and CTC2), serial ports (COM1 and COM2), parallel port (LPT1), keyboard, math coprocessor, real-time clock and local IDE. -
Page 41: Counter/Timers
5. COUNTER/TIMERS The ZT 8907 includes two Intel-compatible 8254 devices for a total of six programmable counter/timers. The counter/timers are useful for generating timing loops, timed and periodic interrupts, and for counting external asynchronous events. The major features of the counter/timers are listed below. - Page 42 PC-Compatible Counter/Timer (CTC 1) Architecture TIMER 0 1.19318 MHz CLK0 OUT0 INTERRUPT IR0 LOGICAL ONE GATE0 SYSTEM TIMER TICK TIMER 1 1.19318 MHz CLK1 OUT1 REFRESH LOGICAL ONE GATE1 COUNTER TIMER 2 1.19318 MHz CLK2 OUT2 SPEAKER LOGICAL ONE GATE2 FREQUENCY ZT 8907 ÛZIATECH...
-
Page 43: Programmable Registers
5. Counter/Timers Auxiliary Counter/Timer (CTC 2) Architecture Interrupt Output System Register 1 CTC2 Timer 2 = IRQ15 Default CTC2 Timer 1 = Programmable CTC2 Timer 0 Counter/Timer Base Address: E8h Frontplane J2 CLK0 CLK0 GAT0 GAT0 OUT0 OUT0 CLK1 CLK1 GAT1 GAT1 OUT1... -
Page 44: Additional Information
5. Counter/Timers ADDITIONAL INFORMATION Refer to the Ziatech Industrial BIOS for CompactPCI and STD 32 Systems software manual for more information on the operating system's use of the counter/timers. Refer to the Intel 82C54 CHMOS Programmable Interval Timer data sheet for more information on the 8254 Programmable Interval Timer registers. -
Page 45: Dma Controller
(local) DMA slaves are supported, depending on configuration. DMA slaves are I/O devices that use a ZT 8907 DMA channel to transfer data to or from ZT 8907 memory. The major features of the DMA architecture are listed below. -
Page 46: Dma Channels
DMA channel 2 may be used for other peripherals. Note that if the optional local floppy option is selected it will use DMA channel 2, making the backplane DMA channel unavailable to the ZT 8907. Frontplane: Three channels of DMA are accessible through frontplane connector J6. -
Page 47: Operating Modes
6. DMA Controller DMA Architecture CT16 CT29 ECP-DAK DAK1/6* MASTER TO ON-BOARD CT17 PARALLEL PORT CONTROLLER DAK7 U9-96 DRQ7 DAK6 DRQ1/6* DRQ6 TO CPU DAK5 DRQ5 CT39 DAK4 DRQ0/5* ECP-DRQ DRQ4 FROM ON-BOARD PARALLEL PORT DAK0/5* CONTROLLER U9-99 DRQ3/7* CASCADE CT25 DAK3/7* SLAVE... -
Page 48: Dma Slave Operation
1. The DMA slave generates an STD bus BUSRQ* or a frontplane DMA request. 2. The system controller gains control of STD bus resources (multiple master only). The system controller is hardware local to the ZT 8907 that manages the STD bus interface. -
Page 49: Programmable Registers
"Slave DMA I/O Port Addressing" on the following page. Page registers extend the 16- bit DMA address to the full 24-bit address space available on the ZT 8907. I/O port addressing for the DMA page registers is given in the "DMA Page I/O Port... - Page 50 6. DMA Controller Slave DMA I/O Port Addressing Address Slave Master Register Operation Channel 0 Base/Current Address Write Channel 0 Current Address Read Channel 0 Base/Current Count Write Channel 0 Current Count Read Channel 1 Base/Current Address Write Channel 1 Current Address Read Channel 1 Base/Current Count Write...
-
Page 51: Real-Time Clock
7. REAL-TIME CLOCK The ZT 8907 includes one Motorola 146818-compatible real-time clock. The real-time clock provides clock and 100-year calendar information in addition to 114 bytes of CMOS setup static RAM. These functions are battery backed for continuous operation even in the absence of system power. -
Page 52: Additional Information
7. Real-Time Clock Real-Time Clock Register Addressing Offset Function Range Address Time-Seconds 0-59 Alarm-Seconds 0-59 Time-Minutes 0-59 Alarm-Minutes 0-59 Time-Hours 1-12 (12 hour mode) Time-Hours 0-23 (24 hour mode) Alarm-Hours 0-23 Day of Week Date of Month 1-31 Month 1-12 Year 0-99 Ah-Dh... -
Page 53: Serial Controller
8. SERIAL CONTROLLER The ZT 8907 includes two serial ports that are compatible with the industry standard 16C550. The interface for each serial port is implemented with a 5 V charge pump technology to eliminate the need for a ±12 V supply. The serial ports include a complete set of handshaking and modem control signals, maskable interrupt generation, and data transfer rates up to 115.2 Kbaud. -
Page 54: Programmable Registers
8. Serial Controller PROGRAMMABLE REGISTERS There are seven registers for initializing and controlling each serial channel. The "Serial Controller Register Addressing" table below shows the I/O port addressing for these registers. COM1 is located at address 3F8-3FFh; COM2 is located at address 2F8- 2FFh. -
Page 55: Parallel Printer Port Interface
The different modes for the printer port are described below. Details for the parallel port on the ZT 8907 are discussed in the following topics. Shown in parenthesis is the description for each of the modes as presented in screen 2 of the BIOS SETUP utility. -
Page 56: Interrupt Selection
9. Parallel Printer Port Interface INTERRUPT SELECTION The interrupt mapping for the PC standard architecture and the ZT 8907 is shown below. Parallel Port PC Interrupt ZT 8907 Interrupt LPT1 IR7 or disabled for off-board LPT support PROGRAMMABLE REGISTERS There are three registers for the compatibility/extended mode parallel port interface. The "Compatibility/Extended Mode Parallel Port Interface Addressing"... -
Page 57: Parallel I/O
10. PARALLEL I/O The ZT 8907 includes six 8-bit parallel ports for a total of 48 I/O signals. Three of the 8-bit ports are available to the user through connector J5. The remaining three parallel ports are dedicated to controlling an monitoring local operations. The general operation of the six parallel ports is explained in this chapter. -
Page 58: Output Latch
10. Parallel I/O Three ports of the on-board 16C50A Digital I/O ASIC device are used for system registers to monitor and control other board functions. These registers are illustrated in Chapter 11, "System Registers." Parallel Port Functional Diagram Passive Termination Connector J5 Internal Data Bus Output... -
Page 59: Input Buffer
10. Parallel I/O Input Buffer The input buffer is enabled during read operations to transfer the data from connector J5 to the internal data bus. If the parallel port bit is configured as input, the data read is the data driven by an external device. The input buffer is an inverting device. -
Page 60: Programmable Registers
The 16C50A Digital I/O ASIC supports standard and enhanced operating modes. Standard mode is not available to ZT 8907 users; enhanced operating mode is automatically configured by the ZT 8907 BIOS. There are three register banks used for controlling the device's features. These register banks are selected by programming bits 6 and 7 of I/O port E7h with a "00"... - Page 61 10. Parallel I/O Enhanced Bank 1 I/O Port Addressing Note: Select this register bank by programming bits 6 and 7 of I/O port E7h with a "01". Address Register Read Operation Write Operation 00E0h Port 0 Event Sense Status Control 00E1h Port 1 Event Sense Status...
-
Page 62: Port Data Registers
Register: Port 0, 1, 2, 3, 4, and 5 Data Bit 7 Bit 6 Bit 5 Bit 4 Bit 3 Bit 2 Bit 1 Bit 0 Mode: Enhanced (Bank 0) Address: E0h-E5h ZT 8907 Access: Read Port X I/O Control 0 Input is a logic high... -
Page 63: Port Event Sense Register
Bank Bank Port Port Port Port Port Port Mode: Enhanced (Bank 0) Address: E7h ZT 8907 Access: Read and Write Port Write Inhibit 0 Inactive 1 Active Bank Address 00 Bank 0 01 Bank 1 10 Bank 2 11 Undefined Port Event Sense Register Reading the event sense status of each port gets the status of each I/O port sense line. -
Page 64: Event Sense Manage Register
Bits 7-4 Bits 0-3 Bits 7-4 Bits 0-3 Bits 7-4 Bits 0-3 Bits 7-4 Bits 0-3 Mode: Enhanced (Bank 1) Port 3 Port 2 Port 1 Port 0 Address: E6h ZT 8907 Access: Write Event Polarity 0 Negative 1 Positive ÛZIATECH... -
Page 65: Bank Address Register
Bank Bank Bits 7-4 Bits 0-3 Bits 7-4 Bits 0-3 Event Sense Manage Port 5 Port 4 Mode: Enhanced (Bank 1) ZT 8907 Address: E7h Access: Write Event Polarity 0 Negative 1 Positive Bank Address 00 Bank 0 01 Bank 1... -
Page 66: Debounce Configure Register
Port Port Port Port Mode: Enhanced (Bank 2) Address: E0h ZT 8907 Access: Read and Write Debounce 0 Disable 1 Enable Debounce Duration Register (Ports 0-3) This register controls the duration required by each input signal before it is recognized for ports 0 - 3. -
Page 67: Debounce Duration Register (Ports 4-5)
4 and 5. The default value is 00 for a 4 µs debounce period. Parallel Port Debounce Duration Register (Ports 4-5) Register: Debounce Duration Port 5 Port 4 Mode: Enhanced (Bank 2) Address: E2h ZT 8907 Access: Read and Write Duration 00 4 microseconds 01 64 microseconds 10 1 milliseconds 11 8 milliseconds Debounce Clock Register This bit must be set to a 1 to use the debounce feature. -
Page 68: Bank Select Register
10. Parallel I/O Bank Select Register Parallel Port Bank Select Register Register: Bank Select Bank Bank Mode: Enhanced (Bank 2) Address: E7h ZT 8907 Access: Read and Write Bank Address 00 Bank 0 01 Bank 1 10 Bank 2 11 Undefined ÛZIATECH... -
Page 69: System Registers
11. SYSTEM REGISTERS The ZT 8907 uses three ports of the onboard 16C50A Digital I/O ASIC device for system registers. These registers are mapped to I/O ports E3h through E5h and are illustrated in the following topics. • For more information on how the Digital I/O ASIC works, see Chapter 10, "Parallel I/O,"... -
Page 70: System Register 2
11. System Registers System Register 2 Digital I/O ASIC System Register 2 System Register 2 Register: DSB RSV RSV PFN SBN BRAM Address: Read and Write Access: † STD Bus NMIRQ (Input) 0 Inactive 1 Active † Power Fail NMIRQ (Input) 0 Inactive 1 Active †... -
Page 71: System Register 3
ADDITIONAL INFORMATION The ZT 8907 includes several other system registers that are exclusively managed by Ziatech operating system software. These registers are located in the ALi chipset. Refer to the Acer Labs FINALI-486 M1487/M1489 486 PCI Chip Set Preliminary Data Sheet for more information on these registers. -
Page 72: Watchdog Timer
12. WATCHDOG TIMER The primary function of the watchdog timer is to monitor ZT 8907 operation and to take corrective action if the system fails to function as programmed. The major features of the watchdog timer are listed below. •... -
Page 73: Additional Information
12. Watchdog Timer multiple_on al,not 10h multiple_o endm ;------------------------------------------------------------- ; strobe_wd strobes and re-arms the watchdog timer. ; The state of Bit 1 must be maintained (write the same value as was read). ; Bits 3 & 4 must be handled as shown in the input_e5 macro ;------------------------------------------------------------- strobe_wd pushf... -
Page 74: Pci Mezzanine Local Bus
13. PCI MEZZANINE LOCAL BUS The ZT 8907 includes a PCI compatible local bus interface (J13) to CompactPCI mezzanine devices. The PCI mezzanine bus operates at the same speed as the CPU external clock speed. Ziatech offers PCI peripheral adapters designed specifically for this local bus interface. -
Page 75: Programmable Led
14. PROGRAMMABLE LED The ZT 8907 includes a Light-Emitting Diode (LED) located immediately below the board extractor. The LED is software programmable through bit 7 of the Digital I/O ASIC's System Register 3 (E5h) (refer to Chapter 11, "System Registers"). Writing a logical 0 to the LED bit turns the LED off and writing a logical 1 to the LED bit turns the LED on. - Page 76 14. Programmable LED 0e5h,al popf ;-------------------------------------- ; led_off turns off the led. Bit 7 controls the ; LED. The state of bit 1 must be maintained ; (write the same value as was read). Bits 3 ; and 4 must be handled as shown in the ;...
-
Page 77: Ac Power-Fail
The ZT 8907 requires a transformer-isolated AC voltage of no more than 30 V from the same source that provides the system power. Ziatech's optional AC wall transformer (ZT 90071) meets these requirements. - Page 78 15. AC Power Fail In operation, a non-maskable interrupt is generated when AC power falls below 95 VRMS. The non-maskable interrupt must be enabled through jumper W6. The application software must include a non-maskable interrupt service routine to perform the following: •...
-
Page 79: Memory Module Socket (U17)
Memory Module Socket U17 BIOS RECOVERY If the ZT 8907's BIOS becomes corrupted, recover it by installing a PROM programmed with the BIOS into socket (U17). The PROM allows the board to boot and the BIOS to be reflashed. To order the PROM (ZT 95204), contact Ziatech. -
Page 80: User Static Ram
16. Memory Module Socket (U17) 1. Install jumpers W2A and W4B 2. Insert the PROM into the boot socket. Make sure the device is correctly oriented. 3. Power on the system with the CPU reinstalled. The CPU will boot either to a Mini Command colon prompt (:) or a P: prompt if the P: drive contents are still intact. -
Page 81: Star System Video Emulation Sram
16. Memory Module Socket (U17) STAR SYSTEM VIDEO EMULATION SRAM When the ZT 8907 is used in a STAR SYSTEM and sharing a video card with other CPUs, a 128 Kbyte SRAM module must be installed in socket U17. Perform the steps below. -
Page 82: Optional Ide Interface
The onboard IDE interface is a factory load option at Ziatech. Option D1 to the ZT 8907 includes a hard disk, cable, and connector. When configured for local IDE operation, the ZT 8907 requires one additional slot in the STD 32 card cage. -
Page 83: Star System Applications
SINGLE BOARD APPLICATIONS When the ZT 8907 is used in single board applications with a local IDE hard disk, Ziatech suggests that the application provide power to the ZT 8907 via a mating STD 32 connector. For mounting support, both the STD 32 connector and standoffs (to PCB mounting holes located on the ZT 8907) should be used to physically support the assembly. -
Page 84: Optional Local Floppy Disk Interface
18. OPTIONAL LOCAL FLOPPY DISK INTERFACE The ZT 8907 can be factory configured to use a local (non-STD) floppy disk drive. This is a special order option and is intended for higher volume applications where a remotely mounted floppy drive is required. Optional connector J14 on the solder side of the board is loaded for access to the floppy signals. -
Page 85: Board Configuration
ZT 8907's jumpers and cuttable traces. BIOS SETUP OVERVIEW The ZT 8907 has many features that can be configured with the BIOS SETUP utility. The SETUP utility is executed during the boot sequence when the "S" key is typed. In DOS systems, SETUP may be executed by running the SETUP.COM program from the... - Page 86 A. Board Configuration BIOS SETUP Utility: Screen 1 Generic SETUP Options Ziatech Industrial BIOS Setup Utility Copyright (C) 1997, Ziatech Corporation 1.44M Floppy Disk A: ......Floppy Interface ....... STD32 Floppy Disk B: ......IDE Interface ......STD32 COM1 Port .......
-
Page 87: Zt 8907-Specific Setup Options
RAM.) † 000D8000h - 000DFFFFh JUMPER OPTIONS AND LOCATIONS The ZT 8907 includes nine jumpers, W1-W9. The default configuration of these jumpers is shown in the "Factory Default Jumper Configuration" figure on the following page. "Customer Jumper Configuration"... - Page 88 A. Board Configuration The "Jumper Cross Reference" table below divides the jumper options into functional groups. Jumper Cross Reference Function Jumpers AC Power-Fail NMIRQ* Enable CMOS RAM Erase Flash Write Protect Local Keyboard Disable Multiple Master Interrupt Port 80 Test Mode PROM/SRAM Selection SRAM Battery Backup STD Bus Access Disable...
-
Page 89: Jumper Descriptions
Configuring W1 selects the signal path for the multiple master interrupt (required for operation in an STD 32 STAR SYSTEM). By default (W1A = In) the ZT 8907 uses INTRQ4* for the multiple master interrupt and makes INTRQ* available for application use. -
Page 90: W2 (Prom/Sram Selection)
"User Static RAM" topic in Chapter 16 for step-by-step instructions. 3. STAR SYSTEM Video Emulation SRAM: When the ZT 8907 is used in a STAR SYSTEM and is sharing a video card with other CPUs, remove all jumpers from W2 and install a 128 Kbyte SRAM module in socket U17. -
Page 91: W3 (Cmos Ram Erase)
SRAM is installed in socket U17. W5 (Local Keyboard Disable) If W5 is not installed, the ZT 8907's on-board keyboard controller is enabled (and available through connector J7). Installing W5 (default configuration) disables the local keyboard controller on the ZT 8907. W5 must be installed when using a keyboard controller located on the backplane. -
Page 92: W6, W7 (Non-Maskable Interrupts)
Disabled W8 (STD Bus Access Disable) Installing W8 prevents all operations from reaching the STD bus, allowing a ZT 8907 with a standard BIOS to be installed in a system as a stand-alone processor (see note below). Configuration of this jumper sets bit 7 of the Digital I/O ASIC's System Register 2 (E4h). -
Page 93: W9 (Flash Write Protect)
STAR SYSTEM, only one CPU (the Permanent Master) is allowed to pull up the STD 32 bus signals. 2. CLOCK* and SYSRESET*. When RP1 and RP2 are installed, the ZT 8907 drives the CLOCK* and SYSRESET* signals; removing RP1 and RP2 inhibits the CPU from driving the CLOCK* and SYSRESET* signals. -
Page 94: Cuttable Trace Options And Locations
CPUs Note: To use the ZT 8907 as a stand-alone processor, jumper W8 must be installed. CUTTABLE TRACE OPTIONS AND LOCATIONS The ZT 8907 contains several cuttable traces (zero ohm shorting resistors) for configuring less frequently selected board options. The "Cuttable Trace... - Page 95 A. Board Configuration Cuttable Trace Locations CT16 CT17 CT25 CT29 CT39 CT47 CT46 CT48 CT53 (S o l d e r S i d e) ZT8907 ÛZIATECH...
-
Page 96: Ct4-Ct6 (Counter/Timer Clock Sources)
A. Board Configuration Cuttable Trace Definitions Default Description Counter Timer 2 Clock Source Counter Timer 1 Clock Source Counter Timer 0 Clock Source IRQ15 Selection IRQ15 Selection CT16 DMA Channel 3/7 DAK Selection CT17 DMA Channel 3/7 DAK Selection CT25 DMA Channel 3 DRQ Selection CT29 DMA Channel 1/6 DAK Selection... -
Page 97: Ct7, Ct8 (Irq15 Input Source Selection)
A. Board Configuration CT # State Function † Clock channel 2 driven with on-board 8 MHz clock Clock source driven from J2, pin 8 † Clock channel 1 driven with on-board 8 MHz clock Clock source driven from J2, pin 4 †... -
Page 98: Ct16, Ct17, Ct25, Ct29, Ct39 (Frontplane Dma Channel Selection)
A. Board Configuration CT16, CT17, CT25, CT29, CT39 (Frontplane DMA Channel Selection) The ZT 8907 supports either 8-bit or 16-bit frontplane DMA, available on connector J6. Up to three frontplane DMA channels are available simultaneously. These cuttable traces configure the three chosen frontplane DMA channels to be either 8-bit or 16-bit. -
Page 99: Ct53 (Std Reset Configuration)
A. Board Configuration However, some STD 32 systems define P5 for VBAT (battery backup). If the ZT 8907 is used in a system that requires P5 to be configured as VBAT, then CT48 should be removed. CT # State Function †... -
Page 100: Specifications
B. SPECIFICATIONS This appendix describes the electrical, environmental, and mechanical specifications of the ZT 8907. It also includes illustrations of the board dimensions, the P/E connector pinouts, the connector locations, and various cables, as well as tables showing the pin assignments for the ZT 8907's 15 connectors. -
Page 101: Dc Operating Characteristics
1.4 A typ., 2.3 A max. † ±12 V not required for ZT 8907 operation. However, some PCI mezzanine cards may require these voltages. Refer to the documentation provided with the particular PCI mezzanine card installed on your ZT 8907 for more information. -
Page 102: Battery Backup Characteristics
Long life lithium with solid-state polycarbon monofluoride cathode STD-80 Compatibility The ZT 8907 is designed for use in an STD 32 backplane environment. While designed to be backward compatible with STD-80 systems, the ZT 8907 is not guaranteed to work in all system topologies. - Page 103 B. Specifications STD Bus Loading, P Connector PIN (CIRCUIT SIDE) PIN (COMPONENT SIDE) OUTPUT DRIVE OUTPUT DRIVE INPUT LOAD INPUT LOAD MNEMONIC MNEMONIC +5 VDC +5 VDC DCPDN* INTRQ4* (VBAT) D7/A13 [1] D3/A19 [1] D6/A22 [1] D2/A18 [1] D5/A21 [1] D1/A17 [1] D4/A20 [1] D0/A16 [1]...
- Page 104 E66 E65 EXRDY E68 E67 INTRQ3* +5 VDC E70 E69 MAKx* MREQx* MSBURST* E72 E71 SLBURST* XA31* XA27* E74 E73 XA30* XA26* E76 E75 XA29* E78 E77 XA25* XA24* XA28* E80 E79 Note: REQ indicates required connection. ZT 8907 ÛZIATECH...
-
Page 105: Mechanical
Board Dimensions and Weight The ZT 8907 meets the STD-80 Series Bus Specification for all mechanical parameters. In a card cage with 0.625 inch spacing, the ZT 8907 requires one card slot with or without the zPM PCI bus video adapter installed. The "Board... -
Page 106: Connectors
Connectors As shown in the "Connector Locations" illustration on the following page, the ZT 8907 includes several connectors to interface to the STD bus and application-specific devices. A complete description and pinout for each connector is provided in the following topics. A brief description of each connector is shown in the "Connector Assignments"... - Page 107 B. Specifications Connector Locations J8 Speaker J5 Parallel I/O RESET P/E Connector J9 Printer Port J1 Frontplane Interrupts J10 AC Power Fail J2 Auxiliary Counter/TImer J6 Frontplane DMA J7 Video/Keyboard J13 CompactPCI J3 COM2 Output Local Bus Interface J11 Mezzanine Video J4 COM1 J12 In-System...
-
Page 108: Std 32 P/E Connector
Connector" figure shows signal assignments. The E connector extends the P connector to interface the ZT 8907 to the STD 32 bus. This connector combines with the P connector to make a 114-pin (dual 57- pin) card-edge connector with fingers on 0.0625 inch contact spacing. The mating connector is a Viking S3VT68/5DP12 or equivalent for the solder tail, or a Viking S3VT68/5DE12 or equivalent for the card extender. - Page 109 B. Specifications J1 (Frontplane Interrupt Connector) J1 is a latching 10-pin (dual 5-pin) male transition connector with 0.1 inch contact spacing. The mating connector is a T&B Ansley #622-1030 or equivalent. Frontplane interrupts are available through this connector. The pin assignments are shown in the "J1 Frontplane Interrupt Connector Pinout"...
- Page 110 B. Specifications J2 (Auxiliary Counter/Timer Connector) J2 is a 10-pin non-latching (dual 5-pin) male transition connector with 0.1 inch contact spacing. The auxiliary counter/timer input, output, and control signals are available through this connector (depending on the configuration of cuttable traces CT4-CT6). The pin assignments are shown in the "J2 Auxiliary Counter/Timer Connector Pinout"...
- Page 111 B. Specifications J3/J4 (COM2/COM1 Connectors) J3 and J4 are each latching 10-pin (dual 5-pin) male transition connectors with 0.1 inch contact spacing. These connectors include the RS-232 serial interface signals for COM2 and COM1. The pin assignments are shown in the "J3/J4 COM2/COM1 Connectors Pinout"...
- Page 112 B. Specifications J5 (Parallel I/O Interface Connector) J5 is a 50-pin (dual 25-pin) vertical male header with 0.1 inch contact spacing. The Digital I/O ASIC signals are included in this connector. The pin assignments are shown in the "J5 Parallel I/O Interface Connector Pinout" table below. The pin assignments are chosen for direct connection to an I/O module mounting rack, such as those offered by Ziatech (ZT 2226) and Opto 22.
- Page 113 B. Specifications J6 (Frontplane DMA Connector) J6 is a 10-pin (dual 5-pin) vertical male header with 0.1 inch contact spacing. Three frontplane DMA channels are available through this connector (depending on the configuration of cuttable traces CT16, CT17, CT25, CT29 and CT39). The pin assignments are shown in the "J6 Frontplane DMA Connector Pinout"...
- Page 114 B. Specifications J7 (Video/Keyboard Output Connector) J7 is a latching 16-pin (dual 8-pin) vertical male header with 2 mm spacing. VGA video and keyboard signals are available through this connector (when W5 = Out). The pin assignments are shown in the "J7 Video/Keyboard Output Connector Pinout" table below.
- Page 115 B. Specifications J8 (Speaker Connector) J8 is a latching 2-pin male low-profile header with 0.1 inch contact spacing. The speaker signals are available through this connector. The pin assignments are shown in the "J8 Speaker Connector Pinout" table below. The mating connector is a Molex 39-01-0023 or equivalent.
- Page 116 B. Specifications J9 (Parallel Printer Port Interface Connector) J9 is a 20-pin (dual 10-pin) vertical male header with 0.1 inch contact spacing. This connector includes the standard Centronics printer control and data signals. The pin assignments are shown in the "J9 Parallel Printer Port Interface Connector Pinout" table below.
- Page 117 B. Specifications J10 (AC Power-Fail Connector) J10 is a latching 2-pin male low-profile header with 0.1 inch contact spacing. The mating connector is a Molex 39-01-0023 or equivalent. The mating connector also requires two Molex 39-01-0031 terminals or equivalent. The AC input signals for the optional power- fail detection feature are available through this connector.
- Page 118 J11 (Mezzanine Video Interface Connector) J11 provides an interface for optional PCI VGA interface boards to route video signals to the ZT 8907. Video signals are then routed through the J7 Video/Keyboard Output Connector. The zPM11 Super VGA Interface uses this mechanism. The pin assignments are shown in the "J11 Mezzanine Video Interface Connector Pinout"...
- Page 119 B. Specifications J12 (In-System Programming Connector) J12 is the In-System-Programming (ISP) port used during the manufacturing process to program on-board PLD devices. The pin assignments are shown in the "J12 In-System Programming Connector Pinout" table below. J12 also serves as the Port 80 Decode jumper. See Appendix A, "Board Configuration"...
- Page 120 B. Specifications J13 PCI Mezzanine Local Bus Interface Connector Pinout Pin # 3.3V AD[1] AD[0] ACK64# GND 3.3V AD[4] AD[3] AD[2] AD[7] 3.3V AD[6] AD[5] 3.3V AD[9] AD[8] C/BE[0]# GND AD[12] AD[11] AD[10] 3.3V AD[15] AD[14] AD[13] SERR# 3.3V C/BE[1]# GND 3.3V PERR# DEVSEL#...
- Page 121 B. Specifications J14 (Optional Floppy Disk Interface Connector) J14 is a surface mount connector location for a 26-pin optional floppy disk (located on the solder-side of the board). This interface is provided primarily for single board computer operation (without an STD 32 backplane. STD 32 users should use the ZT 8954 Floppy Disk Controller Interface for floppy support).
- Page 122 Electronics (IDE) hard disk interface. The pin assignments are shown in the "J15 Optional IDE Interface Connector Pinout" table below. Ordering option D1 includes an IDE drive integrated with the ZT 8907. This option is useful for single board computer operation (no STD 32 backplane) or for STAR SYSTEM operation where the hard disk interface is local to the ZT 8907.
-
Page 123: Cables
B. Specifications Cables The following cables are available from Ziatech. Illustrations are included on the following pages for those who wish to make their own cables. • ZT 90072 Digital I/O Cable • ZT 90136 Serial Cable • ZT 90157 Printer Cable •... - Page 124 B. Specifications ZT 90136 Serial Cable 1 METER +/- 2 CM BLUE WIRE ON PIN 1 PIN 1 T & B ANSLEY PIN 1 T & B ANSLEY 622-09P 622-10-30 CONNECTION TABLE 622-09P 622-10-30 1. TRIM ALL CABLE ENDS FLUSH WITH CONNECTOR BODIES. 2.
- Page 125 B. Specifications ZT 90157 Printer Cable 36"+1/2" Pin 1 Pin 2 Pin 1 Stripe CON-00052 and CON-00098 Circuit Assembly CA-25DSS-3 and Tex-Techs FCH 25A, Pin 1 respectively (screws, if any, removed from backshell) Female 25 Pin D-Type Connector with solder pot leads and metalized backshell Pin 20...
- Page 126 B. Specifications ZT 90233 Video/Keyboard Cable 1.5" PIN CONNECTION TABLE TCSD-22N TCSD-25 TCSD-22N TCSD-25 SAMTEC SAMTEC TCSD-22N TCSD-25 PIN 1 PIN 1 3M 3625/44, GRAY 44-CONDUCTOR, NOTES: 1MM CENTERS, 28 GUAGE 1. PINS 1, 2, 3, 4, 5, AND 6 OF THE TCSD-25 STRANDED FLAT CABLE CONNECTOR ARE NOT CONNECTED ZT8907...
- Page 127 B. Specifications ZT 90201 IDE Cable HIRSCHMANN #MAK 50 S (930172-517) FEMALE 5 PINS AT 180˚ DIN CONNECTOR 10" (± ½") PIN 2 PIN 1 1 - 4 HEAT SHRINK TUBING SAMTEC 1/4" DIAMETER 3" BLACK ALPHA FIT 221-1/4 TCSD-08-01-N (±...
-
Page 128: Digital I/O Asic System Setup Considerations
The purpose of this appendix is to illustrate precautions you should take to prevent latchup conditions and protect inputs. The 16C50A Digital I/O ASIC device used on the ZT 8907 is designed by Ziatech to offer bi-directional I/O signals with or without event sense capability. This device features low power, high speed, wide temperature operation achievable only by utilizing CMOS technology. -
Page 129: Power Supply Sequence Mismatch
A common application is to interface to a 24-position ZT 2226, Opto 22, or equivalent I/O module rack. Vcc and ground are provided from the ZT 8907 through connector J5, with Vcc protected by a 1 A fuse. This application is illustrated in Figure 1. - Page 130 C. Digital I/O ASIC System Setup Considerations Figure 1. I/O Rack Vcc and Ground Supplied Via Interface Cable Correct Power Supply Sequence, Signal Level Matched ZT 8907 24-Position Custom 16C50A Digital Application Power ASIC Supply 1Amp Interface Cable ZT8907 Figure 2. I/O Rack Vcc and Ground Supplied Externally...
-
Page 131: Signal Level Mismatch
C. Digital I/O ASIC System Setup Considerations Figure 4. Computer and External Power Supply with Common Switch Correct Power Supply Sequence, Potential Signal Level Mismatch ZT 8907 24-Position 16C50A Digital Custom Application Power External ASIC Supply Power Supply Interface Cable... -
Page 132: Protecting Cmos Inputs
C. Digital I/O ASIC System Setup Considerations Figure 6. Computer-Switched External Power Supply, Common Ground Correct Power Supply Sequence, Correct Signal Level Match Custom ZT 8907 Application 16C50A Digital Power External ASIC Supply Power 1Amp Supply Interface Cable ZT8907 Figure 7. Computer and External Power Supply with Common Switch and Ground... -
Page 133: Inductive Coupling
C. Digital I/O ASIC System Setup Considerations cabling is added, the capacitance goes up, resulting in the use of a smaller pullup resistor until the maximum sink current of the output is achieved. If the 16C50A Digital I/O ASIC device is driving the output, its maximum sink current at a Vol of .4 V is 12 mA. -
Page 134: Additional Information
C. Digital I/O ASIC System Setup Considerations In the above circuit, the Texas Instruments 74S1053 Schottky diode clamps limit a transient to ±1 V above +5 V or below ground. The ferrite bead has a 50 ohm impedance at the frequency of interest. As the diodes begin to clamp and current flows ®... -
Page 135: Pci Configuration Space Map
Details for each device's configuration space can be found in the respective manufacturer's data manuals. For more information on the PCI chipset implemented on the ZT 8907, refer to the FINALi-486 M1489/M1487 486 PCI Chip Set Data Sheet, or contact ALi distributor Pacific Group Technology at (408) 764-0644. - Page 136 D. PCI Configuration Space Map PCI Configuration Header Device ID Vendor ID Status Command Class Code Revision ID Header Cache Line Latency BIST Type Size Timer Base Address Registers Cardbus CIS Pointer Subsystem ID Subsystem Vendor ID Expansion ROM Base Address Reserved Reserved Interrupt...
-
Page 137: Zt 8907 Vs. Zt 8902: Technical Differences
An integrated 1.4 Gbyte IDE drive can be mounted to an optional onboard IDE interface on the back of the ZT 8907. Option D1 to the ZT 8907 includes a hard disk, cable, and connector. When configured for local IDE operation, the ZT 8907 requires one additional slot in the STD 32 card cage. - Page 138 In order to support the video interface design of Ziatech's local PCI mezzanine boards, the ZT 8907 includes an additional connector (J7) for attaching a 2 mm ribbon cable for VGA and keyboard support. The 2 mm cable connected to the zVID2 card in existing ZT 8902 applications is easily modified: replace the 50-pin (female) header with a 16- pin (female) header for mating to J7 on the ZT 8907.
-
Page 139: Zt 8907 Programming Issues
ZT 8907 PROGRAMMING ISSUES In most cases, ZT 8902 applications that do not program any VLSI chipset registers or flash memory ports directly will not require modification in order to run on the ZT 8907. Unchanged configurable items include: •... -
Page 140: Customer Support
F. CUSTOMER SUPPORT This appendix offers technical and sales assistance information for this product, warranty information, and necessary information for the return of a Ziatech product. TECHNICAL/SALES ASSISTANCE If you have a technical question, please call Ziatech's Customer Support Service at the number below, or e-mail our technical support team at tech_support@ziatech.com. -
Page 141: Ziatech Warranty
F. Customer Support Once you have an RMA number, follow these steps to return your product to Ziatech: 1. Contact Ziatech for pricing if the warranty expired. 2. Supply a purchase order number for invoicing the repair if the warranty expired. 3. -
Page 142: Trademarks
Texas Instruments is a registered trademark of Texas Instruments, Incorporated. VxWorks is a registered trademark of Wind River Systems, Inc. STD 32 is a registered trademark of Ziatech Corporation. STD 32 STAR SYSTEM is a trademark of Ziatech Corporation. All other brand or product names may be trademarks or registered trademarks of their respective holders. - Page 143 1050 Southwood Drive San Luis Obispo, CA 93401 USA Tel: (805) 541-0488 FAX: (805) 541-5088 E-Mail: tech_support@ziatech.com Internet: http://www.ziatech.com...
- Page 144 Artisan Technology Group is your source for quality new and certified-used/pre-owned equipment SERVICE CENTER REPAIRS WE BUY USED EQUIPMENT • FAST SHIPPING AND DELIVERY Experienced engineers and technicians on staff Sell your excess, underutilized, and idle used equipment at our full-service, in-house repair center We also offer credit for buy-backs and trade-ins •...
Need help?
Do you have a question about the ZT 8907 and is the answer not in the manual?
Questions and answers