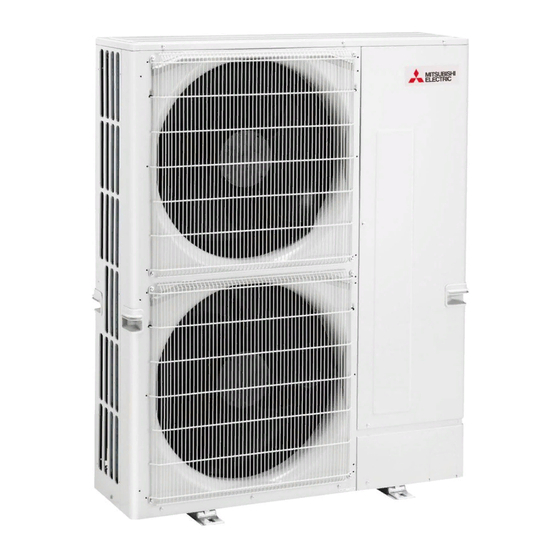
Mitsubishi Electric CITY MULTI PUMY-P200YKM2 Installation Manual
Hide thumbs
Also See for CITY MULTI PUMY-P200YKM2:
- Installation manual (272 pages) ,
- Technical & service manual (134 pages) ,
- Installation manual (12 pages)
Advertisement
Quick Links
Advertisement

Related Manuals for Mitsubishi Electric CITY MULTI PUMY-P200YKM2


Summary of Contents for Mitsubishi Electric CITY MULTI PUMY-P200YKM2
- Page 1 Air-Conditioners PUMY-P200YKM2 English INSTALLATION MANUAL FOR INSTALLER...
-
Page 2: Table Of Contents
• Use only accessories authorized by Mitsubishi Electric and ask a dealer or an limit in the event of refrigerant leakage. Consult a dealer regarding the appro- authorized technician to install them. - Page 3 1. Safety precautions 1.1. Before installation Caution: • Do not use the unit in an unusual environment. If the air conditioner is installed • When installing the unit in a hospital or communications office, be prepared for noise and electronic interference. Inverters, home appliances, high-frequency in areas exposed to steam, volatile oil (including machine oil), or sulfuric gas, areas exposed to high salt content such as the seaside, or areas where the medical equipment, and radio communications equipment can cause the air...
-
Page 4: Installation Location
2. Installation location 2.1. Refrigerant pipe Refer to Fig. 4-1. 2.2. Choosing the outdoor unit installation location • Avoid locations exposed to direct sunlight or other sources of heat. • Select a location from which noise emitted by the unit will not inconvenience neigh- bors. - Page 5 2. Installation location 2.6. Ventilation and service space 2.6.2. When installing multiple outdoor units 2.6.1. When installing a single outdoor unit Leave 25 mm space or more between the units. 1 Obstacles at rear only (Fig. 2-8) Minimum dimensions are as follows, except for Max., meaning Maximum dimen- 2 Obstacles at rear and above only (Fig.
-
Page 6: Installing The Outdoor Unit
2. Installation location 2.6.3. Windy location installation When installing the outdoor unit on a rooftop or other location unprotected from the wind, situate the air outlet of the unit so that it is not directly exposed to strong winds. Strong wind entering the air outlet may impede the normal airflow and a malfunction may result. - Page 7 4. Installing the refrigerant piping 4.1.1. Connection without Branch box (Fig. 4-1) A+B+C+D+a+b+c+d+e [ 150 m L = A+B+C+D+e [ 80 m (mm) ℓ = B+C+D+e [ 30 m A Liquid pipe B Gas pipe H [ 50 m (Outdoor lower H [ 40 m) L [ 60 m ø9.52 ø19.05...
- Page 8 4. Installing the refrigerant piping Selecting pipe size I In case of using 1-branch box The piping connection size differs according Branch box L [ 20 m ø9.52 to the type and capacity of indoor units. Match the piping connection size of branch box with Liquid (mm) indoor unit.
- Page 9 4. Installing the refrigerant piping 4.1.3. Mixing system (City Multi indoor units and M, S, P series indoor units (Connection with Branch box)) (Fig. 4-6) 4.1.3-1 In case of using 1-Branch box A Outdoor unit B First joint C Branch header (CMY) D Branch box E City Multi Indoor unit F M, S, P series Indoor unit...
- Page 10 4. Installing the refrigerant piping 4.1.3-3 Selecting pipe size (Fig. 4-7) Pipe size System pipe size A Outdoor unit B First joint A liquid pipe B Gas pipe C Branch header (CMY) L1 [ 60 m or L2 [ 20 m ø9.52 ø19.05 D Branch box...
- Page 11 4. Installing the refrigerant piping 4.2. Connecting pipes (Fig. 4-8) Fig. 4-1 is a sample of piping system. • Conduct sufficient anti-condensation and insulation work to prevent water dripping from the refrigerant piping. (liquid pipe/gas pipe) 45°± 2° • Increase insulation depending on the environment where the refrigerant piping is installed, or condensation may occur on the surface of the insulation material.
- Page 12 4. Installing the refrigerant piping 4.3. Refrigerant piping (Fig. 4-10) Remove the service panel D (three screws) and the front piping cover A (two screws) and rear piping cover B (two screws). 1 Perform refrigerant piping connections for the indoor/outdoor unit when the outdoor unit’s stop valve is completely closed.
-
Page 13: Drainage Piping Work
4. Installing the refrigerant piping Precautions when using the charge valve (Fig. 4-14) Do not tighten the service port too much when installing it, otherwise, the valve core * The figure to the left is an example could be deformed and become loose, causing a gas leak. only. - Page 14 6. Electrical work 6.2. Control box and connecting position of wiring <PUMY-P·YKM> (Fig. 6-1) 1. Connect the wiring between the outdoor unit and the indoor unit or branch box to L1 L2 L3 N B1 B2 the transmission terminal block (TB3) of the outdoor unit. Connect the wiring between the outdoor unit and the centralized control system TB1B to the transmission terminal block (TB7) of the outdoor unit.
- Page 15 6. Electrical work <Example of Transmission Cable Wiring: Not using Branch box> ■ ■ M-NET Remote Controller MA Remote Controller M-IC M-IC M-IC M-IC M-IC M-IC M-IC M-IC (51) (51) (01) (02) (05) (06) (01) (02) (05) (06) M1M2S M1M2S M1M2S M1M2S TB15...
- Page 16 6. Electrical work <Incorrect Systems> 1. Group operation by single 2. Group operation between different 3. Connection of M-NET Remote controller remote controller refrigerant systems (3-branch type) (3-branch type) (3-branch type) (5-branch type) A-IC A-IC A-IC A-IC A-IC A-IC MA-RC MA-RC WL-RC WL-RC M-NET...
- Page 17 6. Electrical work Cross-sectional area of Wire for Main Power Supply and On/Off Capacities <When power is supplied separately> Minimum Wire Cross-sectional area (mm Power Supply Breaker for Wiring *1 Breaker for Current Leakage Main Cable Ground Model Outdoor Unit 3N~380-400-415 V 50 Hz 25 A 25 A 30 mA 0.1 sec.
- Page 18 6. Electrical work Warning: • Be sure to use specified wires to connect so that no external force is imparted to terminal connections. If connections are not fixed firmly, it may cause heat- ing or fire. • Be sure to use the appropriate type of overcurrent protection switch. Note that generated overcurrent may include some amount of direct current. •...
- Page 19 6. Electrical work Ex 1. Outdoor + Branch <1> (M, S, P Series Indoor A, B, C, D, E) + Branch <2> (M, S, P Series Indoor A, B, C) *1 Outdoor address Branch-Box <1> Branch-Box <1> start address + 50 = 01 + 50 = 51 address (01) *2 *2 Branch-Box <1> SW1 1, 2, 3, 4, 5 ON A-port address = Start address = 01 Outdoor (01) = A-port B-port address = Start address + 1 = 02 M, S, P Series Indoor C-port address = Start address + 2 = 03 address...
-
Page 20: Test Run
7. Test run 7.1. Before test run ► After completing installation and the wiring and piping of the indoor and • The insulation resistance drops due to accumulation of refrigerant in the com- outdoor units, check for refrigerant leakage, looseness in the power supply pressor. The resistance will rise above 1 MΩ after the compressor is warmed or control wiring, wrong polarity, and no disconnection of one phase in the up for four hours. - Page 21 This product is designed and intended for use in the residential, commercial and light-industrial environment. Importer: Mitsubishi Electric Europe B.V. Capronilaan 46, 1119 NS, Schiphol Rijk, The Netherlands French Branch 25, Boulevard des Bouvets, 92741 Nanterre Cedex, France German Branch...
Need help?
Do you have a question about the CITY MULTI PUMY-P200YKM2 and is the answer not in the manual?
Questions and answers