Advertisement
Quick Links
Advertisement

Related Manuals for Vivitek LT30C-F


Summary of Contents for Vivitek LT30C-F
- Page 1 Model:LT30C-F...
-
Page 2: Important Safety
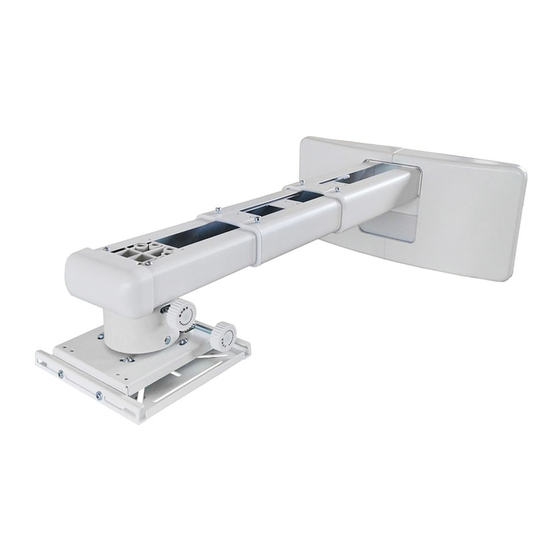
Important Safety Checking The Supplied Accessories diagrammatic designation quantity presentation (M6X55) Screw Φ10mm Anchor bolt Fixed Support Arm X 1 L5 Allen key Wall Plate X 1 Wall Cover X 1 L3 Allen key (M4X10) Screw (M6X15) Screw M4 connecting screw Projector Mounting Plate X 1 Wall Plate Cover X 1... -
Page 3: Checking The Installation Position
Checking The Installation Position 1080P [1920 x 1080] Projection image size Installation distance From a projecting surface From a projecting surface Bottom height Diagonal Width x Height (V-Offset) to the rear of the unit L1 to the rear of the unit L2 cm x cm inch (cm) inch... - Page 4 ● The bracket is suitable for concrete wall mounting or wooden stud wall or calcium silicate board(screws M6x55 must be attached to the stud and securely fastened。 ● Concrete wall mounting thickness must be a minimum 4'' ,Anchor bolt and screw (M6 x55) are needed to be used for concrete wall installation. ●...
- Page 5 ● ● You can adjust the projector upward/ Tighten the screw “F” after locating -downward according to your need. the projector position. Sliding distance of adjusting the projector upward/downward: 3.15''(80mm) To Install The Projector On The Projector Wall Mount If the surface is not at, pls use the “G”...
- Page 6 To Install The Projector On The Projector Wall Mount Power cable and signal cable Tighten the screws Connect power cable and other signal cable to projector To Adjust The Projector Forwards/Backwards Check the scaleplate to see the distance from mounting plate to the wall. Note: To make adjustments to meet your demands, screws must be loosened in a specific order.
- Page 7 To Adjust The Projector Upwards/Downwards Screen Adjustment Direction To Adjust The Vertical Tilt Knob Screen Adjustment Direction Adjustment Knob To Adjust The Horizontal Roll Knob Adjustment Knob Screen Adjustment Direction Pg.7...
- Page 8 LT30C-F Product Weight 11.46 lbs(5.2kg) 12.8" ( 325mm ) - 29.1" ( 740mm ) 41L3603-EN-MC...
Need help?
Do you have a question about the LT30C-F and is the answer not in the manual?
Questions and answers